In recent years, more and more people are interested in ways to improve their homes. One of them is considered to be finishing the balcony with MDF panels, since in addition to its functionality, it can be used to visually expand any apartment. This quality is in demand by owners of small living spaces based on 5 or 9 storey buildings of the old type.
The fact is that any increase in space provides additional comfort for living.
What is MDF made from?
Everything is hidden in the name, since from English it is translated as medium-density wood-fiber tiles. Fine wood shavings are used to make MDF. It undergoes high-temperature pressing, resulting in the release of a significant mass of lignin, which has excellent adhesive properties.
High pressure promotes gluing of chips and the formation of homogeneous tiles for use on the balcony. Even with the use of many additives, the material is environmentally friendly.
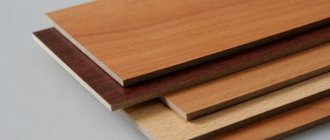
Later, the tiles go through an external processing stage. They come in many colors and imitate different types of wood. Thanks to this, balcony cladding is possible in various design styles. This helps to create an attractive aesthetic image of a given room.
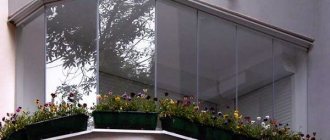
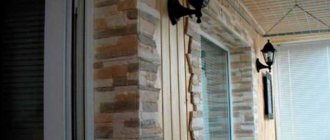
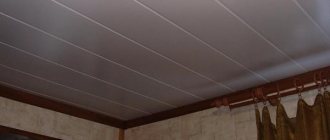
You can verify this with the help of a photo of finishing a balcony with MDF panels with different colors.
Performance characteristics
MDF panels are made from sawdust. To increase the strength and prevent rotting of the material, special fastening and disinfecting compounds (formaldehyde and resins) are added to the composition. Among the characteristics of the material are:
Maximum strength 17-23 MPa
Density up to 600-850 kg/m3
Significant water resistance, from 3 to 10%
Thanks to fire retardants, the level of fire safety is quite high
Thickness 6 mm
Width 150-300 mm
Positive aspects of using MDF
The material is difficult to bend or break because it has excellent flexibility. This property allows you to cover corners using curved panels. Due to this, the installation process is significantly simplified and allows you to evenly cover the entire area of the room.
The process of installing MDF panels is very simplified, since they can easily be drilled, sanded, planed and other types of machining.
The material perfectly protects walls from high humidity or sudden changes in temperature, and is also resistant to the formation of mold or fungi.
Sequence of finishing work
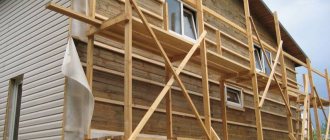
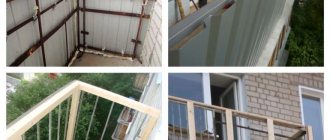
First of all, a frame of wooden or metal elements is installed along the perimeter of the loggia, intended for installing the window system and fastening the materials of the internal and external cladding.
Frame for finishing work and insulation of the loggia
The fastening spacing of frame elements is selected individually, taking into account the characteristics of the selected glazing system, insulating and finishing materials.
Frame on the loggia before finishing and glazing
After installing the frame, glaze the balcony. To do this, you can use plastic, aluminum or wooden systems.
Loggia glazing process
To decorate the external walls of the loggia, use high-quality sheet materials that can provide adequate protection of the internal space from dust, precipitation and cold. Galvanized sheet materials and moisture-resistant plywood work well. Sheet materials are attached to a pre-arranged frame using self-tapping screws. The finishing trim is installed on top of the sheet sheathing. Siding and other materials that are resistant to moisture are well suited. The remaining cracks are filled with construction foam.
The internal lining is carried out according to the standard scheme. First, frame elements made of wooden slats or metal profiles are fixed to the walls. A polyethylene film or other suitable waterproofing material is attached to the frame slats. Foam boards, mineral wool or other suitable insulation are glued onto the film using a “liquid nails” type compound. A vapor barrier material is attached to the base slats on top of the thermal insulation. The slats of another batten, intended for attaching the finishing trim, are fixed to the bottom sheathing.
Balcony insulation
Balcony insulation
Insulation scheme
As a finishing material for the interior of the loggia, you can use moisture-resistant plywood, wooden lining, sheets of plasterboard, PVC panels and siding.
The floor as a whole is finished similarly to the walls. Tile, laminate, linoleum and other similar materials are suitable for finishing the loggia floor. To visually expand the space of the loggia, tiles or laminate can be laid diagonally.
Tiled floor on the loggia
Preparatory stage
It will require the investment of significant effort, time and money. The fact is that covering a balcony with MDF panels will not work without creating a high-quality base.
Therefore, you will have to do the following work:
All surfaces are cleaned and tapped with a hammer. If uneven areas are identified or crumbling has occurred, it is necessary to knock out the entire unreliable area and seal it with cement mortar and sand.
The smallest cracks are sealed with silicone sealant or covered with polyurethane foam. Various debris and layers of dust are removed.
The surface is coated with an antiseptic primer twice - the second after 4 hours. This is necessary to ensure that there is no mold or mildew under the panels. Although their surface is not subject to this type of impact, it is recommended to perform this step.
Insulation
This is quite easy to do, since this will require the application of hydro and thermal insulation materials. It is especially important to create high-quality protection against moisture. For this purpose, coating-type waterproofing is used. Depending on the type, it can be sprayed over the entire surface area or applied using a roller. If the balcony is sufficiently dry, you can only stop at laying roll insulation, since this option is much cheaper.
How to mount MDF panels on clamps?
Mounting is carried out from the corners. The first plate is installed with a tenon to the corner with a distance from it of approximately 3 mm. The second panel is installed on the opposite surface directly opposite the initial one, and a universal corner is added to its tenon.
Due to this, the elements are qualitatively connected and a full-fledged angle is formed. The remaining corners are finished in a similar way with a 1 cm indentation from the surface of the floor and ceiling - necessary for high-quality ventilation.
After this, it is easy to attach the remaining panels. They fit into the groove of the previous elements. Clips are added to the grooves for high-quality fixation. No reinforcements are needed for the spikes.
In order for the installed panels to gain an aesthetic appearance, it is sometimes necessary to carry out minor trimming, since the tiles may not completely fit. To finish, you need to install the baseboards and add caps to the edges.
Installation of wooden sheathing
The condition of the laid surface largely depends on the lathing. Before installation, the direction of laying the panels is selected. Without any doubt, horizontal panels visually increase the width of the balcony, but vertical panels increase its height.
The peculiarity of the installation of the sheathing is as follows: for horizontal panels the planks are attached vertically, and for vertical panels they are attached horizontally.
Experts believe that the most convenient installation is when the walls are sheathed vertically and the ceiling is across the balcony.
The wooden sheathing is installed in the following order:
ceiling and walls are marked;
the slats are cut to size and mounting holes are drilled into them;
level, starting from the corners, slats are attached to the walls and ceiling in increments of 50 cm. The first rail is installed at a height of 30 mm from the floor. You definitely need slats around the perimeter of the door and window openings. It is recommended to fasten with dowels;
Sometimes prepared insulation is placed inside the sheathing.
