- March 15, 2019
- Repair Tips
- Marina Lobacheva
To decorate any room, you can use different finishing materials. When doing work in the toilet, property owners often pay attention to plastic panels. The use of these materials has numerous advantages, and the installation procedure is considered easy, which allows even a beginner to do it with their own hands. To do this, you need to figure out how to cover a toilet with plastic panels with your own hands. To do this, you can form a frame or glue the panels directly to the walls of the room.
Advantages of using the material
Before decorating a toilet with plastic panels with your own hands, you should decide on the positive parameters for using these elements. The advantages include:
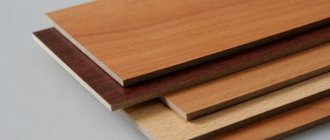
- magnificent appearance of the coating, and you can even choose panels that imitate wood or other high-quality and beautiful materials;
- ease of installation allows you to do this work yourself;
- it is allowed to apply any photographs to the material using special printing, which allows you to independently select the ideal version of the panels;
- the cost of PVC panels is considered affordable, which is especially important for people who do not have a significant amount of funds to carry out repair work;
- there is no need to first engage in work related to leveling the walls if you use a frame, which saves money and time;
- the panels have excellent waterproofing properties, so they can even be used in the bathroom;
- It is very easy to care for the created coating;
- The service life of the coating is considered significant, so there will be no need to start repair work again soon.
Modern panels are made from high-quality raw materials, so they can be safely installed in residential premises. When cleaning the coating, you can use different cleaning agents without fear of damaging the structure of the material.
Disadvantages of use
But the use of PVC panels also has some disadvantages. These include:
- flammability of the material, and during melting harmful components are released;
- for each room it is important to choose the right panels so that the small toilet is not visually narrowed;
- after renovation, the size of the room decreases, especially if a frame is used, which is not always acceptable for a toilet, which usually has a small area.
Therefore, before choosing this material, you should evaluate all the positive and negative characteristics. The most significant advantage for many people is the attractiveness of the coating and ease of installation. If they are well versed in how to decorate a toilet in an apartment with plastic panels, then you can save on paying the labor of experienced specialists.
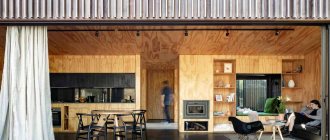
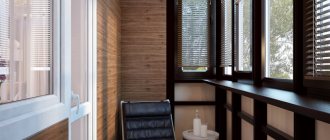
Monochrome interiors
Using panels of just one tone you can create the most amazing and unique interiors:
- Green. An unusual design can be created using the entire gamut of green, from noble malachite to light shades of olive fruits. All of them will fill the “corner of thoughtfulness” with natural serenity and give the opportunity to rest the eyes and brain.
- Grey. It just seems that gray color is boring and can only be used in government institutions. In fact, his palette is very wide: morning fog, river mother-of-pearl, smoking coals, thunderclouds, antique silver, coal or stylus. Gray panels will fill a small room with confidence and calm. It is best to use them from black shades near the floor to light panels near the ceiling.
- Bright colors. Toilets in yellow, red, and orange colors will look stylish and unusual. Such elegant rooms perfectly lift the spirit of a person who has just woken up, but can quickly become boring.
How to choose?
Before starting work, it is important to choose the panels themselves correctly. For this purpose, the following recommendations are taken into account:
- you should choose different panels for the ceiling and walls;
- the appearance of the elements must ideally match the chosen color scheme and interior style;
- when pressed, no cracks or deformation should appear, otherwise the coating will quickly sag and settle;
- the outer layer must be perfectly smooth, so various irregularities are not allowed;
- You should not buy panels that have a not very pleasant smell, since in this case it can be argued that the composition contains low-quality chemical compounds;
- a lot of attention is paid to the dimensions of the elements, since if the work is done in a small toilet, then you should not choose panels that are too wide;
- You should first ask the seller for quality certificates to ensure the safety of using PVC panels in a residential area.
Only with the right choice of material can you obtain a high-quality and durable finish.
Selection Guide
At first glance, PVC panels differ only in design, but this is a misconception; the quality of the plastic can vary significantly depending on the manufacturer.
It is best to ask friends who have encountered this issue, since it is quite difficult to visually determine quality. But there are some tips:
- The PVC panel must be soft. High-quality plastic can bend to an angle of more than 90 degrees. You can bend the panel slightly until you feel tension; the larger the angle, the better.
- The fastening groove should bend freely without kinks, and return to its original position when you release it.
- The panels should not emit any noticeable odors. A noticeable smell of plastic is a sign of poor quality production.
The next nuance that needs to be taken into account is the width of the panel. It can be from 12 to 35 cm; the wider the segment, the more carefully the sheathing will need to be leveled. The optimal option for walls is considered to be less than 25 cm wide.
Once these two factors are taken into account, you can move on to choosing colors and patterns. Here everything depends on personal preferences and the style of the overall interior of the apartment.
What decor do you choose?
Before decorating a toilet with plastic panels with your own hands, it is important to decide on a specific color scheme and finishing style. In this case, the recommendations of experienced designers are taken into account:
- it is desirable that the style of the toilet be similar to the decoration of other rooms in the apartment or house;
- for small rooms, panels with a white or beige color are ideal, since due to such colors the size of the room visually increases;
- if the homeowner does not want to use a monochromatic finish, then you can use the accents that are placed on the plumbing fixtures or other items in the toilet;
- if the bathroom is combined with a bathroom or simply has a significant size, then it is even possible to use contrasts or dark shades.
Each person independently decides what color or pattern the panels will have.
Sea style
The unusual design appeared quite recently, but quickly became popular due to its brightness and cheerfulness. There are a lot of design options:
- Classic white and blue colors or interior with the addition of red on a background familiar to this style;
- Combination of yellow on top and blue on bottom;
- Using panels with shells, fish, dolphins, octopuses and other marine life.
An unusual option would be panels with palm trees, sailboats and other exotic objects.
Rugs in the color of the seabed, sandy beach, or wooden deck of a ship will help complement the panels.
Finishing method
Before finishing the toilet with plastic panels with your own hands, you should decide on the installation method. To do this, you can choose one of the options:
- Adhesive toilet finish. This method involves directly gluing the panels to the walls of the room. This method does not reduce the size of the toilet too much, so it is ideal for small spaces. But to implement such work, you will have to first pay a lot of attention to the quality leveling of the walls, since in the presence of various irregularities or transitions it is impossible to obtain an even coating.
- Using a frame. This method is considered the most popular. It consists in the fact that initially a special frame is formed on the walls, to which the panels are then fixed using self-tapping screws. The frame can be made of wooden slats or metal profiles. You can carry out work even on an uneven surface, but this significantly reduces the area of the room.
The choice of a specific method depends on the preferences and desires of the direct owners of residential property. If the walls are smooth, so you don’t have to spend a lot of time and effort to level them, then you can glue the panels to the surface. If there are various deformations or significant curvatures, then the best solution would be to attach the panels to a pre-made frame.
pros
First, let's look at the positive aspects of using plastic panels as a finishing material for a bathroom. The list of advantages of these products is quite impressive:
- Low price. This method of surface finishing is one of the most cost-effective. It would be cheaper to paint with water-based emulsion.
- Easy to install. Plastic panels do not require special repair skills. Even those who have undertaken repairs for the first time can cope with their installation.
- Fast installation. Installation of one PVC panel takes just a few minutes. Since bathrooms usually have a very small area, all the work will take you very little time.
- No need for surface preparation. There is no need to level or plaster the walls for plastic panels.
- Low maintenance requirements. PVC is a waterproof material that perfectly withstands wet cleaning and contact with various detergents. Therefore, keeping the walls in the toilet clean will not be difficult.
- Wear resistance. Despite the fact that plastic is a fragile material, if you do not subject it to strong mechanical stress, PVC panels will last you quite a long time.
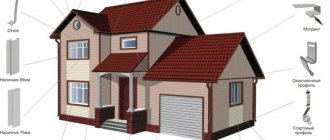
What materials and tools will be needed?
Before lining a toilet with plastic, you should prepare in advance the necessary materials and tools for this. These include:
- directly PVC panels, which must be of high quality, identical and homogeneous;
- if finishing is done using glue, then you need plaster to level the walls, as well as special glue for plastic panels;
- if installation involves the use of a frame, then metal profiles or wood slats are prepared;
- for an attractive finish, it is important to prepare decorative fittings for attaching the panels;
- edging profile;
- self-tapping screws equipped with a wide head;
- an electric drill, which greatly simplifies and speeds up the process of attaching elements;
- a knife specially designed for cutting PVC panels;
- construction level, allowing finishing to be completed efficiently and quickly.
When done correctly, the result is a truly beautiful finish. Therefore, many people prefer to sheathe the toilet step by step with plastic panels. Photos of the resulting finish can be viewed below.
Metallic profile
The metal profile ensures high strength of the frame and the entire structure. All parts have the required dimensions, there is no need to adjust them.
Besides:
- There is good moisture protection and thermal protection. Service life - up to 15 years, if the outer layer was not damaged during the work.
- Less weight compared to wooden products, no heavy loads on the surface during installation.
Installing a metal product is inexpensive, this option is optimal.
Preparation
If a person plans to do all the work himself, then he should carefully study the instructions on how to sheathe a toilet with panels. In this case, you can avoid various significant problems and distortions on the new coating. The process begins with preparatory work. They depend on which installation method was chosen by the owner of the premises. The following actions are performed as standard:
- Initially, the old decoration, if any, is removed from the walls;
- if repairs are carried out in an old room, then it is advisable to completely replace the old pipes or plumbing;
- if you plan to attach the panels with glue, then the walls are leveled, for which you will have to use high-quality plaster;
- after this, all walls are covered with a special primer, and it is advisable to choose an antibacterial composition, which will prevent the occurrence of fungus or mold when the humidity in the toilet increases;
- all unnecessary objects that may become an obstacle to optimal fastening of the elements are removed from the room;
- The panels are pre-cut if necessary in the locations of plumbing fixtures and corners.
Before starting the actual finishing work, the lamellas must be left for about a day to acclimatize at room temperature.
How to glue panels?
If you choose the adhesive method, then how to cover the toilet with plastic panels yourself? To do this, perform the following steps:
- initially the walls are leveled, for which plaster is used;
- after it dries, putty is applied, which is rubbed well;
- Check the evenness of the walls using a building level;
- even if there are the slightest transitions or irregularities, there is a possibility that the panels will become deformed or will not adhere well to the base;
- a primer is applied to the walls;
- after it dries, the creation of an optimal adhesive solution begins, intended for working with plastic elements;
- The panels are glued end to end.
For such work, you need to choose special lamellas that are not equipped with special holes for fastening with self-tapping screws. If you figure out how to finish a toilet with panels, you can easily cope with the process yourself. Due to the fact that the lamellas are glued to the surface, the coating does not reduce the area of the room.
Installation work
To begin installation, you need to apply markings. Then two guides are fixed parallel to each other.
The second step is to stretch the threads into the places where the structural parts are attached to provide a guide to the initial level. For smooth walls, this stage is replaced by marking with a marker where the guide parts are located.
In case of high humidity, to prevent the appearance of dampness, a protective layer (vapor barrier) must be placed before marking.
Progress of further work:
- Install a sheathing made of metal or wood material. Installation of the guides begins along the wall, from left to right.
- Based on the type of design chosen, place and fix the bar (horizontally or vertically).
- Additional fastening is installed at intervals of 30-40 cm.
- All the sheathing parts are installed in the same way.
The lathing for PVC panels made of plastic material is installed on specially designed adhesive tape. Before this action, it is necessary to clean the surface from grease and dirt for better fastening.
Creating a wireframe
How to decorate a toilet with plastic panels if there are uneven walls? For this, the ideal choice would be to create a frame to which the lamellas are then attached. To create such sheathing, timber beams or metal profiles can be used. If wood is selected, then all the bars must first be treated with a special antiseptic solution.
If metal profiles are used to create the frame, then you will have to spend quite a significant amount on their purchase. It is much easier to work with wooden elements.
How to panel a toilet? To do this, you need to make a correct and even frame, for which the following steps are performed:
- Initially, you need to make elements of the required size, for which wooden or metal slats are cut based on pre-made marks;
- bars or profiles are attached to the wall with anchors, for which it is advisable to use an electric hammer drill to simplify the process;
- the distance between elements depends on the width of the selected panels;
- to ensure evenness of fastening, it is important to regularly use a building level;
- It is advisable to secure the elements with locking screws and anchors;
- The lathing can be done not only on the walls, but also on the ceiling of the room.
Using the frame, you can even hide various elements of communications, which include pipes. In this case, you can leave a small hole in the frame, closed by a door. It is intended to provide access to meters or other important places in the systems.
Each finishing method has its own advantages, so before covering a toilet with plastic panels, you should decide on the optimal method of work.
Video description
How to decorate the corners of walls and boxes with plastic without using profiles, see this video:
Ceiling lining
Finishing a bathroom with plastic panels will be more complete if the ceiling is also covered with them. If you haven’t thought about this before, the frame can be fixed directly to the ceiling. To lower it for installing spotlights, use galvanized straight or ceiling hangers. But it is better to immediately plan such a finish, then the top bars of the wall sheathing will become the basis of the frame.
If in the future it is planned to decorate the junction of the walls with the ceiling with plinths, the panels are simply assembled sequentially along a short wall. The first can be glued or inserted with a tenon into the starting profile fixed to the ceiling frame.
Attachment to the ceiling frame Source stroy-podskazka.ru
There is another way - by installing a starting profile around the entire perimeter. It is attached only to the side walls and one cross wall, from which a set of panels will go. It is glued to wooden blocks and secured with staples for reliability; screwed to the metal profile with self-tapping screws in small increments.
The panels, cut to size, are first inserted with their ends into the side starting profiles, for which they need to be slightly bent. Here it will become clear how high-quality the material you purchased is. Then they slide forward - into the front starting profile and alternately into each other, each being fixed with self-tapping screws through the nailed edge.
Installation of the first ceiling panel Source obustroeno.com
When decorating a toilet with PVC panels, it is important not to forget about lighting. At the installation points of the lamps, you will need to cut round holes corresponding to their diameter and let the wires out.
The most difficult step is the last step - installing the edge panel. If the starting profile were fixed along the entire perimeter of the ceiling, this would be impossible to do. But even without it, the finish will look unfinished.
Therefore, the last part is cut in width so that it is 1-1.5 cm of the remaining clearance. After that, a starting profile is put on the cut edge, and the sheathing beam is lubricated with liquid nails. Having installed the panel in its place, the edge with the profile is pressed against the frame and fixed until the glue completely sets.
Frame cladding process
Once the sheathing is completely ready, you should make sure that there are no bends or problems in it. After this, the fastening of the direct lamellas begins. How to cover a toilet with plastic panels with your own hands? To do this, perform the following steps:
- the procedure begins with the corners in which the starting profiles are fixed;
- they must be correctly aligned, for which a level is used;
- The panels are usually fixed to the sheathing with self-tapping screws or special brackets;
- then the remaining elements are fixed, which are connected to each other and attached to the frame;
- along the perimeter of the entire room, a ceiling profile is fixed on top, designed to connect the ceiling and wall coverings;
- The panels need to be fastened with a small gap at the top to create an expansion joint;
- the elements are connected to each other using special tenons and grooves;
- a box designed to hide a sewer riser or other similar elements is sheathed in the same way;
- skirting boards are installed below to hide the lower part of the covering;
- A ceiling plinth is mounted on top.
If you figure out how to properly line a toilet with plastic panels, the procedure does not take much time and does not require significant effort.
Video description
This video shows the process of marking and installing finished inspection hatches:
Cladding of walls and boxes
Finishing a toilet with plastic will be easy and quick if it is plain or with a vertical repeating pattern. It is much more difficult to match panels to each other under tiles, with borders or large patterns, parts of which are located on adjacent lamellas. They must be very accurately and accurately combined, which requires at least a small amount of play for vertical movement.
- Setting up starting profiles.
These profiles are attached to the lower and upper beams of the sheathing with a stapler or self-tapping screws in increments of 15-20 cm. They allow you to hide the end cuts of the panels and not use skirting boards to form joints with the walls and ceiling.
- Installation of the first panel.
The technology provides for the installation of a plastic corner profile, which is attached to the frame in the same way as the starting profile, but in a vertical position. The first panel is inserted into its groove with the tenon side, which, after being leveled, is fixed to the horizontal sheathing through a nailed edge strip with self-tapping screws with a wide head.
The alignment of the pattern and the ease of further installation depend on the exact position of the first panel. Source stroy-podskazka.ru
But, since PVC fittings are made predominantly in white, in combination with colored panels it looks too contrasting and cheap. Therefore, internal and external corners are rarely used, making joints by adjusting the panels to each other. In this case, the first panel is attached to the frame using liquid nails. To ensure neat corner joints, the tenon is cut off from the first panel adjacent to the corner. Or they put starting profiles on the edges.
- Installation of the following panels.
Next, finishing the bathroom with PVC panels is easy and quick: they are inserted with a tenon into the groove of an already fixed part and screwed to each beam of the sheathing. If the width of the last panel does not fall within the gap between the penultimate one and the corner, it is cut along its entire length with a sharp stationery knife or jigsaw.
The panels are inserted into the locking part and fixed to the frame Source balkonyi.ru
Adviсe
Many people think about how to finish a toilet with panels. How to do the work yourself? To do this, take into account the advice of professionals:
- if you have a very small room, it is advisable to glue the panels to the walls;
- if there are significant unevenness on the surface, then to speed up the repair process it is advisable to install sheathing;
- if the room needs insulation, then insulation and waterproofing materials can be placed in the empty space of the frame;
- with the help of such finishing you can hide the unattractive elements found in every toilet;
- even if one panel breaks, it can be replaced with a similar element without destroying the entire coating.
The use of PVC panels for interior decoration is considered an ideal solution for many residential property owners.
Wooden blocks
To make the lathing, you will need slats without defects: straight, smooth, with mandatory sections of 20x20. There are no difficulties during installation, the material is easy to process and can be installed in any way.
To avoid any defects, the wooden material must be dried naturally.
Mold and mildew may appear on the surface. To prevent this from happening, use paint or antiseptic with varnish. It is recommended to use hardwoods (acacia, beech, aspen) that can withstand high humidity and have good strength.
If you provide a suitable level of humidity, this design will last up to 5 years.