Why do you need finishing putty?
Regardless of the chosen finishing option, be it paint or wallpaper, the surface needs to be leveled and various defects eliminated. Putty can cope with the task. It is produced in different types. Problems visible to the eye are eliminated with a starting composition, which can be applied in a thick layer.
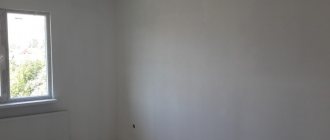
To bring the work area to perfect evenness, you will need a finishing mixture. Unlike plaster, it can be distributed in a thin ball without cracking during drying and use.
The finishing composition contains fine particles, which makes it possible to give the surface absolute smoothness. With the help of putty, even invisible defects that are difficult to notice at the preparation stage are eliminated.
The main functionality of this product is to level walls and ceilings before painting or wallpapering. An important point is the ability of the mixture to smooth out roughness and irregularities that lead to divergence of wallpaper seams when joining the panels.
This type of finishing, such as paint, is popular. Its significant disadvantage is the high requirements for foundation preparation. The surface must be perfectly flat and smooth. Finishing putty can cope with the task.
Important points in work
When applying putty yourself, it is very important to follow the following rules:
- It is necessary to putty only in good lighting, otherwise it will be impossible to achieve a perfect result.
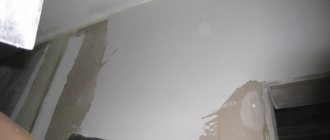
- Before and after applying each layer, the surface must be thoroughly primed. It is important to wait until both the putty itself and the primer are completely dry.
- It is advisable to putty the entire surface at the same time and dilute the amount of mixture required for work at once, but remember that it hardens quite quickly (depending on the type).
- If the mixture is finished, but work needs to be continued, then the already applied layer must be moistened with water at the joint for greater adhesion. When it dries, it is better to use a primer.
- When joining, it is worth applying the mixture overlapping.
- It is necessary to reinforce with cobwebs, otherwise cracks will appear. The exception is finishing puttying of drywall.
- For a large area, you can check whether the layer is even or not using a regular thread, which is pulled diagonally.
- After drying, diluting and using the mixture again will not work.
You should also note that dry putty is cheaper, but sets much faster, which is important when planning the scope of work.
When puttying, it is necessary to take into account the characteristics of the selected mixture depending on the purpose, and carefully follow the manufacturer's recommendations. It is also worth using putty only for the final coating of walls before painting or wallpaper, and they must be leveled with plaster. This will significantly save time and money
What kind of putty is there?
Different types of putties are available. To understand the intricacies, familiarization with the classification of mixtures, which differ from each other according to the following characteristics, will help.
By purpose
Putty: all about the material and wall putty | Secrets, tips and experience of a professional
There are compositions:
- starting (for leveling surfaces);
- finishing (to give smoothness and decorative properties);
- universal (combining the qualities of start and finish).
They differ in the grain size of the material.
By degree of readiness
Putty mixtures are produced in dry form and ready for use. The first option has an affordable price and a long shelf life. It is dissolved with water before starting work. To obtain a plastic solution, you must strictly adhere to the dosage.
The finished mixture is packaged in polyethylene containers. It doesn’t last long, the cost is higher, but you don’t have to waste time preparing the solution.
By area of application
Putties are produced specifically for indoor and outdoor use (facade). The scope of application is determined by the composition of the mixtures. For example, gypsum-based products are suitable only for interior work, while cement-based ones can be used inside and outside the house.
By composition
Where to use this or that putty is determined by the basis of the composition. The following types are available:
- plaster;
- cement;
- acrylic;
- latex;
- polymer.
Latex is more suitable for wet rooms, as its characteristics include increased resistance to moisture. The polymer composition can be used on any substrate indoors and outdoors.
Taking into account the properties of a particular type of putty, a suitable option is selected.
| For what kind of work? | Type of putty |
| For walls | In dry rooms it is better to use a gypsum composition; for wet rooms, cement and acrylic are suitable. |
| For the ceiling | On a gypsum and acrylic basis. |
| For wood processing | Acrylic composition. |
| For drywall | In dry rooms, gypsum and acrylic bases are used. |
| For facades and exterior work | Mixtures based on cement and polymer materials. |
| For painting | It is recommended to choose an acrylic or gypsum base. |
Types of putties according to degree of readiness
When considering the question of which putty is best to putty on walls for painting, it is worth noting that such material is sold in two types.
Dry mixes
This material is in greatest demand because it is inexpensive and has a long shelf life. To get a paste-like putty, you simply need to dilute the dry mixture with water according to the instructions. But the mixture must be mixed immediately before puttying and in small batches, since the composition sets quickly. Dry putty is supplied in bags weighing from 5 to 25 kg.
Ready-made formulations
Putty is supplied in buckets or large tanks. It is not difficult to guess that such material can be used immediately without any preliminary preparation. The shelf life is shorter than that of the dry composition and the price is higher.
How to choose
When purchasing putty, experts recommend taking into account important factors that determine the purpose and properties of the mixture.
| Manufacturer | You can avoid mistakes in quality by giving preference to well-known brands. Among them: Ceresit, Dulux, KNAUF, PUFAS, KREPS, Volma, Weber. |
| Types of putty | All putties are classified into several types. They differ in composition and purpose. The differences between them can be seen with the naked eye. Main types:
|
| The basis | When making the mixture, the main component is used to ensure adhesion and elasticity of the solution. There are the following base options: gypsum, cement, acrylic, latex, polymer. Depending on the type of putty, the composition for specific work is selected. With a cement base you can work outdoors, gypsum is used only for interior work, acrylic ideally smoothes out roughness, so it is applied before painting or artistic painting. A polymer mixture is considered a universal option due to its unique properties and increased resistance to adverse environments. |
| Application area | Depending on the components of the composition, putties are produced for interior and exterior use. Any work can be done with universal mixtures. |
| For what premises? | The mixture may include hydrophobic components that make the putty moisture resistant. Information about what type of premises the product is suitable for is contained on the label (type of room – wet, dry). |
| Water consumption, l/kg | For each mixture produced in dry form, a certain amount of water is required to mix the solution. Its quantity is indicated by the manufacturer on the label. To obtain a working putty consistency, use from 0.2 to 1.3 liters of liquid per 1 kg of product. |
When choosing putty for different types of work, preference should be given to universal compounds that will equally well prepare surfaces indoors and outdoors.
How to apply finishing putty
Anyone can master the technique of applying putty. It will be easier to cope with the task if you use a set of tools, which includes:
- drill with a mixer attachment for mixing the solution;
- spacious capacity;
- spatulas of different sizes (with a wide and narrow working part, angular);
- a set of brushes and a roller (for applying primer);
- rule (required when forming a thick layer of solution);
- level and other measuring devices;
- sandpaper or trowel mesh for sanding the surface after the putty has dried.
Surface preparation
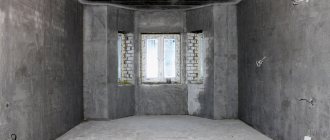
Before leveling the walls and ceiling, you need to carefully prepare the surface. To do this, remove the old finish and remove flaking fragments. If there are stains that look like fungus or grease, you need to treat them using appropriate products.
You can get rid of grease by wiping the stain with gasoline or another solvent intended for enamels and oil paints. Fungus or mold is removed using deep penetration antiseptic compounds.
The cleaned surface is treated with a primer. In rooms with high humidity, it is recommended to use soil with an antifungal additive. This will help protect the walls from the development of microbiological processes.
Work can be continued only after the primer has completely dried. The time is indicated on the primer label. Experts advise applying the product in two layers with intermediate drying for at least 2-4 hours.
If there are serious flaws, starting putty is applied. After drying, the surface is again covered with primer and allowed to dry.
Putty application process
Work with putty must be carried out under certain conditions: with average humidity and a temperature of 5 degrees.
Step by step steps:
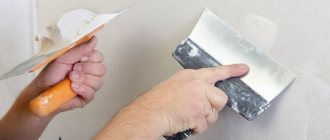
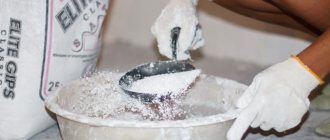
- Prepare the mixture following the instructions. You need to strictly adhere to proportions. Knead in a spacious container until a homogeneous structure is obtained, using a mixing attachment and a drill. Do not mix the ingredients at high speed, as this may lead to the formation of bubbles. It will be difficult to work with such a solution.
- Apply putty to a dry surface with a spatula, leaving an even layer after passing the tool. When forming balls in adjacent areas, avoid overlaps. Experts advise holding the tool at an angle of 30 degrees. Try to distribute the mixture in one motion.
- It is better to make batches in small portions. The viability of the solution depends on the base. Gypsum putty hardens the fastest.
- Upon completion of work, time is given to completely dry the surfaces. This takes on average 24 hours.
When applying putty, you need to control the thickness of the layer. It should not exceed 2 mm. For some types of mixtures this figure corresponds to 1 or 3 mm. Before using the material, you should carefully study the instructions.
To level the walls/ceiling, sometimes it is necessary to apply 2-3 layers of putty. They need to be formed with intermediate drying and soil treatment.
If you want to get a perfectly smooth surface, use a bright light when rubbing the putty, where all the flaws will be visible.
When preparing the base for wallpaper, 1-2 layers are sufficient, followed by cleaning with a fine grout mesh. Puttying before painting is done more carefully. To create a perfectly smooth surface, use sandpaper with the finest abrasive.
FAQ
What is the difference between finishing putty and starting putty?
You can distinguish the starting putty from the finishing putty by several criteria. One of them is color. The start is recognized by a pronounced gray tint. When applying the mixture, the looseness of the structure is noticeable. It is convenient to distribute it only with a wide spatula. After drying, the surface must be sanded. To do this, use a grinding machine or sandpaper (trowel mesh). The finishing putty is always light, almost snow-white. After diluting the solution, a plastic mixture is obtained that is easily distributed even with a narrow spatula. The dried surface is smooth and even. It is sanded with the finest sandpaper. When applied correctly to the walls, defects such as scratches, drops, and gouges are eliminated. The main difference between start and finish is particle size. In the first case, they are larger, so the solution turns out loose. The fine-grained finish not only copes with unevenness, but also smoothes out the roughness that remains from coarse putty or plaster. Another difference between putties is the thickness of the layer. You can only form a thick ball using the start. The finish is applied in a layer of no more than 1-3 mm.
Why does finishing putty roll off when applied?
The first reason for the putty to roll off during application is the poor quality of the mixture. Therefore, it is recommended to give preference to well-known manufacturers who value their reputation. The second reason lies in unscrupulous surface preparation. In this case, it is either not well treated with primer, or it was not applied at all. The rolling effect may also appear when working on a wall/ceiling that is not completely dried. Incorrect kneading can cause rolling. Beginners often do this manually using a spatula or stick. This technology does not ensure the dissolution of the smallest particles, resulting in the formation of lumps. You need to use a mixer. Violation of proportions affects the quality of the solution. By pouring water by eye, it is impossible to obtain a plastic mixture. Therefore, experienced craftsmen advise not to deviate from the instructions.