Repair is an undertaking that is costly not only in terms of finances, but also in terms of time. The desire to speed up the process is natural both for the customer and for the performers who strive to complete the work faster. However, haste is one of the main enemies when performing any repair work. Thus, the process of finishing the wall canvas must be carried out in strict compliance with technology and time frames. Plastering walls is a fundamental element of repairing the wall material of premises. This is not only a labor-intensive process, but also a lengthy one. The plaster layer needs a sufficient amount of time to dry before proceeding with the final finishing of the room. Failure to comply with technology leads to unpleasant consequences. What are the dangers of finishing a wet plastered wall?
Types of putty
The main difference between finishing coatings is their composition. The following types of plasters are available for sale:
- Gypsum is the most common type. It is often chosen by contractors because it is very easy to use. In addition, you can permanently correct the surface, which makes work easier, and get perfectly smooth walls and ceilings. It is also an ideal putty for plaster;
- Cement and cement-lime have a coarser grain size than gypsum, and therefore do not provide such a smooth surface. In addition, they are more difficult to use. However, they are more resistant to moisture and mechanical damage than gypsum;
- Limestone and gypsum-lime - designed for leveling walls finished with lime or gypsum-lime plasters. Like gypsum finishes, they should not be used in wet areas;
- Polymers are easier to apply and process than gypsum finishes. They provide a very smooth surface. They can be used for finishing partitions in rooms with high levels of humidity, like putty on wood.
How long should the primer dry before painting the ceiling?
Today, painting the ceiling is still popular. This is a simple and fairly cheap option for finishing the ceiling, which can be completed in a short time and without special construction skills. The only thing that can spoil the impression of a freshly painted ceiling is its uneven surface. Therefore, preliminary preparation of the ceiling for painting is necessary. The work itself takes up the lion's share of the entire ceiling finishing. But if the preparation of the ceiling for painting is poorly done, then the final result may be disappointing. To prevent this from happening, you need to be patient and carefully complete all the work to prepare the ceiling for painting.
Preparing the ceiling before painting takes place in several stages. Each of them is necessary to create a smooth and reliable surface for further paint application. To carry out surface preparation work, you will need a certain tool :
- wide and narrow spatulas;
- roller and brush;
- paint trough;
- container for mixing putty;
- drill and special mixer attachment;
- stationery knife;
- a grater with a sanding mesh or a special sanding machine with zero sandpaper;
- safety glasses and respirator.
Materials you will need :
- deep penetration primer, for example, Ceresit ST 17;
- Knauf multi-finish gypsum putty or other;
- painting fiberglass “gossamer”;
- glue for glass wallpaper;
- a stepladder, or better yet a table or trestle.
Having acquired everything you need, you can begin the actual work of preparing the ceiling for painting.
Ceiling cleaning
When finishing from scratch in a newly built house, you can immediately proceed to the second stage of work. But if a major renovation is being carried out, then you will first have to clean the ceiling of the old finish. There are several options for what you have to do.
- If the ceiling was covered with wallpaper , then using a regular spray bottle or roller we wet the surface with warm water and let it absorb. After some time, the glue will get wet, and the wallpaper can be carefully removed using a regular spatula. It is enough to pick them up, they will easily come off. As a result, not a single piece of paper should remain on the ceiling. Finally, wash off any remaining glue. This can be done with a regular sponge dipped in warm water. You may need to change the water several times. The main thing is that the ceiling surface is clean as a result.
- If the ceiling was previously painted with water-based paint or whitewashed , you will have to do the same as with wallpaper. First, lightly wet it and then use a spatula to scrape off the old finish. But unlike wallpaper, which can be removed almost as a whole canvas, paint or whitewash is not so easy to scrape off. Ideally, the old coating will be removed in small flakes. Otherwise, you will need to work hard. To facilitate the process, the surface will have to be slightly moistened from time to time. Some craftsmen remove the whitewash dry. This approach has its place, but it has one significant drawback - too much dust. Upon completion of work on removing whitewash or water-based emulsion, the ceiling must be thoroughly washed. You will have to change the water several times.
Form and method of application
Putties are offered in loose form for mixing with water or as a ready-to-use mass. The latter form is more convenient, and the use of such a product allows you to speed up the work.
Similar to another parameter - method of application. This can be manual or machine control using a unit. Machine application is much faster, especially for large surfaces.
- Traditional cement-lime putties are especially valued for their durability, but it is worth remembering their other advantages.
- Their very good adhesion makes them an ideal base for painting, as well as for all types of cladding, such as wallpaper or ceramic tiles.
- They are suitable for any interior and any conditions - for the kitchen, living room, corridor or children's room, and due to the fact that they are waterproof, also for rooms with humidity above 70%, such as bathrooms.
- Each putty has a minimum and maximum layer thickness specified by the manufacturer. Usually it is 2-3 mm.
It is also worth paying attention to the maximum allowable size of individual cavities. The standard is 3 mm, but you can also buy plaster that can be used to seal 20 or even 30 mm of unevenness.
Is it possible to plaster undried Rotband?
Masters online: 430 Orders per week: 1,023 Offers per day: 978
Kick out such a “master” URGENTLY, and continue to select workers more carefully and pay generously, otherwise all this will result in three more journeys.
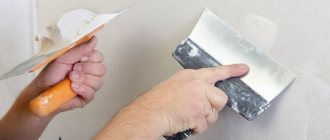
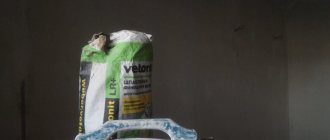
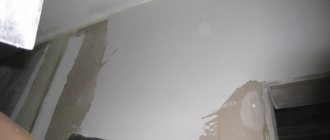
Vetonit is a finishing putty, not a plaster. I understand his intention - I wanted the grip on the Rotband plaster to be better. But for this, your hands must not just be golden - you can make holes by putting putty on wet plaster. and secondly, the rotband sets very quickly - that is, it is still wet, it does not look dry, but in fact has already hardened. and then it can be puttied.
Look for another master.
Yes, they answered you correctly, kick him out. More than once in my practice I have encountered something similar when putty was applied to wet plaster. After such a “pie” has completely dried, the putty often begins to peel off from the plaster; if you start rolling it with a roller, then a layer of putty is wound onto the roller. The trick is that the shrinkage coefficient of plaster and putty is different! Send this specialist on foot. refresher courses, dry the surface for four days, and prime again. Something like this.
You need to let the rotbont dry otherwise it will be bad
Call us and we will do everything you need. And when asked what to do, go after such a master by the neck. When it all peels off and cracks, the technician will turn off his phone. Butler Arthur
Rotband that is not dry is not scary, but after priming you have to wait 6 hours until it dries, then you can plaster
Source
Application conditions
The possibility of using putty in rooms with high humidity significantly depends on its composition. The most popular gypsum finishes should not be used where air humidity remains above 70% and where walls may be exposed to splashing water.
In the case of polymer and cement products there are no such restrictions.
- Most manufacturers state that the finish can be used at temperatures between 5-25°C.
- During work, drafts should be avoided so that the surface of the partitions dries evenly.
- Drying (setting) times vary greatly.
- Some products bind in a few or tens of minutes, others in a few or tens of hours.
“Cheap products are expensive to work with.” An expert answers questions about primers
Affiliate Material
Plastering walls, gluing wallpaper or tiles, painting - the surface will have to be primed before any coating, and no professional builder or home craftsman should skip this stage. The primer increases adhesion, reduces the absorbency of the base, glues dust particles and detachments invisible to the eye on the surface, and fills small cracks. In theory, this creates a homogeneous surface that is both durable and has high adhesive properties, and the next applied material remains firmly on it for many years. But not everyone succeeds this way: there are many subtleties in priming, and users always have many questions on this topic. We asked Sergei Glebov, product manager of the KNAUF group, to answer them.
Price and quality
One of the main criteria for choosing building materials is price. However, to compare the profitability of buying putty for different surfaces, it is not enough to look at their price on the shelf.
- These products are offered in packages of various capacities - from 1 to 30 kg.
- Therefore, it is best to calculate how much we will pay for the selected kilogram.
- But this is not enough, because the products described differ significantly in characteristics.
Therefore, in our list there is an item “wear at a layer thickness of 1 mm,” which allows you to estimate how many kilograms will be required to finish partitions with a given surface.
High-quality putties from famous manufacturers usually cost more than no-name ones. However, among little-known brands you can also find a quality product that will provide a good appearance to the walls and will last a long time.
Manufacturers
Currently, one can note a relatively large selection of gypsum putty, but not all of it is popular and of high quality. Unfortunately, all materials produced in Russia and the CIS are of very questionable quality at an unreasonably high price.
Often, domestic putties are purchased for extremely low-cost work, where quality comes last. The best manufacturers of gypsum putty are companies from Poland and Germany, although their price is much higher - it corresponds to the quality.
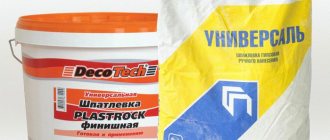
Some of the best putties are considered to be products from the Knauf company, produced in various modifications. Often, when you search for “gypsum putty,” a photo of this company’s product appears. But there is no classic starter in their assortment, but there are finished products (after opening the bucket you can start putting putty) for each of the products in the range.
Ceresit putties, produced as starter and facade putties, have proven themselves to be quite good. Pairs perfectly with Knauf products. Also, some types of putty are produced by the well-known company Tikkurila, but it is known for its paints. But the putty of this company is also of high quality.
The Polish company Alpol, specializing in bulk materials, presents starting (S20) and finishing (S22) putty. Almost all builders who can buy this company give preference to it. But since Alpol does not produce a universal one, another Polish manufacturer Acryl Putz gained its popularity precisely in the segment of universal gypsum putty and rightfully occupies its niche.
Applying putty yourself
Carrying out finishing work often does not require special skills; accuracy and diligence are important.
Priming the walls: Depending on the type of putty, priming and leveling of the walls and ceiling may be required.
- Preparation of the solution. Putties are available in ready-to-use form or in free-flowing form for mixing with water. The proportions of the mixture must correspond to the recommendations on the product packaging.
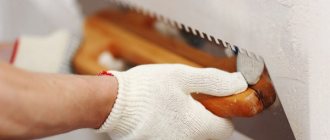
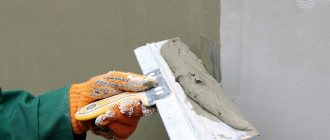
- Applying plaster - the solution is applied with a stainless steel spatula to the thickness recommended by the manufacturer. The number of layers depends on the condition of the base and the desired effect.
- Surface finishing: smoothing is done by wet or sanding. The method is indicated by the manufacturer on the packaging.
The putty can be selected taking into account its use on the wall or ceiling, as well as the intended purpose of the room.
Walls are usually much more susceptible to damage than ceilings, so it is best to choose a compound that is hard and resistant to damage once dry.
Preparatory work
Before starting puttying, the walls must be perfectly clean and smooth. It is necessary to remove stains from grease and soot, remove old putty, apply a primer to ensure adhesion of the solution to the walls.
If there are irregularities, bumps, or other defects, it is necessary to eliminate them, knock out lumps, cover the cracks with the starting mixture, and prime the walls. One layer of primer will be enough, the main thing is to do it well, do not leave gaps, apply the mixture using a special roller.
Which is better: heated floors or radiators?
Warm floorBatteries
Preparing putty for work
If the putty is dry, then take a wide container, pour water into it, add the composition and stir with a mixer. How to putty plasterboard walls with finishing putty? To avoid lumps and clots, it is important to do this procedure for a long time, then leave the finished material for 15 minutes to swell and stir for another 3 minutes.
It is important to repeat this cycle several times in order to be sure of obtaining a soft and elastic mass for puttying walls. It is important not to re-dilute the resulting composition, otherwise the putty will form clumps and “draw” stains on the wall.
Finishing coatings for wood
One of the methods for eliminating wood defects is putty using preparations intended for this purpose. Wood putty is most often used in places such as: wooden stairs, parquet floors, furniture, frames, door frames, as well as various types of structures.
- Two-part wood putty is a solution, but requires proper preparation before applying to the wood. Wood leveling mixture consists of a hardener that must be mixed with the base. In addition, the product should be used relatively quickly due to the rapid loss of properties after opening the package.
- One-component wood putty - very easy to use. It is most suitable for repairing small cavities. One-component wood putty is also less rigid than two-part wood putties.