Extruded polystyrene foam of the Penoplex brand, thanks to its excellent characteristics, is becoming the most popular insulation for interfloor and attic floors, as well as for walls and partitions. This material is suitable for almost any covering, as well as for installing a “warm floor” system on top of it.
Do-it-yourself floor insulation with penoplex under screed
You can do the insulation of the floor with penoplex under the screed yourself by understanding the technology of performing the work. Moreover, the installation of such insulation is quite acceptable both for a private house and for an apartment located on any floor. Penoplex is a lightweight material, and in combination with a screed that is not too thick, it will slightly weigh down the floor without causing any damage to the overall structure.
Experts have proven that up to 10% of heat is lost through the floors of a private home, and this figure is quite impressive, especially if you convert it into monetary equivalent. To avoid unnecessary annual heating costs, it is better to invest once in insulation material, which will quickly pay for itself, since the amount of monthly payments for energy use will be significantly reduced.
The technology for insulating a concrete surface with Penoplex differs from the thermal insulation of a floor on the ground and requires a different approach.
“Penoplex” can insulate both a floor on a concrete base and a floor on the ground. The technologies are quite different and require a different approach. But first, a few words about the thermal insulation material itself.
Penoplex floor screed
In floor insulation, penoplex, also known as extruded polystyrene foam, has found its worthy application. Its properties allow it to be used for flooring even with the highest loads. But in order for the material not to fail, you need to follow the technology - an incorrectly designed penoplex screed can ruin the whole thing. In order to prevent unfair complaints about this heat insulator, we will tell you how foam boards should be installed correctly in a screed and what the installation principles are.
Allowable maximum
The maximum thickness of a semi-dry screed depends on the need to hide communications and unevenness of the subfloor. Sometimes, with large differences and unevenness of the base, the thickness of the screed layer can reach up to 150 mm.
If it is necessary to make a screed of greater thickness, use expanded clay flooring, which will help reduce the specific weight of the screed and save costs on the material.
If there is a heating system inside the screed, the thickness of the screed directly depends on the diameter of the pipes.
wall panels for loggia photo
The thicker the layer of semi-dry screed, the higher the loads the floor in the room can withstand during operation.
Penoplex screed technology
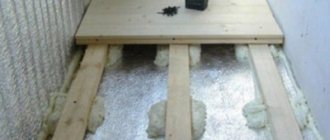
Let’s analyze the installation of a floor with penoplex from the very beginning, because preparing the base is also an important stage. If it turns out to be uneven, then neither the screed on the penoplex slabs nor any other will differ in quality. If the floors are installed on the ground, the base under the foam screed must have a sand cushion. It must be properly compacted and leveled to avoid large differences in height. If this is an ordinary floor, then a rough screed will also not be superfluous.
The required thickness of extruded polystyrene foam and its density are determined based on the loads that are planned in the room. For regular insulation in an apartment, it is enough to lay foam boards with a thickness of 20-30 mm and a density of 31-35 kg/m3 in the screed. If this is the floor of the first floor, it is better to increase the thickness to 40 mm. When installing floors on the ground, a heat insulator with a thickness of 50-100 mm is used. If this is a garage, then it makes sense to use 45-density material, but in a house its use will most likely be economically unjustified.
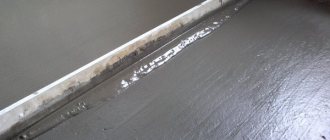
The foam slabs are laid end-to-end in the screed. It is advisable to seal the seams with a special foil tape; you can also use regular tape. This is necessary to ensure that liquid from the cement screed, which will be placed over the penoplex, does not get between the slabs. Often the insulation is additionally protected with waterproofing - this can be roofing material, glassine or even simple polyethylene.
Please note: according to the screed technology, the waterproofing is placed on the penoplex, and not under it. Its task is to prevent moisture penetration. Once water gets into the joints between the plates, it will remain there for a long time - after all, extruded polystyrene foam practically does not absorb it.
Before pouring the screed onto the foam boards, be sure to leave a temperature gap around the edges. It compensates for possible expansion. To do this, a deformation tape is attached to the wall around the perimeter, for example, foamed polyethylene foam 1 cm thick.
Installation of reinforcing mesh
Before applying a layer of plaster, penoplex needs to be reinforced with special nets. Polymer cellular fabrics with a density of at least 140 g/m2 and no more than 160 g/m2 are best suited for reinforcement. The general rule is that the smaller the cells, the better the reinforcing properties. A high-quality mesh with suitable characteristics helps to level and strengthen the surface of the penoplex.
Note! If you plan to use cement-based plaster, the mesh must be inert to an alkaline environment.
Reinforcement should start from the corners. To do this, cut strips from the mesh, the width of which should not be more than 35 cm, and the length is determined by the length of the corner. The strip is folded in half lengthwise, a fixing compound is applied to the penoplex and the mesh is pressed against it.
The entire wall is reinforced in a similar way. First, lay a layer of fixing mixture (plaster), then press the mesh against it, smooth it out and make sure it is fixed. The reinforcing fabric should be overlapped, because areas not covered with a polymer mesh will stand out noticeably against the general background. A thin layer of fixing mixture is applied on top of the cellular coating, which ensures a tight fit and strong fastening.
Penoplex screed thickness
Penoplex has been laid under the floor screed, it’s time for concrete work. Typically, cement-sand mortar is used in proportions 1:3, 1:4. If there is a need to lighten the structure, for example, with a large screed thickness (10-15 cm) on penoplex, you can use cement with expanded clay. In any case, the thickness should not be less than 4 cm. This is the technology for installing penoplex screeds that is offered by the manufacturer, no matter whether the design is intended for installing a heated floor or for tiling.
However, practice always makes its own adjustments. Some people add a reinforcing mesh and claim that in this case a 2cm screed on the penoplex will be sufficient. However, let us clarify - essentially the reinforcing layer itself should be 10-15 mm cm from the surface of the insulation, so what 2 cm! Therefore, you should not violate the technology, if you are not satisfied with the height of the floor, it is better to put thinner penoplex under the screed.
There is another option, which involves installing a screed made of gypsum fiber sheets (GVL). They are laid in two layers, and this is where a two-centimeter screed on penoplex turns out to be just right. In this case, the use of glue is considered optional. Just? But definitely more expensive. The advantages of gypsum fiber board screeds are primarily the time gained. According to the rules, the cement must stand for 28 days before work on laying penoplex on top of a wooden floor can be continued. Using gypsum fiber sheets does not require any waiting at all.
Decorating the coating
Before plastering the penoplex with decorative material, you need to apply a primer using a roller or paint brush.
This composition provides a sufficient level of adhesion, which significantly increases the service life of the finished coating. In addition, primers provide protection against fungi and mold. Most often, structural or textured plasters are used to decorate facades. In the first case, the application process is as follows:
- First, apply the solution with a spatula and level it. The thickness of the layer should be equal to the grain size of the material.
- After several hours, when the plaster has set, you need to rub it again. Only now they use not sandpaper, but a trowel or grater. The tool is pressed against the wall and processed with vertical movements.
- The wall is then left to dry, after which paint is applied in two layers. The first coat of paint should be slightly darker than the second.
- After the paint has dried, the surface is treated with varnish.
Textured surfaces are designed in the same way as structural ones, but instead of grouting, a different technique is used. It involves applying relief designs with a roller or brush. It is also permissible to use special stamps or a regular sponge, which are simply touched to different parts of the surface, leaving marks. After drying, textured plasters are painted and varnished.
After grouting, plastering of penoplex is easy and relatively quick. To decorate the coating, you can use a sponge with large pores or a special grater.
There are ready-made decorative plaster compositions that create an unusual texture on the outer surface.
Bark beetle plaster, in addition to the usual basic components, contains white powder and small pebbles with a diameter of up to 2.5 mm. With certain skills, the master can make different designs from the same mixture by directing the movements of the spatula in a certain way. The work of a plasterer thus turns into the work of a decorator.
If the mixture contains larger stones, up to 4 mm in size, the relief will be completely different. Granules are crumbs made from natural raw materials: granite, marble. Pebble plaster gives the facade an unusual, beautiful look and provides shine in the rays of sunlight. White cement plaster mixtures with the addition of large granules of quartz, dolomite, and marble are available for sale. For some unknown reason, it was called the lamb. Perhaps the appearance of the facade reminded someone of the wool of sheep.
An interesting decorative option is created by mosaic plaster based on polymer acrylic interspersed with natural colored chips.
Penoplex screed and finishing floor covering
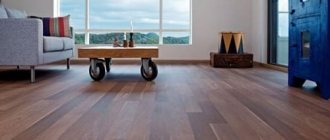
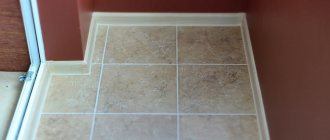
Floor screed with penoplex implies quite a few options for the finishing coating. In principle, you can use it to make any kind of floor. The most common options:
- Ceramic tiles - laid with tile adhesive.
- Warm floor, water or electric – screed on foam boards is done using the “warm floor” system.
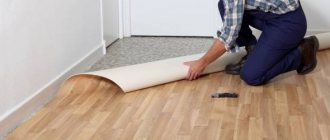
- Laminate - mounted using its usual technology, on a substrate.
- Wooden floor - wooden logs are laid, which are fixed with polyurethane foam. Flooring is made on top.
The floor on a heat insulator, even if it has significant compressive strength, should not be laid without a screed. It is needed in order to evenly distribute the load over the surface. It is not at all necessary to reinforce it, especially if you are installing a regular coating in a house, and not a runway. Insufficient thickness of the foam screed (less than 4 cm) can lead to it cracking, crumbling and deforming in every possible way.
The idea of putting penoplex under the screed of any floor can be called excellent. After all, this is, in fact, what it is intended for. An insulated floor will significantly retain heat in the house and ensure comfortable living.
What is Penoplex?
"Penoplex" is an insulating material made from extruded polystyrene foam. It is manufactured in several versions, each of which is designed for thermal insulation of various surfaces and elements of the building, that is, the choice of material must be made correctly.
"Penoplex" is one of the best modern insulation materials
This insulation has special markings indicating its most important technical characteristics, on which the area of application of the material depends. “Penoplex” are labeled 31, 31C, 35, 45 and 45C, but not all varieties are suitable for floor insulation, but only those that have a sufficiently high density - 35 and 45.
"Penoplex - 35" is essentially universal and is used for thermal insulation of foundations, external walls and floors. This type of insulation has the following characteristics:
- fairly high density – 28 ÷ 38 kg/m³;
- low thermal conductivity: the coefficient is only 0.030 W/m×°C;
- low hygroscopicity - 0.4% of the total volume in 24 hours, and moisture absorption during the test was noted only during the first 10 hours;
- flammability is designated as G1. This is a very high indicator of fire resistance, and since a heat-resistant concrete screed will be laid on top of the insulation, the material will be completely fireproof;
- The noise absorption rates of this material reach 41 dB;
- the tensile strength of "Penoplex - 35" is 0.4÷0.7 MPa;
- operating temperature range from -50 to +75 degrees.
Prices for Penoplex
penoplex
This type of polystyrene foam is well suited for insulating a concrete floor under a screed. If desired, a “warm floor” system can be installed for insulation.
"Penoplex - 45" has the highest density of all varieties of this material and is perfect for insulating the floor of a private house on the ground. By the way, it is even used as a heat insulator for runways and road surfaces.
"Penoplex" 45 has the following technical characteristics:
- density 40.1 ÷ 47 kg/m³;
- its hygroscopicity is even lower - only 0.2% of the total volume per day, and all moisture absorption is also limited only to the first 10 hours of the test;
- fire resistance is designated as G4, but if the insulation is installed under a heat-resistant coating, then this no longer matters much;
- the tensile strength of "Penoplex - 45" is 0.4-0.7 MPa;
Otherwise, the technical characteristics are the same as those indicated above.
There is another gradation of types of penoplex insulation - according to the area of application. This marking is usually indicated on the packaging:
| Dimensions in mm | Type (density) | |||
| "PENOPLEX" 45(35-47 kg/m³) | "PENOPLEX" F (29-33 kg/m³) | "PENOPLEX" K (28-33 kg/m³) | "PENOPLEX" C (25-32 kg/m³) | |
| Width | 600 | 600 | 600 | 600 |
| Length | 2400 | 1200 | 1200 | 1200 |
| Thickness | 40; 50; 60; 80; 100 | 20; 30; 40; 50; 60; 80; 100 | 20; 30; 40; 5; 60; 80; 100 | 20; 30; 40; 50; 60; 80; 100 |
From this line, three types of heat insulator are suitable for floor insulation:
- “Penoplex Foundation”, which has a density of 29 ÷ 33 kg/m³ and is excellent not only for insulating foundations, but also for floors in residential and basement areas. The heat insulator has high moisture resistance, has good heat and sound insulation properties, and is therefore suitable for installation on concrete and prepared soil surfaces. Do-it-yourself foundation insulation with penoplex is quite affordable.
- “Penoplex 45”, which was already mentioned in the article, allows you to insulate floors in residential premises, garages, as well as the surfaces of flat roofs.
- “Penoplex Comfort”, whose density is 25 ÷ 35 kg/m³, is widely used for insulating any surfaces in the interior of residential buildings and apartments, and even rooms with high humidity. It is quite possible to insulate floors in a private house with it, if a rigid base is built under it.
Ordinary polystyrene foam may also be suitable for insulating floors. Some homeowners choose it because the price is significantly lower than Penoplex. However, we must not forget about the serious difference in the technical characteristics of these materials. To clearly see that extruded polystyrene foam is much more suitable for floor insulation, it is worth comparing the parameters of both materials:
| Material parameters | Extruded polystyrene foam (EPS) | Styrofoam |
| Thermal conductivity (W/m oC) | 0,028 ÷ 0,034 | 0,036 ÷ 0,050 |
| Vapor permeability (mg/m×h×Pa) | 0.018 | — |
| Water absorption over 24 hours in % of volume | 0.2 | 0.4 |
| Ultimate strength at static bending MPa (kg/cm²) | 0,4 ÷ 1 | 0,07 ÷ 0,20 |
| Compressive strength 10% linear deformation, not less than MPa (kgf/cm²) | 0,25 ÷ 0,5 | 0,05 ÷ 0,2 |
| Density (kg/m³) | 28 ÷ 45 | 15 ÷ 35 |
| Operating temperatures | -50 to +75 | |
It should be noted that despite the fact that the characteristics of these materials differ from each other, the process of insulation with them is absolutely the same.
You may be interested in information about what constitutes floor insulation on the ground
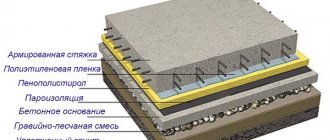
Insulation under the screed with PENOPLEX® materials
As general construction practice shows, a building loses up to 15% of heat through floors, especially if the house has a ventilated underground. This problem can be solved by installing high-quality thermal insulation under the screed. It will not only reduce heat loss through the foundation, but also extend the life of the entire building as a whole. For this, a variety of materials are used - expanded clay, polystyrene foam, liquid polyurethane foam and even mineral wool. However, extruded polystyrene foam is considered the best option for insulation under floor screed, which has a number of advantages:
- has excellent thermal insulation properties - PENOPLEX® slabs 50 mm thick retain as much heat as a 350 mm layer of expanded clay. This allows not only to properly insulate the base, but also to reduce the height of the floor;
- withstands severe loads due to its high strength - it is resistant to mechanical stress, does not break and practically does not shrink;
- is not afraid of water, has zero moisture absorption and low vapor permeability. It has absolute biostability - does not rot or become moldy;
- is not subject to shrinkage and does not change its size with changes in ambient temperature;
- It is light in weight and does not exert significant load on supporting structures;
- environmentally friendly and durable - the service life of the material is at least 50 years if the installation technology is followed.
Among other things, the insulation is produced in the form of plates and is easily cut to the required sizes. Its installation is not particularly difficult and does not require construction skills or the use of special equipment.
Features of installation of PENOPLEX ® insulation under the screed
To create a thermal insulation layer, you first need to calculate the required amount of insulation. We take the area of the room as a basis, and take into account the material with a margin of 10–15%.
The thermal insulation layer must be at least 50 mm. In most cases, the optimal thickness is 100–150 mm. It varies depending on the climatic characteristics of the region, so for more accurate calculations, use the thermal insulation calculator.
Recommended installation procedure:
- Prepare the base - remove the old screed, knock down all the protrusions and irregularities. Remove construction debris and dust the surface. Fill small depressions and cracks with cement mortar.
- Be sure to prime the floor and adjacent walls to a height of 15-20 cm. Apply a deep penetration primer 1-3 times, allowing each layer to dry before applying a new one. This will clear the base of dust and strengthen the top layer of concrete.
- In case of serious differences in height (more than 10 mm), level the base with a self-leveling mortar or bulk material, which is carefully compacted during the leveling process. Due to their dense structure, PENOPLEX® slabs can be laid on a backfill of coarse sand, expanded clay or sand-gravel mixture.
- In rooms above the ground or basement, be sure to waterproof the base to prevent capillary penetration of moisture into the structure. The absence of a water barrier leads to the appearance of microscopic cracks in the concrete and, as a result, corrosion of the reinforcement inside it. Place a polyethylene film on the surface of the base or cover it with a special polymer composition with an overlap of 10–15 cm on the walls.
- Place a damper tape around the perimeter of the room, which will compensate for the thermal expansion of the screed.
- For ease of use, polystyrene foam can be glued under the screed with special glue. For example, polyurethane adhesive for PENOPLEX® FASTFIX® insulation with high adhesion to most building materials. Lay the slabs on loose substrates as tightly as possible, simply pressing lightly against the surface and moving them along the powder. There is no need to glue insulation to the rolled waterproofing.
- Install thermal insulation boards end to end, starting from the corner opposite to the entrance. Shift each new row by about half the slab to prevent the formation of cold bridges at the joints. When laying level, ensure that the surfaces are horizontal. If necessary, the material is trimmed with a construction knife.
- Upon completion of work, wait until the adhesive has completely dried - this process usually does not take more than a day. When laying the material loosely, you can immediately make a screed.
Before pouring the solution, it is recommended to cover the insulation with plastic film or seal all joints between the plates with tape to prevent cement “milk” from leaking into the gaps between the sheets. PENOPLEX® under the screed can withstand quite severe compressive loads, so it does not need reinforcement. However, it is recommended to reinforce the concrete layer itself with a metal welded mesh with large cells in order to increase the load-bearing capacity and strength of the floor. Filling the screed can be done in any way in accordance with the technology recommended by the manufacturer.
Simple installation, high insulating properties and excellent performance characteristics make PENOPLEX® boards the best option for creating a thermal insulation layer under a screed. You can buy insulation at a competitive price from our official online store or from dealers.
Plaster-adhesive mixture Ceresit Ceresit ST85 for expanded polystyrene, 25 kg
Among the significant advantages of dry building mixture, it makes sense to highlight durability, reliability and high adhesive properties.
The basic rule, which must be strictly followed before applying such an adhesive solution, is checking the load-bearing base (wall, ceiling) for the absence of dust and other contaminants. If there are any unevenness or remnants of the old putty/plaster coating on the surface, then you should definitely get rid of them.
For best adhesion, it is highly recommended to coat the underside of foam sheets with a primer. A mass of not too liquid consistency can be applied in different ways - either in the form of continuous (solid) lines, or in the form of dots, or in the form of a dotted line - at the discretion of the user.
Penoplex under floor screed: Construction and thickness of screed - Installation methods + Photos and Videos
Penoplex under floor screed is an effective method for insulating floors at home. Due to its good strength and density properties, it is used when laying floors for various loads. This insulating material is produced in the form of perfectly flat slabs and can easily be used to create a cement-sand or self-leveling screed. The main thing is to strictly follow the rules.
An important step is to properly prepare the foundation. If it has unevenness, then the quality of the floor will be poor. If the installation is carried out on the ground, then a sand cushion is placed under the screed, compacted and leveled. For a regular floor, a rough screed is also needed.
Compare with foam plastic
The question is quite reasonable: why buy expensive polystyrene foam, if you can buy cheap polystyrene foam - it is produced in the form of mats of the same thickness and size. But it's not that simple. These two insulation materials have significant differences, and polystyrene foam is inferior to expanded polystyrene in many respects:
- In terms of strength with the same thickness and density, it has been experimentally proven that penoplex is 4 times stronger than polystyrene foam, which is why it is used even in road construction.
- Due to its low density and special structure, foam is susceptible to crumbling.
- The degree of water absorption of polystyrene foam is 10 times higher than that of expanded polystyrene. It follows that penoplex can be used without vapor barrier.
- The density of penoplex is much higher than that of polystyrene foam.
- The thermal conductivity of penoplex is not much, but it is superior to polystyrene foam.
- The flammability of penoplex is lower.
Polystyrene foam is laid on a sand bedding
A special method for producing extruded polystyrene foam makes it possible to obtain a material with closed pores, so this material is definitely better than polystyrene foam.
Polystyrene foam in the body of the screed when pouring stairs
Penoplex screed device
The required amount of penoplex and what density is calculated depending on the planned loads of the room. So, for simple insulation of an apartment, 20-30 mm slabs with a density of 31 to 35 kg/m will be quite sufficient. cube If this is the first floor of an apartment building, then it is better to choose insulation with a thickness of up to forty millimeters. For floors built on the ground, you will need to lay thermal insulation with a thickness of fifty to one hundred millimeters. In a garage, a material with a density of 45 would be most suitable.
Penoplex sheets in the screed are placed end-to-end, and the seams must be taped. To do this, you can use regular tape or special foil tape. This is done to prevent moisture from entering from the cement mortar placed on top of the insulation. The slabs can be additionally protected with roofing felt, parchment or simple polyethylene.
Installation of ventilation systems- Pipes for internal sewerage
How to choose a window sill?
Important: You need to understand that waterproofing is placed on top of penoplex, and not vice versa. It performs the function of insulation from moisture. If liquid gets into the joints between slabs once, it will remain there for a long time, because... gas-filled material is not able to absorb moisture.
When installing screeds onto the insulation, it is necessary to leave a gap at the edges for possible expansion of the material. Why is a special damper tape made of foamed polyethylene attached to the perimeter of the walls?
Each work must begin with a preparatory stage. First, the unevenness of the insulation is checked. If this is detected, the problem is eliminated immediately, since in the future it will be impossible to achieve the desired result when further pouring the screed.
Balcony insulation
The floor of the loggia also needs high-quality insulation, this is especially important if the balcony and the main room form a single whole. To insulate the floor, you will need penoplex with a thickness of 40-60 mm for a combined loggia and 20-40 mm for a non-combined loggia.
Penoplex is attached to the floor surface using dowels. The joints between the plates must be blown out with foam. As soon as it hardens, glue all joints with regular tape, which will provide a smooth, uniform surface.
Then a layer of vapor barrier is attached, which is provided by foil-coated polyethylene film or foil-coated polyethylene foam. The vapor barrier is secured with polyurethane glue. The vapor barrier is installed end-to-end and after that all joints are taped with metal tape, which will provide a “thermos” effect on the loggia floor.
If you have a wooden floor on the loggia, then first logs are installed on the floor, insulation is placed between them, and then flooring is attached to the logs.
Screed
After the penoplex has been installed, a screed is made. Most often, when insulating the floor in a private house, sand-cement mortar 1:4 and 1:3 is used. If you need to lighten the structure in the case of a very thick layer of screed from ten to fifteen centimeters, an expanded clay-cement mixture can be used.
Important: According to the manufacturer, the minimum thickness of the screed should not be less than four centimeters.
There is a method for screeding using gypsum fiber boards. Such insulation is more expensive, but much simpler, since there is no need to wait for the cement to dry.
Finishing
There are several ways to finish a screed:
- Laying ceramic tiles;
- Warm floor;
- Laminate flooring;
- Installation of wooden floors on top of logs.
Note: Laying flooring on a heat insulator cannot be done without a screed, even with very durable insulation.
The screed acts as a uniform distribution of the load over the surface. If the thickness of the screed is less than four centimeters, it may crack and deform.
Installation of PVC windows- Covering the drain hole with your own hands
- How to lay flexible tiles on the roof?
The classic method of laying penoplex
Using penoplex you can insulate any base. There is no big difference on what surface the insulation is laid. The main thing here is to lay waterproofing underneath it. The slabs themselves can be laid without fastenings or placed on glue. The places where the sheets are joined are glued and foamed with polyurethane foam.
An important nuance when laying penoplex is that it must have a perfectly smooth surface and be covered with a vapor barrier material. This technology is used for insulating any floors. The classic version of a cement screed is a leveled surface of a hardened mortar.
Note: The screed will be stronger than the cement used above. As a rule, the M400 brand is used for such purposes.
To obtain an even screed, certain rules must be taken into account. It is better if several people are involved in the work in order to mix the solution and perform the actions simultaneously. When laying vapor barrier material, the contact points between the concrete base and the bottom of the walls must also be insulated. Why is foamed polyethylene laid over the entire perimeter of the walls? The thickness of the vapor barrier membrane is larger than the screed. This is somewhere from twelve to fifteen centimeters.
Note: To better adhere the film to the wall surface and improve adhesion, a primer material is applied to it.
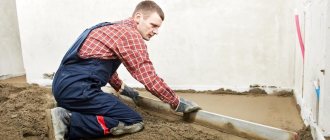
After completing the vapor barrier and waterproofing work, the solution is mixed. For convenience, use a drill with a special attachment. Of course, a small concrete mixer will significantly speed up the process, but you can do it without it. Then the leveling beacons are installed using a hydraulic level. The solution is poured from the farthest corner. After pouring the first portion of the solution, the surface is leveled. Next, a reinforcing mesh is placed on layer 1 and the second layer is poured.
Filling is done between the beacons for ease of alignment. The process is repeated until the room is completely covered. The screed is made depending on the expected load from 5 to 10 cm thick. A heated floor device can be placed inside the screed.
After completing all the work, in the first three days it is necessary to periodically wet the screed for better adhesion of the solution and to prevent cracking. Then it is aged until final hardening. Once the concrete has hardened, the finishing coating is applied.
Insulation with self-leveling mixture
Let's take a floor with a concrete base as an example. First, the old base is completely dismantled. The floors are cleaned, uneven areas are sealed, and communication holes are foamed.
How to properly lay a vapor barrier on the ceiling?- Is it possible to glue wallpaper on whitewashed walls?
- Imitation of a brick wall made of gypsum plaster
After preparing the base, begin laying the penoplex, which is secured with glue. The insulation joints should also be taped. A vapor barrier film is placed on top, and polyethylene tape is laid at the junctions with the wall. The solution is being prepared.
The self-leveling solution does not require additional actions; you just need to spread the mixture over the surface with a needle roller. The solution itself spreads into a thin layer. A certain amount of time is allowed to polymerize and harden to the extent that further coating with the finishing material is possible.
Important: The thickness of the self-leveling mixture ranges from one to two centimeters, no more. Therefore, it is important to determine at what level the finishing will be located.
With the use of penoplex it is possible to solve 2 problems - insulate and level the floor. An exceptionally smooth surface can be achieved using a self-leveling floor. By insulating the floors, you will create comfortable living conditions in your apartment or house.
Minimum layer of screed on polystyrene foam. Which insulation is better?
Taking into account all the expanded clay and vermiculite bedding, as well as various additives to the solution, extruded polystyrene foam is the most popular insulation material. Its strength is beyond any doubt. It would be possible to stop at this option, but its price forces us to look for alternatives.
Laying the other two insulation materials (stone wool and ordinary polystyrene foam) on the floor under the screed raises concerns among many. This comes from ignorance of the varieties (brands) of these materials. Crumpled pieces of foam underfoot and mineral wool in rolls intuitively suggest that under a layer of mortar they will look even worse. If you clearly see the strength of the insulation intended for this purpose, then doubts disappear. The durability is impressive. This is more than enough for a screed in an apartment:
The second panel (crushed by a wheel) is filled with low-density mineral wool, which is used as a thermal insulation layer in facade systems. Not to be confused with stone wool samples intended for floating screed. You need to know, albeit superficially, the technological characteristics of the materials for laying under the screed and the one you have chosen. This is so that later, you don’t have to look for the reason why the screed bends.
Every brand that produces thermal insulation has this type of insulation. Also, it can be included in the name as a soundproofing material for the floor, under the screed:
- So Thermolife has slabs “TL Pol” and “TL Pol-S”.
- TechnoNIKOL has three types of such slabs: “Technoflor soil”, “Technoflor standard” and “Technoflor prof”. Each has its own purpose, characteristics and cost.
- ROCKWOOL has slabs “FLOOR BUTTS”, “STEPROCK ND”, “STEPROCK HD”.
- PAROC has a plate “PAROC SSB 1” and “PAROC SSB 4”.
All of these products have high density. From 110 kg/m³ (PAROC SSB 1) to 160 kg/m³ (Stroprock). Another indicator is compressive strength at 10% deformation. This value varies, from 20 to 40 kPa (PAROC SSB 4).
If we compare the cost of replacing (on large layers) cement screed with insulation, we will get approximately the following price ratio per conventional cubic meter of material:
APPROXIMATE PRICE RATIO.
Replacing a partial layer of DSP screed (2) with a sheet of extruded polystyrene foam (4) will have almost no effect on costs. Or perhaps a slight increase in price. But taking into account all the factors - delivery, labor costs for lifting and laying, weight for covering, insulation - the extruder wins by a small margin.
Savings are possible only by using ordinary polystyrene foam (1). With basalt wool (3) it is impossible to say for sure. Significant price range.
Calculations are approximate and depend on the quality of the material, the delivery area, and the characteristics of the work in the given area.
Using penoplex under floor screed
An effective way to insulate a house is to lay penoplex under the floor screed. This material is ideal for such work, as it is quite durable and dense. Since the slabs of this modern insulation are perfectly flat, they can be screeded either in the classical way using cement-sand mortar or using self-leveling self-leveling floors.
Penoplex has high thermal insulation properties
Options for semi-dry screeds
| 1. The semi-dry screed is cut off using polyethylene film. | |
| 2. The use of a heat and sound insulating layer - mineral wool board, polyethylene foam or polystyrene concrete. Separated from the screed with plastic film. | |
| 3. Screed mounted on the foundation. Heat and waterproofing are applied. The top layer (screed) is separated by film. |
Recently, when leveling indoor floors, semi-dry screeds have become increasingly used. The advantage of semi-dry screed is the reduced drying time of the mortar, which significantly reduces construction time.
Semi-dry floor screed can be applied to both concrete and wooden floors. When forming a semi-dry screed, it is important to follow the technology at all stages of work.
Laying penoplex under a floor screed in the classic way
There are several floor subfloors that can be insulated using penoplex. There is no significant difference on what the insulation boards are laid. The main point here is the need for waterproofing under penoplex. This applies to any type of base. The slabs themselves can be laid without fastening or attached using glue or special self-tapping screws with plastic washers. The joints between the plates are glued, foamed with polyurethane foam or insulated with tape.
Various options for arranging screeds using penoplex
In any case, the foam under the floor screed should be smooth, dense and covered with a vapor barrier film. This rule applies to any method of creating an insulated floor. A classic concrete screed is a leveled and hardened mixture of cement, sand and plasticizers. The higher the grade of cement, the stronger the screed. Most often, Portland cement M400 is used for these purposes. In order for the screed to turn out smooth, you need to follow certain rules. It is best to do the work together. One person mixes the solution, and the second performs the main steps.
Then, when a vapor barrier membrane is laid on the penoplex slabs, it is necessary to take care of the contact points between the concrete and the lower part of the walls along the entire perimeter of the room. They must be isolated. To do this, take a strip of polyethylene foam and lay it along the walls, overlapping them in the form of an angle. Polyethylene should be higher than the planned thickness of the screed. As a rule, they take 12–15 cm.
Penoplex sheet dimensions
Helpful advice! To make the film adhere better to the walls, you can apply a primer to them. This will improve adhesion between materials.
When the insulation, vapor barrier and waterproofing of the bottom of the walls are completely ready, you can begin the main work. The solution is mixed in a bucket or other convenient container. This can be done conveniently using a drill with an attachment. If it is possible to install a small concrete mixer in the house, then it will be even better. Filling work begins after the leveling beacons are installed on the floor. This is done using a simple or hydraulic level. Start pouring the solution from the farthest corner. When the first batch of mortar is poured onto the floor and leveled with a shovel, a reinforcing mesh is placed on it. This will prevent the screed from cracking. Only after this the next layer is poured.
Floor insulation with penoplex
Filling is done between the guide beacons, one at a time, so that using the rule it is convenient to level the solution along them. All operations are repeated until the entire room is completely covered with the solution. The thickness of the screed should be from 5 to 10 cm. It depends on what load is expected to be placed on the floor of this room in the future. You can place structural elements of a “warm floor” system inside the screed.
Floor screed arrangement diagram
Helpful advice! When carrying out work on laying penoplex under the floor screed and pouring the solution, you should wear soft shoes. This will prevent accidental damage to the material.
When all work is completed, it is necessary to periodically water the screed for 3 days. This will allow the cement to set stronger and achieve the best hardness without cracking. After this, it is recommended to wait a few more days for the cement to finally turn into solid concrete, which can only be broken with a hammer drill.
Laying reinforcing mesh on top of penoplex
After the concrete has completely hardened, you can begin installing the finishing floor covering. It can be absolutely anything: parquet, laminate, linoleum or even a state-of-the-art 3D self-leveling floor.
How to plaster extruded polystyrene foam technology
If insulation boards are installed on the walls of a building, it is necessary to cover them with finishing as quickly as possible. Professionals recommend doing this immediately after the glue used to fix the material has dried.
Carrying out calculations
It is better to buy material for plastering with a reserve. I wouldn’t want to run for an extra bag in the midst of work. But how do you know how much materials you need? To do this, carry out a simple calculation:
- calculate the area of the walls being processed without taking into account window and door openings;
- on the packaging of the decree the approximate consumption of the mixture per square meter. For different compositions it fluctuates in the range of 4–6 kg;
- multiply the indicated value by the area to be treated and obtain the required amount of mixture;
- We add another 10% to the resulting value - this will be the final amount.
Preparation of plaster mixture
Usually the manufacturer provides instructions for preparing the solution, so be sure to study the packaging and recommendations. If you are plastering polystyrene foam for the first time, do a small batch first to get used to the solution and the execution process.
- Pour the dry mixture into the container.
- Add water in small portions.
- You can mix by hand, use a hammer drill with an attachment or a construction mixer.
- When the consistency is completely satisfactory, leave the solution for 5 minutes to ripen and stir again.
In some cases, it is necessary to make the solution a little thinner than indicated in the instructions.
Pasting with reinforcing mesh
First of all, corners and slopes are processed. To do this, cut the reinforcing mesh into strips so that there are 10–15 cm of material on both sides of the corner.
- a thin layer of mortar is applied to both sides of the corner;
- apply a mesh and smooth it from the corner so that the material is completely immersed in the solution;
- if the length of the piece is not enough, make an overlap of 10 cm; you cannot glue it to the joint.
Next, proceed to the total area of the wall. They work in the same order:
- The wall is covered with mortar.
- The width of the strip is slightly larger than the size of the reinforcing mesh.
- Apply the material and smooth it using a wide spatula or smoother.
- The next layer of mesh is located on the previous one, by 10–15 cm.
Grouting plaster mesh
The first layer must dry completely. After this, use a grater and sandpaper to process the surface using light circular movements. This will remove small unevenness and help you use less leveling solution.
Leveling the surface
We prepare a new solution and begin leveling the plastered polystyrene foam. Now work with a wide spatula:
- a small amount of solution is collected onto a wide spatula;
- applied to the wall using arc movements from top to bottom;
- layer thickness no more than 3 mm.
Make sure that the surface is as smooth as possible.
Grouting the second layer
Grouting is started only after the layer is completely dry. They work with the same grater and sandpaper. Just be sure to select fine grain to remove small flaws. Otherwise, you can simply ruin the whole job.
Primer
This stage should not be neglected. If you do not coat the base with a primer, the decorative layer will either be poorly applied or quickly lose its attractiveness. The composition of the primer depends on the finishing method:
- Further decorative plastering - a composition containing quartz sand is used, it helps to increase adhesion.
- Painting - a composition without sand, makes the base even smoother.
Finishing
Having chosen one or another finishing method, they act strictly according to the plan provided by the manufacturer. Both painting and decorative plaster have their own nuances and methods of applying the material. Therefore, you will have to study a few more articles to figure out how to do everything correctly.
Floor insulation with penoplex using self-leveling mixtures
To consider this case in more detail, let’s take an example with a concrete base. If the apartment is not located on the first floor of the building, then the thickness of the insulation can be less than 5 cm. This is quite enough. Before starting the main work on laying penoplex under the floor screed, the old covering is completely dismantled. If there was a cement screed, then remove it using a hammer drill. Then the floor slabs are freed from dirt and dust, all irregularities are sealed and holes from utility lines are foamed.
An example of arranging a screed with insulation on a balcony
When the base is prepared, foam boards are laid on it, which are best glued with an adhesive composition. The joints between the plates are also glued. Then a vapor barrier film is placed, foamed polyethylene tape is laid around the perimeter at the junctions with the walls and a solution is prepared.
Attaching foam sheets to the floor
Self-leveling solutions do not require additional human actions to level them. You just need to carefully distribute the mixture using a needle roller over the entire surface. It will spread itself under the influence of gravity and fill the entire surface of the penoplex slabs with a thin layer. Prepare the mixture according to the instructions. After pouring, you only need to wait a few hours until the solution polymerizes and hardens to such an extent that the topcoat can be laid.
Laying penoplex for arranging heated floors
Helpful advice! If you plan to screed the floor using self-leveling mixtures, then you need to know that the thickness of such a coating can be only 1 - 2 cm. Therefore, when creating the entire “pie” of the floor, you need to correctly calculate at what level the finishing coating will be located.
Using penoplex under a floor screed solves two important problems at once: leveling the surface and insulating the floor. Both of them are resolved successfully. The coating obtained using self-leveling flooring is especially smooth. In addition, due to its small thickness, it is also lightweight.
Preparation of the solution
Recommendations for the preparation of commercially available mixtures are contained on the packaging and in accompanying documents. When purchasing, you can get additional advice about the features of the products and the specifics of their preparation.
When making plasters yourself, you should remember the main points. The components taken in accordance with a specific recipe must be sifted and mixed well. It is advisable to check the stickiness of the mass before starting work. If the plaster sticks too much to the spatula, it will be difficult to apply. In this case, you should increase the amount of filler. If the mixture does not stick at all, you need to increase the amount of binder additives. Using the sampling method, you should select the average fat content of the mixture, because if the viscosity is excessive, the layer of plaster may crack after drying. An insufficiently sticky mixture is not very convenient to work with and forms a layer with little strength.
What is it needed for?
Mats are able to retain heat without causing increased humidity and subsequent mold. The material is lightweight, so even with a poured screed it does not have a significant impact on the entire structure. This point is especially important in apartment buildings.
It has been proven that the use of penoplex, especially in private homes, reduces heat loss several times. Therefore, it is logical to invest once in a good floor repair in order to subsequently save money on electricity and heating.
Most often, mats of this type are placed on reinforced concrete floors or primed foundations. Concrete floors are the easiest to process, especially at the stage of leveling and subsequent pouring of the screed.
Insulation on the ground base
It is recommended to lay penoplex on a ground base, without main foundation slabs, using the following technology.
The standard insulation scheme assumes the presence of a vapor barrier layer under the foam sheet; in some cases this operation is skipped. The insulation layers are arranged as follows:
The soil base is leveled, compacted and dried. A layer of crushed stone, about 40 cm high, is tightly laid and compacted. Sand is poured onto the crushed stone cushion in a layer of about 10 cm.
Some craftsmen use a modified technology in alternating laying layers:
Granite chips, crushed stone or gravel are poured onto the ground. Then everything is watered generously and compacted. After this, the soil is dried.
It is recommended to use these rules during construction only in the warm season, so that the soil has the opportunity to dry out sufficiently. Then dry sand is poured.
Penoplex is placed on the resulting base; the seams can be glued with tape (or use an adhesive solution). Layers of waterproofing are applied to sheets laid in a checkerboard pattern, onto which a reinforcing mesh is mounted.
Thermal insulation process
For subsequent cement screed, metal cellular reinforcing mesh is used. The height of the mesh should not exceed 25 cm. Fill the floor with cement mortar, checking the level.
If you do the insulation of the floor on the ground floor of a private house yourself, you should pay attention to the fact that it may be necessary to cut holes in the foam slabs for communication pipes. This stage of work should be carried out after laying the sand, at the first measurements
Features and Benefits
The material has practically no negative properties and characteristics. The only caveat when using it is the prohibition of exposure to ultraviolet rays and solvents. But when working with a screed, these factors are practically eliminated.
At the same time, penoplex has a huge number of useful properties and features:
Excellent strength under bending pressure or strong mechanical stress. You can not be afraid to walk on penoplex even in shoes; there will be no significant marks left on the surface.- During installation work, it is not necessary to use any additional respiratory, eye or skin protection, such as with mineral wool or dust insulation.
- During operation and even during long-term use, extruded polystyrene foam does not crumble and does not emit toxic gases and substances.
- Penoplex is not afraid of moisture, so mats can be laid even on an unheated floor. This point is important when repairing warehouses, storerooms and balconies.
- The manufacturer guarantees that the material will not lose its properties for 30 years. But with proper installation, this period far exceeds the guaranteed one.
- Compared to polystyrene foam, which was previously popular as an affordable insulation material, penoplex has less flammability, which is especially important in a residential building.
Penoplex is often chosen as an insulating layer when renovating children's rooms. The material is as environmentally friendly as possible and creates comfortable living conditions regardless of the time of year.
Briefly about the main thing
Penoplex is characterized by two properties. The first is its low thermal conductivity, due to which it has good thermal insulation. Secondly, the slabs are not susceptible to mold and mildew; they create a good soundproofing layer, while rejecting moisture.
Another advantage is that penoplex is universal in use - it can be used regardless of the base flooring. But here it is important to understand what thickness of penoplex to use for the floor under the screed. The further load on the surface (purpose of the room) has a huge impact. If this is, for example, a warehouse or a garage where a car will be stored, it is better to choose denser slabs.
The type of finishing does not matter. It all depends on the preferences of the owner of the premises. You can choose laminate, tile, plywood or parquet.
Another mandatory point is waterproofing. If this layer is skipped or installed incorrectly, spilled water may accumulate under the finish coat. Penoplex does not absorb moisture, and it will be quite difficult to dry it.
Ratings 0
Installation instructions
Laying the material takes place in several stages. All instructions must be strictly followed for perfect alignment and good insulation.
Preparatory stage
Penoplex can be laid on reinforced concrete slabs or wooden flooring. The main working condition is that differences in floor height should not be more than 10 mm. If they are greater than the permitted limit, a cement-sand mixture is used to reduce the level. If you plan to level a wooden floor, gypsum fiber board sheets or ordinary plywood are placed on it.
When laying a concrete floor, the following work is also required:
- carefully inspect the coating for cracks, holes or depressions;
- if they are quite deep and the sand mixture cannot properly correct the problem, polyurethane foam is used;
- all cracks and depressions are sealed, wait for the surface to dry completely, after which it is important to cut off the excess material according to the level of the concrete;
- Be sure to remove all protruding parts on the future floor, sweep away debris and dust;
- You should also treat the wall around the perimeter of the room with a primer so that it adheres well to the damper tape;
- after cleaning the base, it is treated with a deep penetration primer;
- the tape should first be cut into long strips, which will have a width equal to the height of the future screed with penoplex;
- the material is stretched along the perimeter and fixed with glue.
Laying
There are several popular styling technologies:
- The slabs can be tightly fixed to the base using glue; it is selected specifically for the material. Other experts insist that using an adhesive base will be unnecessary. The slabs fit perfectly on their own in a tight row due to the presence of a specific edge at the ends. After this, all the sheets will be pressed with a screed, making the use of glue pointless.
- Regardless of the technology chosen, all sheets must be laid offset. Each next row of slabs is placed in the center of the previous one.
- Instead of a damper tape, you can use a perforated membrane; it must be installed on the wall. Penoplex boards are laid on it. Be sure to leave a gap of 5 mm between the wall and the substrate.
Sometimes foam boards are fixed with dowels. They should definitely be taken only in mushroom shape.
Placement under screed on the ground
If you decide to lay the mats on a primed base, a lot of preparation is required before installation.
- First, in the room where the work will be carried out, you need to select soil to a depth of 50-60 cm. The resulting base must be compacted well to prevent subsequent shrinkage. It will lead to serious deformation of the screed.
- After this, a mixture of crushed stone and gravel is poured into the resulting pit. Its height should be 30 cm. Be sure to compact each layer well to prevent subsequent deformation.
The evenness of the sand cushion should be checked using a building level. Differences over 10 mm are strictly prohibited. It is important to achieve as smooth a surface as possible.
Why plaster
Plastering is a necessary part of the finishing work, allowing you to safely invest in thermal insulation without fear of its destruction in the future.
External plaster protects the facade from wind and precipitation that can cause damage to the material. The inner plaster layer on extruded polystyrene foam can serve as an additional decorative finish.
Penoplex is a durable polymer, however, under strong local mechanical loads, dents can form on it, which can lead to cracking on the sheets. If the coating is plastered, its resistance to impacts will increase, and an additional layer of protection for the synthetic board from UV rays will appear.
Thermal insulating coating made from foam sheets has joints that are usually sealed with polyurethane foam. To form a perfectly flat surface and protect the seams from aging, plaster must be applied on top of the sheets and seams.
Questions and answers
The absence of this stage of work can cause poor adhesion of the screed and penoplex to the wall, so the use of damper tape is mandatory.
Can. This will practically eliminate heat loss without affecting the health of the residents in any way. No toxic substances are released during operation.
Before laying penoplex, you should first familiarize yourself with the detailed characteristics of the material and its operating conditions. Only by strictly following the recommendations of specialists will it be possible to obtain not only a perfectly flat, but also a warm floor.
What is penoplex?
Penoplex is an extruded polystyrene foam (EPS), produced by the Russian company of the same name, which became a pioneer in the mass production of insulation materials. Unlike its predecessor, polystyrene foam, EPS is made using a completely different technology, so the quality of the extruded “newbie” and its characteristics are very different for the better.
Extruded polystyrene foam is made by foaming raw materials. This processing allows you to obtain a lightweight but incredibly durable material, inside of which there are tiny air bubbles. Thanks to these numerous cells, penoplex has the highest thermal insulation properties.
It is easy to distinguish real “penoplex” from other brands of extruded polystyrene foam: it has a “Dutch” orange color. These are slabs 600 mm wide, their length is 1200 or 2400 mm (only 45 and 45C). The thickness of the material varies: a maximum of 100 mm, a minimum of 20. It is this that determines the number of sheets in the package - there are only 4 thick slabs, the thinnest ones can be 20.
How to style
In a wooden house, the floor is mainly blown due to the fact that the boards dry out over time, and gaps form between them, sometimes quite large. But if the floor is insulated with high-quality material, then even as the floor covering dries out, the heat in the house will not become noticeably less. Our recommendations for proper installation of penoplex when insulating the floor in a wooden house.
What tools and materials may be needed when insulating a floor with penoplex.
You can read all the information about foam adhesive for outdoor use here.
It should be noted that wooden floors can be insulated using penoplex in different ways. The most common and simplest of them is insulation along logs.
The result is a truly warm floor. But in this case, high-quality waterproofing is necessary.