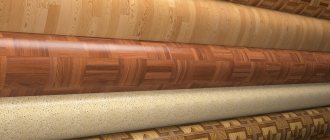
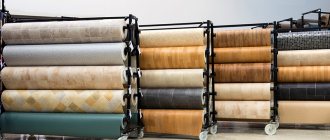
Linoleum is a popular floor covering that imitates high-quality parquet boards or laminate. PVC coating copes well with sound and heat insulation, which is why in most apartments and houses the floor is covered with linoleum. But the aesthetics of the floor can be compromised over time due to damage. Repairing linoleum will help restore the integrity of the coating. This is a simple process that requires adherence to technology. More details about the restoration of linoleum will be discussed in this article.
Linoleum repair
Features of polymer flooring material
Linoleum is a popular polymer roll covering for flooring in a private house, apartment or office. This material is also in great demand for laying floors in industrial premises, warehouses and workshops.
Positive traits
The popularity of using polymer flooring is due to a number of its advantages:
- sufficient density;
- good flexibility;
- waterproof;
- large selection of structures and colors;
- affordable price;
- ease of working with the material.
Coating characteristics
Variety of coating texture
Polymer roll flooring is produced in rolls that have a width from half a meter to 5.0 meters and a length from 6.0 to 45.0 meters. The thickness of such a coating is 1.50 – 5.0 mm, and for laying floors in industrial and sports facilities, the thickness increases to 9.0 mm.
Laying on the floor
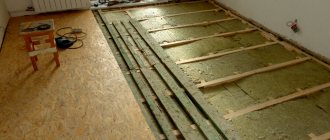
The industry produces a coating that has a heat and sound insulating base, so it can be laid directly on a concrete screed without special surface preparation. The base must be level and dry. Laying of the coating is carried out using special glue or polymer mastic.
Required Tools
To restore the damaged area, you should prepare. The following items will be needed:
- the remainder of the damaged linoleum, the piece should be an area that is enough to make a patch;
- a sharp and hard knife, a cutter will also do;
- device for making a right angle. You can take any corner, wooden or metal;
- any adhesive substance. You will have to use glue or “liquid nails”; putty will also work;
- a spatula, but not an ordinary metal one, but one made of rubber;
- wide adhesive tape or masking tape, they will be needed for the intermediate stage;
- roller, we will use it when working with adhesive;
It is important to know: when repairs are underway, you should not throw away excess pieces of linoleum. They will come in handy for sealing a torn or burned area.
- a syringe is also very useful for convenient work with glue;
- to heat the material, you need a regular electric hair dryer;
- a piece of hard and dense material, with the help of which the surface will need to be leveled;
- something heavy that will serve as a weight to press down the patched piece.
Repair and restoration of linoleum
Restoring linoleum The article describes the causes of defects in linoleum coating and how to eliminate them in various cases.
- Causes of damage
- Removing stains
- Joint repair
- Repairing holes
- How to remove bloating
- Repairing punctures and dents
- Restoring torn linoleum
- Burn update
Linoleum is a polymer floor covering. It belongs to rolled finishing materials, looks very presentable, provides thermal and sound insulation of the ceiling and perfectly imitates natural materials, having a rich variety of patterns. However, during operation or due to improper installation, damage may occur on the coating that disrupts its aesthetics. You will learn how to update linoleum after renovating a room and correct defects in this material by reading this article.
Types of damage
There are several types of damage that owners of PVC-coated floors have to deal with. Below are the most common ones.
Types of linoleum
Table. Typical damage to linoleum.
| Damage, photo | Description |
| Attrition | Appears against the background of long-term use of the floor covering. The abrasion often appears locally, for example, under chairs. |
| A cut | Cuts may be the result of careless manipulation of sharp objects. Cuts occur relatively rarely. |
| Breakdown | When using furniture with sharp legs, pinpoint damage to the linoleum is possible. To avoid breakdowns, special gaskets are used. |
| Through gap | Dragging heavy objects across linoleum with a drag can cause through tears in the flooring material. |
| Spot | Occurs when the surface comes into contact with chemicals or fats. As a rule, such stains appear in the kitchen. |
READ MORE: Types of paints for wooden floors
Despite the variety of damages and ways of their occurrence, it is possible to restore the original appearance of linoleum without the help of specialists. To do this, you need to choose one of the effective methods and follow the instructions.
How to eliminate bubbles on linoleum
Repairing punctures and dents in linoleum
If punctures are found in the linoleum, they must be eliminated, since when wet cleaning, water can enter through the holes under the floor covering, which will ultimately lead to its swelling. Small punctures with a diameter of less than 1.5 mm can be removed using polyvinyl chloride glue.
You need to stick adhesive tape onto the punctured area of the coating, and then make a thin hole in it exactly above the defect site. In this case, the tape should not cover the edges of the linoleum puncture. Then through this hole you should pour a little glue into the puncture. When it hardens, the tape must be removed, and the excess adhesive mixture must be carefully cut off to the level of the linoleum surface.
If punctures larger than 1.5 mm in diameter are detected, thicker glue should be used. In this case, you won't need tape. C-type “cold welding” is suitable as a binder.
Dents on the surface of linoleum can be repaired with putty, which can be prepared in two ways:
Dissolve twenty parts of rosin in five parts of alcohol, add dry paint matching the color of the coating, and four parts of castor oil. Then all this needs to be mixed thoroughly.
Dissolve one part of rosin in four parts of thick turpentine and add a pigment of a suitable color, then mix the composition.
After filling the dent, the mastic should be smoothed with a spatula, and after drying, its surface should be sanded with sandpaper.
Terms of use
In order for the floor covering to last more than 30 years, it is necessary to strictly follow the installation technology. There are no universal rules, since each type of floor has its own nuances.
On the concrete floor
Before installation, the surface must be completely removed down to clean concrete. The final layer is cleaned and sanded, potholes and cracks are filled with putty.
Be sure to seal the joints between the wall and the floor. Small cracks are sealed with concrete mortar, large cracks are sealed with sealant or polyurethane foam.
The gluing areas are degreased. Glue is applied to the concrete surface. Linoleum is glued onto the coated area. The surfaces are firmly pressed together and secured until dry. The complete gluing process takes on average 24 hours.
On a wooden floor
The adhesive composition must be evenly distributed with a spatula. First it is applied to a wooden base, and then to linoleum. The surfaces are glued together.
Before gluing the linoleum end-to-end, apply a tape of glue to the seam. The tape is cut at the seam location and the glue is squeezed onto the gap. After 10–20 minutes, the fastening material is removed.
You can also resort to cold welding (a sealant that is designed to secure the edge). It can be colorless or colored.
Updating linoleum when burning
Probably, hookah lovers, and not only them, have to do it most often. The approach to solving the problem of burnt coating depends on the depth of its damage. Fine coals, as a rule, are capable of damaging only the first two layers of linoleum - protective and decorative. Less often, the top layer of the PVC base is also damaged; very rarely, when the coating burns through.
If only one transparent protective layer of linoleum is damaged by fire, when its pattern is not affected, the resulting defect after cleaning the burnt edges is practically invisible. And so that it does not stand out as a dark spot in the light, the border of the damage can be slightly shaded with the edge of a coin. After this, the “burn” must be covered with a thin layer of linoleum mastic.
If the coating pattern and its base are damaged after removing the burnt area, the burned area is very noticeable: this spot has dark edges and yellowness in the middle. Such a defect greatly spoils the appearance of the coating, especially when there are several such spots. In this case, linoleum can be repaired, just as if it is torn, using “cold welding” type-C glue.
In addition to this, you will need a pigment of a suitable color from the store. Although you can make it yourself. To do this, you will need to find a piece of the same linoleum that is currently lying on the floor, burnt. If this is difficult to do, try cutting it off from the flooring somewhere in an inconspicuous place - under the baseboard, for example.
From the outer surface of the found sample, scrape off the colored chips with a knife, collect them and mix them with the repair mixture. It is necessary to fill the burned area of linoleum with the finished composition, and when the mixture hardens, you need to cut off its excess flush with the surface of the coating. As an additional measure, it is recommended to subsequently treat the entire surface with special wax.
If the linoleum burns through, you will have to put a patch on it. But in any case, it will be noticeable. You cannot leave a hole in the coating. When water gets through it under the linoleum, a damp environment is formed, which promotes the proliferation of fungal and mold spores. Therefore, when burning, repair of linoleum is mandatory.
The work is carried out in this order:
- You need to select a suitable piece of linoleum and lay it over the burnt hole.
Then, using a sharp knife, cut through the patch material and the floor covering so that the defective surface is located inside the closed cut line. The result should be a hole identical in shape to the cut patch.
After this, lifting the linoleum, you need to carefully glue the edge of the hole to the base, and then connect the joints of the patch and the hole using “cold welding”.
After the glue has polymerized, its excess on the seam must be cut off flush with the floor covering.
In addition to all the listed repair methods, small defects in linoleum can be masked with applications, that is, contrasting patches in the form of roses, butterflies and other things can be glued onto the coating, creating a certain pattern. Then these places are usually covered with a special linoleum varnish. It all turns out quite touching and original.
How to restore linoleum - watch the video:
That's all. We wish you more creative ideas and less troubles. And let the damaged linoleum not create any special problems now, especially since you already know how to get rid of them. Good luck!
Glue selection criteria
The effectiveness of fixing the floor covering will depend on how correctly the adhesive mixture is selected. You can decide which glue to glue linoleum with based on the following criteria:
Concrete, wood, plywood and other materials from which the main floor is usually made have different water absorption rates. Accordingly, for each of them, glue with a certain percentage of water and active substance will be optimal. For linoleum on a wooden floor, a soluble mixture is suitable. If the coating is placed on a surface that does not absorb moisture at all (for example, tiles), then you will have to make do with joining the joints by hot or cold welding - the main sheet will not stick.
Type of linoleum.
There are three types of coating; One glue is intended for semi-commercial linoleum, another for household use, and a third for commercial linoleum. This is due to different densities and structure of the material, different thicknesses of the protective PVC layer, substrate material and other characteristics. The choice is also influenced by whether the coating is homogeneous or heterogeneous, natural or synthetic, etc.
Room area.
In small rooms (up to 10 m2) glue is not needed at all. If fixation of the material is required, then in a small area the mixture without using a solvent is applied to the base of the floor in a continuous layer. In large public, commercial, and industrial premises, a more effective two-component composition is used, which is applied to the floor locally. To process the seams, the hot welding method or reaction adhesive for linoleum joints is used.
From the video you will learn more:
Since it is often not possible to find one specific option, they also focus on glue consumption per 1 m2. It depends on many characteristics; the average consumption calculated by the manufacturer is indicated on the packaging. It is approximately 300–400 g per m2.
Option No. 1: glue over the entire area
How can you repair a hole in linoleum? You need to prepare the following:
- a piece of linoleum of the same color;
- sharp mounting knife;
- metal ruler;
- construction tape;
- linoleum mastic and cold welding glue;
- notched spatula;
- hard roller.
Linoleum must be cleaned of dirt and dust. A patch is placed on the prepared area over the defect, matching the lines of the pattern. Then the correct position is selected, the linoleum is secured with tape around the perimeter.
Then apply a ruler to the coating and cut through both layers to the base of the floor. You need to remove the top piece and put it aside.
It is necessary to try the patch on the cut out area in the coating, check the tightness of the joints and the compatibility of the pattern. The mastic is applied in a thin layer to the base using a fine-toothed spatula. To securely fasten the edges of the covering around the perimeter, you need to lift it with your fingers and coat it with mastic underneath.
The patch is placed on the area, while you need to monitor the location of the pattern. The material is smoothed with your hands, pressing along the edges, and then rolled out with a roller in all directions. Then you need cold welding glue type A, the tip is inserted into the seam and guided around the perimeter
It is important that the glue is distributed evenly in the seams
Before drying, do not touch the patch or step on it, otherwise there is a risk of displacement and deformation. It is advisable to place a piece of plywood on it, press it down with a weight and leave it for several days.
Do-it-yourself ways to solve basic problems
There are many problems with linoleum, each of which has its own solution.
Went in waves
If a defect appears near the wall, one may suspect a lack of technical clearance during installation. To cope with the problem, it is recommended to remove the baseboard along 3 walls and trim the panel. It should sit for several hours - it all depends on the thickness of the material and temperature conditions. Once the linoleum has straightened out, the skirting boards can be installed again.
If a bubble appears in the center of the room, carefully make cuts along the swelling on both sides. Then it is recommended to release the air and seal it with masking tape. This will prevent glue residue from getting onto adjacent areas.
Glue is injected into the resulting holes with a syringe and the edges of the coating are joined. Then apply masking tape and apply a weight. Sometimes stretching of the coating leads to swelling. In such a situation, it is recommended to cut the canvas and remove the excess. It is necessary to fix linoleum in the same way as in other situations.
Joining seams
When fixing linoleum in large rooms and on thresholds, it is fixed by cold welding. There is a risk of seams coming apart when used. Anyone can glue such a coating on their own. It is recommended to overlap the fabrics by 5 millimeters. You should make a cut in the center of the mound and grab 2 edges. The procedure must be carried out using a level bar. Then remove the trimmed excess and degrease the edges. The surrounding areas are cleaned with masking tape.
To carry out the work, it is recommended to take PVC glue type C. To do this, you should process the edges, glue them and leave them under the load.
After the glue has hardened, the excess should be carefully trimmed with a knife, remove the adhesive and treat the welding area with wax
Elimination of burns
A patch will help cope with such damage. To do this, it is recommended to cut out the damaged area in the coating. It is best to give the hole the correct shape - round, square or rectangular. If there is scrap left after attaching the linoleum, this is considered an ideal option. Otherwise, it is worth choosing a coating of a suitable texture and color.
It is recommended to cut a patch from it that is the same size as the hole. You need to try it on
It is important that the pattern and size match. It is recommended to cover the edges of the hole with masking tape.
Clean the floor from debris and treat it with a primer. Apply glue to the patch and glue it into the hole. To do this, it is permissible to use PVC or PVA glue. Oppression is placed at the repair site for 2 days.
Sealing torn holes
If the linoleum is torn, it can be repaired with a patch. It is also permissible to glue the torn surface back in place if the damage has smooth edges.
Bonding with mastic
Mastic is one of the most popular adhesives. It makes it easy to glue linoleum at home. The method is reliable, it connects “tightly”, but if you need to remove the coating for a while, then the linoleum will tear in the place where the mastic was used. It is also easy to attach the raised piece this way.
Work order:
- Before gluing the joints, prime the base.
- The edges of the coating are degreased with any alcohol-containing product. Acetone or solvents cannot be used, as they can corrode the linoleum.
- As soon as the base has dried, you need to apply a small amount of mastic to it with a spatula.
- Then the edges of the linoleum are applied to the surface and pressed tightly. The joint must be carefully rolled with a hard roller.
The mastic dries for about a day, so during this time the area where the coating has been treated needs to be pressed firmly with something heavy. A board is placed on the joined edges, and a load is placed on it.
What to do if you burn through linoleum?
Today, construction stores have a large variety of high-quality linoleum in their assortment. It meets all standards and norms, but there are several reasons why it is not very popular and widespread. One of them is cost.
If you bought high-quality “commercial” class linoleum, then this article is probably not for you: such linoleum is almost impossible to accidentally burn through or seriously damage. But when purchasing linoleum for an apartment, we usually choose a household class of linoleum.
It is this kind of linoleum that is easy to burn if you accidentally drop a hot curling iron, cigarette or soldering iron. If you have household linoleum in your house, then a fallen cigarette butt or soldering iron will probably cause damage to the floor covering. If the linoleum is commercial or semi-commercial, then there will be no damage to it.
Now it remains to answer the main question, what to do if you burn through the linoleum
Firstly, it is important to immediately remove the hot object from the linoleum to prevent a fire
If we talk about a fallen cigarette butt, then, of course, it cannot cause serious damage to the linoleum covering, since during the fall it has time to cool down. However, even such a small thing as ash can leave noticeable marks on the material. Another common situation where linoleum is damaged can occur if your flooring is laid near sources of open fire, for example, near a stove or fireplace. In such cases, a hot spark flying out can not only burn through the linoleum, but also start a fire.
If, however, an accident does happen and the linoleum in the apartment is still burnt, but you don’t want to spend money on completely replacing it, then you can fix it by using some simple tips for repairing linoleum. To begin with, you can make a patch that would fit the size and pattern of the burned area.
Main advantages:
- low cost;
- big choice;
- wide possibilities for selecting the width of linoleum, which is important for high-quality installation;
- simple and quick installation;
- no need to involve professionals, which saves money.
But even with the apparent simplicity of the installation of linoleum, the correct joining of the panels of material is of great importance. Here you need to try, otherwise the type of coating may suffer greatly over time.
Repair of linoleum joints by welding
It consists of restoring the tightness of the seams between the covering sheets. At home, such DIY linoleum repairs can be done in two ways: “cold” and “hot”.
“Cold welding” is the conventional name for the procedure for gluing sheets, in which their contacting edges are dissolved with the help of chemically active components of a special glue and are monolithically connected, mutually penetrating each other by 0.1-0.5 mm. After the glue dries, the edges of the canvases remain interconnected by their own particles of structure. The “cold” welding method is considered the most reliable and especially relevant for joining elastic materials.
The procedure is as follows:
- It is necessary to combine two linoleum sheets with an overlap of 50-60 mm.
In the middle of this thickened area you need to draw a longitudinal cutting line with a pencil.
A soft pad should be placed under both sheets.
Using a sharp knife and a metal ruler, you need to cut both sheets of linoleum at once along the intended line.
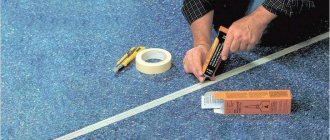
Then remove the scraps and lining, stick masking tape onto the resulting seam and cut it along the same line.
After this, you should install a special tip on the tube of glue and carefully use its needle to fill the seam between the coating sheets using “cold welding”.
After 15 minutes, the tape must be removed, and after three hours the seam will acquire its final strength.
This method of repairing linoleum floors is very popular, but problems often arise with the choice of glue. It is usually labeled as "linoleum glue" or "cold welding." It is produced by Bostik Linocol (France), RICO Grace (Poland), Werner Muller Type C, FORBO 671 Noviweld (Germany), Homakoll S 401, CYCLONE H 44 (Russia) and other lesser known ones. The cost of a package of glue, depending on its volume, is $8-15.
Hot welding of linoleum seams is carried out using a polymer cord and a construction hair dryer with a special nozzle. When heated, the cord becomes plastic; it is laid in a seam 3-5 mm wide, where, with further heating, the material vulcanizes together with the edges of the linoleum sheets. After cooling, the molten cord forms a monolithic structure with the edges of the seams.
Hot soldering at home
Using the above method in an apartment is almost impossible. Purchasing the required equipment will increase the cost of repairs, and then it will lie idle for a long time. Therefore, a home craftsman can use an easier method of hot soldering without complex tools. It allows you to solder linoleum with your own hands according to an individual design from a floor covering of the same thickness.
To obtain a high-quality, invisible connection of the spirit of rolls (pieces), it is enough to have:
- usually a metal ruler, a template (pattern);
- construction knife;
- power supply from 1 kW and more;
- metal or plastic roller.
Using a heated soldering iron, you can glue linoleum with a tight fit of the butt seams. To do this, the sides processed at the manufacturing plant are laid close to each other. When creating a specific design, appliqué or using leftovers, laying is done with an overlap of 1 - 2 cm. Then, using a construction knife, according to the rule, ruler, and patterns, two layers are cut at once. It is better to glue small elements and parts with glue or mastic. If the sticker is not being applied, double-sided construction tape is glued under the seams.
The soldering iron tip bends at an angle convenient for work. The edge is sharpened
Particular attention is paid to the smoothness of the side surfaces. They will ensure smooth sliding of the soldering iron in the seam
The thickness of the tip should be no more than 1 mm.
The degree of heating of the soldering iron is checked on the side edges of the linoleum, which will subsequently be covered with a plinth. If, upon touching the tip, the surface immediately melts, it means that the operating temperature has been reached. The speed of movement must be selected on the same covered areas of the coating. There should be no deep deformation of the material and no noticeable color change.
When soldering joints, the tip must be held vertically without falling to the sides. A movable stop is installed under the leading hand to ensure a stable position. The soldering iron should be carried by yourself. An assistant rolls the seam with a metal or plastic roller.
How to fix a hole in linoleum without a patch
You can get rid of dents and small-diameter holes using special adhesives for linoleum:
PVC glue A-type. The consistency of the composition is quite liquid, suitable for sealing deep scratches and holes with a diameter of up to 1.5 mm. To avoid staining the adjacent surface, apply masking tape to the defect site. A neat cut is made in it above the hole in the floor covering. The adhesive composition is pumped in with a syringe. Preferably flush with the surface. After hardening, remove the tape. If the glue sticks out above the surface, then carefully cut it off with a knife. For a better effect, the area is rubbed with wax.
C-type PVC adhesive is suitable for larger holes. It has a thicker composition. The best option is to use it together with a tint that matches the color of the coating. Both compositions are mixed and poured into the hole.
Features of filling holes
Restoration of the floor covering has a number of subtleties:
- Location of the defect. If this is the center of the room, you will have to work hard to disguise the repair site. In corners and under furniture, damage to the linoleum will be less noticeable.
- Defect scale. It is more difficult to repair large areas; patches are indispensable.
- Availability of a drawing. With such linoleum, you will have to select several colors for small defects, if there is not a piece left from installing the floor covering.
If you do not immediately repair the hole that appears, it will gradually creep away under mechanical influence. Dirt will accumulate in it, which over time will lead to swelling of the coating and the appearance of unpleasant odors.
Linoleum went in waves
If the defect occurs near the wall, then most likely the technical clearance was not observed during installation. They unscrew the plinth along three walls, trim the fabric, and leave it to rest for several hours or days, depending on the thickness of the material and the surrounding temperature. The flooring has straightened out and the baseboards are being installed back.
If the linoleum is swollen with a bubble in the middle of the room, then neat cuts are made along the swelling on both sides, air is released, and glued with masking tape so that excess glue does not stain the adjacent area. Glue is driven into the holes formed with a syringe, the edges are joined, secured with masking tape, and left under the load.
Blistering of the coating often occurs due to stretching of the canvas. You will need to not only cut the canvas, but also remove its excess. Gluing is carried out similarly to the previous methods.
Joining seams
When installing in large rooms and on thresholds, linoleum is often connected using cold welding. During use, such seams sometimes come apart. Anyone can seal linoleum on their own. The canvas should be stretched with an overlap of 5 mm. Make a cut in the middle of the resulting mound, grabbing two edges. Perform the operation by applying a flat bar. Remove the cut off excess. Degrease the edges and protect the adjacent surface with masking tape. For this work you will need C-type PVC glue. The edges are processed, glued, and left under pressure. The glue has hardened, the excess is carefully trimmed with a knife, the tape is removed, and the welding area can be treated with wax.
Seal the coal hole
Fixed by installing a patch. The damaged area is cut out on the floor. It is better if the hole is prepared in the form of a regular figure: square, circle, rectangle. If there is any scrap left after installing the floor covering, this is an ideal option, otherwise you will have to go to the store and select a material that matches the color and pattern (if available). After this, a patch is cut out to fit the resulting hole and tried on. The pattern, size (the patch fits into the cut-out space on the floor, fits tightly to the edges), and the direction of the texture must match.
Protect the edges around the hole with masking tape. The floor in the area of the hole is cleared of debris and treated with a primer. Glue is applied to the patch and glued into the prepared hole. PVA and PVC glue are used. At the repair site, oppression is installed for 2 days. You can restore a burnt hole by showing your design skills. For example, make an applique using fabrics of different colors.
Torn holes
It can be solved by using a patch or by gluing the torn surface in place if the edges at the defect site are even.
Even large holes that appear during operation can be repaired thanks to modern adhesives and ingenuity.
Repairing minor defects
Small cuts and cracks are the easiest to repair, but many people choose not to do this. Indeed, they are almost invisible on the surface, do not stand out, and do not interfere. But over time, dirt and dust will begin to clog in them, the edges will begin to fray, and the hole will expand. Therefore, you must immediately choose the appropriate method and seal the hole.
How to eliminate a minor defect in the coating? Here is a list of suitable funds:
- Mastic. Sold in the form of paste, pencil, and a variety of colors.
- Cold welding. Reaction glue allows you to quickly and reliably eliminate any defect. Melts the PVC coating, creating an even, invisible seam.
- Sealant. It is advisable to purchase a woodworking product, choosing the desired color, it will eliminate minor defects.
Scuff marks can be removed using linoleum wax. Shallow damage can be easily rubbed off with this composition. This should be done with the edge of a coin, then treated with a cloth until a glossy surface is obtained. You can also cover up scuffs with mastic or polish. Before repairs, be sure to clean the floor covering from dirt and debris and dry it well. If necessary, degrease the area.
How to seal a small through hole? It is best to carry out repairs by cold welding; this method is suitable for gluing gaps up to 3–4 mm, but compositions for larger cracks are also commercially available. Painting tape is glued to the area around the defect for protection, then glue is applied using a thin spout. Once the surface melts, the hole will disappear. Once it has completely hardened, remove the tape and cut off excess glue with a sharp knife.
You need to be careful when working with cold welding, such products are toxic. It is necessary to use a respirator, gloves, and ventilate the room well.
You can also glue small cuts and tears with a homemade product:
- melt half a kilogram of rosin powder in a water bath;
- cool the mass to 50 degrees, add 150 ml of alcohol, 100 g of castor oil;
- tint the mixture with pigment;
- Using a syringe with a needle, inject glue into the defect area and wait until it hardens completely.
Is it worth gluing?
Before you disassemble the method of gluing linoleum to the floor, you need to become familiar with the methods of installing this type of coating in general. Methods for laying linoleum:
- ordinary flooring without the use of adhesive components;
- gluing using regular double-sided tape;
- connection to the base using mastic;
- gluing with special glue.
Linoleum is easy to install even for a beginner
Technology for laying linoleum using tape
In the first case, it is enough to simply place the linoleum on the floor surface, let it rest, and then install plinths around the perimeter of the room - this will fix the material. But this technique is only suitable for laying the covering in rooms with a small area and it is desirable that the linoleum be laid in a continuous strip, without joints. The method is also suitable for installing coatings where the load on the base will not be too intense. Otherwise, the material will “float”. The main disadvantage of the method without using glue is the appearance of folds on the coating over time, some mobility of the material in any case, which will affect the durability of the material.
Trimming linoleum when laying
The most difficult, but better quality material can be laid on mastic or glue. This method is optimal for installing coverings over large areas, as it will not allow the linoleum to move on the floor and, accordingly, will not allow the material to quickly become unusable.
Double-sided tape is also a good option, but for concrete surfaces it’s far from the best. The fact is that it may not stick well to this type of base.
Installation with double-sided tape
And now the answer to the question - is it necessary to glue linoleum to concrete at all? It is necessary, but not always. For example, if the material is installed in one large piece in an apartment, then it is quite possible to do without the adhesive installation method, securing the material with a plinth around the perimeter of the room. If the installation is made from separate sections of material, then you will still have to glue it, otherwise it will move over time.
In this case, it is better to glue linoleum to the floor
It is also important to evaluate the operating conditions of the material before making a decision on gluing. For example, if the room is a walk-through room, people constantly move around it, or it is an office space, then fixing with glue will be, if not necessary, then desirable
However, in rooms you don’t have to glue the canvas completely - sometimes it’s enough just to apply glue crosswise in several places of the material and that’s it - the coating will stick. But in the corridor it is recommended to glue the material over the entire surface.
Why glue linoleum to the floor
Fixing a large hole without a patch
It is advisable to use this coating repair option when a piece of linoleum is not completely torn out. Such a hole can be repaired quite efficiently, but to do this you must strictly follow the repair instructions. The first stage of eliminating a defect without a patch is to level the torn part of the linoleum.
In order to straighten the flap, you can use one of two common methods. The first of them is to press down the linoleum with something massive. This will level it out, but it will take quite some time (about 24 hours). The second method is more effective. To implement it, you will need to iron the linoleum with an iron through gauze moistened with water.
Note! When using the iron, you should be careful as there is a possibility that the coating will melt when exposed to high temperatures. To exclude this possibility, you need to fold the gauze fabric in 10-15 layers.
An effective way to repair a large hole in linoleum requires the use of liquid nails. The base located under the gap must be cleaned of dirt and dust. Then liquid nails are applied to it. In order to distribute them evenly, it is best to use a construction gun. Next, the torn part of the linoleum is pressed to the base and rolled out with a roller. In the end, all that remains is to remove any excess glue with a wet rag and wait a day until the composition dries completely.
Thus, there are several answers to the question of how to fix a hole in linoleum yourself. The choice of the appropriate method depends on the nature of the damage and its dimensions. The quality of work depends on the correct selection of the adhesive composition and other materials used to eliminate the defect.
What recommendations can you give for fixing holes in linoleum at home?
Thresholds
If you install a threshold in the doorway to connect the coverings between rooms, this will not require a large investment of effort and money. As a result, the edges of the coating will be secured, and seams and other installation defects that may arise during the process will be hidden.
Advantages:
- It is quite easily secured with the screws supplied with the threshold or with “Liquid Nails” glue;
- reusability;
- easy to replace;
- protects the floor well from water, dirt and dust;
- durability, which especially applies to metal products, and with the right choice of shade, almost complete invisibility;
- additional decorative effect, as the interior will look like it’s finished;
- the difference between coatings of different thicknesses on the floor of the same level can be smoothed out.
To hide the joints of linoleum, you can use special thresholds
Flaws:
slight protrusion above the floor; installation only under an arch or in a doorway, since such seams cannot be hidden in the middle of the room; It is important that the installed thresholds do not interfere with closing the door completely, and therefore you then need to either file the edge of the panel or install the door only after the floors are completely finished.
Types of thresholds
We have not listed all the overlays that are suitable for covering the joints of linoleum with each other or with some other coating.
Here are the types of thresholds, differing in design and installation method:
- straight - suitable for joining linoleum of the same thickness;
- multi-level - to compensate for height differences and join coatings of different thicknesses;
- finishing - they can be used to seal the edges of linoleum without connecting it to any other coating;
- corner - they are used to decorate the seams and edges of linoleum on stairs.
There are several types of thresholds for linoleum
Materials for planks:
- Aluminum and brass are the most commonly used materials due to their strength, durability and attractive appearance. Usually painted to resemble metals such as gold, silver, bronze;
- plastic is short-lived, but cheap. Among the products made from it there are those suitable for rounded joints. The requirements are regulated by GOST 19111-77, according to which door thresholds are semi-rigid products. A plastic strip zones the space and hides the difference in thickness of different coatings;
- rubber overlay on an aluminum base - feet do not slip on it;
- MDF is an unpopular material, very expensive, and it swells from moisture;
- cork is common because it is environmentally friendly, soft, and durable. It also cushions and performs a compensatory function.
Which threshold for joining linoleum is better to choose?
The process of attaching the linings
The planks can be secured with self-tapping screws or by gluing them. Each of these methods has its own differences from the other.
The use of self-tapping screws is much more reliable, and the use of a decorative plug hides the fasteners.
The connection with glue will not be so strong, but for a base that is loose and unsuitable for holding self-tapping screws, you will have to use this particular method.
Algorithm for installing thresholds on self-tapping screws.
| Sequencing | Description |
| Step 1 | Lay the linoleum, adjusting the joints as close to one another as possible. Measure the full length of the seam. The base and part of the linoleum at the joint should be completely cleaned of all types of contaminants. |
| Step 2 | Cut the threshold to the required dimensions and fit it to the joint. |
| Step 3 | Mark areas on the floor where you will then need to drill holes for dowels. Make holes according to the marks, insert plastic elements for fastening there. |
| Step 4 | Place a strip over the seam and secure it with self-tapping screws. Snap on the decorative cap. |
It is easy to join linoleum strips with thresholds to each other and to other coverings. They are not suitable for hiding seams in the middle of a room, but they are quite suitable for decorating a doorway or a joint on a staircase.
Thresholds for hiding linoleum joints can be easily secured using self-tapping screws
Self-repair technology
Many problems associated with defects in polymer flooring can be eliminated on site yourself. The instructions below contain basic recommendations and methods for solving problems of restoring the integrity and appearance of floors.
Repairing holes and stains
- Repairing linoleum with a hole in many cases, if there is material of a similar structure and color, can be carried out by cutting out a damaged fragment of polymer. For this operation, it is advisable to use a metal ruler and a sharp knife;
Removing the defective part
- Then, using special glue, install a patch carefully selected to match the design.
Advice! If there is a very noticeable difference in color tones between the patch and the main part of the floor, it is necessary to correct the situation with the help of heated colored mastic.
Some tips on how to update linoleum after renovation:
- For removing stains resulting from contact with aggressive chemical substances and which cannot be removed with water and linoleum cleaners. need to be lightly sanded with fine-grained sandpaper. As a result of stripping, a matte area will appear on the linoleum;
- To give it its original appearance, it is necessary to wipe the surface with a cloth, after soaking it in a small amount of turpentine, followed by polishing with a dry cloth.
Repairing cuts and tears
All cuts, tears, punctures and old linoleum seams are restored using cold welding (PVC glue). Special C-type glue has a thick structure and is similar in composition to a polymer. Thanks to this property, glue can be used to both glue and replace linoleum where the strips diverge.
Let's take a closer look at how to repair torn linoleum:
Photo of cold welding linoleum
- As preparation, it is necessary to rub the ends of the torn area of the coating a little with sandpaper to eliminate burrs and irregularities;
- The gluing area is thoroughly cleaned and dried;
Advice! It is advisable to securely fix the edges of the linoleum to the floor using double-sided tape until the cold welding dries.
- The glue must be squeezed out along the entire length of the tear. Thanks to the thick structure of the glue, you don’t have to worry about it getting on the front part of the linoleum;
- After the cold welding has completely dried, it is necessary to carefully cut off the formed tubercles of glue. The seams are additionally masked with special linoleum mastic.
Other connection methods
There are also methods for joining this flooring. These could be thresholds, double-sided tape, a profile.
Double-sided tape is the simplest material for this purpose. This is a cheap and fast method, but far from being of high quality. When working, first glue the tape to the floor, and then glue the covering sheet onto it.
You can use tape to join linoleum, but it will not hide the joints beautifully.
It is also easy to join linoleum with thresholds, but here you will have to work more. And sometimes it is not possible to choose the thresholds of the same shade as the linoleum, which leads to a less attractive appearance of the floor.
When selling a threshold, fasteners are usually included with it - dowels, screws. All that remains is to screw the threshold to the floor where the pieces of linoleum meet. Before this, the floor itself is drilled where the dowels will be.
