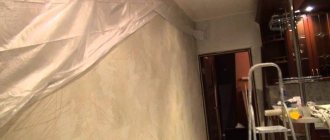
Non-woven wallpaper comes in two types - with and without a pattern, which allows you to paint them later. Even the most fastidious buyer will like this type of finishing material, because non-woven fabrics have quite a few advantages: they are durable and strong, capable of masking small imperfections on the walls, and hanging wide wallpaper will not be difficult for one person. However, before you get down to business, you should find out how to glue meter-long non-woven wallpaper correctly so that it lasts a long time.
Rules for gluing non-woven wallpaper yourself
The pasting technique involves the use of generally accepted norms and rules. In addition, you need to take into account the characteristics of non-woven finishing materials. They are wider than paper ones and are heavier. All you need to know so that the interlining does not swell and the pattern is preserved is:
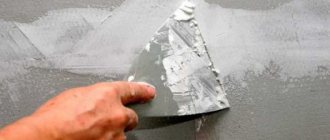
- Before gluing the walls you need to putty (if the panels are uneven) and prime.
- The direction of the pattern is indicated on the packaging using special symbols.
- Adjustment of the pattern along the edges is carried out in accordance with the instructions (straight - all strips are glued in one direction; reverse - in the opposite direction).
- The non-woven fragments are pressed against the wall from top to bottom, smoothed with a dry cloth, and the joints are rolled with a special rubber roller.
- Glue needs to be applied to the wall. Non-woven fabric allows you not to apply it to the back side of the fabric base.
- The technology involves gluing strips without seams (joint to joint, without overlap).
The temperature in the building must be constant during drying. The large weight of non-woven finishing materials requires that the glue have the appropriate thickness and viscosity. Wallpaper does not wrinkle if, after gluing, the surface is smoothed using rollers or clean rags.
How and with what to glue non-woven wallpaper
If an air bubble has formed on the surface, you need to dilute the wallpaper glue to achieve a liquid consistency. Using a syringe, inject the mixture through a neat puncture and carefully smooth the area with a special spatula.
Before gluing non-woven wallpaper at the joints, they are folded back and debris is removed from the walls with a spatula. Then special glue is applied to them. The wallpaper is rolled with a rubber roller.
PVA and compounds not intended for wallpaper cannot be used for these purposes. They do not provide high-quality adhesion and over time may appear as yellow spots on the wallpaper.
In order not to eliminate defects, and to ensure that the results of the work done please the eye for a long time, it is important to follow the nuances of gluing technology. High-quality materials installed according to all rules will last at least 10 years.
Which wallpaper glue is best to choose for non-woven wallpaper?
Paper is used as the basis for wallpaper production, which allows the use of starch-containing compositions. You can glue using PVA glue or specialized mixtures. If they contain polymer components, then such wallpaper can be glued to drywall or cork without puttying. Mixtures are now being sold that include antibacterial additives that prevent mold and mildew from appearing.
This problem is solved with a primer. Before gluing, you need to take into account the thickness, size and weight of the strips. If we are talking about massive non-woven wallpaper, then a thick (viscous) solution is used when gluing. The lungs can be glued to liquid. If the wall surface has unputtyed shells, glue that has increased thickness is used. The preparation recipe is indicated in the instructions for use.
How to glue non-standard canvases alone
At first it seems that it is difficult to handle one-meter non-woven wallpaper with your own hands, however, considering that a person’s arm span can be 150 cm, this is possible. Everyone knows that the first pancake is lumpy, so if the first time you can’t glue it smoothly, it’s easy to fix it by removing the canvas, coating the wall with glue again and reapplying the strip.
Wallpaper glue does not dry instantly, but from several hours to a day, so the main thing is not to rush. With experience you will get better and better.
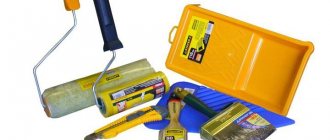
What tools will you need?
You should prepare in advance. You will need equipment and tools. Before you start working with non-woven materials, you need to think about what kind of glue to use and what you will need for this. The process cannot complete successfully without:
- wide brushes or rollers for applying adhesive;
- wallpaper knives and a wide spatula for cutting the ends of the strips;
- special equipment (electronic levels, plumb lines or levels);
- containers for preparing glue;
- clean dry rags for smoothing the surface of the wallpaper;
- stationery scissors;
- narrow rubber rollers for rolling seams (joints);
- pencils or ballpoint pens for marking.
All of the above must be available. The list does not indicate the tools necessary for the preparatory work.
Glue strips of canvas
The process of gluing wallpaper on walls itself is unlikely to raise questions, since it is no different from working with paper wallpaper. The only difference is the optional use of glue for the canvases themselves (excluding hot weather and working with ceilings).
Important point! The main condition when working with wallpaper is to completely prevent any drafts or winds from entering the room. Otherwise, the stripes will move away from the surface.
Now let's talk about how to glue the canvases themselves:
- Prepare the surface of the walls, and then take out the necessary tools, the already mixed glue and the wallpaper itself.
- Determine in which direction you will glue the canvases. This must be done taking into account the angle of incidence of the light.
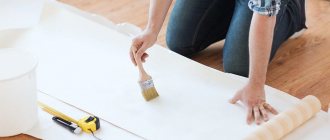
- Prepare one strip of wallpaper, apply the adhesive to the wall using a brush or roller.
- Fix the canvas on the surface.
- Moving your hands from the central part of the canvas to its edges, expel the air from under the wallpaper.
- Remove excess wallpaper from the bottom by cutting it off with a utility knife.
- As you work, carefully monitor the consistency of the pattern on the wallpaper so that the pattern appears continuous even if the seam is noticeable.
- Combine all the canvases clearly end to end.
Video - Pasting non-woven wallpaper
To ensure that the bottom edge is even, apply a spatula to it and trim the material along it. If you choose wallpaper with a pattern, then you need to measure the canvas in advance so that the pattern matches. Cut off the rest so as not to get confused with the location of the pattern.
A spatula is necessary to ensure that the cut edge is smooth and straight.
Find out how to choose wallpaper for brickwork, and also familiarize yourself with the gluing process in a special article on our portal.
Proper preparation for gluing
General requirements state that before gluing non-woven wallpaper, you must:
- Wash the floor, or better yet, lay cellophane on it. This will save time on cleaning.
- All electrical wiring outputs are isolated.
- By removing socket covers and switches, the room is de-energized.
- If there is not enough natural light in the room, the “glasses” with connectors for sockets and switches are sealed with masking tape, which is then removed.
All necessary equipment must be in good working order, clean, and preferably new.
How to dilute glue correctly?
It is best to do the preparation immediately before gluing non-woven wallpaper. Strips of the required length are cut in advance. The dry granular mixture is poured into a dry container. Then it is filled with the required amount of water. In this case, you need to continuously stir the resulting mass until the granules are completely dissolved, monitoring the consistency.
IMPORTANT! The recipe indicated on the packaging of wallpaper glue is designed for the entire pack, and it is not advisable to dilute the glue in advance. Over time it thickens. The optimal quantity is for 4-5 strips.
Surface preparation
Non-woven wallpaper can be glued to:
- concrete panels;
- plastered brick walls;
- plywood or OSB;
- drywall or other prepared surface.
Working with difficult areas
There are areas in the room that can be called difficult when working. These include corners of rooms, doorways, window openings, arches, and so on.
Working with these areas involves the following:
- Corners in the room . In order to paste over the inside of the corners with a neat seam, you need to measure the area from the edge of the already pasted wallpaper to the other wall, adding 1 centimeter to this. Spread the entire adjacent part, as well as the small edge of the next wall, with glue and glue the canvas, covering the second wall by 5-6 centimeters . Next, carefully level the material and cut off the excess part from the other wall, leaving only one centimeter. The same should be repeated on the other side of the corner. After this, the product must be cut vertically so that the bottom layer is not touched. Then carefully align the edges of the wallpaper - you will get an even joint without visible seams.
Processing internal corners
- Door and window openings . If the canvases are without ornament, then it will not be difficult to paste: you will have to measure out the required amount of wallpaper and glue it to the top and bottom of the openings (in the case of a window, in a doorway - only on top). If the product contains a pronounced pattern, it will be more difficult. You will have to select a strip of wallpaper, measuring it so that it matches the ornament, and you also need to select the position of the door or windows. After this, cut out the place in the canvas where the doors and windows themselves are located, and then glue the strip to the wall.
Working with door and window openings
- Unfolded corner . If the room has an angle of more than 90 degrees , then the work cannot be done according to the first principle - the overlap will be very noticeable. In this case, it is recommended to stick the canvas, extending it onto the other wall exactly 2 centimeters . But the overlap is not made the same - the second strip must be glued so that the overlap is only one centimeter. This way the overlap will not be noticeable, and the seam will remain smooth and neat.
Processing a rotated corner
Algorithm for gluing on walls with your own hands
First, the wall is coated with glue. The width of the treated surface is greater than the width of the roll. Lubricate with a special soft roller or a wide thick brush. When preparing the stripes, take into account the need to adjust the pattern. Non-woven wallpaper needs to be glued joint to joint.
Stage 1: diagram and marking of walls
The width of the roll is measured from the window, and a vertical strip is drawn along the level or plumb line. This is a guideline so that the fragments and joints are even. By marking the wall along its entire length, you can determine the required number of solid strips, which should be cut in advance.
Stage 2: preparing wallpaper
If non-woven wallpaper is glued without matching the pattern, the fragments are cut with a small margin in length (5-7 cm more than the ceiling height). When it is necessary to adjust the pattern, the margin is made larger by the amount indicated on the packaging of non-woven wallpaper opposite the corresponding symbol.
Stage 3: gluing
The pasting process begins from the window. When applying fragments, you must ensure that they are vertical. To do this, markings are applied to the wall.
When gluing non-woven wallpaper, only the wall is covered with glue. If the canvases are heavy (vinyl-coated), it may be necessary to apply glue to both the wall and the wallpaper.
Rolling with a roller or smoothing with a rag, press the middle of the strip along the entire length, having previously unrolled the wallpaper.
Remaining air and excess glue are expelled from the axis to the edges, which are rolled with a narrow special roller for tight adhesion. There should be no overlaps.
Stage 4: final
All protruding parts of the fragment are cut off with a wallpaper knife. To ensure an even cut, apply a wide metal spatula to the cutting line. Below you can leave the wallpaper as is, since after gluing, a plinth is installed that hides the defects.
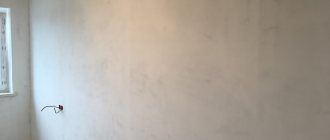
Preparing walls for decoration with wallpaper
The surface of the walls must be carefully treated before wallpapering. If you leave noticeable flaws on the surface, then soon the glued canvases will begin to lag behind, and then completely peel off or tear in some places. It is clear that such an appearance of the coating will greatly spoil the external qualities of the room, so try to avoid this.
Prices for mixtures for leveling walls and ceilings
Mixtures for leveling walls and ceilings
Preparation for pasting is a difficult stage in this work, which involves the following:
- Removing all sockets, switches , hanging furniture, chandeliers. Moreover, the holes that appeared from these works must be sealed with tape.
- Strip off old wallpaper . If they are paper, then wet them with water first - this will remove the paper faster. Non-woven fabrics are much easier to remove; you just need to pick up the edge and then pull it. Plaster, paint, whitewash also need to be removed or washed away.
- After this, you need to evaluate the external condition of the room: look for cracks, creases, holes, tubercles. These defects must be corrected with putty using a sickle mesh. Let the mixture dry. Then apply a finishing coat of putty, smoothing the surface of the walls. If there are uneven differences, smooth them out.
- If the surface of the room is in terrible condition, which cannot be corrected with putty, cover it with plasterboard . Treat the seams with putty so that it is not noticeable.
- Where the two-phase putty was applied, go over it with sandpaper. Clean the room from dust, dirt , wipe the walls with a damp towel or rag.
- Treat the surface of the walls with a primer . But don’t rush into this – the walls should be allowed to dry out.
Video - Preparing walls for decoration with wallpaper
That's all. The main points of preparing the walls are considered, and the walls are leveled. Remember that only with a careful approach can you achieve a beautiful renovation. Also know that neglecting the primer layer will cause the adhesive to soak into the wall, making it difficult to glue the product.
The smoother and lighter the walls are, the better the wallpaper will look.
How long does non-woven wallpaper take to dry?
It all depends on the temperature in the room. The higher it is, the longer it will take until it dries completely. Usually it is 6-10 hours. At this time, there should be no drafts in the room.
The pasting procedure is simple and can be carried out independently, without the involvement of a professional construction team. Non-woven wallpaper is ready for painting, which is a definite plus. The only thing you need for a quality repair is accuracy and the above instructions.
Preparing the glue mixture
For non-woven wallpaper, preference is given to universal or special products for this type of material. Before the purchase itself, as well as mixing the glue, you need to carefully look at its compatibility with this wallpaper. This is an important point, since different types of adhesive mixtures are offered for different sizes of material.
How to mix the adhesive composition:
- Pour water at room temperature into a bucket in the proportions that you read in the instructions.
- Stir the water to form a funnel in the middle.
- Slowly add glue into the funnel, without ceasing to stir .
- Mix the mixture and leave for half an hour.
- After 30 minutes, mix the glue thoroughly again.
Prices for various types of glue for paper wallpaper
Adhesive for paper wallpaper
The mixed glue should sit for half an hour
The composition is not applied to the product - they only need to treat the top layer of the walls. However, to be more confident, you can apply the compound to the material. You need to work in a concentrated manner, especially in the summer, since the adhesive mixture quickly hardens on the surface.
Important point! Follow the instructions each time when mixing the glue. Incorrect proportions may result in a different consistency. As a result, the properties will be lost and you will not be able to work with this composition. It is also recommended to use freshly prepared composition each time.
The most convenient way to apply glue to the wall is with a lint-free roller
How to choose wide wallpaper
The first rule that should be followed before purchasing finishing material is that vinyl in a roll looks different than on a pasted surface. If you buy wallpaper in a specialized store, you can evaluate the appearance of the material from the samples presented at the stands.
How to choose meter wallpaper:
- To obtain a harmonious interior design, choose finishing materials from the same collection, series and batch of the same manufacturer.
- Since wallpaper is not cheap, you need to make sure that it meets the declared quality by asking the seller to demonstrate the presence of a certificate.
- If several wallpaper options are displayed, they first look through the bottom and top rows, and then the middle - at eye level they often place a product that is not in demand or is more expensive.
- You need to choose a pattern and color according to your taste, but at the same time you need to take into account the overall concept of the interior, the compatibility of the color scheme and texture of the wallpaper with pieces of furniture and the decor of the room.
To get a visually seamless surface without seams after pasting, it is better to choose wallpaper with foamed vinyl coating. Non-woven materials do not shrink after drying, which greatly simplifies the work with finishing.
Advantages of wide non-woven fabrics
Using non-woven wallpaper you can create a seamless coating effect on the surface. This is highly valued, which is why finishing materials are highly controversial.
A meter width means fewer joints on the wall, but these are not the only advantages of non-woven fabrics:
- Simple and quick pasting procedure. Anyone can figure out how to glue wallpaper on a non-woven base with a little patience.
- You will spend less time and money buying and gluing one meter-long roll of vinyl than purchasing and gluing two rolls of narrow sheets, plus saving on glue.
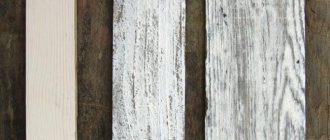
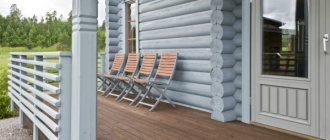
- A wide variety of textures and shades allows you to implement interesting design ideas. The line of non-woven wallpaper includes options that imitate wood and natural stone.
- It is technically correct to call non-woven materials three-layer - an opaque base, non-woven, vinyl coating as a decorative layer that gives texture and relief.
- Dense structure and elastic properties, thanks to which it is possible to mask wall unevenness, microcracks, and slight differences in surface height.
- High tensile strength, which is provided by the non-woven backing, and the resistance of the vinyl coating to abrasion and loss of color saturation.
An additional advantage of wallpaper is ease of maintenance. They can be cleaned dry or wet. If the humidity level in the room increases, the material does not stretch and “shrink.”
To give a room a new look, update the design or implement a bold interior design solution, wallpapered ceilings and walls can be painted in the desired shade.
Checked! Non-woven wallpaper can be painted up to ten times. It’s unlikely that anyone will want to experiment with color so often, but the material can withstand dyeing three times.
Some disadvantages and inconveniences
There are no significant disadvantages to non-woven wallpaper. To obtain an ideal coating of walls and ceilings, it is important to properly prepare the base for subsequent pasting. It is necessary to level the surface if it has defects, and carefully cover large cracks, putty and sand them with fine-grained sandpaper after drying.
Some inconveniences of how to glue vinyl wallpaper on a non-woven backing:
- Step-by-step preparation of the base for the upcoming pasting. The surface serves as a base for gluing wallpaper, so the strength of fixation of the canvas depends on the quality of the preparatory work.
- You need to stock up on an extra roll of wallpaper in case there is not enough material or the strip breaks during the gluing process and lies unevenly on the wall. It is important to choose rolls from the same batch.
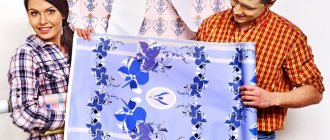
- Wide wallpaper is easy to glue, but you need an assistant for accurate wallpapering. He will be able to hold the edge of the strip so that it does not randomly stick to the base coated with glue.
- Air bubbles remain under the wallpaper, which need to be driven out with a roller to the edges of the canvas. If this is not done, the material in such places swells and gradually lags behind.
- If the question arises of how to glue vinyl wallpaper on non-woven fabric in hard-to-reach places, you must leave allowances and then calculate the material consumption.
Non-woven canvases are made from cellulose fibers, so they are completely harmless to health. After applying a vinyl coating to them, the effect of vapor-tightness of products cannot be excluded, which can be attributed to the disadvantages of finishing materials.
Experts advise! There are non-woven and paper-based wallpapers on sale, which differ in characteristics, gluing technology and cost. How to check the multi-layering of canvases? If possible, you need to tear off a small piece of wallpaper and see how many layers it consists of.
Difficulties in working with the material
The most common difficulties arise when working in the corners of a room . Often when preparing walls it is difficult to get a completely flat angle. However, it is quite easy to correct the situation. The next strip should be aligned strictly vertically and overlap the previous panel. Then, when the wallpaper is dry, make a straight, vertical cut across the overlapping section. Pull back the bottom strip and carefully coat the top with glue and press the paper against the wall.
Attachments of glued trellises under the ceiling and near the floor are cut with a sharp knife, if necessary, using a long metal ruler. You also need to cut holes for switches and sockets with a knife. These actions can only be performed after the wallpaper has completely dried, otherwise there will be a high probability that the knife will not cut, but will break the newly glued edge of the canvas.
When hanging wallpaper, you need to know that the vinyl coating is practically impervious to air, so it takes about 2 days for the wallpaper to dry completely. Otherwise, all efforts will be in vain.
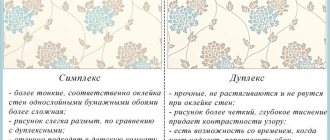
Decoding the symbols on the wallpaper
In order to use it correctly and choose exactly what you need, you should carefully read and decipher the symbols on the label, which is usually found on a roll. Performance characteristics are especially important.
Wallpaper type designation:
- RV – relief vinyl.
- PV – flat vinyl.
- STL – glass wallpaper.
- STR – structural; they are used as a basis for painting walls.
- TKS – textiles.
The remaining characteristics are indicated in the form of graphic icons.
Equally important is the degree of moisture resistance when choosing wallpaper:
- One wave is low, that is, it can survive the removal of glue during the gluing process.
- Two – mostly high, that is, it is allowed to wipe with a wet cloth from dirt and dust accumulation.
- Three – this type of wallpaper can be washed with detergents and rags.
- Wave + brush – can be cleaned with strong surface cleaning products using brushes.
- Three waves and a brush are very resistant to cleaning.
The influence of the sun is also an important factor, especially for rooms with windows facing the sunny side. Light fastness designations:
- Half sun – will fade when exposed to sun.
- Half-sun with + - a higher degree of protection, the fading process is longer.
- Sun – resistant to sunlight.
- Sun with + - can withstand even long-term strong direct exposure to bright sunlight.
- Two suns - have very high protective properties against sunlight.
Icons indicating the rules and methods of using the adhesive solution, how and where to apply it:
- Water + sponge – there is a layer of glue on the back of the canvas, and you just need to wet them.
- Brush + wall – apply the adhesive mixture only to the surface, the wallpaper remains dry.
- Brush + canvas – apply from the back of the canvas to the wallpaper and smear the wall.
- A piece of material with two strips - you need a special adhesive solution.
There are also very important icons for rolls with designs or patterns that show how to join and help you calculate the number of rolls needed.
- Arrow + zero – no adjustment.
- Two arrows opposite each other - the elements of the design are juxtaposed opposite each other.
- Combined - the shift occurs by half the pattern.
- Opposite - when combined, the wallpaper should be in different directions.
- Fraction - the numerator indicates the height of the pattern (step), the denominator - the offset value.
Over time, you may want to re-paste the wallpaper for one of the reasons: it has faded and you want a new color. Dismantling icons will come in handy:
- The brush under the canvas must be moistened before dismantling.
- If there is just an arrow on top, they are removed in the usual dry state.
- A pattern in which there are two layers - the top layer is decorative and comes off separately from the backing, which can serve as an excellent basis for new wallpaper.
- One horizontal, two vertical stripes - cut after gluing with overlap.
- The wall with the hammer is very strong.
Before gluing non-woven wallpaper on a paper base, it is very important to read and compare the batch number and article number. They must match on all purchased rolls. Otherwise, there is a small risk that the color hue or saturation will be slightly different.
Where to buy and at what price?
You need to buy non-woven wallpaper from a trusted place - do not go to small stores that charge a large markup and offer low-quality goods. Wholesale centers and large federal chains are a good solution.
Also, if you need a wide catalog, you can contact large specialized stores. As a rule, they will be able to advise you or even help you make a custom drawing. We advise you to choose between Italy and Germany - these are the highest quality producers of such canvases.
The price of non-woven wallpaper in Moscow or the regions currently ranges from 500 rubles to 10,000, depending on the coating and pattern. Narrow rolls are one and a half to two times cheaper due to their smaller volume, but there are exceptions.
To see the most popular wallpaper options, go to any popular online store and sort by popularity using a filter in the catalog. So you will select the canvases that suit you in terms of price-quality ratio.
Variety of surfaces and textures
One of the most common materials for wall decoration is vinyl corrugated wallpaper with paper. The base of such coatings consists of paper, and the top layer includes polyvinyl chloride, designed to perform protective functions, making the wallpaper resistant to moisture, sunlight and damage. In addition, these wallpapers come in different designs and are suitable for any interior style. That is why today such trellises are so common.
There are quite a few types and types of vinyl trellises. They can be classified according to different parameters.
On the surface:
- smooth;
- corrugated;
- embossed, etc.
Any vinyl trellis is obtained by applying a layer of vinyl to a substrate - by spraying or in the form of a film. Their further processing depends on the type - the vinyl layer can be foamed, the design can be drawn or printed.
Varieties:
- Embossing. A thin layer of polyvinyl chloride is applied to the paper, on which various types of textures are created by hot stamping. The tapestries are thin and smooth, reminiscent of beautiful silk fabrics.
- Screen printing has a wide variety of textures. The vinyl layer imitates natural stone, various types of plaster, and fabric.
- Heavy vinyl has the thickest top layer. This type is characterized by increased strength and relief. Creates the effect of leather, three-dimensional embroidery. Thanks to its thickness, it helps to hide small unevenness in the wall.
- Trellis with chemical embossing have a smooth, glossy surface, from which dirt is most easily removed. Their difference is increased strength, resistance to light, humidity and detergents.
- Relief trellises are obtained as a result of special processing. When they are produced on a printed vinyl layer, inhibitors are applied to specific areas of the substance that foams the paint.
The choice of a specific type depends on the purpose of decorating the room, the desired style, as well as the quality of the walls. Embossed and matte trellises help hide small unevenness, and a smooth glossy pattern is better for smooth walls .
Preparation of glue
For vinyl wallpaper, choose universal compositions or special products for non-woven materials. Before mixing the product, you need to check the compatibility of the glue and wallpaper, since different compositions are suitable for light, heavy, and dense samples.
How to prepare glue:
- Clean water is poured into the bucket in the required proportion.
- The liquid is stirred to form a funnel.
- Slowly add glue and stir constantly.
- Allow the mixture to swell well for 20-30 minutes.
- Before use, the glue is mixed again.
The composition is applied only to the surfaces to be pasted, but in order for the wallpaper to stick more firmly to the ceiling, you can also coat the canvases themselves. It is worth adhering to this recommendation in the hot season, since the glue dries quickly on the wall.
Attention! Do not violate the proportions of water and glue specified by the manufacturer on the packaging. Otherwise, the mixture turns out to be of inappropriate consistency and loses its adhesive properties. For work it is better to use freshly prepared glue.