What is relief plaster?
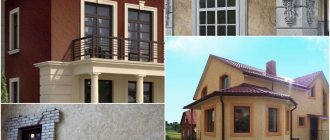
Decorative plaster has been used for wall decoration for many centuries, changing according to style, but always remaining very popular in interior design. The peculiarity of this technique is that it is almost impossible to reproduce the same pattern twice - they can be very similar, but never the same. In addition to relief, the wall is given volume and color tone, the diversity of which is achieved in various ways. Moreover, if desired, you can change the color of the walls. This can be done very easily - purchase paint of the desired color and apply it to the surface using a roller or sponge.
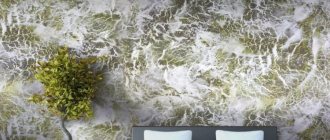
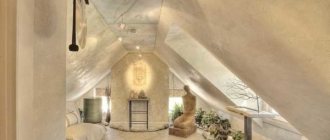
Relief plaster completely changes the interior of the room
The plaster applied to the walls can have any pattern, but it can protrude slightly above the surface or even 10-15 mm, or it can create a sense of volume only with color. The relief pattern can imitate tall grass, tree bark, a wall damaged by insects - “bark beetle”, stone and many other various curls and lines.
The plaster mixture intended for relief is plastic, it is easy to apply to the prepared surface and remove the design from it.
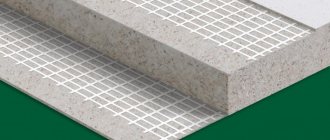
Surface preparation
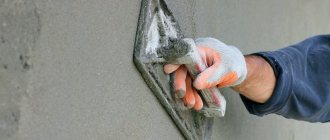
This is a necessary step before applying not only decorative plaster. The main task is the elimination of small and large defects. The surface is cleaned and brought to almost perfect smoothness.
It is worth addressing some important points. After studying them, the process of applying the composition will not cause any difficulties.
- No other work should be carried out in the premises. New windows and doors are installed, and ceilings and floors are finished. This must be taken into account so that nothing spoils the design during the application of the decorative coating.
- Insufficiently dense walls are treated with a restorative primer. This helps strengthen the surface and acts as a protection against dampness.
- To avoid cracks, it is recommended to putty the joints. Each layer is covered with deep penetration acrylic primer.
- Fine sandpaper is used for sanding.
- Each applied layer must be thoroughly dried.
For finishes with large relief, there are not many rules for preparation. Minor irregularities are allowed. Many formulations hide them without problems.
The surface material also affects the preparation conditions. For example, some coatings have many pores that will take all the moisture from the finished mixture. This will noticeably spoil the quality. Such pores need to be closed by applying several layers of primer on top.
Pros and cons of using
Everything can be learned by comparison: ordinary wallpaper provided the owners with a whole set of undeniable advantages, the main ones of which, perhaps, are the ease of application and versatility of use. What about the obvious advantages of textured plaster?
- resistance to any mechanical stress;
- excellent vapor permeability;
- maintaining performance at any temperature;
- high level of fire resistance;
- not afraid of ultraviolet rays;
- variety of surface relief;
- wide selection of color options;
- no toxic substances in the composition;
- good heat and sound insulation;
- basic installation and dismantling.
As you can see, textured plaster has more than enough advantages in terms of expressive wall design - in the photo you can only see how perfectly this or that texture fits into the interior. If you go from the other side and try to “dig out” the negative, the first thing that comes to mind is the relatively short service life
. Regarding other, more sustainable finishing materials. Otherwise, we have before us a case where even with the greatest desire to come up with a minus out of the blue, nothing happens.
Peculiarities of work - expert advice
To ensure that working with decorative solutions does not seem very complicated, you need to take into account some nuances:
- It is necessary to prepare the walls as best as possible for puttying. A smooth finish will not work on very textured walls. And some textured putties will also not fit as they should.
- Plastering is more expensive than wallpapering or painting. Therefore, take this into account when planning your renovation. Always be prepared that you may need a new portion.
- Textured designs and deep reliefs require more material compared to smooth surfaces. This also needs to be taken into account when planning repairs. For example, acrylic type is required for 1 sq.m. on average from 2.5 kg. up to 3kg. But each manufacturer has different recommendations, you need to rely on the instructions.
- To save on putty, you can choose a primer mixture with deep penetration. But it is necessary to look for compatible ones so that the work does not crumble or become deformed. This primer will additionally protect against mold and fungi, because it contains a fungicide and an antiseptic.
- For distribution, you can use any movements (long, short, crosswise, longitudinally, smoothly, roughly). You can even roll it out with a tool in different directions or with gloved hands. To get the same effect, 1 person must distribute everything in the room.
- The solution will harden within 2 weeks. And until it dries completely, you need to be extremely careful so as not to spoil the plastering.
- Due to the rapid hardening, quick work is required, so it is better to do everything together. For example, the first will apply, and the second will distribute and create relief.
- To maintain a pleasant appearance for a long time, everything is treated with acrylic varnishes or protective wax. They increase service life, prevent cracking, make the surface more resistant to moisture, and make the coating shiny, emphasizing the relief.
Rules for choosing relief plaster
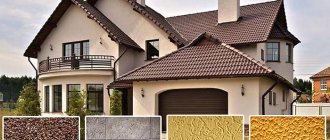
The correct choice of decorative coating is the key to durability, pleasant appearance and quality of the treated wall surfaces. First of all, the choice depends on the personal preferences of the owner of the premises, but it is also important to take into account the advice of specialists in the construction and repair industry.
Design
Creating a design concept is the first point in renovating a house or apartment. This includes the type of design of walls, ceilings, floor coverings, furniture style, the presence of accessories and various equipment. All of the above should be united by one idea, the color and texture of the walls is no exception. If we are talking about repairs from scratch, then relief plaster is quite easy to find. You need to focus on 2-3 design options, and select the appropriate material for each of them. Here everything depends on the imagination of the owner of the living space and the designer, if there is one.
The relief plaster of the walls should be in harmony with the entire interior: floor and ceiling coverings, furniture, accessories
Nature of the coating
The texture of the walls can radically change the overall visual perception of the room, so it is also important to approach this issue responsibly. With the help of various ornaments and patterns, you can emphasize the advantages and hide the shortcomings of the room. For example, a small drawing on the wall visually increases the space, while a large one reduces it. You can also visually expand the room using vertical or horizontal stripes.
When choosing a texture, you need to follow some rules. For a classic interior, a coating that imitates wood, leather (see photo) or natural stone is better suited. For more modern ones, “metal-like” plaster is suitable. For children's rooms, an excellent solution would be a surface that replicates the texture of the peel of various fruits with corresponding images.
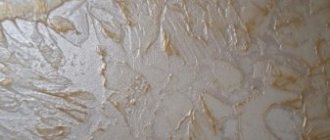
Decorative plaster imitating snake skin - ideal for classic interiors
Color
This point is considered one of the most important. Most people prefer to trust their taste in choosing the color scheme of plaster, but there are some general rules that will help you make the right choice. The first thing to consider is that dark colors narrow the space, while light colors expand it.
Most designers say that it is better to make all four walls in the same color, but you can experiment a little, for example, make two walls beige and two deep red. Calm, non-aggressive tones are suitable for a bedroom; a colorful pattern would be appropriate in a children’s room; a living room or office is best designed in the classic “natural wood” design.
A relief map will be a useful and original decor for a teenager’s room.
Cost and manufacturers should also be mentioned. Unfortunately, at the moment, Russian-made decorative plasters do not perform at a high level. Now European, especially Italian brands are valued more than all others.
On a note! When purchasing, it is not recommended to chase cheapness. The reason is simple - the composition, which was manufactured abroad and then delivered here, physically cannot cost less than its “local analogues”.
Bottom line
This is what applying decorative plaster created by yourself looks like in a nutshell. Let's summarize the above:
- it is not necessary to buy original mixtures - you can use cheaper products;
- To create beautiful effects, ordinary finishing putty is suitable;
- one of the simplest imitations is under a rock; the option in the rain requires more physical effort, but the result is more beautiful;
- a wall finished to look like rock can be painted using the “dry brush” or “wash” technique; “rain” is painted only using the latest method, which requires even greater costs (including financial ones), although it will be easier to correct errors here.
Of course, there are other methods that you can create yourself, as well as recipes for making homemade decorative plaster. But, since such decoration has not yet become fashionable, walls with “rock” and “rain” will look original. In addition, it will not be a pity to start repairs in a few years, because relatively little money was spent on it.
Rate the article, write a comment, and if you liked the article and found it useful, share it with your friends.
The technological process of finishing with relief plaster has a number of features:
To implement the idea, you need a life-size drawing, in the form of a sample or fragment. It is better to keep this fragment nearby and check it as you work so that the reproduced relief or pattern is as close as possible to what was intended.
- Surface preparation for decorative plaster is standard and is carried out with special care. Old layers of plasters, paint or wallpaper should be removed and the surface cleaned to a solid base.
- Dust surfaces using ordinary household means - a rag, brooms or brushes. Sometimes washing with water and additional priming of the surface is required. It is preferable to use penetrating primers with an antiseptic effect, which have the advantage of protecting the wall from insect pests, fungus and mold.
- When the base is completely prepared, they begin mixing and applying the starting layer of plaster, the first layer under the subsequent finishing relief layers. the first layer must dry completely, then it is primed for maximum adhesion to the finishing layer.
- On a completely dry base, they begin to apply the next layer of plaster, forming reliefs, patterns or designs. Each type of drawing requires its own, individual technique. Depending on the intended effect, the surface is either leveled when the solution sets, or left until completely dry. If several layers are needed, then subsequent ones are applied only after the previous layers have completely dried.
- The last stage is tinting the surface, which is usually done on slightly damp plaster. Excess paint can be removed from the protruding relief pattern with damp sponges - this gives an additional volumetric-tonal effect, emphasizing the depth of both color and relief.
Do-it-yourself relief plasters are not quick to make; all layers should be thoroughly dried, and many reliefs require several days of work. You cannot rush into this complex and artistic process, so as not to introduce negativity, which will affect the final result of the entire work. The order of the stages and high-quality preparation of the foundation are important. Sometimes, to create spectacular reliefs, they use improvised means that are completely unusual for finishing work, and not always expensive.
About accessories and tools for creating plaster relief
Traditional plasterer tools - trowels, trowels, usually notched and smooth steel spatulas, floats and half-graters are used of all types, required sizes and depending on the finishing idea. In addition, special devices are needed:
- To give the designs a characteristic bubble effect and create a shading relief in addition to the volumetric one, use ordinary foam rubber and kitchen sponges of any kind
- Rollers with attachments with designs for making impressions on wet plastered surfaces - according to the original idea. Specialized stores offer a wide range of patterned rollers and roller covers. It is also possible to make a drawing on a roller yourself - pure exclusiveness.
- The roller can create grassy reliefs, horizontal stripes, geometry or abstraction - it all depends on the design.
- Plastic bags and films, various brushes, ordinary rubber gloves, fabric, mesh, terry mitten and a host of completely unexpected household utensils can create miracles of artistic decoration in skillful hands. It is better to train and practice new methods of creating reliefs on a sheet of primed plywood.
- Any household or gardening utensil that has a texture that can be imprinted on wet plaster and give it relief is suitable for work.
- Special designs imitating snake or crocodile skin applied to rollers will give very realistic fantasy illusions on the walls.
- Often the volume is created with spatulas of various types
Relief plasters give limitless scope to imagination, not only in the selection of wall patterns, but also in the selection of tools for their implementation. A creative technological breakthrough could include children's toys, dinner forks, combs and manicure spatulas.
About materials for relief plasters
First of all, you will need mixtures that level the base under the relief layer. Depending on the base material and finishing layer, different compositions are chosen:
- If the intended relief layer is made of gypsum mixtures, the composition for the base is also purchased using gypsum binder. Universal gypsum plaster dry mixtures are a stable, proven option.
- It is possible to make cement-based mortars with your own hands, the proportions are classic - one part cement binder to three parts clean sifted sand. But the ready-made dry mixture will not only speed up the work process, but also the working mixture will have better plasticity, and it will be easier and faster to complete the base for artistic work.
- Clay plaster compositions for the first layer have a lot of advantages - they are elastic and completely environmentally friendly. But clays are used very rarely for plastering, since technologically advanced new mixtures are easier to work with and reduce finishing time.
Decorative design is carried out with special ready-made mixtures intended for creating artistic plasters. The characteristics of these compounds vary very widely; there are a huge number of types. The packaging contains all the information from the manufacturer - for which reliefs these compositions are intended, whether they are homogeneous or include ingredients for a special effect: it can be stone chips of various fractions and colors, tonal or contrasting to the main mixture.
Such formulations are produced ready-to-use, diluted to a stable consistency. The price of ready-made mixtures is higher than dry ones, but there is a precisely maintained proportion of mixing water, and you can start working instantly by opening the bucket and mixing the mixture. Tightly closing the container with the remainder of the mixture will guarantee its suitability for the period of work required by the plastering technology.
Primers for plaster layers also exist in a wide range - in the form of liquids and pastes. For the first leveling layers, a liquid primer with antiseptic additives is preferable. Pastes are mainly used for finishing decorative layers - they are more convenient to apply and create excellent adhesion of the layers.
Frozen relief plasters are painted with emulsion, water-dispersion, acrylic and other paints. The most popular paint is white, any coloring can be done. The finishing layer is usually varnish. Even one layer of varnish will significantly extend the life of the decorative coating, and several layers of varnish will give a special effect of a matte or glossy surface. Imitations of reptilian skins and polished stone illusions especially need a varnish layer. A simple and inexpensive consumable - masking tape (masking tape) is needed to limit fragments of relief decoration, distribute zones and grip plastering works. Painting tapes are applied in one motion and hold firmly, and when removed they do not leave marks on the finish.
Interior solutions
If you have previously worked primarily with wallpaper or paint, then most likely plaster appears to be an inconspicuous cement mortar that can hardly be used in finishing.
Let's dispel the misconception.
"Silk" on the walls
- Mother-of-pearl coating, differences in degree of gloss and grain. Adding sophistication to the room. Various application methods, use of almost any color scheme. All of the above is a brief description of this type of decorative plaster.
- Its composition includes rayon, cotton and cellulose fibers, as well as water-soluble glue flakes.
- This is a unique material that imitates a silk surface, while creating the illusion of transparency of the walls. You can definitely create a stylish design, you just have to remember to carefully prepare before application.
Sandstorm effect
- Externally it resembles sandstone. Apply with a brush. The technique is different, so the drawing depends on your hand. Ideal option for interior decoration.
- The composition most often includes quartz sand, but river sand can also be included. For a sparkling effect, finely crushed shell particles are added. There is a coating with reflective beads. In the interior it looks impressive and unusual.
- Textured sand is resistant to dampness, and the fine quartz included in the composition protects against fungi.
"Travertine"
- This decorative plaster imitates the calcareous tuff used for construction in Ancient Rome. Can be applied smoothly to walls or rubbed in until glossy. The thickness of application is determined by the size of the fraction.
- It contains marble powder to create shine, pigments, binders and slaked lime. The material itself is durable and acts as protection for the wall.
- It can be used to create various designs, such as a world map.
"Texture"
- Masks unevenness and other wall defects. A universal material that is suitable for those who do not want to waste time on perfectly leveling the wall. Can be used to imitate natural materials.
- The composition includes small stones, elements of granite or marble chips, and sometimes cotton and flax fibers are present. Coarse fillers are placed in a thick layer, due to which all defects are covered.
- When applying, stencils, structural rollers are used, and artistic modeling is performed.
"Bark beetle"
- Currently one of the most popular decorative plasters. The material is used not only for interior decoration, but also for the facades of the house. For this, different factions are taken. The interior looks restrained and sophisticated.
- Consists of mineral filler, granules (of different sizes) and liquid.
- Several application methods: horizontal, vertical, circular.
"Fur coat"
- Acts as a protector against sudden temperature changes. Otherwise called pebble plaster. Most often this coating is used in the bathroom and kitchen. Can be applied to concrete, stone, gypsum and cement plaster, drywall.
- Acrylic, cement, silicate are the main components. Texture is achieved through mineral chips.
- Small price. Anyone can handle this finishing method, so professional help is not needed.
"Home Venice"
- Venetian decorative plaster is a complex and capricious material. However, it can be found in the interior with noticeable frequency. It will be difficult to recreate this type of coating without experience, but the result is worth it.
- Three important components: stone dust, slaked lime and pigments to give color.
- This coating can be single-color or multi-color. It replicates marble with a glossy surface. Sanding can be done by hand or using polishing equipment.
Tools we will need
First, we will need standard items for plastering:
- container for diluting plaster mixture;
- assembly mixer for mixing the mixture;
- Master OK;
- a set of spatulas of different sizes;
- trowel - for rubbing the surface;
- mounting level;
- Plastering tool
To apply relief plaster we will need additional tools:
- In general, any object can be suitable for applying relief, be it a fork, a toothbrush or anything else that gives a decorative shape to the solution. A sponge is for applying a “special” bubble-shaped pattern;
- roller with a pattern - can be purchased at a hardware store with a ready-made and symmetrical pattern;
- plastic film - can serve as an option for creating texture and a unique pattern;
- car tire - can also serve as a design option;
- roller attachments – there is a large selection of roller attachments with a wide variety of designs.
How to choose the best materials First, we need to determine what materials we will need, and which one will suit us best.
Tool for relief plaster
Preparation of the solution
“Fur coat” in the form of a dry mixture can be purchased at any store. Before use, this composition should simply be diluted with water according to the instructions and mixed thoroughly. If you decide to prepare the composition yourself, this will also not be a big problem. All you need is river sand (which should be sifted first) and cement as a binding component.
- Combine one part cement with three parts sand.
- Fill the mixture with water at the rate of 200 ml of water per 1 kg of dry mixture.
- Using a construction mixer, mix the solution thoroughly.
- Let the mixture sit for 5 minutes and stir again.
As a result, you should get a homogeneous mixture with a consistency reminiscent of sour cream. It should not be too thick, because in this case it will be inconvenient to work with. And the material consumption will increase noticeably.
Alignment
First we will level the wall; for this we will use the following mixtures:
- gypsum mixture, it can only be used if the relief layer also consists of it.
- cement plaster mixture is cheap and cheerful, the most commonly used material, it is usually prepared at home. The recipe is not complicated; add three parts of clean sand to one part of cement.
My advice is, of course, it is better to use ready-made mixtures, their properties are much better, they are much more flexible and durable.
- clay used to be a very popular material, it is very elastic and, perhaps, the most environmentally friendly, but now it is rarely used because of the price and the difficulty of finding this material.
Mixture selection
For relief plastering of walls, compositions specially produced for this purpose are used. They are different, depending on the texture we want to make. They may also contain stone chips, which cannot be used for other designs.
Therefore, we need to select a mixture specifically for our design and idea.
It is packaged immediately in finished form, most often in plastic buckets, which makes it easier to store leftovers if there are any after work. Relief plaster is sold in all construction stores.
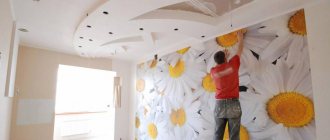
Applying the base layer of plaster
Applying the main layer of plaster
We need it to level the wall, plus it acts as a base for the subsequent layer of relief plaster.
First, mix the solution in a previously prepared container; it is important to pour the solution into water, and not vice versa.
We use a mixer for mixing. Next, apply the solution to the wall with a trowel or spatula.
The thickness of the layer is selected individually for each surface, the main thing is that it is even after installation. After the solution has dried a little (but not completely), you need to rub it with a trowel to completely level the surface.
When plastering, we constantly check the surface with a level; when something is missing, we add mortar and level the surface. When the base layer is laid, the dried plaster is again covered with a layer of soil.
Painting plastered walls
For the convenience of applying paint, use a special tray for the roller; it helps to better roll the paint into the roller, which means there will be no drips on the wall. Next, we paint the surface with water-based paint in a pre-selected color.
It is best to paint the entire surface at once so that the tone is the same everywhere; the remaining layers are selected as planned, depending on the chosen pattern.
Masters use small brushes to paint walls; with them they can create a whole picture, a so-called panel, but for now this task is not for us, although if you are confident in your artistic abilities, you can try. After the entire surface has dried, it can be varnished with a solution for interior work.
Painting
Often the walls are painted in one tone. In the case of the types of finishing described above, it is better not to use such a simple technique, since all the protrusions and depressions are simply lost. Therefore, having finished the wall using the first or second method, you need to choose one of two methods: “dry brush” or “wash”. By the way, if a surface finished to resemble a rock can be painted using any of these methods, then only the latter is suitable for simulating rain, since there are no protrusions here, only depressions.
Let's start with the dry brush. To paint, you need to buy two paints of different tones. The one that is darker (by one or two tones) is applied first. After the layer has dried, you can begin applying the second one. To do this, the brush is immersed in the bath, and then thoroughly wiped both its sides and the cardboard. This is done so that a minimum amount of paint remains on the fibers. Then, with chaotic movements, the brush is wiped on the wall. In this case, you need to keep it parallel to the surface and touch it quite a bit. To avoid any streaks left from the tool, movements should be made in different directions.
Now let's move on to the "blur". Here you also need paints of two tones, only the one that is lighter is applied first (as a background). By the way, it must be moisture resistant. After the background has dried, a dark layer is applied to it. For it, it is better to purchase paint that is not moisture resistant. When the second layer dries (it won’t dry completely!), you need to take a damp cloth and lightly wipe the wall, the top layer will “whiten”. As a result, the dark coating will remain only in the depressions.
The second method is more expensive both in terms of finances, time and effort. But the process is easier to control: if more paint has worn off than necessary, it can be applied and wiped off again.
Briefly about the main thing
- First of all, you need to choose the pattern that you want to put on the wall, remember it and think through every little detail so that it turns out exactly the way you intended it.
- The second very important stage is the preparation of the walls; everything needs to be done carefully. You need to remove old wallpaper, tiles, plaster, everything that is unstable on the wall.
- We sweep away all small elements (dust, dirt) with a brush or broom so that they do not interfere with applying the mixture.
You definitely need to prime the wall, this will help improve the adhesion of the mixture, which will give wear resistance and durability to your work.
- The relief mixture is applied only to the base layer, which also needs to be primed, since without it the wall most likely will not be level.
- It is best to use a ready-made mixture in jars or buckets; it is diluted in the required proportion, which means the quality will be better than a homemade mixture.
- The so-called stone plaster can be used; it contains many small stones, when rubbed, various intricate patterns are formed.
- It is advisable to apply varnish to the surface, especially if the plaster is made to look like stone or leather.