How to properly plaster adobe walls inside a house - stages of work
Adobe houses are a housing option made from natural and environmentally friendly materials: clay, sand, earth, straw and water are used for their construction. This method of construction was widespread in the last century, but even now there are many of its admirers. In the summer, such a house is always cool, and in winter it is quite warm. However, working with the material has certain specifics, so it is important to know how to properly plaster adobe walls inside a house.
Construction technologies
There are 4 technologies for constructing such houses:
- frameless block;
- frame block;
- adobe frame;
- frameless adobe;
- turluchnaya.
Block technologies involve working with pre-fabricated blocks; when using adobe technologies, a very thick mixture is hammered into formwork, which is then removed or left as an exterior/interior finish.
When building a house using frame technology, a wooden frame becomes the load-bearing element of the walls, so you can use light, warm adobe.
To build a house using frameless technology, you need heavy adobe, which, after hardening, will gain sufficient strength . A turluch wall is made by coating a strong frame on both sides with a clay-straw mixture, and its advantage is its ease of manufacture. The downside of the turluch wall is its extremely low strength, due only to the design of the frame.
What are the features of plastering?
When plastering adobe walls, it should be remembered that the main feature of structures that contain natural materials is the need to protect them from the outside from frost, as well as take care to remove excess moisture from the wall itself.
When performing work on external walls, you should decide what thickness of the plaster layer will need to be applied. If it is thick, then it is better to use a reinforcing mesh in the process, otherwise in the future the plaster will begin to fall off in pieces.
Wooden houses
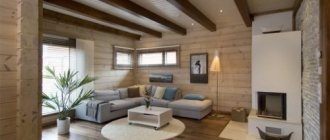
Wooden structures are no less common. The unique atmosphere inside such a building has a calming effect on guests and owners, and the fresh and fragrant air gives a good mood .
The tree requires constant maintenance; the only repair option is to replace sections.
Using a support system, the load on the damaged part is removed, damaged logs are removed and replaced with new ones. This work is quite complex, requiring the participation of several people.
It is better to take care in advance of waterproofing, lining external walls with suitable materials, creating a drainage system and draining the soil under the house.
What solution can be used?
Before plastering adobe, you should know that such structures are poorly able to tolerate excess moisture. Therefore, the main requirement for finishing material is increased moisture resistance.
Standard cement plaster is not suitable in this case. Such a coating will become heat-intensive, thermally conductive and have poor vapor permeability.
The result will be moisture seeping out from inside the house, settling on the inside of the cement layer and regularly flowing down. As a result, the plaster will either crumble in a couple of years, or the wall will collapse (this is more typical for warm regions).
The ideal option for adobe walls is a lime-based composition. It’s easy to make it yourself by mixing 1 part of the main component with 5 parts of sand. This is an excellent option for the lower volumetric layer of plaster. For the final layer, the same mixture is usually used, but in a 1:1 ratio.
Plastering adobe walls inside a house is often done using a mixture containing gypsum.
If there is such a need, then you can make the walls even by using a solution with the addition of straw, manure or sawdust. This strengthens the structure of the solution and allows you to avoid using a plaster mesh.
Advantages of clay plaster
Clay as a building material has the following positive qualitative characteristics:
1. Hypoallergenic. Clay is one of the few materials that, in principle, does not contain harmful substances, but, on the contrary, works as a purifier, that is, it absorbs excess moisture and impurities that are in the air;
2. Reusable. If, in the event of some construction work, there is excess clay left, you do not need to worry that after a certain amount of time you will need to look for “fresh” material again. The clay does not deteriorate and is ready for use, even after a long break;
3. Environmental cleanliness. When decorating walls with clay, shingle nets are used. And in this case, there is no need to treat the wood with toxic substances, since clay is essentially a preservative and, by covering the shingles, prevents the processes of rotting and decomposition.
When choosing clay as a finishing material, you don’t have to worry about significant financial costs, since this material, along with others, is quite cheap and accessible.
Wall treatment
The algorithm for processing walls will be as follows:
Experienced craftsmen recommend using dyes based on metal oxides: they are characterized by stability, and the mixtures are not prone to fading over time.
How to plaster adobe walls inside a house depends on the condition of the surface. The main thing is that these are natural materials that do not violate the environmental friendliness of the structure and do not prevent moisture from escaping.
Lime-based plaster should be given enough time to dry slowly at above-zero temperatures.
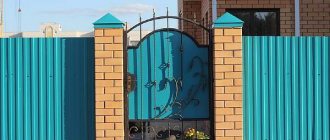
Before plastering the adobe walls outside the house, it is advisable to fill them with chain-link mesh; it will significantly improve adhesion. At the same time, slopes are often made on the outer corners - a denser layer of plaster is carefully smoothed out and sometimes decorated with ornaments.
Source
Summing up
We hope our article was useful to you. In order to more accurately understand the technological and practical issue, our website provides detailed photo instructions in which you will find useful information on this issue.
What to do if you need to completely level it? There are several options for leveling walls in an adobe house. But before proceeding directly to leveling, you need to find out the level of deviation. To do this, we will need beacons that we attach to the surface over the entire area where we need to level the walls. Another way to level such walls in cottage renovations is to use plasterboard.
In accordance with the lighthouse, it is necessary to install a metal profile; this can be done using the same gypsum plaster. If we choose this method, then it is advisable for us to first lay material for heat or sound insulation on the wall. This will also make it possible to get rid of the space between the wall and the sheet of drywall.
I don’t know how much your old foundation can serve as a foundation and withstand covering adobe walls with new brickwork. And for this, it must first of all protrude beyond the surface of the adobe walls by ten centimeters or a little more for laying the brick cladding. When you simply need to level the base of an adobe house along its bottom, they usually make a reinforced concrete belt around its entire perimeter. To do this, prepare the surface of the site by cleaning the soil and digging it to a depth of at least a shovel bayonet. Then pour a layer of sand about 10 centimeters.
A frame is made from reinforcement in the form of four rods connected to each other with welded wire. They are intended for performing traditional plastering work on various substrates, as well as for leveling any walls before laying tiles, wood finishing and wallpapering. For example, ATLAS ZERMIT CH has the texture of “small lamb with a crumb thickness of up to 2-3 mm; the content of larger crumbs gives, accordingly, a more relief surface.
Due to the fact that you want to prepare the walls for painting, install the beacons as close to each other as possible, so you get a more even overall plane of the wall. The house is made of adobe, walls without lathing, sand-clay plaster, lime whitewash. How to properly approach the issue of leveling walls with putty (finishing) or how to properly prepare such walls for painting with water-based paint. Thanks for the answer. There is a special plaster based on silicate, like the company “Ceresit” produces these, but if you need a more budget option, then it is better to use clay, sand and lime.
I need advice, tell me how best to level the walls made of adobe block. At the moment the walls are very uneven, I don’t know if plaster will help. The walls are a little covered with lime, but I would like to simply level the surface and paint over it. The metal profile must be set so that it matches the lighthouse. You can secure the profile with the same gypsum plaster, then cover the curvature with plasterboard.
It is better to fill the void between the sheet and the wall with something, for example, heat-insulating or sound-proofing material. It is because of the formation of voids that professionals recommend using gypsum plaster. Adobe bricks are a fairly functional material; houses made from such bricks are usually durable due to the strength of the material. Such bricks contain large pores, which allows the room to remain warm in the winter, and in the summer it is quite cool in such houses.
But how to level adobe walls if such a need arises? Let's look at several technologies to find out how to level clay walls. After completing the installation work, you must let the glue dry for 2-3 days.
At the same time, there should be no sudden temperature changes in the room. From under the drywall, remove the available materials that held the sheets in place, and putty the resulting cracks along with the seams. Before starting repairs, it is advisable to make a natural ventilation system in the room, which will reduce the humidity in the house and maintain the evenness of the plasterboard sheets.
What kind of plaster can I use?
As you know, adobe buildings do not tolerate moisture well, so the finishing must first of all be moisture resistant. However, it should be said right away that traditional cement plaster is absolutely not suitable for these purposes. The fact is that such a coating has a high heat capacity, good thermal conductivity and poor vapor permeability. As a result, moisture seeps from inside the house through the walls and settles on the inner surface of the cement finish, after which it flows down. In the best case, such plaster of an adobe house will begin to crumble in a few years, in the worst case, this will lead to complete destruction of the walls, which can happen in a warm climate.
It is best to use a lime-based finish as a binder. This composition is easy to make with your own hands from lime and sand in a ratio of 1:5. It is perfect for thick, rough layers of plaster. For finishing, use a mixture in a 1:1 ratio.
If the walls of the house are uneven, then to level them you can use a solution with a small admixture of straw, manure or sawdust. This will strengthen the overall mass, and thereby avoid the need to use a plaster mesh. The fact is that the mesh is secured with long nails that destroy the walls.
Advice! For interior plastering of an adobe house, you can use a gypsum-based mixture.
Clay houses
Walls in high-rise buildings do not require a special approach during repairs; all that may be required of you is preliminary leveling. A completely different approach is required when renovating private houses that are made from non-standard materials. .
House with adobe walls. These were built in areas rich in clay deposits. Clay was mixed with any fibrous materials (hay, moss, wood shavings) and bricks were formed from it.
Good quality adobe can be easily chopped with an ax without cracks and can fall from a height of human height without breaking. The masonry is the same as brick.
When repairing adobe walls, you should know that their destruction occurs due to insufficient moisture insulation.
Main factors that need to be addressed:
- Create the necessary conditions to prevent moisture from groundwater, and also make a frost-resistant base. To protect against precipitation, a cornice with a width of at least 40 cm is required. Heavily damaged areas are replaced, taking care of waterproofing.
- In case of buckling and deformation, the building structure should be checked. It is necessary to reduce lateral pressure and strengthen the floors.
- If the roof is destroyed, take care of waterproofing and only then undertake repairs.
- In addition to these damages, there may be destruction of corners, slopes and edges, which are covered with plaster or eliminated with a special tool - an extruder designed for working with adobe.
To strengthen an old clay structure, you can perform a simple set of works to bring the surface to perfect condition.
- First of all, all clay that has fallen behind the sub-grid is removed.
- A metal frame is made from scrap materials, which is fixed to the wall using brackets.
- All cracks are covered with a solution of cement, sand and clay. After complete drying, plaster is applied.
- For a decorative effect, apply finishing putty.
What solution can be used?
Before plastering adobe, you should know that such structures are poorly able to tolerate excess moisture. Therefore, the main requirement for finishing material is increased moisture resistance.
Standard cement plaster is not suitable in this case. Such a coating will become heat-intensive, thermally conductive and have poor vapor permeability.
The result will be moisture seeping out from inside the house, settling on the inside of the cement layer and regularly flowing down. As a result, the plaster will either crumble in a couple of years, or the wall will collapse (this is more typical for warm regions).
The ideal option for adobe walls is a lime-based composition. It’s easy to make it yourself by mixing 1 part of the main component with 5 parts of sand. This is an excellent option for the lower volumetric layer of plaster. For the final layer, the same mixture is usually used, but in a 1:1 ratio.
Plastering adobe walls inside a house is often done using a mixture containing gypsum.
If there is such a need, then you can make the walls even by using a solution with the addition of straw, manure or sawdust. This strengthens the structure of the solution and allows you to avoid using a plaster mesh.
Performing plastering
Preparation
Before plastering the adobe wall, it is necessary to prepare it:
Advice! If plastering adobe walls is done using this method, then the wooden slats must be treated with an antibacterial compound before installation.
Plastering an adobe house during construction
Plastering
Once the walls are prepared, you can begin applying the coating.
Instructions for performing this work are as follows:
Finished adobe house
Note! Lime plaster should dry slowly at a dry, above-zero temperature. Therefore, after applying it, the surface must be protected from direct sunlight and dry wind.
cheers for the dacha funny pictures
Other publications in the “Interior decoration of the house” section
What are the risks of using conventional slabs in the bathroom? Let's consider the features of constructing partitions in the bathroom from tongue-and-groove gypsum boards. Each such slab is made of building gypsum and is a rectangular parallelepiped, the joining and supporting surfaces of which are .
A modern house built from rounded logs requires practically no other finishing except painting with compounds with protective properties and decorative capabilities. The interior of the house is made of natural wood and is decorated with floors, stairs and furniture. Professionalism of modern furniture makers, the latest.
Removing old varnishes or paints from wooden surfaces is called stripping. Typically, three methods are used to remove old varnishes or paints from wooden surfaces: thermal, mechanical and chemical. As a rule, the choice of removal method directly depends on both the material itself and.
May 25, 2013
Adobe bricks are a fairly functional material; houses made from such bricks are usually durable due to the strength of the material. Such bricks contain large pores, which allows the room to remain warm in the winter, and in the summer it is quite cool in such houses. But how to level adobe walls if such a need arises? Let's look at several technologies to find out how to level clay walls.
- gypsum plaster;
- using sheets of drywall;
- leveling with clay.
First you need to determine the level of deviation from the norm. To do this, we use special metal elements - beacons. They are attached to the wall, and they determine how much the wall is deflected. These beacons need to be placed throughout the room or apartment, depending on where the walls will be aligned.
Once the devices are installed, you can begin leveling the adobe walls. We eliminate unevenness using gypsum plaster; it easily sticks to the wall. When the process is completed, only thin lines from the beacons will remain on the wall. Afterwards the walls are puttied. This method is long and difficult, but the result will please you.
Where to start renovating an adobe house
Like any repair, it all begins with an inspection of the building, drawing up a work plan, estimates and purchasing the necessary materials. If you are not sure that you can carry out all the work yourself, then it is better, of course, to turn to qualified workers. The main elements of any residential building are the foundation, walls and roof, so we will consider everything in order.
Foundation
In adobe buildings, a classic foundation was rarely used, that is, the walls of the house were built on a compacted clay pad. Or, in the version of the adobe structure, wooden pillars were driven into the ground, which were subsequently coated with clay. When inspecting the building, if you see the presence of cracks on the walls, a difference at the level of window openings, then with a 100% guarantee we can say that the house has shrunk and the foundation under the walls needs to be repaired.
Option to strengthen the foundation of an adobe house
To do this, trenches are dug along the walls, but not in a continuous strip, but in increments of approximately one meter and a depth of about 0.6 m. Waterproofing is done along the lower edge of the adobe blocks. Foundation sections are laid in problem areas (the simplest option is reinforced concrete or sand-cement blocks). After this, waterproofing is done around the entire perimeter and a blind area is constructed.
Walls and ceilings
One of the main problems of adobe walls is that over a long period of time a “belly” appears: irregularities and bulges appear on their surface. If such irregularities are up to two centimeters in size, you can try to clean them up, and when they are larger, it is better not to take risks, but to think of a way to cover them (in the case of a facade, you can use siding, and plasterboard inside).
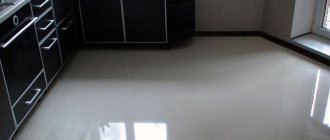
Plastering adobe walls inside the house
When building adobe houses, all floors were mainly made of wood. Therefore, it is necessary to assess the condition of the floor beams and if they are in poor condition, they need to be completely replaced. Of course, this is a large amount of work, since this will require dismantling the roof, replacing all the piping and making new wooden floors.
Roof
The roofs of such houses were previously covered with whatever was at hand: from reeds to ceramic tiles. When restoring an old roof, the first thing to start with is an inspection of the entire wooden structure. If necessary, replace worn-out elements and treat the entire sheathing, for example, with mastic.
Before starting roof repairs, it is necessary to carefully inspect all its elements.
If the old roof is covered with tiles, it is advisable to replace it with a lighter material, since, having a large weight, it creates an undesirably large load on the entire structure of the house.
When deciding to carry out a complete reconstruction of a building, first of all, never neglect the advice of specialists. Because, unknowingly, you can cause irreparable damage to the entire building, which will ultimately affect your budget.
How to build a sauna with your own hands?
The construction of a box, that is, walls and a roof, a bathhouse, is no different from the construction of a house described above, the difference concerns only :
- interior decoration;
- heating systems;
- ventilation.
Due to high humidity, the finishing inside the bathhouse should be made of coniferous wood, preferably pine or larch.
These materials are saturated with tree resin, so for the first few years after finishing, there will be a pleasant pine smell inside the bathhouse, which will weaken over time, but will never completely disappear.
In addition, pine boards are noticeably cheaper than birch or oak , which means that the money saved can be spent on something else.
Another difference is the heater stove, which preferably heats the dressing room. Heaters are made of both metal and brick, and the main difference from heating stoves is a noticeably higher temperature, as well as resistance to high humidity and drops of water falling on its surface.
Choose the type of heater based on available energy resources:
- electricity is practical, but very expensive and not available everywhere, but the sauna stove is small in size;
- gas is also practical and much cheaper, but it is not available everywhere;
- Firewood is available even where there is no electricity or gas, and is also the most traditional fuel for a heater.
In addition, the stove should dry the bath after finishing washing in order to reduce air humidity as much as possible and avoid the appearance of condensation on the walls.
The ventilation system of a bathhouse is very different from a home one, because it needs to provide a high level of humidity during bathing, and then quickly ventilate the room to prevent mold and rot from appearing.
This can be achieved in the following ways:
- provide several closable openings (this could even be a pair of vents) to ensure quick release of steam;
- use external and internal finishing made of materials that allow maximum permeability of water vapor;
- provide forced ventilation to quickly clear the room.
Decorative plaster Saman
Surface preparation
Before applying the design effect of Bousillage Rustique BR1 - Adobe walls, it is necessary to carefully prepare the surface. Surface type No. 2, method 2. Application conditions: air temperature: from 5°C to 35°C relative air humidity - no more than 75% (recommended - 60%).
Applying Bousillage Premiere Base Coat
Applying the finishing coat of Bousillage Rustigue
Application of a protective and decorative layer
Caring for the surface consists of wiping it with a damp sponge from time to time. No detergent is used.
Surface preparation
The first stage of plastering a wall on clay requires surface preparation. Oil stains are removed, traces of mold are cleaned to the ground. If the wall is damp in some places, you need to find the source of this problem.
Sources of wall moisture:
- if groundwater is close to the surface, moisture can rise to the wall through the pores of the foundation. In this case, measures are taken to lay waterproofing material between the base of the building and the wall;
- When water pipes are laid close to walls, condensation can cause moisture in the walls. The pipeline requires the installation of heat-insulating material that prevents the formation of moisture;
- if the wall becomes wet from rainwater, install drain pipes and canopies.
Finishing: features
At this stage, you need to finally level the walls and grout using clay-sand mortar without any fillers. First, you need to prepare a fairly liquid grout with which you will plaster the wall with a second layer.
The layer of rough plaster for more or less even walls can be equal to 1 cm. For uneven walls, the thickness of the layer can vary from 0.5 to 2-3 cm.
Grout
Maintain a proportion of 3:1:1, where 3 parts are sand and one part each of cement and clay. The solution should be liquid for a more even application. As in the previous version, the sand must be dry, of medium fraction.
For fine sand you will need much more cement. A large one will look very rough. Mix dry sand with cement and only then add clay. After thoroughly mixing these three components, gradually add water.
This layer will also require quite a lot of time to dry completely, from one to three weeks, everything will depend on the microclimate of the room. It is strictly not recommended to dry both the first and second layers using a hair dryer.
This can lead to cracking of the walls, which, of course, leads to additional work, and you will again have to plaster the wall, sealing the cracks, and wait for drying.
Therefore, drying should take place under natural conditions, without additional means, even if you are in a hurry to finish construction. Everything may turn out completely the other way around, and you will end up spending much more time on remodeling.
Advantages and disadvantages of each method
The advantages of block technologies are the possibility of preliminary preparation of blocks and rapid construction of walls .
However, there is a need to store a large volume of finished material in a dry room - this is a serious drawback.
The advantage of frame construction is that the strength of the walls does not depend on the parameters of the adobe mixture, which means that it can be made as light as possible, which will allow you to do without insulation.
However, higher construction costs can be considered a disadvantage.
For adobe technologies, it is not necessary to store finished blocks for a long time, but this is the only plus; there are many more minuses :
- the construction of walls requires much more heavy manual labor, which cannot be mechanized;
- a wall gains strength much more slowly than one made from blocks, so building a house takes much longer.
Decorative coating with adobe effect
For interior use, wall preparation must be carried out in accordance with SNiP for preparing walls for painting. Minor defects and scratches are allowed. We draw your attention to the fact that the pronounced curvature of the walls and frequent deep defects will have a significant impact on the consumption of decorative material in a larger direction.
First, you need to saturate the walls with a special deep penetration impregnating primer PRIMER NORMAL. Before use, the impregnation should be diluted with plain water in a ratio of 1:8. Impregnation is applied using a regular paint roller. Drying time: 2-4 hours.
To create this effect, ROCCIA material should be applied in 2 layers: 1 layer (1 mm thick), covering evenly the entire surface and leaving obvious traces of the track from the working area of the Venetian trowel. 2nd layer with island broaches, creating obvious sagging in the form of unevenness and scratches. Drying time of the decorative coating: 6-8 hours, including between layers. ROCCIA decorative plaster has excellent thixotropy, so the material retains its paste-like state as long as you work with it. Therefore, if at any stage you are not satisfied with the result, you can repeat the procedure again.
To proceed to the next stage of decoration, the decorated walls must dry completely. Complete drying time: 24 hours.
24 hours after applying ROCCIA decorative plaster, remove obvious defects from the surface, if any, using K1500 sandpaper. After sanding, it is necessary to remove the resulting dust from the surface using a brush or a damp cloth.
The last stage of creating a decorative effect is the application of a special glaze decorative coating METALLINE. Before application, the material should be diluted with water by 20-30%. This will prevent rapid drying of the material during application and control the intensity of the pearl. METALLINE decorative paint should be applied with a sponge, lightly touching the tops of the texture. This way the paint will only be applied to the surface of the relief.
appraiser services for apartment flooding
Time for complete drying of the decorative coating: 24 hours.
For more detailed advice or an application master class, we recommend contacting our technical specialists or using the services of our salons.
Please note that painted walls must sit for at least 24 days before their initial cleaning.
We insulate from the outside
External insulation
Any surface requires external cladding. Wind and precipitation gradually destroy any material, negatively affecting its heat and sound insulation qualities .
Additionally, after prolonged exposure, it can cause the wall to collapse and require costly restoration.
- An adhesive layer is applied to the surface, allowing the thermal insulation materials to be secured.
- Foam-based slabs are attached to this layer using dowels.
- A painting mesh is installed on top of the foam, and two layers of putty are applied.
- When insulating and repairing external walls, the last step is to apply a decorative protective layer of mineral plasters or silicate facade paints.
Features of plastering adobe walls
The most important feature in this matter is that the material for finishing the walls from adobe is under our feet and costs almost nothing. After all, this requires clay, sand, water, common sawdust and, in some cases, a little cement. The technology of applying plaster itself takes place in two stages: the first layer (rough) and the second - decorative, that is, finishing.
First layer
To apply a rough layer you will need clay, sand, sawdust and water in appropriate proportions, which are best determined experimentally as they did in the old days. The clay, of course, must be clean, the sand (not river sand) must be sifted, and the sawdust must be washed and dried so that it does not mold or form a fungus. In addition, the sawdust should be left for about a year until it dries completely under natural conditions.
Before final preparation of the mixture for plaster, you must first mix the sand with sawdust, and then add clay and water. The quality of the batch can be determined as follows. Roll the mixture into a ball the size of a chicken egg and press it lightly, giving it the shape of a flat cake. If the “cake” does not crack at the edges, then the mixture is sufficiently plastic and suitable for work. Otherwise, you need to select other proportions through experiment.
First layer of plaster
Having figured out the proportions, you can proceed directly to the plastering process. To do this, you will need a flat board with a handle, onto which a high-quality mixture is applied in a heap and from bottom to top, swaying from side to side, apply putty to the surface of the adobe. All these actions need to be periodically monitored by level.
The layer of the applied mixture with more or less even walls can be 1 cm, but if the walls have differences, this thickness can be increased to 3 cm, but then the layer will take longer to dry. The work must be done as quickly as possible so that the putty does not harden, and if this happens, its plasticity can be restored by adding water.
The rough layer must dry well and for this to happen, plastering work must begin in early summer. And then it will take 1 - 2 months, and if the work is done in cold weather, then it may take 3 - 4 months and still the result will be doubtful.
Finishing layer
It's hard to believe, but this is a house made of adobe
After the rough layer has completely dried, we proceed to finishing the surface. In this case, grouting is done only with a clay-sand mixture without adding sawdust. However, for a better binder, cement is added to the solution, which in the end will look like one part clay, one part cement and three parts sand (1: 1: 3). Mixing should be done like this: first mix sand with cement, then add clay and finally mix it all with water, which needs to be added gradually. The consistency of the finishing mixture should be liquid so that it spreads evenly over the previous layer.
As in the first case, the finishing layer must dry well in its natural environment without accelerating the process using a hair dryer or anything else, as this can lead to the formation of cracks.
Finally, you can whitewash your house, as they used to do in the south of Russia, but that’s another story.
Algorithm of actions
The construction of a house from adobe follows the same algorithm as from any other material , that is:
- determining the size and shape of the future structure;
- drafting;
- calculation of the quantity of materials, their cost, as well as additional costs;
- foundation preparation;
- purchasing material;
- erection of walls;
- roofing installations;
- interior and exterior decoration;
- connection of communications.
Determination of sizes and shapes
At this stage, you need to determine the optimal size and shape of the house , taking into account the following factors :
- soil bearing capacity;
- maximum allowable construction costs;
- type of technology;
- bearing capacity of blocks;
- permissible level of heat loss;
- wind load on the roof.
It is quite difficult to take into account all these factors, especially when building a large house, so most houses made of such light material as adobe are relatively small and one-story, and located so that the roof slope is always directed towards the prevailing winds .
In addition, keep in mind that the greater the width of any of the windows, the more difficult it is to form an opening for it, because the length of the blocks is short, which means you will have to install a wooden or concrete lintel.
Drafting
It is advisable to involve an experienced craftsman
in this work , otherwise even a small mistake made at the design stage will seriously complicate the construction of the house.
In addition, at the design stage, the optimal type and configuration of the foundation is determined, and the technology for constructing walls is selected.
Having chosen the technology, the amount of material is determined taking into account the permissible level of heat loss. In houses without a wooden frame, it is sometimes necessary to build 2 walls - load-bearing and insulating, which is also calculated at the design stage.
Foundation preparation
In order to determine the parameters of the optimal foundation and not overpay, it is necessary to conduct a soil study to determine its bearing capacity and freezing depth. Without taking these factors into account, it is impossible to build a reliable foundation that is guaranteed to hold the walls for at least 50 years.
The optimal type of foundation for an adobe house is a pile-strip foundation, but if you plan to make adobe floors in the house, then it is advisable to pour a concrete slab on top of the foundation.
Purchasing material
The easiest way is to dig up clay in your own garden and buy straw from nearby farmers. After purchasing the materials and making the blocks, they will have to be stored either under a canopy or in a well-ventilated area. If you plan to build an adobe house, then clay and straw must be stored in the same conditions as adobe.
Store boards for constructing the frame in the same conditions. If they are protected from sunlight and precipitation, then they can lie in a stack with spacers for 2–3 years without loss of strength . However, it is better to buy them before starting construction, because the fresher the wood, the stronger and more resistant to diseases or pests it is.
Walling
Since there are many types of frames, and this topic does not relate to straw recycling, we will not consider it in detail, we will limit ourselves to general information .
The main requirement for the frame, in addition to sufficient rigidity and strength, is the same distance between the vertical posts, which was equal to the length of one adobe block, and when using the adobe method it was the same and amounted to 40–60 cm.
Place spacers and stiffeners so that they do not interfere with the laying of blocks or mixture. Before assembling the frame, protect all elements of its structure from rotting and other damage using special preparations.
Clay technology
To build a wall, you will need adobe, the thickness of which is comparable to slightly damp cottage cheese, that is, similar to a mixture of straw and damp earth.
A prerequisite for obtaining strong walls is their reinforcement with steel or any other reinforcement .
Carry out reinforcement vertically and horizontally, apply vertical reinforcement at corners and in increments of 2–3 meters, lay horizontal reinforcement in increments of 1–1.5 m.
Be sure to lay waterproofing between the foundation and the lower (basement) row. Do not make the formwork too high at once, otherwise it will be difficult to fill and compact the lower rows. Strengthen the formwork carefully, otherwise it may be pushed through when compacting the mixture.
After installing the frame and formwork, fill the wall as follows::
- Place the prepared mixture into the formwork along the entire perimeter of the wall, creating a layer 15–20 cm thick;
- when all the formwork is filled, take a suitable-sized beam or log weighing 10–20 kg and, lifting it half a meter, beat the mixture with force so that it fills the space of the formwork as much as possible and compacts it;
- with each blow, move 1–5 cm, the smaller the shift, the better the compaction will be, if the width of the wall is noticeably larger than the diameter of the tamper, then first move it across the wall and only when you reach the edge, move a little further;
- walk this improvised tamper along all external and internal walls 3-4 times;
- lay the next layer of the mixture and compact it in the same way;
- when 5–10 cm remains to the top of the formwork, increase it by another 1–2 rows;
- Reinforce the openings above the windows with a wooden beam or board of sufficient thickness to withstand the impacts of the rammer;
- Be sure to install a window frame in window or door openings;
- to compact the material inside the vertical reinforcement, hit it close to the reinforcement on both sides;
- Having laid 5–7 rows, lay horizontal reinforcement;
- do not start laying the next row if there is at least one unfilled or uncompacted space in the previous row;
- attach the Mauerlat to the frame boards, but if you use frameless technology, then embed wire in the last 3 rows to fix the Mauerlat in increments of 50–100 cm;
- do not attach the Mauerlat to the top row of adobe with anchors or any other devices, use only embedded wire;
- if winds often blow in your region with speeds exceeding 30 km/h, then pour a concrete belt over the last row or make a mauerlat from boards 50–100 mm thick, laid one on top of the other so that its total thickness is 150–200 mm;
- After 1–2 weeks, remove the formwork, after 1–3 months, attach the mauerlat, and also insert windows and doors.
Block method
Block masonry differs from ordinary brick masonry only in the mortar used; a mixture of clay and sand is well suited . If a house is built using frameless technology, then the blocks are laid in rows, and every 4–6 rows a reinforcing belt is created, which will increase the strength of the wall.
Fiberglass or carbon fiber reinforcement is best suited for reinforcement, because they are less susceptible to high humidity. The optimal joint size is 1–2 cm, the thickness of the mortar is the same as when working with brick.
It is not advisable to lay more than five rows in a day, because in order for the masonry mortar to gain sufficient strength, it needs to lose a certain amount of moisture.
If frame walls are filled with blocks, then reinforcement is not required, because the strength of the supporting structure depends on the frame. Clay-sand mortar is also used for masonry and no more than five rows of heavy and eight rows of light adobe are laid per day.
Despite the fact that windows and doors are inserted into openings delimited by a frame, there will not be an extra gap, because the moisture shrinkage and swelling of such a wall, although less than that of a wall made of timber, is quite significant. Without frames, the windows and doors of such a house will be much more difficult to insulate, and cracks may appear in autumn and winter.
Turbeam technology
Usually this technology is used only for the construction of various utility rooms, for which it is a pity to waste normal materials. Therefore, 10–15 cm thick are used as vertical posts
When the frame is ready, mix an adobe mixture, the same as for making blocks, but with an increased content of manure or droppings, then coat the frame on both sides in several layers with this mixture.
Exterior decoration
Adobe has very high hygroscopicity, so the exterior finishing should protect it from precipitation, but not interfere with the movement of water vapor.
The following types of exterior finishing are usually used::
- plaster;
- installation of a ventilated facade;
- brick lining.
Plaster
For plastering, clay and lime based solutions are used, which protect the wall well, but require large roof overhangs .
If it is not possible to make huge overhangs, then cement is added to the solution, which effectively holds the plaster even under the influence of precipitation, preventing it from getting wet and sliding.
To ensure that the plaster holds well, attach a reinforcing mesh to the wall, made of any suitable material. This can be a bed or fence mesh made of metal or plastic, but in villages shingles are popular - narrow wooden slats 2–4 mm thick nailed to the wall crosswise.
After installing the reinforcing mesh, it is advisable to install beacons , which will help make the wall surface smooth, however, this operation is not necessary for sheds and other utility rooms.
Place the beacons vertically and diagonally, as for ordinary plastering or pouring floors, and after installing them, wet the wall and throw the prepared solution on it. When enough mortar has been poured onto the area, use a board or thick lath to level the surface of the wall, moving the board or lath along the markers.
In the same way, plaster the entire surface of the house, and also form slopes near windows and doors. The next day, rub the entire plastered surface with a wooden or foam float to hide all defects and whitewash all the walls.
The advantage of this type of finishing is its low cost, but it needs to be updated every few years, depending on the condition of the wall - if somewhere the plaster has peeled off or fallen off, clean the area down to the adobe and plaster it again.
Do not use cement-based solutions for plastering, because due to low vapor permeability there will always be dampness between the plaster and the wall, so the protective layer will quickly crumble.
with the following ratio of sand, lime and clay in mass parts are optimal
- For roughing 5:1:1.
- For finishing 1:1:0.
Installation of a ventilated facade
A ventilated façade is a waterproof rigid covering attached to the wall with a frame that provides good ventilation of the adobe surface. This coating is noticeably more expensive than plaster , but its service life, if properly manufactured, is tens of years.
The exception is finishing with boards, because due to moisture expansion and shrinkage, each fragment changes its size, so the paint does not adhere well to it. However, in the villages the houses are shalevanny, that is, covered with thin (10 mm) boards, and last for 50 years or more, maintaining a beautiful appearance. They are periodically tinted, so they always look like new.
Creating a wireframe
Here are the most popular materials for creating a frame:
- wooden beam;
- wooden slats;
- aluminum profile;
- steel profile.
Aluminum profiles are the most expensive, but the most durable, although even wooden beams, if properly processed and installed, last for many decades.
In addition, it is advisable to lay a vapor-permeable waterproofing film between the frame and the wall so that it allows steam to pass out , but protects the wall from condensation.
When creating a ventilated façade of frameless walls, the main problem is related to the insufficient strength of adobe or adobe walls, so the methods used to attach the frame to brick or wooden walls are not suitable here.
An anchor bolt or metal pin knocked into the wall will not provide a sufficiently reliable fixation, so over time the frame will begin to become loose.
To deal with this issue, do the following:
- Cut and label the vertical posts so that each one is tied to a specific location.
- Drill mounting holes in them for a plastic dowel in increments of 50–70 cm, so that each hole is located approximately in the center of the block (not relevant for adobe walls).
- Place the stand in its place and drill holes in the wall for the plastic dowel.
- Perform this operation for all racks.
- Treat the holes with a deep penetrating primer based on PVA.
- Let the holes dry for a day or two.
- Cover the walls of the house with a vapor-permeable waterproofing film and make holes in it for attaching the racks. It is convenient to attach the film using a construction stapler.
- Fill the holes of one post with Liquid Nails glue and immediately insert plastic dowels into them, then replace the post and secure with dowel nails.
- Leave the stand for a day. After a day, continue installing the ventilated façade.
If your house is built using frame technology, then attach the racks to the frame using self-tapping screws, covering the walls with vapor-permeable film.
Selection of cladding material
The most popular materials are the following:
- shalevka or lining;
- metal profile sheet;
- plastic boards or panels;
- waterproof plywood, OSB or chipboard.
Shalevka, that is, a sawn or planed board with a thickness of less than ten mm, is the cheapest finishing material, so it is still in demand among those who need their own housing, but are extremely limited in funds.
Shalevka easily tolerates sunlight and rain, however, due to significant changes in size during swelling and drying, the paint quickly peels off from it, so this finish must be painted every 2-3 years . The most effective protection is made from lining, that is, boards with a tongue-and-groove lock, because even during shrinkage, no gaps appear between adjacent boards.
A metal profile sheet does not need frequent painting, but it is noticeably more expensive than shalevka. Depending on the shape, it has to be mounted vertically or horizontally, so design the frame configuration taking this parameter into account. Attach it to the frame using screws for metal or wood, depending on the material of the frame, after drilling a hole for them with a drill of a smaller diameter.
The average service life of siding made from this material is 20 years, after which it gradually fades and rusts.
If the material is protected from corrosion, then paint it every 15–20 years to maintain the original color.
Plastic finishing boards and panels have a service life comparable to metal profile sheets, and the method of fastening depends on the type of material.
Due to the wide variety of types of this material, as well as other parameters, the price range is huge, so you can find both inexpensive finishing, which is only slightly more expensive than lining, and noticeably higher quality, and therefore expensive, material.
The rate of color loss under the influence of ultraviolet radiation depends on the quality of the product, but even the best materials fade after 10–15 years. Unlike metal, it is very difficult and expensive to reliably paint plastic trim because conventional paints do not adhere well to such surfaces.
Waterproof plywood, OSB and chipboard are used as a rough finish, that is, a base for laying more beautiful materials, such as ceramic tiles. In addition, due to their extremely low swelling and shrinkage values, they are ideal as a base for applying decorative plaster, such as “fur coat” or “bark beetle”.
These materials are attached to the frame using appropriate screws , and the cost of purchasing them depends on the thickness and material from which they are made. The cheapest products are made from coniferous wood, and the most expensive ones are made from hardwood, in addition, OSB and chipboard are noticeably cheaper than plywood.
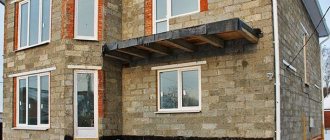
Brick lining
This is one of the most expensive, but at the same time the most popular modern methods of exterior finishing.
Regardless of the type of brick used (red or silicate), a foundation is made for it, and it is desirable that it be connected to the foundation of the adobe house.
The best solution would be to calculate a single foundation for adobe and brick walls at the design stage .
You can cover an adobe house with bricks after about a year, when it shrinks. It is necessary to leave a gap of 5 cm between the brick and adobe wall to ensure ventilation and removal of condensation.
Externally, such a house will be no different from other brick buildings , which is important for those who are embarrassed to live in an adobe house, despite all its advantages. A decorative wall is erected under the roof, leaving small holes at the top and bottom for ventilation.
Interior decoration
The most popular materials for interior decoration are:
- adobe;
- drywall.
In villages, when mixing adobe plaster, horse manure was added, which, after drying, lost its odor and also gained the ability to absorb volatile aromatic substances from the air.
Perhaps for this reason, in houses whose walls are plastered from the inside with adobe mortar with manure, there is always a pleasant smell of freshness.
Carry out plastering in the same way as outside, that is, filling the wall with reinforcing mesh and placing beacons. Remember that such a wall is not suitable for hanging any heavy objects on it, but if you need to hang a TV or mirror, use the same method that is used to attach the frame to adobe.
Drywall is fixed in two ways:
- screwed to the frame with self-tapping screws;
- glued to the wall.
If you decide to install drywall on the frame, then proceed as described above, however, in order to glue this material, you first need to level the surface.
You can use 2 methods for this:
- leveling plaster on beacons;
- gluing wooden guides into the wall.
Do the leveling plaster in the same way as described above, and to glue the drywall to the guides, do this :
- use only planed timber measuring from 30x30 (thickness and width in mm) to 50x50;
- cut the block into pieces of such length that they stand vertically between the floor and ceiling with a gap of 0.5–1 cm, the optimal step between the bars is 30–45 cm;
- if the distance from the floor to the ceiling around the perimeter of the room is not the same, then mark each block so that it corresponds to only one place;
- mark their position on the wall;
- using a wall chaser or other tool, hollow out (cut) a groove of the required depth and width so that each block fits into it with little effort;
- insert all the bars and make sure that they are all located at the same level and form a plane; if any element protrudes, deepen the groove; if the block sank too far, level it with wood chips;
- pull out all the bars along with the chips and put them together so that you know which chip belongs to which fragment and where it should be;
- treat the grooves with a deep-penetrating primer and leave to dry;
- treat each block with preparations that protect against rot and other damage when the wall and bars are dry;
- glue them into the wall according to the marks using liquid nails glue;
- after drying, check the plane again, if everything is fine, glue the gypsum board to these bars with “liquid nails”;
- After the glue has hardened, fill all joints.
Floors, ceilings and roofs
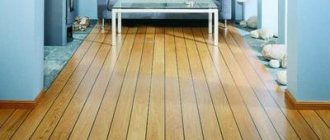
Any type of flooring is suitable for adobe houses, but the cheapest with good performance are wooden floors on joists with adobe sealing. You can insert the logs of these floors into holes in the foundation or plinth (if provided for by the project), or place them on a concrete slab, lifting them, if necessary, with brick tables.
Make the insulation from a mixture of straw and lime, and
the proportion of lime does not exceed 5%, this is :
- provides good thermal insulation;
- provides sufficient strength so that the insulation does not sag over time;
- prevents the appearance of rodents or various diseases to which straw is susceptible.
Lay a rough floor made of tongue-and-groove boards 35–50 mm thick over the joists, and as a finished floor, lay any covering you like that allows steam to pass through.
The same insulation is well suited for reducing heat loss from the ceiling and roof, which we described in detail here.
Plastering adobe walls
We bought a dacha, there is a small house made of adobe 4.5 m by 2.5 m, there is a foundation, the walls are a wooden frame + adobe 20-30 cm thick. The outside walls are lined with boards. I want to plaster and level the walls inside, I think with gypsum plaster on the mesh, is this possible?
Another question, it seems to me that one wall has sagged a little and tilted, but not much, that is, there is a 5 mm gap between the wall and the ceiling, what can you recommend? I’m thinking of either sealing it with mortar or blowing it with foam, thereby strengthening the wall. I'm thinking of covering the outside with siding.
Vova, Zaporozhye.
Hello, Vladimir from Zaporozhye!
Yes, you yourself judged everything correctly. You can do exactly this.
True, the walls are also plastered from the inside with adobe, that is, with the same composition as the main walls themselves. But recently, many people prefer not to mess with this and replace the adobe plaster with a more modern one, including gypsum, placing it on metal or plastic plaster mesh. Which are attached with self-tapping screws to adobe walls so that there is a small gap between the mesh and the wall surface. Then the mortar is applied with a trowel (trowel) and as a result a plaster mesh is obtained, lined with mortar on both sides.
But at the same time, it is very necessary that there is absolutely no dampness inside the room. Otherwise, the gypsum plaster will get wet and hang from the surface of the walls, until it completely slides off. Not later than this spring I observed something similar in one building. The spectacle is most terrible. Everything needs to be redone, with the gypsum plaster replaced, at least with ordinary sand-cement plaster.
If there is a small gap under the ceiling between it and the wall, then your recipe will also come in handy. You can use a cement solution, or you can use macroflex foam from a spray can. At the same time, do not forget that the hardened macroflex foam under the influence of ultraviolet radiation (sunlight) can decompose within one season. Therefore, it must be protected from direct sunlight.
It’s also a good idea to lay pieces of wire along the gap for reinforcement, or, in worst case scenarios, ordinary rods of wicker (waisting), it will be even stronger.
But be sure to check after a year to see if the gap appears again. Then it will be necessary to more thoroughly deal with the foundation and wall to strengthen them.
Siding will naturally transform the look of your house for the better. It will look much better than just covered with an old board.
So, as they say, the goals are clear, the tasks are defined, comrades to work!
Quartz Vinyl Flooring Sale!
Discounts! Free shipping! Installation! Wide choose. Eco-friendly materials. Comfortable showroom. Storage. Laying. Guarantee. Stock. LVT, SPC… +7
Other questions on the topic of adobe houses:
Quartz Vinyl Flooring Sale!
Discounts! Free shipping! Installation! Wide choose. Eco-friendly materials. Comfortable showroom. Storage. Laying. Guarantee. Stock. LVT, SPC… +7
Other questions on the topic of walls in various rooms:
Zavalinka
Base
Cover the house with bricks
Quartz Vinyl Flooring Sale!
Discounts! Free shipping! Installation! Wide choose. Eco-friendly materials. Comfortable showroom. Storage. Laying. Guarantee. Stock. LVT, SPC… +7
Questions about the walls
Quartz Vinyl Flooring Sale!
Discounts! Free shipping! Installation! Wide choose. Eco-friendly materials. Comfortable showroom. Storage. Laying. Guarantee. Stock. LVT, SPC… +7
All questions to Semenych about construction
Semenych (author of materials)
Our site is regularly updated with interesting and unique materials and articles on the topics of lumber, building materials and works, the author's opinion and knowledge of a real coven with more than 15 years of experience are provided. There is a section - funny stories of shabashniks. If you would like to receive information about this, subscribe to our website's newsletter. We guarantee that your address will not be shared with third parties.
how to dilute floor enamel
Apartment renovation in Moscow and Moscow region
We work with a guarantee! Wide range of repair work. Professional craftsmen. +7
| Country house | Bath |
| For the dacha | Tool |
| Materials | Tales |
| Foundation | Log houses |
| Roofs | Insulation |
| Walls | Siding |
| Floors | Cellars |
| Attics | Doors windows |
| Stairs | Extensions |
| Wells | Toilets |
| Balconies | Loggias |
| Condensate | Flooding |
| Fences | Kennels |
| Sidewalk | Birdhouse |
| Adobe | Carts |
| Garages | Barn |
| Greenhouses | Bath |
| Swing | Brazier |
| Shower |
| Horizontal bar |
Plastering on adobe, how to plaster adobe, technology
Plastering on adobe, how to plaster adobe, how to prepare an adobe wall for plastering.
Adobe, or as they are also called, adobe houses, are quite common in the southern latitudes of our country.
Since clay is a fairly cheap building material that lies right under your feet.
In addition, clay buildings are practical and convenient. Adobe buildings are the most environmentally friendly buildings in the world. Houses made of adobe retain heat well in the cold season. And on hot days, they delight the owners with coolness and freshness.
As a result of this, clay, as a basis for the construction of residential premises, was and remains a fairly common building material.
It is clear that this technology will not solve the housing problem on a planetary scale. However, it was and remains the basic basis of all modern technologies.
Because clay was the first building material that allowed humanity to build its own, comfortable housing.
The adobe houses basically consist of a single-layer, fairly wide wall. To improve technology and increase performance properties, the following can be added to adobe:
Any additive reduces the negative property of adobe - loss of geometry when the wall is waterlogged. Today we will look at issues related to the finishing of adobe buildings. Let's find out which plaster on adobe will help maintain the microclimate in the room and extend the life of the building.
Turnkey house price
When building an adobe house on a turnkey basis, that is, when all the work is performed by hired specialists, the main advantage of adobe housing construction is lost - low cost.
In the villages, construction was carried out “by the whole world,” so the main expenses were related to feeding the workers from the heart, because the clay and straw lay underfoot, they only needed to be lifted and delivered to the place.
In addition, when building a turnkey adobe house, the type of soil and terrain are of great importance, because the costs of constructing the foundation depend on them.
Theoretically, the difference in the cost of turnkey construction of brick and adobe houses lies in the price of the material; a cubic meter of adobe block will cost 2–4 thousand rubles excluding delivery, while the cost of good brick for the same volume will be 7–15 thousand rubles.
It should be taken into account that in terms of heat loss, a 40 cm thick adobe wall is comparable to a 1.5 m thick brick wall, or a 20 cm thick brick wall insulated with 5–10 cm thick polystyrene foam.
Reasons for the destruction of an adobe house
The first and main thing that should not be allowed, and which causes adobe houses to quickly collapse, is the presence of moisture.
In order to ensure the durability of an adobe house, it is necessary to protect it from moisture. But clay has an excellent capillary effect.
That is, a phenomenon in which liquid is able to circulate through capillaries in porous materials.
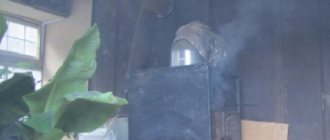
Human waste products contain large amounts of moisture at elevated temperatures.
We heat the room, but at the same time we cook food, heat water for our needs, wash ourselves, and so on.
Increased humidity and temperature increase the partial pressure inside the house. Naturally, moisture, in the form of steam, penetrates and is absorbed into the wall. A zone is formed in the wall where steam is converted into liquid.
Of course, some of the steam comes to the surface and evaporates. But, the bulk of the liquid remains inside the walls. This creates a zone of severe waterlogging.
On the one hand, this cycle is the basis for the formation of a positive microclimate in the premises of adobe houses.
On the other hand, an excess of moisture leads to dampness inside the room. And the adobe walls settle and begin to collapse, that is, they are about to break.
Protection methods
Adobe houses should be protected from excess moisture during the construction stage. First of all, take care of protecting the walls from groundwater, precipitation, and so on.
That is, an adobe house must be on a stone foundation, with a plinth, and with all the methods of modern waterproofing of the base of the building.
The next step is to protect the walls from precipitation using a large roof overhang. The ultimate goal is to minimize the contact of adobe walls with moisture outside the building.
Inside the building you should:
The ultimate goal is to maintain optimal, comfortable air humidity and prevent dampness in the room.
Finishing of adobe houses
In modern conditions, it is possible to increase the protection of adobe buildings without losing the environmental properties of the material. The simplest way to finish adobe buildings is plastering with clay mortar and whitewashing with quicklime.
This is what they did back in the days of our grandfathers. However, in the modern world, new technologies have appeared that make it possible to give the building a more modern look. In addition, annual whitewashing is not the best option for maintaining the building.
Exterior decoration of the house
Effective, vapor-permeable insulation materials are used for exterior finishing. This could be a modern, ventilated façade that will protect the outside walls from frost and excess moisture.
And at the same time, it will allow the walls to “breathe” and, thereby, remove excess moisture from the wall itself.
Ventilated facades include the external finishing of the house with clinker tiles or facing bricks. Also, adobe houses can be faced with plastic or wooden panels.
The finishing of the building is carried out with a mandatory gap, allowing air to circulate freely. This eliminates the possibility of condensation and moisture accumulating on walls and finishing surfaces.
Interior decoration of the house
It doesn’t matter what technology was used to build the adobe house:
The walls will always work the same way. If the ultimate goal of your construction or renovation is to preserve the natural regulation of the microclimate. For the micro cycle of adobe buildings to work.
That is, the interior decoration of the house should have the same properties as adobe.
Environmentally friendly interior finishes that do not disturb the indoor microclimate include:
Not recommended
For interior decoration, it is not recommended to cover adobe walls with plasterboard or clapboard. When interior walls are finished with plasterboard or clapboard, a gap is formed between the wall and the finish.
The air gap is additional thermal insulation. In this case, the condensation zone of the adobe wall will immediately move closer to the inner surface.
The air circulation in the room is noticeably disrupted and the humidity of the wall increases. At the same time, the walls warm up worse and almost never dry out.
Therefore, you cannot use interior wall finishing that would create a gap. It’s another matter when the lining or drywall is attached directly to the wall, without an air gap.
In this case, air circulation is not disturbed, the adobe will dry out normally. This will improve humidity regulation.
Of course, only in the case when the lining is not coated on the outside with varnish or other material that covers the capillaries.
However, those who are familiar with adobe houses know how difficult it is to obtain adobe walls with ideal geometry.
After all, for such finishing you need fairly smooth walls that allow you to apply the finishing material without gaps.
Pros and cons compared to other materials
Here are the advantages of an adobe house:
- extremely low construction costs;
- environmentally friendly, therefore does not poison residents and does not pollute the atmosphere;
- more resistant to open fire than wooden buildings;
- very low heat loss, so even without insulation it is warm in winter and cool in summer;
- all stages of construction can be carried out without the use of special equipment, using only hand tools and improvised means;
- Due to high vapor permeability, such a house always has a moderately dry climate.
Here are the disadvantages:
- ready-made adobe blocks are much more demanding in terms of storage conditions than brick, and are comparable in this parameter to wood;
- even heavy adobe does not have sufficient compressive strength for the construction of multi-story buildings, and blocks made of low-density material are suitable only for insulating or filling the walls of frame houses;
- adobe is very hygroscopic, and as it absorbs water it loses strength, so such houses must be carefully protected from precipitation;
- even blocks made of heavy adobe do not hold mortgages and other fasteners well, so it is difficult to hang something heavier than a TV on such a wall;
- if the blocks are made incorrectly (not enough sand or lime), then mice often live in them, which dig minks there and carry food there;
- a house can be built only in warm weather, but if even slight frosts are expected, all work must be stopped, otherwise the water inside the adobe or clay mortar will turn into ice and loosen the material, depriving it of its strength.