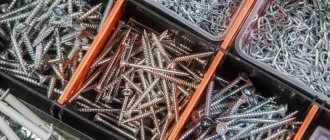
The quality of fasteners plays an important role in the creation of plasterboard structures. The correct choice of materials will not only make the structure durable, but also reduce costs. Particular attention should be paid to drywall screws. They are always needed, and in large quantities. Self-tapping screws have different lengths, shapes, diameters, thread pitches, heads, and are also made from different materials. You need to figure all this out before buying the first drywall and profile screws you come across.
Sizes and types
Self-tapping screws for drywall differ in type and size. Their standard diameter is:
- 3.5 mm;
- 3.8 mm;
- 4.2 mm;
- 4.8 mm.
The following lengths are possible:
- 9.5 mm;
- 14 mm;
- 25 mm;
- 35 mm;
- 45 mm;
- 55 mm;
- 75 mm;
It is very easy to get lost in this diversity, but everything is not as complicated as it seems. Standard self-tapping screws for drywall profiles have a diameter of 3.5 mm and their length is 25 or 35 mm, but sometimes 9.5 mm long screws are used (to fasten profiles together). The classic version is 3.5*25 mm . If the sheets are laid in two layers, then 35 mm long screws are needed.
After screwing in the self-tapping screw, it should protrude 1 cm from the back side. Based on this and the specific situation in which the repair is being carried out, you can guess for yourself which screws are needed for the profile and drywall.
How else do self-tapping screws differ from each other? They can have different threads, the pitch of which can be small or large. There are also differences in the material used. It can be high-carbon steel (steel contains 0.6-2% carbon), stainless steel, brass or alloy steel. The last option is the most desirable. The coating of the hardware is also important.
- It may be missing.
- Zinc is used.
- Phosphates are used. Phosphate coating (gives the fasteners a black color) has proven itself best.
- Oxide coating.
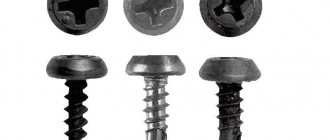
Self-tapping screws for fastening profiles under drywall can have a pointed or drill-shaped tip. The shape of the head is most often countersunk or semi-secret, but sometimes semicircular, hexagonal and horn shapes are in demand. When working with gypsum boards, in the vast majority of cases you need a countersunk head or, as it is also called, a conical head.
The slot design should be cross-shaped. There are also flat, Z-shaped, star-shaped and combined slots, but this is not necessary for working with plasterboard.
The right choice when purchasing
Self-tapping screw coating. In addition to the main material from which the screw is made, it is covered with a shell.
- Phosphated coating – black in color. Fasteners are used in rooms with high humidity.
- Oxidized coating – black color. A protective film is applied and used in a room with normal humidity levels.
- Galvanized coating – for indoor and outdoor use.
Self-tapping screws also differ in the shape of the head, thread, and tip.
Tip difference
It is correct to choose a regular cross-shaped PH spitz for the bat.
Bit PH2 cross-shaped
When choosing self-tapping screws for gypsum boards, you should pay attention to size and weight. All elements must have straight heads and cross-shaped recesses must have clear edges.
Wood or metal
When choosing hardware in a store, you will immediately find that they are divided into two large groups: for wood and for metal. Externally, they are very easily distinguished by the thread pitch. If you take two products in your hand, you will see that the one with fewer threads is intended for working with wood. There are no other characteristic differences between them.
Self-tapping screws for plasterboard for metal have a smaller thread pitch than their counterpart for wood
Which product to choose for repair? Self-tapping screws for wood and metal are also labeled as “for drywall,” so both options are suitable. The choice is obvious if self-tapping screws are required for attaching drywall to wood. However, more often you have to work with a metal profile, and screws for metal are much easier to screw into it, but they are also more expensive.
It is also worth paying attention to self-tapping screws with a 9.5 mm long metal drill. Such bugs are usually used when you need to fasten two profiles together. The presence of a drill makes it much easier and faster to pass through thickened profiles.
Self-tapping screws for gypsum boards are good because they do not require pre-drilling a hole. They drill through the drywall and profile themselves, cutting threads into them. During such drilling, the self-tapping screw pulls together all the parts through which it passes.
Principles for selecting hardware
To choose the right fasteners, you need to analyze their technical characteristics:
- The length of products for metal profiles is 1.1-20.0 cm. To install decorative elements, hardware with a longer length is used.
- If work is carried out on a wooden sheathing, you will need self-tapping screws with a rare thread pitch that do not destroy the structure of the wood.
- For metal profiles, state standards provide for products with fine threads and a wide head.
Material consumption
Having answered the question of how many screws per sheet of drywall are required when working with a wall or ceiling, you can immediately buy the required amount of fasteners. Thanks to correct calculations, there won’t be a lot of extra screws left and you won’t have to go for them twice.
It is impossible to say the exact consumption of self-tapping screws per 1 m2 of drywall. It's all about the distance between the fasteners. The metal frame to which the gypsum board is attached also plays an important role. After all, if there are a lot of jumpers in it, then more screws will be needed. On average, drywall is fastened with self-tapping screws in increments of 15-30 cm for the wall and ceiling. On the ceiling, the pitch is the same if lighter ceiling plasterboard is used.
So, how many screws do you need for a sheet of drywall on the wall and ceiling? On average, about 120 pieces, if we are talking about a standard sheet of 1.2x2.5 meters. From this we conclude that 40 screws are needed per 1 square meter. This is an average of the consumption of a step of 20 cm and the presence of jumpers with a step of 40 cm.
Everything is very individual and depends on the type of structure, so the consumption of screws per sheet of drywall may vary. In any case, you can buy the required quantity, because they are sold in 1000 pieces and 500 pieces, 250 pieces and 50 pieces. You don’t have to take prepackaged fasteners in a box, because you can buy them individually and even by weight.
Fastening drywall to the wall with self-tapping screws: a screwdriver or a screwdriver?
Having put the self-tapping screw on the nozzle, attach it to the point you marked. At first, if you are using a screwdriver, screw it in at maximum speed, but when it enters halfway into the sheet, you need to reduce the speed to a minimum. When working with a screwdriver, the main thing is not to put too much pressure on the handle of the tool and tighten it smoothly. The most difficult thing is to screw in the self-tapping screw correctly at the last stage, when there is very little left. The force of the screwdriver will be enough to tear the cardboard, and in this case the fasteners will not be able to ensure a rigid connection of the sheet to the frame.
Find quality products
What screws are used to secure drywall to the profile? High quality. We already know what characteristics self-tapping screws should have, but how do we know which fasteners are of high quality? The first thing you need to do is visually inspect the hardware. The fasteners must be completely identical. You shouldn’t be happy about the low price when you see that the screws have different thicknesses or uneven shapes.
Correct screw ratios regardless of its length
Ideal cross-shaped holes for the slot are another sign of product quality. Moreover, the hole for the slot should be exactly in the center of the screw. Before choosing self-tapping screws for drywall, you also need to inspect their color. We already mentioned that it should be black. However, it should be a uniform black color, which indicates the high quality of the phosphation or oxidation carried out. Here are the screws you need for drywall.
Marking on screws is another indicator of quality. But, as a rule, these are products of well-known brands, which means their cost will be higher.
When purchasing fasteners that are not packaged, you need to check the stated characteristics. There are cases (often in small towns) when the sizes of self-tapping screws sold do not correspond to the declared characteristics. It is ideal to take a caliper with you to the market to ensure the dimensions are correct. Sometimes it happens that self-tapping screws 3.5x35 mm after manual measurement for some reason turn out to be 3.3x32 mm. In hardware stores, the risk of stumbling upon such a “setup” tends to zero.
A little about splines
If there are different types of fasteners in use - for wood, metal, with or without a drill - I strongly recommend that when purchasing them, you pay attention to ensure that, if possible, their heads are, if not the same, then at least of a similar configuration. As they say, ugly, but uniform.
Another thing is the splines on these heads. If you initially miss this point, then during the work you will have to change the bit on the screwdriver and waste time. Why not take all the fasteners for a slot, say, Ph2 or Pz2? There is a very significant difference between them, and you will feel it if you try to spin them with the wrong size or standard bat.
Let's sum it up
You can answer the question of which screws to use to attach drywall to the profile as follows.
- This should be a self-tapping screw for metal , and in rare cases for wood (if wooden sheathing is used).
- The fastener must have a sharp tip so that it can easily enter the material.
- The presence of a conical head allows you to bury hardware into drywall so that it does not interfere with further finishing work.
- Self-tapping screws for attaching drywall to the profile must have a cross slot so that they can be easily screwed in.
- The ideal size is considered to be 3.5x25 mm , and there may also be cases when a 3.5x35 mm screw is required.
- Black phosphate-coated self-tapping screws are quite durable and do not corrode.
- It is better to choose alloy steel as a material , since brass fasteners are not strong enough.
- Wholesale is cheaper. Knowing the required number of screws per sheet of drywall, you can buy them all at once. The larger the package, the lower the price per piece .
These are the main points that need to be taken into account when using standard plasterboards. Now there should be no questions left about which screws to use for drywall.
Installation features
Recommendations for screwing self-tapping screws into drywall:
- The screw should only enter the slab at a right angle. If it goes to the side, then this needs to be corrected.
- A suitable bit is used for screwing in. It is advisable to choose a nozzle with a limiter.
When screwing in a self-tapping screw, it is advisable to use a screwdriver attachment that limits the immersion of the screw head into a sheet of drywall - The cap is immersed flush by 1 mm to eliminate problems in the future.
- The optimal step is not strictly regulated; the interval can be observed by eye.
When fixing the gypsum board on the base there should be no protrusions or obstacles; all screws are screwed in strictly perpendicular to the sheet and 1 mm below the level of the cardboard - It is better to make a distance from the edge of the sheet of 15 mm.
- When screwing into the guide, it is important to apply a little force, because the rib initially bends a little.
Choosing the right screws and following simple recommendations is a guarantee of high-quality results.
Tips for use
In order to work correctly with self-tapping seed screws, you should adhere to the following practical recommendations.
It is very convenient to tighten screws in gypsum boards using a reverse screwdriver. Installation of hardware is carried out using a special bit (Ph2), which controls the drilling depth. Thus, the head of the self-tapping screw, screwed all the way, is flush with the surface of the drywall. A good screwdriver and a suitable attachment are the key to quick and high-quality installation.
Butterfly fasteners are used when working with gypsum boards in cases where it is necessary to attach something quite heavy to the drywall. The device looks like a special plastic dowel with a self-tapping screw. To install it, you must first drill a hole in the sheet. When screwing the hardware, the internal mechanism folds and is pressed very tightly against the back wall of the drywall. There are several fundamental technical points:
- the hole for the “butterfly” is drilled with a diameter equal to the diameter of the dowel, and its depth should be 5 mm greater than the size of the screw;
- Next, the hole is cleaned of dust (using a construction vacuum cleaner), and the fastening can be installed.
The “butterfly” can withstand a load of 25 kilograms.
In order for the fastening of the gypsum board to the profile to be reliable and of high quality, the required number of “seeds” should be taken into account. So, if the frame is made of wood, then the step for installing hardware is 35 centimeters, and if it is made of metal, then from 30 to 60 centimeters.
A variety of fasteners allows you to select high-quality hardware for any type of work. When working with drywall, reliability and speed of installation are important, which is why self-tapping seed screws are so in demand. With their help, all work with gypsum boards goes much faster, and the result is always pleasing.
To see what the “Bedbugs” self-tapping screws look like, see the following video.
Is it possible to attach gypsum boards to the ceiling alone?
If attaching to the wall is not difficult even without help, then installing drywall on the ceiling on your own will be difficult. But it is quite doable.
Firstly. You can build special supports - one or two. It can be made in a T-shape from the same profile. The length of the “mop” should be slightly greater than the distance from the floor to the drywall level.
We lift the sheet, install it in the right place, fix it with a support and we can safely take the screwdriver and screws.
Secondly. You can use special clamps that can be used to grip the sheet from several sides. The method is less convenient, but more universal - clamps can be used to fix not only gypsum boards, but also profiles and other structures.
Metal sheathing - one or two layers?
In most cases, sheathing of the created wall sheathing with a thickness of one gypsum board is used. This is quite justified if the final cladding is ceramic tiles or other similar material that gives the wall additional strength. When there is wallpaper, paint or a thin layer of decorative plaster on the wall, accidental mechanical damage to the plasterboard sheathing is quite likely, which can lead to the reworking of the entire wall, including the dismantling of the gypsum board. If activity is expected in the room (gym, billiard room), it is better to sheathe the metal profile frame with two sheets of plasterboard. It is very difficult to break through a double layer of cladding even if desired.
But first, let's look at installing one (or the first) layer of drywall. Installation begins from the angle from which the pitch of the supporting profile was calculated. The first sheet is usually laid without the need for a side pattern - the gypsum board is adjusted only in height. After taking measurements, the excess is cut off with a construction knife - first, a shallow cut is made in the face cardboard, after which the gypsum core is broken and the back “paper” is cut off.
The sheet is made 1-1.5 cm shorter than the distance from floor to ceiling. Before attaching the drywall to the frame, place about 0.5 cm of supports under it, which are removed after screwing the plasterboard. This is how deformation gaps are formed between the finishing material and the building surfaces. The sheet is screwed with a screw pitch of about 20 cm to each profile. The heads of the screws should not be deeply recessed, nor should they be left protruding above the front surface. A correctly screwed self-tapping screw should be recessed into the cardboard by approximately 1.5 mm. A special bit with a travel limiter helps speed up the process of tightening screws and regulate the degree of their immersion in drywall.
The remaining sheets are installed in the same way, close to the previous ones. The last KGL on the wall is cut out from the side according to the distance to the adjacent wall. To screw the first layer of plasterboard sheets, self-tapping screws 25 mm long are used. If a second layer of drywall is intended, longer screws (45 mm) will be needed. There is nothing complicated in installing gypsum plasterboard with a second layer - everything is done exactly the same way, only the sheets are shifted by one profile so that the seams do not coincide.
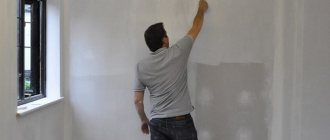
Finishing
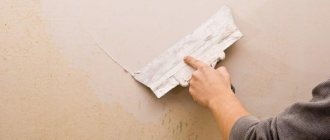
Before the final treatment, the plasterboard is primed again.
Primer of drywall before finishing
This composition is chosen for the finishing material:
- surfaces to be painted or colored plaster are primed with a tinted product corresponding to the type of paint or decorative composition;
- under the wallpaper primer - glue diluted in a certain proportion;
- When facing with slab materials, an adhesion-enhancing primer is needed.
The primer is applied 2 times, and the dry surface is treated with the final product.
Photo selection of wooden frame designs for attaching drywall
Single-level metal frame
An adhesive polyurethane foam sealing tape is placed on the grease-free sections of the profile. Together with the tape, they are mounted horizontally on the walls around the perimeter of the room. Other profiles are mounted on suspensions to the ceiling so as to form a horizontal frame.
GKL are mounted on the frame with self-tapping screws
There are many options for single-level ceilings, but when using any of them, technologies for connecting metal frame elements with each other and with plasterboard sheets are required.
The Knauf company proposed an original solution. To connect all the elements, one type of fastener is used - drywall screws, or, as they also say, drywall screws. The screws are durable and well sharpened. They are screwed into gypsum boards and into the metal of frame elements without preliminary preparation of holes.
Self-tapping screws with press washer
When attaching gypsum boards to profiles, the self-tapping screws for drywall should be twisted perpendicular to the surface of the gypsum boards. They should not break through the paper, and should not be buried more than 1 mm into the sheet.
To prevent over-drilling, it is recommended to use a bit with a stop.
The frame elements are fixed to the base structures with dowels and nails, and in some cases with anchors.
Dowel for quick installation with impact screw
When attaching the profile to the wall, a tape is placed under it - a sealant. Sometimes the entire structure for installing gypsum boards is called a “drywall hanger.”
Tips for using self-tapping screws
- Direct the fasteners into the plasterboard and frame at a right angle. This ensures strength and reduces the likelihood of cracks. If the fastener enters obliquely, then the hole becomes larger, which reduces the strength of the material.
- If the self-tapping screw goes in askew, then you should pull it out and screw it in again.
The important thing is that screwing into the same hole twice is prohibited. Step back at least 5 centimeters from the previous hole, this will ensure that the plasterboard does not collapse
Example of screw location
- Watch how far the screw goes. Professionals say that at least a third of the length should be in the frame. This guarantees good fixation.
- Once the fastener is in place, check the surface for smoothness. The fasteners should not protrude; the cap should be “recessed” to a depth of one millimeter. No more and no less; with a significant deviation from this parameter, a threat to the structure arises.
- When installing a stepped ceiling or partitions with a double layer of gypsum plasterboard, the sheets are laid overlapping. In this case, the edges of the two layers should not coincide, as this reduces the stability of the structure. A similar method is used in fences made of corrugated sheets.
- There should not be any foreign objects or materials between the gypsum board and the frame, since one of the disadvantages of this material is its ability to deform.
Video tutorial on proper fastening from a master:
If you follow the tips for using self-tapping screws, you will get optimal consumption of materials. It increases only due to damage to parts of the structure.
An example of the correct deepening of a self-tapping screw head in a gypsum board