Andrey
14516 0 2
Andrey December 12, 2016Specialization: facade finishing, interior finishing, construction of dachas, garages. Experience of an amateur gardener and gardener. We also have experience in repairing cars and motorcycles. Hobbies: playing the guitar and many other things that I don’t have time for :)
I prepared this article for home craftsmen who want not only to sheathe the attic with plasterboard, but to do it correctly. Next, I will talk in detail about how to finish the attic with plasterboard. We will also look at common beginner mistakes, which will allow you to avoid them.
Plasterboard-clad attic floor
Final finishing
To finalize the attic, the following operations should be performed:
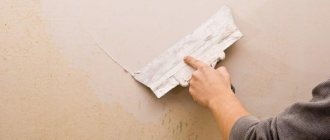
Treatment of joints with serpyanka
- we treat the joints with serpyanka;
- we putty the places where the screws are attached and the serpyanka;
- we rub all the irregularities with sandpaper;
- we prime the entire structure with a deep penetration solution;
- Apply the final layer of putty. It is applied very thinly.
After this, the final finish can be applied. Thanks to the properties of plasterboard, it can be painted, covered with wallpaper, decorated with decorative stucco, stylized as artificial stone, etc. Therefore, you should choose a finishing option only based on your own preferences. Following the instructions above, you can easily cover the attic floor of the house with your own hands. The main requirement is strict adherence to the stages of work and the use of high-quality materials. As a result, the attic will become a uniquely beautiful and warm room in your home.
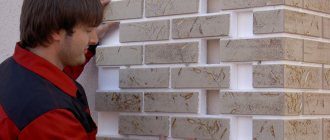
Installation on wooden sheathing
Sheathing is a frame structure made of wood, constructed from slats running across the rafters. Arrangement of slats in one plane using leveling pads.
Plasterboard slabs are installed vertically on horizontal beams.
The importance of this stage lies in the final leveling of the plane. Failure to carry out this process correctly will favor the appearance of cracks.
First, the seams are puttied. The top application of the connecting reinforcing tape is made with the seam passing relatively exactly to its middle.
After the first layer of putty has hardened, a thinner layer is re-applied to the seam with tape.
After it has completely dried, a third layer of putty is applied. The recesses from the screws are also sealed. At the end, all rough spots are sanded down.
Master class on the topic:
The resulting surface is primed and covered with wallpaper, a decorative plaster layer, or painted.
Share this article with your friends on social media. networks!
Areas of application of gypsum plasterboard and gypsum board
Despite the fact that GVL has higher strength characteristics. It cannot completely replace drywall. Simple material is used to level and create walls and partitions. The simplest partition includes a lattice frame made of vertical beams.
Installation of sheets on the floor
Use for partitions and walls
GCR wall cladding is often used, since this material is light in weight and does not create significant loads on the surface of the walls. Drywall is suitable for installing interior partitions and cladding frame buildings.
GVL for walls have high strength, which allows them to be used for cladding industrial premises. Reliable sheets are also relevant for installation in gyms. They cannot be used to process complex surfaces, but they have a long service life.
Installation method for partitions
The construction of gypsum plasterboard partitions is determined by the optimal weight of such material. You can create lightweight screens for zoning, which can be easily dismantled if necessary. This material can be used to decorate walls in residential areas: children’s rooms, bedrooms, living rooms and corridors. When performing renovations with a high level of humidity: kitchen, bathroom or veranda, GVL is recommended.
Partitions with insulation
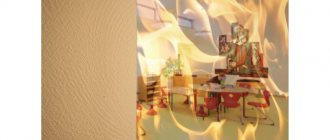
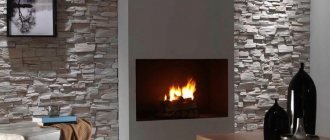
To decorate the walls of a boiler room, switchboard or other structures with rising temperatures, it is better to use fire-resistant gypsum board. This material is also suitable for decorative cladding of fireplaces and stoves. To line a smoke duct in an unheated attic, you can use GKLVO.
Features and secrets of installing gypsum boards on the wall can be seen in the following video:
Watch this playlist on YouTube
Application for ceiling
The technology for installing gypsum plasterboard on the ceiling differs little from installing gypsum fiber board sheets. But there are also some peculiarities. GVL slabs are heavy, so they are difficult to mount to the ceiling alone. Self-tapping screws are used as fastening elements.
When installing a gypsum fiber board ceiling, you need to cut the material. A hand-held circular saw or jigsaw is used. All slab joints must be treated with gypsum putty.
When installing a suspended ceiling from gypsum plasterboard, you can get the following advantages:
- the ability to create complex configurations;
- formation of beautiful arches;
- application of any facing materials.
When installing a suspended ceiling in a bathroom, you need to choose a material with water-repellent characteristics.
Interior use
The use of gypsum fiber on the floor is especially important. In this case, panels are used to withstand high humidity. Since the material has a minimal coefficient of expansion, the joining seams will remain sealed. Interior finishing using gypsum fiber boards allows you to reduce the period of finishing work. GVL sheets can be mounted on frames made of wood or metal. This results in a perfectly flat surface that is suitable for painting, wallpapering and tiling.
Drywall is used to create a convenient TV shelf and functional niches
A device made of gypsum plasterboard for window and door slopes is often used. Installation is carried out before finishing is done. Drywall can be glued to plaster. On door and window openings, the material must be glued over the entire surface, and not in fragments. The designs of arched openings made from gypsum plasterboard are wonderful and beautiful.
Using practical material you can create interesting elements for ceiling decoration
Attic design in Provence, loft, chalet and country style
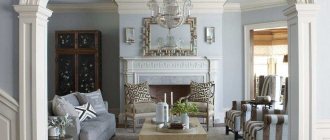
In what style is it now fashionable to decorate an attic? Let’s answer this: there are design trends that are most often followed when decorating attic rooms, and this is no coincidence. After all, what is truly good and beautiful never goes out of fashion. One of the most striking examples of relevance for all times is the interior of an attic in the Provence style. This style came to us, as the name suggests, from the south of France. At this moment, your imagination probably helpfully depicted blooming green meadows, vineyards and fragrant thickets of lavender. That’s right, it was the captivating southern flavor of the French province of Provence that gave the name to this design trend, popular all over the world.
This is interesting The Provence style is characterized by the use of artificially aged furniture, sun-bleached wood and the color scheme of the summer landscape: grassy green, lemon, sky blue, lavender and cornflower blue.
Guest room decorated in Provencal style using shades of lavender and ivory
By the way, a country-style attic is the same Provence, but in the American style. Here, rural romance is expressed in rough, unpainted wooden furniture, checkered tablecloths and bedspreads, and cowboy paraphernalia.
Option for decorating an attic in a traditional country style: solid wooden furniture, pottery, agricultural tools
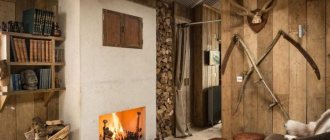
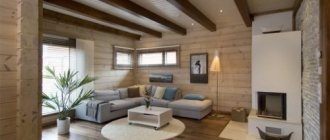
Another type of provincial style is the Alpine chalet. The word “chalet” itself means a mountain hut made of wood with a strongly protruding pediment of the second floor, due to which snow does not accumulate at the entrance. An indispensable attribute of a chalet-style attic are: a fireplace, wooden ceiling beams, leather-upholstered furniture, hunting souvenirs on the walls, many colorful pillows on the sofas, hand-embroidered tablecloths and napkins.
Attic of a wooden house in the style of an Alpine chalet: rafters and beams, textile lampshades, checkered sofa cushions
Let's move away from rural spaces and turn to the modern metropolis. Someone finds harsh city landscapes interesting and attractive, and strives to play with them when decorating an attic. Surely, many of you have heard the phrase “attic loft”, but not many understand the meaning.
A fashionable idea for arranging an attic in the loft style: finishing the walls with brick, an abundance of metal structures, industrial lamps
This is interesting. The loft style is otherwise called a “house turned inside out.” This is when the walls of a living space are finished like the facade of a building: brickwork, gray concrete. And all communications, ventilation ducts, pipes are exposed.
Choosing material
In order to properly veneer the ceiling in the country, it is important to choose the right plasterboard sheets
It is important that the material has increased resistance to moisture. He shouldn't be afraid of water
Therefore, it is important to choose moisture-resistant green plasterboard. Fire resistance properties are also important. Such slabs are reinforced with mesh and contain fiberglass additives. Such designs make it possible to keep slabs from destruction in a fire for several hours. The rafter system will not be damaged at all. The best choice is slabs that combine both fire-resistant and water-repellent properties.
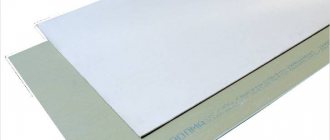
GKL KNAUF (KNAUF) plasterboard sheet 12.5 mm
Walls
Insulation
First of all, in the attic it is necessary to insulate the walls, which will help to avoid significant heat loss. It is best to purchase mineral wool as insulation.
First, a waterproofing layer is laid. The material is secured with an overlap using driven slats or a construction stapler.
The next stage is choosing the location of all the walls. Depending on this factor, waterproofing material can be laid between the rafters, leaving a small gap for air circulation.
It must be remembered that if there is a brick partition, the insulation should be fixed on both sides of the wall. On the inside, the material is laid together with a waterproofing layer, and on the outside, waterproofing and insulation are used, on top of which plasterboard or lining is mounted. In this case, the slopes do not need to be insulated. It is enough to attach a little waterproofing material to them to protect the room from excess moisture.
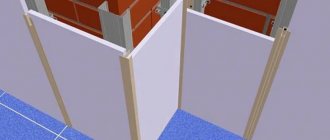
Preparation of partitions
To zone the attic, you should make several partitions.
- From the last beam on the ceiling to the floor itself, you need to install a board 10-15 cm wide and 2 cm thick.
- Then the horizontal bars are installed.
- The partition on the reverse side is sheathed with boards, between which it is necessary to leave a gap of 0.5 mm.
- A layer of hydro- and thermal insulation is fixed on the inside.
Only after completing these works can you begin finishing the attic with plasterboard.
To make interior partitions, it is necessary to prepare special wooden bases. The width of the partition should be from 10 to 15 cm. Some craftsmen prefer to use a channel. Such profiles are fixed to the wall on both sides with self-tapping screws. It is necessary to lower the channel inside the structure and then install these products horizontally. On one side, the partition is sheathed with finishing material. Thus, drywall is fastened with self-tapping screws to a metal structure, and the lining is secured with nails to horizontal bars. After this, you need to start finishing the second side.
Sheathing with plasterboard
Even a novice master can figure out how to cover an attic with plasterboard. So, first of all, it is necessary to sheathe the gables and slopes, and after that comes the turn of the ceiling.
- To cover the slopes on the rafters, it is necessary to secure the bars at a distance of 1 m.
- Then, in these gaps, the bars are installed horizontally.
- Next, the drywall is installed on the base.
- After this, all that remains is to seal the holes and cracks.
Cladding
There are many options for interior decoration of the attic, the photo of which confirms this. So, lining is especially often used for this purpose. It is carefully cut and attached to a wooden base using nails at the joints. After each sheet, you need to check the location of the material using a level. If this is not done, then distortion will be inevitable. Upon completion of the work, the lining must be varnished.
Plywood sheathing
If for some reason you don’t want to use drywall or lining, then you can buy regular plywood. In this case, the surface of the walls will be smooth, which means that both wallpaper and paint are ideal for finishing.
To finish the attic, plywood 1.25-1.52 cm wide, 1.52-2.5 m long, 3-5 mm thick is used. It is best to give preference to moisture-resistant material, since leaks are not excluded in the attic.
The plywood is mounted on the frame using nails or screws for fastening. In the central part, the material is placed at intervals of 30 cm. It is also necessary to leave gaps of 3 mm. They will not be needed if the plywood has tongue and groove edges. Finishing begins with slopes and gables, and then proceeds to covering the ceiling.
OSB sheathing
The advantage of OSB boards is the ability to attach the material directly to the rafters. In other words, the installation of an additional frame, which is necessary when finishing the attic with plasterboard, is not required in this case. Regular nails are suitable for fastening. Before starting work, you need to make sure that the surface is perfectly flat. For interior cladding, it is best to use polished products, because they are much easier to work with.
Thanks to the use of OSB boards, the walls of the attic can be finished with wallpaper or fabric, after priming the surface with a composition containing PVA glue and applying a layer of latex putty. Also, acrylic and oil paint can be applied to OSB boards with a spray or brush. It is better to use a water-based composition only for interior or exterior decoration, because it can cause the slab to bend.
Installation methods
When the room is prepared, you need to start finishing. The base for plasterboard slabs is usually rafters. But still, very often a frame is installed under the finishing material. Single-layer or two-layer sheathing is produced (for good reliability). The side planes are sheathed first, and the ceiling last.
Let's consider a variety of fastening methods:
- Fastening sheet-type material to rafter systems. Its thickness should be at least 25 mm; thinner sheets will be subject to damage and bending during natural vibrations of the roof. This method is suitable if you have a small attic. The distance between the rafter systems should be less than 75 cm. In this way, you will be able to save on material and labor costs - you will not have to build a sheathing. The disadvantage of this method is that there may be difficulties in leveling the cladding layer, because the rafter legs are not always placed very evenly.
- Wooden frame frame for installation - this frame consists of slats made of wood, secured with screws across the rafter systems. They must be located on the same level. If necessary, you can use leveling pads made of wood. The finishing material is installed vertically on horizontal frame bars. A heat insulator is placed under it.
- Plasterboard installation on a metal frame - this method is most often chosen. It is highly recommended for large rooms. This frame is good and durable.
The work is carried out according to the following scheme:
- Markings are made for the frame using a paint cord - its border is marked on the floor. Using a plumb line, the same contour is transferred to the ceiling surface. The lines where the frame elements will be located are marked on all surfaces;
- installation of guides - screws and dowels are used for this work. Each section of the profile is attached to the base in approximately three places. The distance between them is less than 1 m;
- hangers are attached - parts are installed along vertical lines. Likewise, the frame will be good and strong;
- racks are installed - they are placed according to the vertical markings clearly made before. To perform work on attaching racks to hangers and guides, screws are used.
Plasterboard fastening
We already have a base for installing finishing materials and a installed thermal insulator. Now let's start finishing. For good results, follow specific rules and recommendations:
- sheets both from one and from the walls should be at a distance of approximately 5 mm. These slots are needed to protect the structure from flaws during the expansion of the material;
- we combine sheets of drywall with a distance of 15 - 25 cm. Make sure that the self-drilling screw enters the surface only perpendicularly. Its cap should go a couple of millimeters into the surface of the sheet;
- Have a sharp knife handy as you will need to cut some drywall sheets.
Processing of joints
During the final cladding step, it is especially important to ensure perfect surface leveling. Take this process seriously
After all, if it is done poorly, then over a period of time cracks will appear in the connecting places of the sheets.
Putty the joints - place a reinforced connecting tape on top, try to ensure that the joint runs right along the middle of it. When the main layer has hardened, apply the putty again in a thin layer to the seam with the tape.
After it has completely dried, apply a third layer of putty. Also fill in the recesses where the screws were attached. When the putty has dried, plaster over any uneven areas in the final stage.
You have completed the entire range of work on finishing the attic with plaster. Now you can begin the primer mixture and desired finish. Wallpaper, paint of various colors, and structural plaster will look ideal on a smooth ceiling and walls. In the attic you will create cozy conditions for permanent living.
Choosing insulation for floors and ceilings
An important point when decorating an attic is the installation of high-quality thermal insulation, on which the temperature and humidity will depend. Today, the construction market is represented by a chic assortment of modern materials with which you can quickly insulate the attic floor.
Styrofoam
It is considered an ideal insulation material, which is of high quality and low cost. The only disadvantage of polystyrene foam is its structure, which does not allow steam to pass through, so dampness can accumulate in the room (additional ventilation will need to be installed).
The material is applied by spraying, it holds heat well, but the application process is complex.
Mineral wool
It has unique properties due to which raw materials can accumulate moisture. Therefore, it is suitable for finishing the attic provided that a vapor barrier is installed.
Ecowool
Special equipment is required to apply this material. To ensure high-quality insulation, ecowool must be laid correctly, on a previously prepared surface.
Other
In addition, many craftsmen use materials consisting of layers of foil as thermal insulation. To increase their efficiency, it is necessary to install them in combination with other heat-saving insulation materials.
conclusions
So, building your own ceilings from plasterboard sheets is not so difficult. The main component of successful completion of the work is the accuracy of markings, a precise understanding of how to mount the structure and accuracy in work.
A truly practical and reliable plasterboard ceiling in the attic can only be achieved if a full-fledged metal frame is installed. The sheathing is arranged in the same way as it would happen in an ordinary room with smooth walls and ceilings. To secure sheets of plasterboard to the surface of the attic ceiling, you need to assemble a frame - this is a traditional solution.
The smaller the attic area, the more justified the solution will be to install gypsum boards on a wooden frame made of rafters of thin bars fixed on beams. to screw the top screw into the ceiling profile. You can't get to it from above with a screwdriver, this is the easiest way I've come up with. Next, at the ridge, two hangers are attached to each pediment. They must be on the same line (strictly parallel to the central axis of the attic).
For this I also used a laser plane builder. I pulled a thread between them and screwed on the intermediate hangers along the thread:
Insulation of the room
Before starting installation work, it is necessary to insulate the floor. The attic is a room under a roof, so it can be much colder than the rest of the house, especially in winter. Therefore, before covering with plasterboard sheets, the attic is insulated. Various materials can be used as insulation:
Foam plastic, cotton wool, film
- Styrofoam. It comes in different thicknesses: 20, 30, 40, 50 and 100 mm. The thickness of the foam sheets should be selected based on the temperature conditions of the region of residence, the ventilation of the walls and roof. Their installation is very easy, so you can handle the insulation quickly. We seal the gaps between the plates with polyurethane foam;
- mineral wool. It is also very often used for insulating attics. But it has certain disadvantages, among which carcinogenicity occupies a significant place. The dust that is generated during insulation is harmful to human health. Therefore, when working with mineral wool, you must adhere to safety measures. The thickness of mineral wool can be from 20 to 200 mm;
- vapor-permeable film. It should be used if there is damage to the roof or walls. You need to attach it in such a way that the rough side of the film faces you. This film simply needs to be stretched between the rafters and secured with a stapler. For stronger fixation, thin wooden beams should be used, which are nailed along the rafters.
It should be noted that foam plastic and mineral wool can also be used at the stage of installing the frame for plasterboard slabs
In such a situation, they are inserted into the frame and then covered with sheets. Note! During insulation, pay special attention to windows and doors, since this is where drafts most often occur due to poor-quality insulation. In any situation, it is necessary that there are no gaps in the insulation. To seal the gaps remaining after insulation, you need to use polyurethane foam (when insulating with foam plastic) or leftover insulation (when insulating with mineral wool)
After installing it, it is recommended to stretch a vapor-permeable film over the insulation (with the rough side inward to move moisture towards the street). We fix the film using a stapler. You can also fix this film with your own hands after finishing the installation of the frame, before attaching the plasterboard boards.
Finishing the attic floor with your own hands - the main stages
Before interior finishing begins, certain preparations of the room are carried out.
Particular attention is paid to the construction of the waterproofing layer and the performance of thermal insulation work. If the room is already in use, the order of work will depend on the previously completed insulation
We invite you to watch a master class with photos of finishing the attic of a wooden house inside, which includes several stages.
You should prepare for the start of work
Preparing the premises
To make the room functional, you need to figure out when it is advisable to arrange an attic in a wooden house. Photos of completed projects indicate that preference is given to buildings with a sloping roof: one slope is left flat, the second is made steep.
The need to perform thermal insulation work is determined. If the house was not insulated from the outside during the construction stage, the insulation is installed from the inside into the roof and walls.
You should prepare for finishing work
Frame installation
The finishing of the attic begins with the installation of the frame. Depending on the weight of the materials used, preference may be given to a wooden or metal frame. To work you will need:
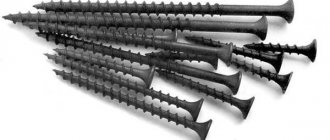
- screwdriver;
- self-tapping screws;
- roulette;
- pendants.
When installing a metal frame, you need to prepare a grinder and a knife. After marking and cutting the structural elements to size, guides are attached along the entire perimeter. Vertical profiles are attached every 0.6 m using self-tapping screws.
Metal structure can withstand heavy loads
Wooden beams are thoroughly dried before installation. Their quality is checked: there should be no blackness, blueness or traces of mold on the surface. A special composition is applied that slows down the decay process. Wooden beams are being installed. Self-tapping screws are used to fasten the elements.
Wooden frame elements require special processing
Insulation and waterproofing
Various materials can be used as heat insulators for residential premises. When doing DIY work, mineral wool is very popular. If the waterproofing layer has already been laid at the stage of installing the roof, insulation is performed in the following sequence:
| Photo | Description of work |
| We prepare a sufficient amount of mineral wool of the required thickness, depending on the location of the house with an attic. | |
| We determine the distance between the elements of the rafter system. | |
| We cut the insulation to size. | |
| To form an even cutting line, you should use a template, which can be a board or plywood of a suitable shape and size. | |
| Stepping back 5 cm from the edge, we mark for the T-shaped fasteners under the metal guides. | |
| Mark the attachment points of the T-shaped fasteners. They should be located every 40 cm. | |
| We fasten the T-shaped guides, carefully controlling their spatial position. | |
| We install the metal profile, check the quality of its fastening and then remove it. | |
| We lay mineral wool between the beams. There should be a gap between the roof and the insulation layer to ensure natural ventilation. | |
| To improve the quality of thermal insulation, we place mineral wool of a smaller thickness on top of a thick layer of insulation. | |
| We install the metal guides in place. | |
| We attach double-sided tape to each metal guide. | |
| We cut out the vapor barrier material that will be attached to the metal profile using a double-sided layer. | |
| Remove the protective layer from the tape. | |
| We distribute the material evenly over the entire surface of the roof, securing it with tape. | |
| We additionally glue a layer of tape on top, rolling it out and pressing it with a roller. | |
| At the junction of the slope and the wall, we fix the material with staples. | |
| We insulate walls and gables in the same way. |
Related article:
Finishing material
The sequence of work when finishing the attic floor depends on the type of finishing material. Let's consider the order of clapboard cladding:
| Photo | Description of work |
| We fasten the ventilation slats. | |
| Using a jigsaw, we cut the lining to size. | |
| We fix the board using hidden fasteners. | |
| We install and fix the remaining boards in the same way. |
If you decide to give preference to a block house, after pre-treating the boards with an antiseptic, they are attached to wooden beams with a thickness of at least 4 cm. The finished coating is primed and varnished.
Watch this video on YouTube
On a metal frame
Metal structures are durable and recommended for finishing work in large attics. Step-by-step instruction:
Before fastening, the frame boundaries are marked on the floor using a paint cord. A similar contour is transferred to the ceiling with a plumb line.
Lines on surfaces mark the locations of frame elements.
The guides are mounted with dowels and screws. A separate profile section is fixed to the base in at least 3 places in increments of up to 1 m.
The hangers securing the frame are mounted vertically.
Installation of racks in the guides is done relative to the vertical markings. The elements are attached to the guides and hangers with self-tapping screws.
Plasterboard boards are fastened with self-tapping screws at intervals of 25 cm.
If the height capacity of a larger amount of vertically located material is available, the fastening of its slabs is carried out offset to avoid long horizontal joints.
Selection of finishing materials
When the attic floor is reliably insulated, the question arises: how to decorate the attic from the inside? There are many materials for covering a room on the construction market - let’s look at the most popular ones.
Lining
Plastic lining is one of the most inexpensive and popular materials for interior cladding of buildings. It can also be used to decorate the attic. The material provides ample opportunities in implementing the design of the room, in choosing colors and patterns. Sheathing with plastic lamellas is done very quickly and does not require special installation skills. The disadvantages of plastic lining include its fragility - the material can crack from an impact.
Cladding the attic with clapboard (plastic)
Note: if you want to give the attic floor a special energy and comfort, use wooden lining to decorate it.
Advantages of natural wood lining: unique colors, natural texture, environmental friendliness. Decorating the attic walls with wood allows you to create a beautiful and “warm” room that is pleasant to be in.
Among the disadvantages of wood: poor resistance to moisture and temperature changes. Therefore, use wooden lining for cladding the attic only if you are sure that the room is reliably insulated and insulated.
Beautiful attic decoration with clapboard: photo example
Recommendation: when working with one or another cladding material, strictly adhere to its installation technology. The better the work is done, the longer the finish will last.
Blockhouse
A good idea is to cover the house with a block house. Such a mansion will resemble a fairy-tale mansion, because the material creates an imitation of timber. Externally, the cladding of a house with a blockhouse looks like a real log house. But this material has one advantage over natural wood - cracks do not form on such cladding over time. Blockhouse finishing is not afraid of moisture, and it does not require regular cosmetic repairs. The sloping shape of the blocks is already a decoration in itself, and the panels are tightly adjacent to each other.
The only drawback of a blockhouse is that such cladding “steals” several centimeters of attic space.
Elegant attic decoration with a blockhouse, photo
Plywood
If the question is how to sheathe the inside of the attic cheaply, then plywood is quite suitable for these purposes. As a rule, this material is used to level surfaces for finishing, but it can well serve as an independent cladding. Among the advantages of plywood are lightness, ease of installation, cost-effectiveness, and strength.
Attention: plywood can be used to finish an attic space only if the humidity level and temperature meet the standards established for residential buildings.
Covering walls and ceilings with plywood is an excellent basis for wallpaper and textile finishing. And if plywood is used as an independent finishing material, then in order to protect it and enhance the decorative effect, you can coat the material with varnish or paint.
Varnishing plywood sheathing will highlight the texture of the material
Drywall
Many owners of private houses use plasterboard to finish the attic floor. Among the advantages of covering with this material: its lightness, non-flammability, low cost. Using sheets of plasterboard, you can quickly level any surface, be it walls or ceilings. But, since there may be high humidity in the attic, it is better to use moisture-resistant material for its finishing.
An example of what multi-level structures can be built - finishing the attic with plasterboard, photo
Tip: Wires and various communications are often hidden behind plasterboard sheathing. But if the attic is located in a country house where you rarely visit, then it is better to lay the wires in special boxes. This way you can always get to them, and they won’t be damaged by rodents.
Plasterboard sheathing can be covered with wallpaper, putty, or decorated with ordinary or decorative plaster.
The illusion of floating in the clouds will be created by beautiful photo wallpapers - an option for finishing an attic, photo
Broken or slanted
First, let's look at the types of roofs. You need to know that the shape of the room determines how the room itself and its size will look.
Therefore, you need to start with the covering: either rebuild it, or adjust the internal structure to match the finished one. The roof on a building comes in various shapes - inclined or broken.
Sloping roof
broken roof
The latter is very convenient in that your attic structure will have vertical walls, and this usually does not cause much stress in the design. Another good thing is that the room is more than 5 meters wide, which means there is room to turn around.
And much less material is used for such a roof. And also simple calculations, simple installation work and ease of use. This explains the particular popularity of the broken structure.
CAREFULLY! The only problem is that the roof itself is expensive to manufacture and will require a little more effort to manufacture.
But as for the superstructure, its construction will take much less time.
You will have a ready-made box for your new room. It will only be enough to insulate it, cover it with finishing materials - and the room will be ready. At the same time, a mandatory condition for its equipment is that the width of the structure is at least 5 meters.
For an excellent result of your work at minimal cost, take on the construction of a gable roof for a house with a break in the middle. You will get a spacious room with four sides.
Finishing an attic with a sloping roof: photo below.
Photos of attic roofs of private houses inside
Finishing the attic roof
Flaws
Sawdust for production
Among the disadvantages of OSB boards, the main place is occupied by the possibility of the material releasing toxic substances. Formaldehyde and toxic resins can be released here. During the production of OSB boards, large sawdust is used, which are connected to each other with glue during the process. The result is a solid slab. It is the presence of glue in OSB that is the reason that such a board can be toxic and release dangerous compounds into the air.
The disadvantages of OSB include:
- low fire-resistant properties;
- low strength indicators. To increase it, two plates are installed;
- more difficult to install on walls. Installation is more labor-intensive compared to drywall;
- cutting creates a lot of construction waste;
- low vapor permeability properties.
This material is not very suitable for renovation work in the kitchen, bathroom and attic.
Decorative finishing
This is the final stage of work. The drywall prepared by us can be used before any type of finishing. It’s a good idea to make decorative molding, paneling with wood, artificial stone and wallpaper. There are many options, and you need to find out which finish will fit best on the surface. Depending on the finish, the material is selected taking into account the optimal weight and size.
Such construction work must be carried out with the highest possible quality, otherwise you will have to buy the material again. If you are not confident in your abilities, then seek the help of builders who will do the job conscientiously. Perhaps you want to save money and do everything yourself. Then read all the tips and recommendations again, and then start the painstaking work.
Finishing the attic with plasterboard helps to increase the usable area and hide defects in wall ceilings, creating a healthy microclimate.
This is a lightweight material that, with a minimum of labor costs, will not create a large load on the attic structure.
But finishing work with plasterboard sheets is carried out after thermal insulation of the room, since the material itself is not insulating.
Preparation
When using an attic space in the summer, preparation consists of removing the existing old coating from its surfaces and cleaning the wall and ceiling floors from dust and debris.
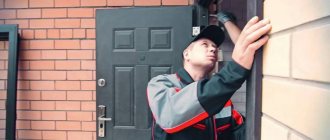
Finishing work does not begin without checking the condition of the roofing.
During the rainy season, weak spots in the roof will appear, and then its timely repair will guarantee the absence of leaks on the installed plasterboard sheets.
Beams and rafters are checked for strength, dryness, and the absence of traces of rot and mold.
For a newly constructed attic, finishing is delayed until the structure is completely dry, as this may affect the displacement and deformation of the drywall.
Next, the prepared attic begins to be finished with plasterboard, the basis for which can be rafters or an installed frame.
Fastening is done in 1 or 2 layers. Start with the side planes, leaving the ceiling trim for last.
Features of attic cladding
Sheathing the attic with plasterboard is done in one layer. Two layers of finishing are required in rare cases when there is a need to further increase the strength of the skin. At the same time, for the rough layer, you can choose materials that are not presentable in appearance, which allows you to save some money on the cladding. It should be understood that creating two layers of finishing is serious work that will take much more time.
The sheathing procedure itself is generally simple. It can be characterized by just two operations:
- Attaching a sheet of material to the sheathing.
- It is attached to the frame using self-tapping screws. The pitch between fasteners can be about 20 cm.
Video on the topic:
Now you know that finishing an attic with plasterboard is an activity accessible to everyone. There are no difficulties or pitfalls, so you can safely do the work yourself. If you follow all the instructions and recommendations, you will be able to make an attic from plasterboard in literally 1-2 days and start designing it. If desired, you can eliminate the need for decorative finishing, if this is not directly necessary for the purpose of organizing a living space.
Sheet filing
Filing plasterboard sheets
When assembling plasterboard ceilings, it is more convenient to carry out the installation with a partner, but if necessary, you can do it alone. In this case, it is necessary to prepare supports made of timber in the shape of the letter T; they will be used to hold the sheet while it is not yet attached to the hanger.
Here are the basic rules by which the process of installing sheets on a frame takes place:
- The sheets cannot be hemmed close to the wall; you need to leave a gap of 2-3 mm.
- The sheets are fastened in a staggered manner so that the joints do not coincide. To do this, a whole sheet is strengthened in the first row, and half a sheet in the second.
- Self-tapping screws are used for fastening; the spacing of fasteners is 20 cm.
- The self-tapping screw must be tightened so that its head is flush with the surface of the sheet. To do this, it is convenient to use a screwdriver with a fixed screwing depth.
More options?
In addition to dividing plasterboard sheets according to the location of their future installation, you should know that this material also differs in its basic properties. Thus, plasterboard, which is used to decorate walls in a wooden house, can be:
- traditional or standard. This is the most common gray material with basic characteristics. Only environmentally friendly additives are added to its composition. It is considered universal, as it is suitable for finishing walls in any room where there is normal humidity and there are no temperature changes;
- moisture resistant. This drywall is a special product, as it has increased resistance to the microclimate of the room, where there is high humidity and frequent temperature changes. It can be identified by the characteristic green color of the leaves. Ideal for installation in the bathroom, loggia, balcony or kitchen. In such premises, its service life will not decrease, and the repair itself, if installed correctly, will last more than 10 years;
GKL options All these three types of plasterboard sheets can be found manufactured by both Volma and Knauf. They also produce a fourth type of drywall - combined. This is the most expensive drywall, since its production uses both reinforcing and antifungal additives along with silicone. Therefore, the sheet will have two properties at once: fire and moisture resistance. The only difference between the manufacturers here is that the Volma combined sheets will cost slightly less than the Knauf company. As you can see, to decorate walls in a wooden house, you can use different versions of plasterboard sheets in different rooms. Only in this way can you make not only high-quality repairs, but also finishing that will serve faithfully for the entire period allotted for it.
Finishing technology
Finishing the attic floor with plasterboard, imitation timber, wood chip boards or PVC panels includes a number of stages and begins with drawing up a project for the reconstruction of the attic space. It is necessary to take measurements of the existing attic and draw sketches from them, from which the layout of the future attic will become clear. Here the location of the stairs, windows and partitions is determined if it is planned to separate several rooms from the attic volume. Next, they move on to drawing up a design project. When reconstructing “with your own hands”, you don’t have to go into excessive detail, but it is necessary to decide on the basic materials, their types and quantities. Based on the results, a list of materials to be purchased is compiled. At this stage, it would not be superfluous to think about possible replacements of the original sizes and sections of the molded timber required for constructing the attic frame with those currently available for sale. Stage 1 of preparation of materials ends with the purchase, delivery and storage. It may also include the treatment of timber with fire-bioprotective impregnations, performed twice with mandatory complete drying after each application.
Let's move on to stage 2 - preparing the attic and marking it. It is better to do this work together. It's faster that way. Based on the sketches, the installation locations of the main frame racks are determined. Their sizes are specified. An opening for the stairs is drawn on the attic floor.
Stage 3 - assembling the frame for the walls and ceiling will require the performer to have basic woodworking skills. The tools you will need are a screwdriver, a drill, a hacksaw, a hammer, a carpenter's hatchet, and chisels. Having a miter saw is helpful. The frame is assembled using nails and screws, using metal fasteners such as corners. The attic frame elements are connected to the roof frame. Thus, the roof rafter, being connected to the attic ceiling rafter, forms a truss, the load-bearing capacity of which is higher than the sum of the similar indicators of these rafters in an unconnected state. After installing the racks and rafters of the attic frame, they are connected to each other by crossbars - horizontal beams, as well as by jibs - beams running from rack to rack at an angle, forming stiffening elements - triangles - in the frame.
Stage 4 - frame sheathing includes insulation of the attic. The choice of insulation is a task whose solution is trivial, so we will focus on only two options: the traditional one - insulation with basalt insulation and the relatively innovative one - sprayed polyurethane foam. The first is budgetary - the work is done independently. The total thickness of insulation layers for central Russia is recommended to be at least 200 mm. Since the insulation is made up of rectangular slabs 50–100 mm thick, it is laid in 4–2 layers.
Insulation with sprayed polyurethane foam is more expensive than that discussed above. Performing it requires special equipment and skills. Therefore, you will have to invite professionals. But this method insulates the premises without leaving cold bridges. It is believed that 100 mm is sufficient for the Russian climate. When concluding a contract, the customer should request that closed-cell polyurethane foam be sprayed, since this insulates better.
Upon completion of laying the insulation into the walls and ceiling of the attic, we install the electrical wiring. We place the wires in pipes (metal or plastic) or in a plastic corrugation. The placement of lamps, switches and sockets is determined in advance
Stage 5 - finishing the gables. Even if skylights are installed in the roof, windows of a conventional design are placed in the gables. Often they repeat the shape of the pediment itself. The outer side of the gable wall around the window is finished by analogy with the wall of the first floor, or an original finish is invented. It all depends on the preferences of the home owner. Finishing the inside of the wall is a task solved by the designer in conjunction with finishing the remaining walls and ceiling of the attic.
Stage 6 - finishing with plasterboard. The inside of the attic walls and the ceiling are covered with sheet material, such as plasterboard. The technology for installing drywall is well known. Therefore, we will focus on the details:
- drywall will not crack if it is attached not to wooden parts, which will change dimensions over time, but to metal profiles specially designed for installation;
- Sound insulation will be better and the wall will be stronger if you install plasterboard sheets in 2 layers;
- In bathrooms and on the ceilings of living rooms, special moisture-resistant plasterboard is used.
Which finish to choose depending on the room
It is necessary to take into account the purpose of the room and its features. For example, for a bathroom or kitchen, choose ceiling cladding that can withstand moisture well. These include plastic panels, waterproof paint, stretch film (but it is better to place it away from the work surface so as not to touch it with a knife).
For a nursery, it is important that the materials are environmentally friendly and safe, but easy to clean. It is better to use wood, varnished or painted
To diversify the interior, you can choose two or three colors or add an image of your favorite character, animal, etc.
For the bedroom, choose calm colors that do not irritate or interfere with sleep. And the living room or billiard room can be decorated brighter and bolder.
Another important factor is the size of the room, including height. Often rooms in the attic are small. But this shortcoming is corrected by a skillful choice of finishes. Light colors, especially white and cool shades, push the boundaries of space. To raise the ceiling, lining, laminate or panels are laid vertically. And horizontal placement will expand the room.
Making a high-quality ceiling on the attic floor is more difficult than under a flat ceiling. But the efforts will not be in vain. The interior of a spacious cottage or a modest private house will become unique and reflect the individuality of the owners.
Finishing the attic with plasterboard
Most owners of private houses, as a rule, think about making the attic space located under the roof suitable for living, which will allow them to significantly expand the usable living area. As an option for a quick and not particularly costly solution to the problem, cladding the internal parts of the roof with some kind of cladding material can be considered, the choice of which is usually determined by the preferences of the contractor.
According to professionals, for these purposes it is most convenient to use plasterboard, which belongs to the category of fairly practical and relatively inexpensive building materials.