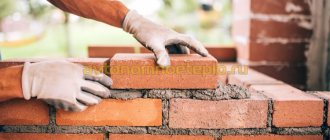
From our article you will learn how to make a mortar for laying a stove from ordinary clay. In addition, we will tell you what additives are needed to prepare a clay solution, as well as what proportions of ingredients should be used to mix it.
With the advent of cement and other ready-made mixtures in construction stores, people began to forget about such a simple, but very high-quality clay mortar. Although some 70 years ago it was clay that was considered the ideal option for preparing mortar for laying a stove.
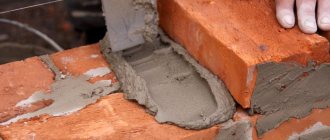
The high temperature turns the plastic clay mortar almost into stone, making it as durable as brick or concrete. True, in order for this to happen, the mixture for laying the stove must be prepared taking into account all the nuances. Our article will tell you how to do this correctly.
Composition of clay mortar: selection of components for the mixture
Ingredients for preparing clay mortar for laying a stove
Most novice builders make one serious mistake when preparing clay mortar. They use low-quality ingredients to prepare it. As a result, the mixture is unsuitable for use.
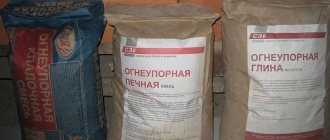
So, for example, to prepare a clay solution suitable for laying a firebox, it is necessary to use so-called fireclay sand. Thanks to it, the firebox will warm up faster and, most importantly, cool down longer.
Ingredients for preparing clay mortar for laying a stove:
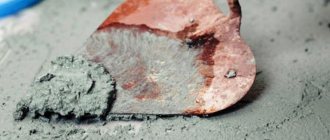
- Clay . If you think that you can use any clay to prepare a clay mixture, you are deeply mistaken. It is the selection of this component that must be given special attention. If you use lean or, as it is also called, sandy clay to prepare the solution, you will end up with a mixture that, after complete drying, will literally begin to crumble. This will be due to the fact that it contains more than 70% sand. That is why, to prepare a clay solution, you need to use clay of medium or maximum fat content. In this case, the amount of sand in the component will not exceed 12%.
- Sand. As mentioned above, it is also advisable to use special sand for preparing the solution. Yes, if you wish, you can use ordinary construction sand, but it is suitable for preparing the mortar that will be used to lay the stove above the firebox. For the firebox itself, you definitely need to find fireclay sand. It can be obtained by grinding refractory fireclay bricks or by completely dehydrating fatty clay. To do this, it will have to be calcined in the oven and then ground into sand.
- Water. This component must also be of the highest quality. Ideally, water should not be hard or contain any impurities. It is also not particularly advisable to use chlorinated tap water to prepare a clay solution. It can also significantly deteriorate the quality of the mixture for laying the stove. In view of this, if you do not have the opportunity to get high-quality water, then collect it in a clean container and let it settle, and only then use it for your needs.
Fireclay sand
Fireclay sand should have fractions of 0 15 - 5 mm. Fireclay crushed stone should have fractions of 5 - 20 mm.
Fireclay sand is also produced by crushing broken fireclay bricks.
Fireclay filler 50 - 60%; This is the so-called fireclay sand with a maximum grain size of up to 5 mm.
Portland cement concrete (per 1 m3 of concrete): Portland cement - 300 kg, chamotte crushed stone - 700 kg, chamotte sand - 700 - 500 kg, finely ground chamotte - 100 - 300 kg, Portland cement - 250 kg, chromite crushed stone - 1200 kg, chromite sand - 850 kg, finely ground chromite - 750 kg.
To repair the linings of trolleys, heat-resistant concrete on liquid glass with sodium fluoride of the following composition is used: liquid glass (specific gravity 1 38) 400 kg, sodium fluoride 50 kg, finely ground chamotte 500 kg, chamotte sand 500 kg and chamotte crushed stone 750 kg. Concrete hardens within 24 hours and does not require moisture.
Concrete on alumina cement (per 1 m3 of concrete): alumina cement - 300 kg, chromite crushed stone - 1200 kg, chromite sand - 1200 kg, alumina cement - 300 kg, chamotte crushed stone - 750 kg, chamotte sand - 750 kg.
Concrete on liquid glass (per 1 m3 of concrete): liquid glass - 300 - 350 kg, chromite crushed stone - 1300 kg, chromite sand - 800 kg, finely ground chromite - 650 kg, liquid glass - 300 - 350 kg, fireclay crushed stone - 750 kg , fireclay sand - 500 kg, finely ground fireclay - 500 kg, liquid glass - 360 kg, expanded clay - 640 kg, finely ground fireclay - 640 kg, liquid glass - 500 kg, expanded vermiculite - 300 kg, finely ground fireclay - 100 kg.
Heat-resistant concrete is prepared from soluble glass with a density of 1 38 - 1 40, sodium silicofluoride, fine and coarse refractory aggregate. Consumption of individual components per 1 m3 of concrete designed for service at temperatures up to 1100 C: soluble glass with a density of 1 38 350 - 400 kg, Na2SiFe 40 - 50 kg, finely ground fireclay 500 kg, fireclay sand 500 kg and crushed fireclay 750 kg. When used as a finely ground additive and crushed magnesite brick fillers, the resulting concrete can last up to 1400 C. Heating refractory concrete to 500 C does not reduce their strength; in the temperature range 600 - 900 C, the strength of most concrete decreases slightly and at higher temperatures increases and often exceeds the strength of the original concrete.
Heat-resistant concrete is prepared from soluble glass with a density of 1 38 - 1 40, sodium silicofluoride, fine and coarse refractory aggregate. Consumption of individual components per 1 m of concrete designed for service at temperatures up to 1100 C: soluble glass with a density of 1 38 350 - 400 kg, Na2SiF6 40 - 50 kg, finely ground fireclay 500 kg, fireclay sand 500 kg and crushed fireclay 750 kg. When used as a finely ground additive and crushed magnesite brick fillers, the resulting concrete can last up to 1400 C. Heating refractory concrete to 500 C does not reduce their strength; in the temperature range 600 - 900 C, the strength of most concrete decreases slightly and at higher temperatures increases and often exceeds the strength of the original concrete.
The ceiling is made of lightweight lining. Thus, vertical combustion screens have the possibility of free thermal expansion upward. A layer of roofing material is laid on top of the combustion screen collectors and ceiling screen pipes to prevent adhesion of the pipe part and fastenings to the concrete. Then a solution of refractory concrete is poured (composition: fireclay sand and crushed stone, aluminous cement) in accordance with the drawings.
Correct proportions of clay mortar for laying a stove
Correct proportions of clay mortar for laying a stove
We would like to say right away that the exact proportions of clay mortar directly depend on the fat content and plasticity of the clay. So, the fatter the clay, the more sand you need to add to it. True, you must definitely take into account whether you will add salt or lime to the masonry mixture. If you do, then in this case the amount of sand will have to be reduced. A universal solution with sufficiently high strength is prepared from 10 kilograms of clay, 2-4 kilograms of sand and 250 grams of salt.
Water must be added in parts so as not to make the mixture too liquid. If you doubt the quality of the clay, then conduct an experiment that will help you determine the correct ratio of components. To do this, take 5 equal weight parts of clay. Do not add sand at all to one; add 1/4, 1/2, 1 and 1.5 parts of sand to the other 4, respectively.
Prepare each mixture separately, form it into flat pieces and air dry them. After drying, be sure to carefully inspect all the cakes. If they have cracks, this indicates an insufficient amount of sand. If the workpiece crumbles, there is too much sand. With the correct proportions of sand and clay, the workpiece will look perfect. It will be strong enough and will not have even the slightest cracks or chips.
How to determine the quality of clay for clay mortar: methods
Ways to check the quality of clay
If you carefully read our article, you probably realized that the quality of clay plays a big role in the preparation of clay mortar. That is why, before you start preparing the mixture for laying the stove, be sure to check it for plasticity.
Ways to check the quality of clay:
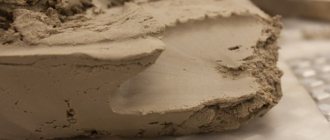
- Tourniquets . Soak the clay in water for a day, and then form it into a long but thin rope. Next, try carefully wrapping the cylindrical shape with a clay rope. The length of the harness should be approximately one third less than the diameter of the cylinder. If the clay is too oily, it will stretch without tears or cracks. Skinny clay will simply tear, but the most suitable clay will give barely noticeable cracks.
- Clay dough. First you will have to prepare a mixture of clay and water. The consistency should resemble thick sour cream. Next, take a wooden spatula or stick and lower it into the clay solution. If it sticks to it and does not fall off, the clay is very greasy and falls off in small pieces - normal. If only moisture remains on the blade, the clay is very thin.
- Sphere. Form the clay into a sphere with as smooth a surface as possible. Next, take a flat plate and, applying force, press on the sphere. If the clay is thin, cracks will appear on the sphere literally immediately. If the source material has a high fat content, the sphere can be flattened by approximately half. If you come across normal clay, the sphere will be flattened by a third.
Why do you need a clay castle around the foundation?
The design of the clay castle itself performs several functions:
- Protection of the foundation from moisture.
- Additional dense cushion for the sole of the base.
- Reducing the pressure of groundwater and melt water on foundation walls.
Of course, modern materials cope with waterproofing several times more effectively.
But a clay castle has the main advantage of being cheap and accessible. After all, you don’t have to buy clay, but collect it from reservoirs or quarries. This material has several more pleasant features:
- fat content, which makes it possible not to use additional materials in the sole area for insulation from moisture;
- the density of the dried substance prevents the foundation from cracking or crumbling;
- ease of use, meaning any amount of material can be used for the lock.
But for all its splendor, clay also has some not very pleasant sides:
- Short-lived protection - after 5-6 years the lock should be rebuilt, removing the previous layer.
- Not always good quality - due to sand impurities, the clay becomes less fatty and freezes strongly, losing its properties.
- Low waterproofing of vertical surfaces - additional waterproofing is required for the external and internal walls of the foundation.
Even with such nuances, you should not refuse a clay castle around the foundation.
This will save significant amounts of money on insulation and other construction work. It is worth knowing that the closer the groundwater comes to the foundations, the more short-lived the castle will be. Therefore, to drain water from foundations, drainage is often performed along the entire perimeter near the base of the house.
How to properly prepare clay for making clay mortar?
Preparing clay for preparing clay mortar
Clay must be diluted with water before preparing clay mortar. If this is not done, then in the end the mixture for laying the stove will not be entirely homogeneous and, most importantly, not very strong. Therefore, it is better to spend extra time on this process so that you don’t have to move the oven later.
So, take pre-cleaned clay and use your hands to separate it into lumps. You can immediately put it in a large container. It is desirable that it be such that you can later add sand and salt here. Fill the clay prepared in this way with water. Ideally, the container should contain 75-80% clay and 20% water.
Don't do anything at this stage, just leave the clay to soak for two days. After this time, check that the lumps have not dispersed. If not, add a little more water and mix everything thoroughly. If there are no lumps and the mixture in the container looks more like thick sour cream, then you can use it for its intended purpose.
IMPORTANT : Clay soaked in water will need to be allowed to sit for at least 12 hours. During this time, excess liquid will collect on the surface and all you have to do is drain it. If you want to use the clay immediately after preparation, then be sure to place it on cheesecloth and wait 30-40 minutes. However, keep in mind that the amount of clay should not be very large.
Preparing the Components
To obtain a high-quality clay solution, you need to properly prepare the main components that make up its composition.
Clay selection
You can always buy clay in purified and crushed form at a hardware store. However, when purchasing, you must take into account that the solution is consumed quickly, so you will have to spend a lot of money on purchasing clay. To save money, most craftsmen extract the mineral themselves, because it is found everywhere. You can find it in any suburban area or close to it.
Typically, clay layers do not lie very deep, and digging up the material will not be difficult. You can also find him on the river bank, at the quarry site. It is important that the clay is well suited for masonry mortar. The main indicator characterizing the quality and plasticity of clay is fat content.
The higher the layer lies, the fattier the raw material, so experienced craftsmen immediately take the middle layers, where the fat content is usually optimal. At the very bottom, the mineral is most often skinny; it will have to be “fatten” by adding fattier compounds. You can reduce the rate of excessively fatty raw materials by introducing sand.
Why is the fat content of clay so important when carrying out masonry work? After drying, only a truly high-quality and plastic solution will not crack at all and will not shrink. The greasy composition will quickly crack, despite the ease of working with it. Skinny clay is also not strong and durable, and it is also very inconvenient to lay.
After extracting the clay, you need to determine its fat content experimentally. There are three main ways to do this:
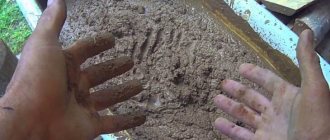
- First way. Take a bucket of water (10 liters), add a little clay, constantly stirring with a wooden stick. Add a few more portions of the mineral to obtain a solution with a creamy consistency. Remove the stick from the mass and inspect it. If the tree is covered with a thick layer of clay paste, then it is too greasy and requires the addition of sand (at least 1 kg per 1 bucket of solution). The optimal layer thickness on a wooden stick is 2 mm. If the layer is thinner than 1 mm, then the clay is thin and requires mixing with fatter clay.
- Second way. Measure 5 parts of clean clay so that each of them is equal to the volume of a liter jar. Leave the first pile unchanged, add ¼ cans of sand to the second, ½ cans of sand to the third, a full can to the fourth, and 1.5 cans to the fifth. Mix each portion well, add water to get a ready-made solution that will not stick to your hands. Roll each type of solution into a ball about 7 cm in size and make a cake out of it. Leave all the cakes under a canopy until completely dry, making notes in advance about the amount of sand introduced. That cake that does not become cracked after drying can become a model for preparing a masonry composition.
- Third way. Carry out all the same manipulations as described in the second method. Do not compress the prepared balls into cakes, but let them dry a little. Then press each ball with two wooden planks. The clay sample that begins to crack only after compression by 1/3 of the diameter is considered the most suitable for masonry. A ball that cracks when compressed to ½ of its diameter is made from a mineral that is too fatty. A skinny sample will crumble immediately.
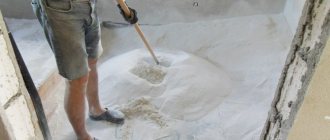
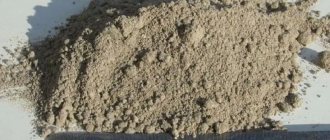
Preparing sand
Only fine sand (fraction less than 1.6-1.8 mm) is suitable for mixing masonry mortar, since the seams of the stove masonry are only a few mm. The ideal option is to mix material of different fractions, since such raw materials set better. Typically, pure quartz sand or a mixture of river sand, quartz sand, mica, and pieces of feldspar are used for masonry. The material is sold in finished packaged form or in bulk. In addition, you can get it yourself, for example, in a sand pit, ravine, or on a steep river bank. Mountain or lake sand is also a good choice, as it perfectly binds the components of the solution.
It is believed that the purest sand is located at a depth of less than 1-1.5 meters. Other types of materials most often have to be washed. Any sand must be prepared and cleaned before being included in the solution. It must be cleared of debris by sifting through a fine sieve. You can fill the material with water, shake it well, and then drain off the surfaced dirt and turbidity. Repeat similar manipulations until the water becomes clear. Dry the sand well before use.
Removing impurities from clay
The presence of roots, plants, pebbles, crushed stone, and soil greatly degrades the quality of the raw materials. It must be as clean as possible - this is the only way to get an excellent result. The preparation process includes several stages:
- Manual cleaning. All large debris and visible impurities are removed from the clay. If necessary, lay out the material in piles and inspect it carefully. This process usually takes the longest.
- Wiping. Contaminated raw materials are sifted through a metal sieve with mesh size of about 3 mm, pressing with the palm of the hand so that all particles pass through the mesh evenly.
- Soak. The mineral is placed in a clean container, filled with water so that the liquid covers it. Place the container under the lid in a cool place and leave for 2-4 days. Check periodically to ensure that the raw material does not dry out. If necessary, add a little more water. After swelling, the material is again wiped through a chain-link mesh with 3 mm cells. The finished mass should resemble thick sour cream.
If the clay is relatively clean, you can not wipe it dry, but remove large impurities and immediately soak it. It is best to use an old bathtub or a wooden box covered with metal sheets for this purpose. In order for the raw material to get well wet, it is covered in layers of 120-150 mm, each of them spilled with water. During standing, you can periodically stir the mineral with a shovel.
Types of clay mortar: preparing mixtures for laying a stove
Types of clay mortar
We have already mentioned above that clay mortar can be of several types. As a rule, a clay-fireclay mixture is used to build the foundation, firebox and chimney, and clay-sand mixture is used for plastering.
Although, according to experienced stove makers, the latter version of the solution can be used for laying the firebox and foundation, it’s just that in this case salt must be added to the main components. As a rule, its quantity does not exceed 250 g for every 10 liters of the finished solution.
Clay-sand mortar for laying a furnace:
- Clean clay and sand from impurities
- Put the sand indoors for a while, and prepare the clay as we described a little above.
- When the lumps dissolve, stir the clay first with a shovel and then with a construction mixer
- Ideally, you should get the most homogeneous mass possible.
- At this stage you can begin to introduce sand
- Do this gradually so that the clay solution is homogeneous.
- As a rule, to prepare a clay solution for tickling, take 2 parts clay and 1 part sand
- Water must also be added in parts until the mass reaches the ideal consistency (it will resemble very thick sour cream)
- To enhance the strength of the masonry, you can add salt. We mentioned its quantity above
Clay-fireclay mixture for laying a furnace (fireproof):
- Clean clay and fireclay sand
- Let the water settle
- 24 hours before preparing the solution, soak the clay in water
- When the lumps disperse, mix it thoroughly with a construction mixer.
- Mix the finished clay with fireclay sand in a 1:1 ratio and add water to it
- You may need quite a lot of liquid, approximately 1/4 of the total mass
- The mixture is thoroughly mixed and can be used for its intended purpose.
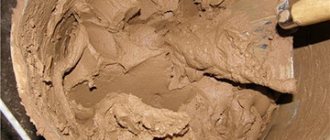
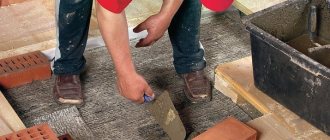
How to check the finished clay mortar for quality?
Checking the solution for quality
After preparation, the clay solution must be checked for quality. This is done so that even before the start of masonry it is possible to correct the consistency of the mixture and increase its plasticity. Experienced stove makers usually do this with a trowel.
They dip the trowel into the mixture, pull it out, and then turn it over. If you have the right clay solution, it will be almost evenly distributed over the instrument and will adhere well to it.
If the solution is too greasy, the clay layer on the trowel will be more than 3 mm thick. In this case, sand will need to be added to the mixture. If the mixture literally immediately falls off the trowel, this indicates that you have gone too far with sand. In this case, you need to add 1-2 parts of clay to the clay solution.
How long can clay mortar be stored and what to do if it thickens?
Storing ready-made clay mortar
In principle, clay mortar can be stored perfectly for a long time. True, you should take into account that you can only store those mixtures to which glue and cement have not been added. If you cover the finished solution with a lid or even a cloth and place it under a canopy, you can use it for 2-3 months.
True, for this you will have to return it to the correct consistency. And you don’t have to be afraid that when you open the container you will see completely dry and very hard clay. You will just need to arm yourself with a hammer and crush it into small pieces. After this, the clay will need to be filled with a small amount of water.
At the initial stage, it may not even cover the top layer. Leave the clay to soak for a day. When it softens a little, try stirring it with a construction mixer. If the consistency is very thick, add a little more liquid and stir again. Once you achieve the desired consistency, the clay solution will be ready for use.
Required tools and materials
To make your own mortar and plastering, you will need the following tools:
- container for stirring the solution;
- shovel for loading mixture components;
- measuring container for measuring the amount of sand, clay and other components;
- sieve for sifting sand;
- spatulas of different widths for applying the composition;
- rule or grater for leveling;
- grout grater;
- electric drill with a nozzle for mixing the mixture;
- hammer drill and screwdriver for attaching the reinforcing mesh.
In addition, consumables are needed:
- steel mesh or shingles for reinforcing walls;
- dowels or nails for fastening reinforcement;
- clay, sand, sawdust or fiber for making a mixture;
- a small amount of cement or gypsum to strengthen the finishing layer.
If you follow the technology for performing the work and our recommendations, it is not difficult to do clay plaster with your own hands, resulting in a stylish, cozy, healthy home with a special natural atmosphere.