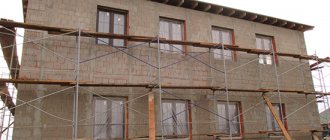
Perlite plaster is particularly durable and highly durable, which is why it is so common when finishing external and internal walls of buildings. The material is very easy to apply, which is why it is popular among professionals and home craftsmen. The layer turns out to be heat and sound insulating, therefore it plays not only a decorative, but also a functional role.
The composition is used not only for decoration, but also for leveling surfaces that can be made of different materials. But if you have walls made of foam concrete, this solution can be called one of the most suitable. The preparation is not difficult, which is an additional bonus of the material.
Attention! If you plan to work with expanded clay concrete blocks, but you don’t like the look of silk plaster, after such thin-layer insulation, you can cover the top with another decorative material. For example, using lining, you will make the wall several times warmer.
Properties of plaster
Plaster with perlite is often called warm plaster. This is due to its reduced thermal conductivity when compared with traditional plaster mixtures. Thanks to this property, the material can be used for primary or additional thermal insulation of buildings. Plaster owes its capabilities to the filler in its composition - perlite. Perlite sand is of natural origin: this rock is formed from obsidian, which appears along the line of contact between the earth and lava from an erupting volcano.
Perlite is a round-shaped granule of different sizes with a porous structure. The shade of perlite varies depending on the exact mineral composition of the rock - it can be gray, black, greenish, reddish. The porosity of the stones reaches 8-40%, and up to 1-2% of the pores are filled with moisture.
Before being added to the plaster, perlite is crushed and fired, causing it to swell under the influence of hot steam. This material turns out to be white or grayish, rounded. Plaster with its addition acquires a lot of useful properties:
- resistance to temperature changes and atmospheric factors;
- resistance to moisture;
- high degree of adhesion to building substrates;
- heat and sound insulation qualities;
- plasticity, low risk of cracking;
- fire resistance and environmental friendliness.
The thermal conductivity coefficient of the material does not exceed 0.043, the bulk density is on average 75 kg/cubic meter. m.
Removing uneven surface areas
Before starting work, check the presence of irregularities and depressions, as well as the level of verticality of the wall. To level the base and eliminate depressions, it is necessary to use a thicker layer of the mixture in this area.
It may be necessary to apply several layers of solution, so this increases the work time. Leveling the surface increases the consumption of plaster by 1 m2, this must be taken into account during work.
Repair standards stipulate permissible deviations of the resulting surface, which differ for different types of plaster mixture:
- For an ordinary plaster mixture, the norm is considered to be a displacement from the vertical of no more than 1.5 cm in relation to the height of the wall or no more than 3 mm to 1 meter, the thickness of the applied solution is no more than 12 mm;
- Improved plaster can have a deviation of no more than 10 mm per final wall height or ≤ 2 mm per 1 m of surface. The layer should not be thicker than 15 mm;
- According to the rules, the highest quality plaster has a deviation that does not exceed 5 mm per building height or 0.1 cm per meter of surface. In this case, the applied layer should be no thicker than 2 cm.
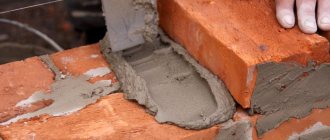
- Often, to remove large irregularities in the wall, a wire mesh is used, the cell size of which is 10x10 mm. To attach the wire mesh to a brick wall, use nails driven into the joints between the bricks.
- If the wall is concrete, then such a mesh is fixed at the point where the reinforcement emerges. To prevent the wire from rusting, it is treated with so-called laitance.
- Small depressions and cracks are covered with mortar. Such preparatory work must be carried out at least three days before using the plaster.
Removing contaminants from wall surfaces
Before applying the plaster layer, you need to clean the surface of the walls. The presence of stains, dust, and dirt significantly reduces the adhesion strength of the liquid plaster solution.
- To clean bases made of brick, concrete, stone, use a solution of hydrochloric acid with a concentration of 3%, then wash the surface with plain water.
- Oil stains are removed using oily clay. It needs to be spread in a solid layer over the grease stains, then the dried wall or ceiling should be cleaned. Dried clay absorbs fat.
- If the contamination is severe and is not cleared immediately, the procedure will have to be repeated. The disadvantage of this method is that sometimes you have to apply clay several times to completely absorb the stain, repeating this process several times.
- Also, removed fat stains may appear again after some time. Therefore, the best method of dealing with grease stains is to remove the affected areas by cutting out. The resulting unevenness must be covered with a solution.
- Dust, dirt and dried mortar are cleaned from walls and ceilings with an iron brush. It is necessary to press the steel brush firmly against the surface being treated and make movements in different directions.
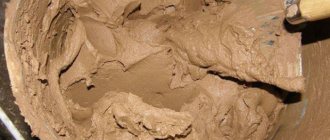
Composition of perlite plaster
Various mineral components can be used as a binder base in perlite plaster - cement, gypsum, lime. After hardening, they give the material the required strength and hardness. To facilitate plastering and impart thermal insulation properties, porous perlite sand of a certain fraction is introduced (coarse - for facade work, medium and fine - for interior work).
Modifying additives are also introduced into the composition. Their role is played by mineral and synthetic components, which improve hydrophobic, plasticizing, and air-entraining properties. Perlite plaster may also contain pigments and dyes.
Types of materials
Depending on the binder component included in the composition, there are several types of building mixtures with perlite.
Cement based
Cement allows you to create a durable and waterproof coating for walls or other structures. Most often, cement plasters with perlite are used for facade finishing and other types of exterior work, as well as for the design of structures operated in conditions of high humidity. The complete strength gain of the plaster layer occurs in 28 days, and the thermal insulation properties are fully manifested after 2 months.
Cement mixtures with perlite are applied manually or mechanized. If necessary, reinforcement with polypropylene fiber can be done (fiberglass is not used due to the risk of destruction in an alkaline environment). Sometimes lime paste is added to the cement mixture to improve its properties. When preparing it yourself, PVA glue or detergent is also added to the plaster as a plasticizer.
Gypsum based
Since gypsum quickly deteriorates from moisture, building mixtures with it are not used for outdoor work. Gypsum plaster with perlite is well suited for finishing interior walls in dry, heated rooms or in rooms with minimally high humidity.
When preparing at home, perlite is added to regular gypsum mixtures, although it is easier to buy a ready-made mixture and dilute it with water. Special modifiers have been introduced into store-bought plasters, which increase the life of the mortar and increase its workability. Without such substances, it will be difficult to apply the composition, because it hardens literally in a matter of minutes. Perlite in gypsum plaster will protect walls from mold and mildew.
Lime based
Lime perlite mixtures are well suited for application to mineral substrates, with which they have the strongest adhesion. Most often, such compositions are used when working with cellular concrete or various types of ceramic surfaces. To make a high-quality solution, slaked lime is used. To increase strength, Portland cement is introduced into it, and to optimize ductility, a plasticizer is added.
Technological process
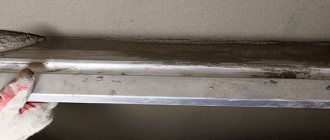
The walls should first be coated with a primer. Wooden surfaces are prepared by installing shingles. This will increase the adhesion of the materials. Concrete and brick walls are wetted with water. Porous surfaces are primed to reduce their absorption. Application is carried out with a trowel and spatula, leveling is the rule. After just 2 hours, the surface can be treated with a sponge dipped in water to make it smooth. If you plan to paint the wall, you can start this work after three days. Within a month, strength will be gained, which is exactly what is needed for cement to harden.
Plaster can be applied with a reinforcing layer, but if it is not provided, the permissible wall finishing thickness is 50 mm. This plaster can also be applied to ceilings, but without a mesh the thickness of the cladding will be 30 mm maximum. It is important to observe the application temperature, which varies from + 5 to + 30 ˚С. It is necessary to maintain relative humidity, which should not exceed 75%.
The preparation of wooden walls must necessarily include the installation of shingles, otherwise you may encounter peeling of the decorative layer. Thermal insulation properties will increase over time, and will gain strength only after two months, when the surface has completely dried. If work is planned for autumn, this feature of the material should be taken into account.
It is important to eliminate rust stains on the surface, as well as layers of poorly maintained finish. The mixture does not need to be prepared in advance. When mixing the solution with a drill, set it to low speed, as the composition may become saturated with air, which will make it less plastic.
Advantages and disadvantages of plaster
The positive characteristics of perlite plaster are beyond doubt:
- high plasticity, ease of application and distribution over the surface;
- safety and environmentally friendly composition, absence of harmful substances;
- lightness - no additional load on walls and load-bearing elements;
- suitability for finishing concrete, brick, aerated concrete, foam concrete, wooden, stone bases;
- non-flammability (NG), complete fire safety;
- non-rotting, resistance to biodestruction;
- lack of attractiveness to rodents;
- long service life, wear resistance;
- vapor permeability and moisture resistance;
- chemical inertness;
- possibility of distribution over uneven bases, hiding surface defects;
- absence of cold bridges after drying and during operation;
- possibility of cooking with your own hands;
- significant reduction in heat loss and noise in the room;
- resistance to frost, temperature changes, precipitation;
- ease of repair of damaged areas.
Perlite plaster has one disadvantage - its high price when compared with classic types of mortars.
Making your own composition
To make perlite plaster you need to purchase the following components:
- cement grade M500 - 1 part;
- sand - 1 part;
- perlite - 3-4 parts;
- the water is clean;
- plasticizer - PVA or liquid soap.
First, a plasticizer is diluted in water (approximately 1% of the amount of binder). Separately mix the dry ingredients - perlite, sand, cement. Afterwards, liquid is gradually poured into the cement mixture, constantly stirring the mass until a plastic thick “dough” is obtained.
After 10 minutes of standing under the lid, the composition is mixed again and application begins. In addition, to improve the technical characteristics of the solution, you can use sodium salt in an amount of 0.5% by weight of cement. This substance is also first diluted in water.
Perlite proportions for concrete mortar
| Perlite concrete recipe | Material ratio, cement: class III perlite: water | For a 25 kg bag of cement, add a bag of perlite (class III) with a volume of 0.1 m³ + liters of water | Bulk density [kg/m³] | Compressive strength [Mpa] | Thermal conductivity λ[W/(m²·K)] |
| 14/4,0 | 1:4:1,25 | 1 + 31,3 | 840 | 3,8 | 0,097 |
| 14/5,5 | 1:4:1,00 | 1 + 25,0 | 920 | 6,4 | 0,078 |
| 16/3,8 | 1:6:1,84 | 1,5 + 46,0 | 670 | 3,2 | 0,110 |
| 16/4,5 | 1:6:1,56 | 1,5 + 39,0 | 740 | 4,2 | 0,087 |
| 16/5,2 | 1:6:1,35 | 1,5 + 33,8 | 800 | 4,9 | 0,073 |
| 18/5,0 | 1:8:1,80 | 2 + 45,0 | 710 | 4,8 | 0,066 |
| 110/5,5 | 1:10:2,0 | 2,5 + 50,0 | 590 | 3,4 | 0,070 |
Other possibilities for industrial use of perlite concrete:
- casting foundations for equipment operating in extreme temperature conditions - from -200 to +800ºC,
- production of reinforced concrete structures, chimneys, energy and refrigeration units,
- production of single-layer panels for the construction of external sandwich-type walls,
- production of floors for bathrooms, dressing rooms, swimming pool insulation.
Application Tools
The job may require different tools depending on the technique preferred by a particular craftsman. Typically, devices from the following list are used:
- trowel;
- construction float;
- spatulas of various widths;
- rule.
You may also need beacons for leveling the plaster layer, a container and a construction mixer for mixing plaster, masking tape for protecting slopes, a stepladder, and a level.
Since perlite produces a lot of dust when added to the mixture, it is important to use a respirator!
Perlite concrete
From the point of view of thermal insulation and sound insulation, it is one of the best building materials. Perlite concrete can be used for insulating floors, ceilings, pouring walls, ceilings, and roofs. By mixing the components appropriately, you can obtain various perlite concretes.
In many cases, it can be used instead of polystyrene foam - there is no need for labor-intensive operations of insulating floors with foam plastic and then pouring screed. It can also be used when laying heated floors.
Preparation for application
Work with perlite plaster is carried out at an air humidity of less than 70-80%, at a temperature within +5...+30 degrees. The base is checked for unevenness and depressions using a level. Get rid of pieces of crumbling coating. Large chips are covered with a reinforcing mesh or a homemade wire mesh.
The cracks are opened and covered with ordinary cement mortar. Scrub or remove dirt and oil stains with a wire brush. To remove dust and improve adhesion, the walls are coated with a deep penetration primer.
Scope of application
The properties of sand and mineral-based mortar make the plaster universal. The mixture is used for repairs, leveling walls, and for decorative coatings. They are used to insulate the facade, or used for interior decoration. It is also suitable for insulating utility buildings, such as summer kitchens and garages. Cement compositions are used for finishing damp rooms (basements).
In addition, perlite solutions are used:
- for brickwork;
- insulation of water and sewer pipes;
- heated floor installations.
Applying plaster
The material is applied in a standard way (manually or using mechanized installations). If necessary, beacons are placed. Typically, manufacturers recommend not applying a layer thicker than 3 cm in one pass, although there are compositions that allow thick-layer application.
The finished coating is leveled with a rubber or polyurethane float moistened with water (you can also use the rule). Leave the finish to dry for a day. The layer of facade plaster must be protected from precipitation and sun using film and shading.
Factory products.
It is easier to purchase a factory solution, although somewhat more expensive. Its advantage lies in the precisely adjusted ratio of ingredients. In addition, special substances with water-repellent properties are added there. Such mixtures must be diluted with water, strictly following the manufacturer's instructions. This will allow you to achieve the desired result. Be sure to immediately prepare the entire composition from one package. This way the quality of the finished coating will be higher. The composition should be homogeneous, without dense inclusions. It must be used within two to three hours until the solution begins to harden.
Material consumption
Before starting work, it is worth calculating the approximate material consumption. If the walls are smooth, it is recommended to take a layer thickness of 1 cm as a basis. You need to calculate the area of the walls to be processed and multiply it by the consumption of plaster (it is always indicated on the packaging of the building mixture). The approximate flow rate for a given formation thickness is 9 kg/sq.m. m. The total is increased by 5-10% in reserve.
For uneven walls the figure always increases. To calculate the consumption, place 2-3 beacons in one vertical plane, measure the thickness of the future plaster layer at three points. The indicators are added and divided by 3, obtaining the average rate. It is multiplied with the area of the walls and the approximate volume of the mixture that will be consumed is obtained.
Valuable question.
The cost of perlite plaster per sq.m varies depending on the brand and weight of the packaged mixture. The price ranges from approximately 215 to 230 rubles per 15 kg bag. Gypsum perlite plaster is usually sold packaged in 30 kilograms for about 300 rubles.
If a layer of perlite is laid out five centimeters thick, the consumption per “square” is about 8.5 kilograms.
That is, you need to pay about 100 - 150 rubles per m². Prices per square meter vary for different types and brands of perlite. Costs are also determined by the thickness of the final coating that is planned to be made. You can buy perlite plaster in regular finishing materials stores, and you can also order it online on the website. data-matched-content-ui-type=”image_stacked” data-matched-content-rows-num=”2″ data-matched-content-columns-num=”3″ data-ad-format=”autorelaxed”>
Tips: how to avoid mistakes
Mixing perlite plaster should not be done manually; it is better to use a power tool for this purpose. The rotation speed of the nozzle should not be more than 600 rpm.
There are other recommendations that will allow you to complete all the work efficiently:
- carefully prepare the base, remove all crumbling areas;
- do not make the solution too liquid, but add water in small portions;
- strictly adhere to the recommended proportions of components;
- expansion joints must first be filled with polyurethane sealant and then covered with plaster.
The best brands
Perlite plasters are produced by almost all companies involved in the production of building mixtures. For example, the Teplon gypsum composition from Unis is of excellent quality, acquires a snow-white color after drying and is suitable for wallpapering and other types of finishing.
Extra Gips “Izo” plaster is also intended for indoor use, as it contains gypsum. It can be applied in a layer of up to 7 cm, and it sets in just 30 minutes. There are also perlite compositions on sale from Knauf, Perlitex, In-Tek, Gaia, Kwik-Mix, etc. All perlite-based mixtures have heat-insulating and noise-proof properties and are an excellent choice for houses and apartments.