At the beginning of repairs, many are faced with the question of what primer to choose and what can replace the primer at home, because they do not trust the quality of store-bought compounds and the expensive price. Preparing the composition at home allows you to save money. Homemade primer for decoupage or putty is not inferior in its effectiveness to store-bought counterparts. There are several options for replacing primer at home, which we discussed in this article and offer you for your reference.
Why prime walls?
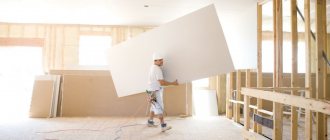
Like any finishing material, wallpaper should hold firmly and not yellow over time. For this, acrylic and alkyd compositions, latex compositions and even a solution of wallpaper glue are used. What can replace the primer for walls under plaster? If plasterboard walls are not pre-treated with primer, then the wallpaper will subsequently have to be removed along with putty or a protective layer of plasterboard panels.
Therefore, wall preparation must be done.
At normal room temperature the primer dries quickly. Already 2-3 hours after application, you can start gluing wallpaper. All work can be completed in one day. Sometimes it becomes necessary to apply a second primer layer, and then the work time increases.
Most often, a second layer is needed for porous and loose surfaces.
Tips for preparing a primer solution
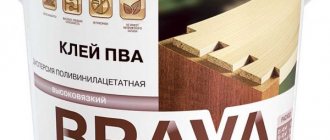
When PVA is mixed correctly, the strip that forms as a result of drying should not be noticeable. If glue is added to a container with water in a significant amount, the soil turns into a flexible film layer, which will subsequently peel off from the wall covering. If there is more of it, the mass will lag behind the base sooner. It happens that in a product in which there is an excess of PVA, peeling does not occur, but after a certain period the glue turns yellow and then the appearance will be unattractive.
Attention! Use homemade primer within 24 hours, otherwise it may lose its properties.
5 / 5 ( 1 voice )
We use acrylic primer
This is the most popular composition, and you can find it in any hardware store. Aqueous acrylates are sold in packages of various sizes and can be either in finished form or in the form of a concentrate, which just needs to be diluted with plain water immediately before starting work.
Acrylate primers have virtually no odor, and you can work without using protective equipment. If the liquid gets on your skin, it is enough to wash it off with a stream of water from the tap. Acrylates effectively clog all small pores on the surface of the wall and significantly reduce its absorption.
The ability to stick, the so-called adhesion, improves. And glue consumption is sometimes reduced by up to 50%.
What kind of fabric can be used for canvas?
So, canvas is made from three main types of fabric
: cotton, polyester, linen and their combinations (mixes).
It is the fabric
and its composition that determines whether the canvas will become your ally or not.
Cotton canvas is the weakest of all types of canvas
.
Interesting materials:
What to do with gladioli babies after digging? What to do with gladioli babies? What to do with baby gladioli bulbs? What to do with the electronic MTPL policy? What should a victim do with a European protocol after an accident? What to do with a ficus if it has stretched out? What to do with fuchsia for the winter? What to do with fuchsia after flowering? What to do with dahlias in the fall after digging them up? What to do with dahlias after digging?
Analogs of primer for repairs
| How can I replace primer? | Description |
| For walls, increasing their strength | This composition is ideal for strengthening the surface of walls. To prepare it you will need the following ingredients:
To prepare the composition you will also need an enamel container. It is necessary to take into account that after cooking, the dishes will no longer be suitable for cooking food in them. |
| Analogue for deep penetration | The basis of this composition is PVA glue. It is able to increase the water resistance of the wall, forming a protective film on it. For the primer you will need:
|
| For wood | It is very difficult to prepare a primer for wood at home, since this material is extremely capricious. In this case, it is better to use a ready-made store-bought mixture. Typically, a primer is used to treat wood:
|
| Under the wallpaper | Quite often, silk plaster primer is used before wallpapering. However, this is not the cheapest option, so you can treat the walls with a mixture of regular primer and wallpaper glue. The main advantage of this method is that the wallpaper is applied to the wall immediately after using the primer. This allows you to get the highest quality results. |
Conclusion
From the article you learned about primer compositions, and I also talked about the process of applying them to different surfaces. The video in this article will show in more detail some of the aspects discussed above, and if you have questions or additions on the topic, write them in the comments under the review.
Did you like the article? Subscribe to our Yandex.Zen channel
November 28, 2016
Design, Construction Chemistry
If you want to express gratitude, add a clarification or objection, or ask the author something, add a comment or say thank you!
Strengthening composition for walls
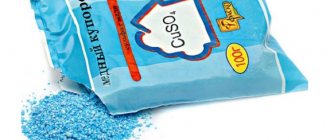
This composition requires copper sulfate, which is distinguished by its antiseptic properties, which is very important when treating walls. This primer is quite easy to prepare if you follow the following algorithm.
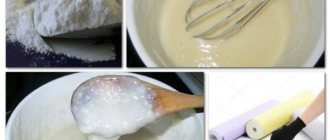
- Fill the container with water and bring it to a boil.
- Grind the laundry soap by passing it through a grater - this will speed up the dissolution process.
- Pour the crushed soap into a pan of boiling water, while reducing the heat. Boil the soap, stirring constantly until completely dissolved.
- Add copper sulfate and wood glue to the soap solution.
- Cover the pan with a lid.
- Cook the entire mixture for about half an hour, stirring constantly.
- The finished composition must be cooled and passed through a sieve, after which it can be used instead of a primer for walls.
We're getting a little ahead of ourselves; However, we note that the paint can be applied to an old coating of the same type without first cleaning the surface. Acrylic over acrylic paint, oil over oil paint, and so on.
However, differences in color may cause the old coating to show through due to it being partially dissolved when the new paint is applied. A primer of the appropriate type will act as a separator that will prevent the paints from mixing (see also the article “Acrylic paint on wood - what is good about it”).
In addition: wood contains tannin, a natural dye that often bleeds through water-dispersed coatings in untidy spots. The primer traps it inside the wood.
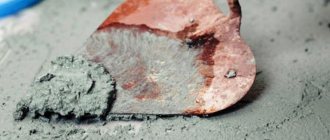
Composition for deep penetration
This is the easiest composition to prepare - you need to mix PVA glue, water and cement in one container. Then you need to thoroughly mix all the ingredients until a homogeneous mass is formed, and then pass them through a sieve and cheesecloth.
This primer option is suitable for wallpaper and putty, and most importantly, it is cheaper than ready-made compounds from the store. In addition, its preparation does not take much time, which is a significant advantage.
Self-cooking involves the following algorithm:
- A set of components from cement, PVA glue and water is prepared in advance. The proportion is 1:8, the least amount of cement is required.
- Water is combined with glue, then cement is poured. Proceed to thorough mixing.
There is no need to cook the mixture for a long time and then wait for it to cool. That’s why the recipe is considered one of the simplest. But the solution is stored for a maximum of 24 hours. This is important for those who are interested in how to make deep penetration primers with their own hands.
This primer can be used immediately after mixing, but it must be taken into account that this is not a long-term product - its shelf life does not exceed a day. Therefore, preparing such a primer for future use would not be the best solution.
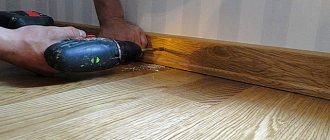
Primer for wood
Wood processing is the most difficult process, since this material is extremely capricious and requires special conditions.
Therefore, preparing a primer for wood at home is not recommended. It is better to purchase a ready-made store-bought composition. Otherwise, there is a high probability of damaging the wooden covering.
When repairing wood processing, the most problems arise. If desired, our own developments are also suitable here, although store-bought formulations still do a better job.
There are several situations where primer is useful:
- In the future, paint and varnish compositions are used. Making a homemade one is also not difficult;
- Lack of heating inside the room where the treatment is carried out;
- The presence of defects that cannot be removed;
- Wood – attached to the facades from the outside, part of the overall structure. Then the composition of the wall primer is indispensable.
Acrylic, alkyds, antiseptics or shellac are complex substances required when working with wood. At home, preparing them is almost impossible; problems arise with maintaining the proportions. You won't be able to use homemade ingredients.
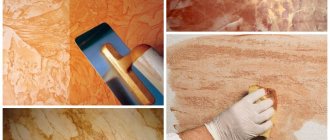
The best option for wallpaper
The most effective method, which will significantly save time and provide a high-quality result, is mixing wallpaper glue with a regular primer. This composition ensures maximum penetration depth and firmly fixes the wallpaper.
The main advantage is that after applying the composition to the wall, you can immediately glue wallpaper onto it. Before applying the primer, you must thoroughly clean the wall of any debris. It is better to apply it with sweeping movements from bottom to top using a roller.
Alternative primer substitutes can be very useful because they can save you money without sacrificing quality. Each analogue has its own characteristics, which must be taken into account before making a choice.
The base can be ordinary wallpaper glue. This is a replacement for regular PVA for the composition. Protects and penetrates into the pores of the material as deeply as possible. There is no need to wait for drying; the wallpaper is immediately applied to the primer.
Adhesive-type compositions allow for independent preparation. The description of the components is as follows:
- 30 grams of drying oil. Plaster is not needed;
- 2 kg chalk;
- 250 aluminum alum;
- 200 grams of dry chalk for painting group;
- 200 grams of soap from the farm. This is the answer to the question of what primers are made of.
Cooking will not cause problems if you follow the instructions. Only at first glance the composition seems complex. Manufacturers, including well-known ones, use the same components for their developments. The cooking algorithm is as follows:
- Pour alum into 1 liter of water.
- Take a separate bowl and dilute glue in it.
- Make sure to keep the fire low. With constant stirring, add soap, alum and drying oil.
- Pour in chalk and mix well.
- Water is added when needed. Nobody is against this option.
For painting
Here you can also use PVA glue. If everything is done correctly, a film is formed that is almost invisible from the outside. The main thing is to make sure that there is not too much glue when adding to the water. Otherwise, over time, such a surface deteriorates, parts separate from each other. Even if it's drywall.
Quick priming is a must even for those who have no experience in such work. It is recommended to follow these tips for better results:
- Before treatment, remove all dirt and old paint and varnish materials from the surface, if any.
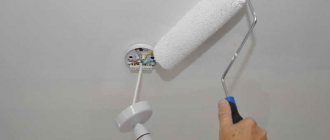
- The mixture is poured into a special container; application involves the use of brushes or rollers. Then the convenience will be maximum. The first step is to process corners and hard-to-reach surfaces. The craft gives results immediately.
- Movements go from top to bottom.
- The second layer is applied only when the first one is completely dry. Then the clutch will become more reliable, and it will be easier to move on to other decorative work. The paint spreads without problems.
If there is not enough solution, prepare a new one. Only the container needs to be thoroughly cleaned, otherwise lumps will appear. Priming will not work effectively. When applying primer, it is recommended to avoid using sprayers; this will increase the risk of damage to the primer.
Any solutions prepared independently are stored for one day, no more. Otherwise, the original qualities are lost and painting is impossible.
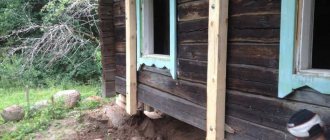
The walls are covered with compounds after completion of all primary work. When repairing and restoring elevations, soils will be needed to increase the strength of the foundation. For preparation, you can use any of the recipes described above. Such materials are suitable for bricks that have begun to crumble. Copper sulfate can be easily purchased by visiting gardening and gardening stores. Hardware stores will help with the rest of the components; they can also be applied to the floor.
The need to visit stores does not always arise if the required type of primers is not available. It’s easier to gather available ingredients on hand to prepare the mixtures yourself. Their quality is no worse than other analogues. The only drawback is the shelf life, which is only a day. Without its observance, one may not think about the long-term preservation of the original qualities. Only the liquid form of the primer qualitatively fills all the pores on the surface, this should also be remembered.
In conclusion, we would like to note that there are quite a large number of options for replacing primer at home.
When choosing a replacement, focus on your needs, this will help you quickly solve the problem without difficulty and unnecessary hassle.
Glue selection
Wallpapering unprepared walls rarely leads to a positive result. The surface needs pre-treatment for the following reasons:
- high absorbency of materials - the glue quickly penetrates into the base, adhesion deteriorates;
- the presence of dust or sand from the solution on the surface on which it is difficult to stick wallpaper;
- roughness caused by the presence of small particles in the composition of the plaster (putty), which leads to loose wallpaper and poor adhesion.
Coating the walls with glue will help eliminate these problems.
The selected adhesive must meet several criteria:
- match the type of wallpaper;
- the manufacturer must indicate in the instructions the possibility of using a primer composition;
- specialized compounds are better than universal ones, especially when gluing heavy types of wallpaper;
- the shelf life must not expire at the time of use;
- for rooms with high humidity levels, compositions with antiseptic additives are used;
- when purchasing, pay attention to the consumption indicated by the manufacturer, taking into account the upper figure, for example, if 50 - 100 g/m2 is indicated, choose a consumption closer to 100;
- have a color indicator (coloring in a liquid state) - this makes it more convenient to apply the composition without gaps, which is important for inexperienced “finishers”.
An important condition is that the adhesive-primer matches the type of wallpaper chosen.
Among the specialized types are mixtures:
- for glass wallpaper and non-woven products;
- for vinyl wallpaper with non-woven or paper base;
- universal, incl. and for paper wallpaper.
Before purchasing, carefully study the instructions for use. It is necessary to prime and glue using the same composition, avoiding incompatibility.