In times of limited assortment of building materials, residents renovating an apartment were forced to look for original ways to reliably adhere wallpaper to a concrete wall. Ordinary newspapers came to the rescue and were used to cover the wall. Today, such extreme methods are irrelevant, since there is a primer on the market for walls under wallpaper, with which the surface is prepared for repair work. We will talk about the types of primers, the classical technology of their application, and reveal the secret of the simple and quick creation of a primer layer.
Priming walls for wallpaper: when is it needed and why?
There are 3 exceptions in which it is not necessary to prime the wall before wallpapering. This is possible if:
- temporary finishing is planned (for 3-4 years);
- wallpaper is glued in non-residential premises;
- Weightless paper wallpaper is used.
If the primer is used incorrectly, the wallpaper will peel off.
In other cases, priming is considered an indispensable preparation step. Applying a primer (or primer) allows you to:
- With glue microparticles of the top coating . By compacting the structure, the surface becomes more resistant to mechanical stress. Microcracks do not appear on the wall, and the wallpaper will not peel off over time.
- Hide wall defects and make the coating perfectly smooth. The impregnation does a good job of hiding pits, strokes, brush fluff, and other little things.
- Neutralize remaining dust particles that would prevent the wallpaper from adhering tightly. After priming, even heavy non-woven wallpaper lays perfectly on the surface.
- Make the base tone uniform and disguise dark spots. This is necessary for gluing very thin or light wallpaper. To even out the color of the walls, use a primer with a lightening pigment.
- Protect the surface from the growth of mold/fungi , which is important for wet rooms. To do this, buy a coating with an antiseptic.
In addition, with a primer you can use less wallpaper glue than without it. Savings are created due to the fact that microcracks are filled with the composition and covered with a water-repellent layer. As a result, the base does not draw moisture from the glue, so it does not dry out and does not require a second layer.
The primer hides minor wall irregularities
Description
The primer is a special construction compound used to prepare the base before finishing. It allows you to achieve maximum adhesion between the surface and the material used as a coating. With the use of primers it will be much easier to achieve uniform walls. The material also makes it possible to hide coating defects, which is especially important when using light and transparent wallpaper.
Also, the primer before finishing allows you to hide places where dust and dirt can accumulate and fill the pores in the original material. It reduces the water absorption of the wall and improves the quality of wallpaper adhesion.
Compound . The primer mainly consists of organic resins, as well as adhesive components. The film is formed by silicate, acrylic, latex and silicone polymers. There are also additives in the solution that can make the liquid more plastic or fluid.
Consumption rates. The consumption parameters are affected by the composition of the primer mixture, the material and structure of the surface being treated, and the humidity of the wall. For example, for acrylic primer the consumption is 100 g/m2 in one layer over a putty surface.
Related article: How to align walls with wallpaper.
Types and characteristics of primers
The main principle for choosing an impregnation is the type of surface on which they plan to apply the composition. Some amateur finishers claim that they sell special primers for different types of wallpaper. However, this is not quite true.
Primers for different types of wallpaper
There are no primers for different types of wallpaper, this is easy to explain logically. The fact is that at least 10 different types of material . At the same time, for each, a special component would be added to the glue, which would work to adhere the wallpaper to this particular surface.
As for wallpapers, there are also a lot of them: the market offers about 10 different types. For a certain type of wallpaper (for example, non-woven) you will have to produce 10 different adhesives (for each surface). It turns out that the market should offer the consumer an assortment of 100 different types of coating. Such an assortment would confuse sellers, buyers, as well as manufacturers themselves.
Now the market offers 10 types of primer and 10 types of glue that are suitable for different types of wallpaper. Such diversity does not harm anyone and does its job perfectly.
If the processing was completed correctly, the wallpaper will lie tightly on the wall.
Classification of primers by purpose and release form
The construction market offers a whole range of different primers. This variety can be sorted by the type of solvent in the composition, the nature of release, and purpose. If you have an idea of all these factors, you can greatly simplify the search for the right composition.
Table 1. Classification of primers.
| Classification type | What types of impregnations are there? |
| By release form | Primers are produced in the form of: a liquid solution that can be used immediately; concentrate for dilution with water; dry mixture, which must first be diluted with liquid. |
| By type of solvent in the composition | The solvents used are: water (in water-based impregnation); organic compounds - white spirit, acetone, isopropanol. |
| By purpose | According to the functions that the primer should perform, it is divided into several types: strengthening (for structures made of plasterboard, cellular concrete, gas silicate); penetrating (for stone, brick, concrete surfaces); adhesive (for gluing wallpaper on tiles, glass or plastic). |
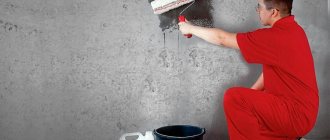
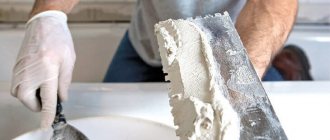
Important! Regardless of the purpose and original form of release, the primer is always applied with a brush or roller. If the room is spacious, use a spray bottle. But it is important not to forget about a respirator and protective clothing.
The mixture is applied with a brush or roller
Classification by soil type
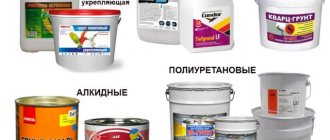
The most important classification of primers on the market is by type of primer. This is the main factor that buyers look at when choosing the right formulation. Primers are acrylic, alkyd, mineral.
Table 2. Classification of primers by soil type.
| Composition, release form | In what cases is it used? | |
| Acrylic | Available in the form of powders, concentrates, and ready-made water-emulsion solutions. An antiseptic is added to some types of acrylic primers, then they are used for finishing kitchens/bathrooms. Also act as pigment primers to even out color. | A universal type of primer that is suitable for almost all types of surfaces. It covers walls made of: wood; concrete; bricks; plywood. They are also different in purpose - strengthening, adhesive, deeply penetrating. It dissolves well in water and dries quickly. |
| Alkyd | The compositions are more aggressive than the previous ones. They consist of alkyd resins with the addition of organic solvents. Due to specific components they have an unpleasant odor, which disappears after long airing. Available only in the form of ready-made wet mixtures. There are 4 varieties available: polyvinyl acetate; glyphthalic; polystyrene; perchlorovinyl. All types create a film on the wall surface that can withstand strong impacts and temperature changes from -40 to +60 degrees . | It is used everywhere and for all surfaces, except plasterboard, gypsum plasterboard, gypsum and cement based coatings. The protective film makes it possible to use a primer for walls in the kitchen and bathroom. Can act as a finishing coating. |
| Mineral | A fairly harmless coating that dries quickly and does not have a strong odor. The composition contains gypsum, cement and lime. | Mineral-based mixtures fill the pores of concrete, expanded clay concrete, and brick surfaces until smooth. Used very rarely. |
The undisputed leader on the market is acrylic primer . It is economical to use, does not smell and fills loose materials well due to its structure. At the same time, it costs less than analogues. Therefore, mineral and alkyd coatings are not easy to buy in a store.
Prices for deep penetration primer
Deep penetration primer
Rating of the best primers
We have collected several primer compositions that have proven themselves to be positive. They include.
Ceresit CT 17
The composition belongs to the category of deep penetration.
- It has excellent performance characteristics.
- It is chosen for processing porous substrates and with heating.
- The presence of a color pigment makes it easier to apply the liquid during use.
- A thin layer of this soil dries within 2 hours.
The components in the mixture are completely safe for human health and the environment;
Prospectors concrete-contact
This product is considered one of the most popular. The primer has good adhesive properties. The composition contains acrylic and polymer components, when applied to the surface a rough base is formed.
- This brand of wall primer provides good vapor permeability and moisture resistance.
- The composition contains antiseptic substances and colored pigment.
- The drying time of the layer is approximately 3 hours.
It is recommended to choose it for interior work. The primer mixture is suitable for coating concrete, plasterboard and non-absorbent substrates.
Liquid vs thick primer: pros and cons
Another classification option is the consistency of the primer and the depth to which it can penetrate. This:
- Thick surface primer. A mixture of creamy white color that lays like a film on the surface of the wall and masks all its imperfections.
- Liquid primer with deep penetration. A transparent solution with a consistency similar to water. The structure helps to penetrate deeply into the wall surface and make it stronger.
Each type has its own advantages and disadvantages; we will analyze them in the table.
Applying a thick white primer
Table 3. Thick and liquid primers, their advantages and disadvantages.
| Purpose | Advantages | Flaws | |
| Superficial | Used to fill loose surfaces, strengthen walls and eliminate minor irregularities. After application to the wall they turn into a smooth film. Some manufacturers add antiseptics and additives to their primers that neutralize alkali. | qualitatively fills micropores; ideally smoothes any surface; the coating is no different from decorative finishing. | does not penetrate deep enough into the wall. |
| Deep penetration | Used in cases where it is necessary to further strengthen the wall. For example, if the material is quite old and there is a risk of cracks. In addition, they are often used when preparing walls in rooms with high humidity (kitchens and bathrooms). Prevents the development of mold and fungi spores. | affordable cost; the ability to penetrate 25% deeper into the wall texture than thick primers; strengthens the loose texture of concrete and makes it as resistant to external influences as possible. | transparency; uneven application (due to the lack of color it is impossible to apply layers without overlapping); absorb moisture, so after the first layer has dried, you need to add a second one; different degrees of impregnation in different areas of the wall (because of this, the adhesion in the texture of the material will be different). |
To prepare a wall for wallpapering, a thick primer is most often chosen. This composition creates a surface that is ideal for further procedures. But for bare walls made of foam blocks, gas blocks and old cement plaster, a liquid variation must be used. It will help to hold together all particles of material at a depth of up to 15 mm .
Important! Some masters use both varieties at once. So, they apply a liquid penetrating primer for detailed work as the first layer, and a thick finishing primer as the second.
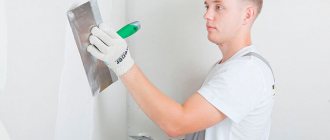
Applying liquid primer to the wall
Application of primer
Now you can proceed directly to applying the primer. This is not at all difficult, although this matter has its own subtleties. Here are some tips that may be very helpful if you are priming for the first time:
- Try to make sure that the light falls on the walls in such a way that the contrast between dry and wet areas of the wall with freshly applied soil is clearly visible. Then you will prevent “mispainting” and will be able to properly prime the wall even in one layer.
- If you are dealing with natural light, choose the wall that is currently receiving light at an acute angle; if you are dealing with artificial light, move the lamp close to the wall being primed.
- After completing the first layer and the primer has dried, run your hand along the wall: if the wall gets dirty and a white coating remains on your hand, then another layer should be applied. Apply it generously so that the wall is well soaked.
- If you prime with diluted wallpaper glue, do not dilute it too much: as a rule, wallpaper glue has a very short drying time, and you may not have time to use up the entire batch.
How to make primer at home
If you don’t trust modern manufacturers, you can make your own primer. To do this, you don’t have to master any special skills or prepare a lot of ingredients. The main thing is to check how accurately the proportions are observed. We offer 3 options for homemade primer.
Basic tips for working with primer
Option 1: Soap and lime primer
To prepare you need:
- 7 l : clean boiled water;
- 200 g : regular laundry soap;
- 2.5 kg : slaked lime;
- 100 g : drying oil.
To prepare the mixture, grate the soap
You will also need two mixing containers and a sieve. When the tools and components for the future primer are ready, we proceed to step-by-step production:
- Pour 3 liters of boiling water into a container, add grated soap . Stir until the soap dissolves.
- When the consistency becomes homogeneous, add drying oil .
- Pour the remaining 4 liters of boiling water into the second container and add lime .
- Combine both solutions, mix and pass through a sieve .
The resulting mixture is cooled for a couple of hours, after which it is used to treat the walls.
Option 2: Primer with copper sulfate
This variation of the solution actively resists the development of fungus and makes the wall surface stronger. To be prepared:
- 7 l : boiling water;
- 500 ml : wood glue;
- 150 g : copper sulfate;
- 1 package : laundry soap, grated.
Unlike the previous method, the primer will be cooked over an open fire. Therefore, you also need to prepare the tiles. In addition, you cannot use aluminum cookware: it will react with vitriol.
Copper sulfate
To prepare the primer you need:
- Pour soap and stir until almost completely dissolved.
- Place the container with the liquid on the fire, add copper sulfate , pour out the glue.
- Reduce heat to low, cook for 30-40 minutes . Stir regularly to prevent lumps from appearing.
Remove the finished mixture from the heat and cool slightly. Then pass through 2-3 layers of gauze.
Important! This strengthening primer will well seal the porous texture of concrete walls and also prevent the formation of black mold.
Option 3: Step-by-step instructions for preparing a deep penetration solution
To make a penetrating primer you will need:
- 8 l : clean boiled water;
- 1.5 l : PVA construction adhesive;
- 1 trowel, finely chopped chalk or cement.
Step 1. Choose any containers, taking into account the total volume of ingredients. We prepare the necessary material.
We prepare the necessary material and containers
Step 2. Pour construction adhesive into a container of water, mix until smooth.
The solution is mixed until smooth
Step 3. Pour cement or chalk into the prepared liquid, stir until dissolved.
Mix with cement/chalk
Step 4. After the composition has cooled, you need to pour it through a sieve or gauze cloth.
Strain the solution through a sieve
Step 5. Apply the finished primer to the wall.
Let's start applying the primer
Important! Thanks to the PVA glue in the composition, this homemade primer will protect the surface from moisture. It also shows excellent strengthening properties.
Video - How to make a deep penetration primer
Tools and materials
For work you will need the following:
- paint bath;
- a roller (foam rubber, velor or pile) on a telescopic handle + a brush (for applying the composition in hard-to-reach places), or a spray bottle;
- ready-made primer or dry composition and container + stirrer for preparing the composition yourself;
- personal protective equipment – gloves, headgear.
How to calculate primer consumption
To find out how much primer will be needed for a thorough study of the entire room, you will have to calculate the area of the walls without taking into account windows and doors. The final figure is doubled (two layers of primer), and then multiplied by 1.1 (taking into account unforeseen losses of 10%).
Next, we turn to the table below and calculate the approximate volume of primer that will be required to finish the room.
Table 4. Approximate consumption of different types of primer.
| Primer type | Surface character | Consumption, g/m2 |
| Acrylic thinned | iron; wooden. | 43 |
| Acrylic undiluted | wooden; OSB, chipboard; plywood. | 130 |
| Alkyd | concrete; brick. | 130-155 |
| Acrylic | anything other than wood. | 110 |
| Universal | for any type of surface. | 60-100 |
The figures are approximate; the exact volume of primer consumed can only be clarified when purchasing the composition. It is indicated on the packaging of the mixture in g/m2 or ml/m2.
Wall processing process
Mortar consumption rates for walls
How much primer solution to buy depends on the material from which the partitions are built, on their ability to absorb the solution, on the quality of the soil, and its density. On average, 100-300 grams of primer with deep penetration are consumed per 1 square meter of area. The approximate consumption of a universal primer is 1 liter per 1 square meter of area. Acrylic consumption – 1 liter per 5 square meters.
Additional Information ! The adhesion of wallpaper to the surface depends on the thickness of the soil layer. The thicker it is, the better the grip.
Basic rules for priming walls
So, let’s put together the most important information and add a few important nuances:
- are primed twice before wallpapering . The first time - to strengthen the base, as well as the best adhesion of the wall to the putty layer. The putty is primed a second time so that the wallpaper sheet is pressed tightly against the wall and does not peel off.
- During the initial (rough) surface preparation, a liquid composition with a high percentage of penetration . As a rule, this is an acrylic primer or homemade primer. For more detailed work, the wall is coated in several layers, with each new layer applied only after the previous one has completely dried.
- Liquid solutions for in-depth treatment take a very long time to dry . Therefore, when using them, it is recommended to take all precautions and take into account technical requirements (wear protective glasses/clothing, do not stay for hours on end in the room where the primer is drying).
- Alkyd impregnation is ideal for wood surfaces . It perfectly masks protruding chips and other defects that will be hidden for a long time under a layer of primer. In addition, this composition ideally hides nail heads, as well as other iron elements.
- The primer for wallpaper should be white, regardless of the color of the wallpaper. Otherwise, colored primers will show through and distort the shade of the wallpaper. In addition, white color perfectly covers dirty spots on the walls.
Prices for wood preservatives
Impregnation for wood
Despite the popularity of white primer, colored primer can also decorate the interior. Moreover, it is quite successfully used as a decorative coating. After drying, the primer layer becomes rough; it perfectly complements the relief of the decorative plaster that is applied on top.
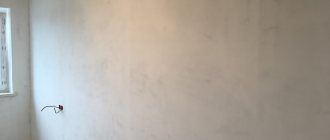
Priming walls is an important part of repairs
Pay attention to the article on the topic - How to calculate the amount of wallpaper per room, which describes in detail with examples how to make the calculations yourself using a calculator.
Priming a wall is not as difficult as it seems at first glance. It is much more difficult to choose the right primer, allow enough time for each layer to dry, and apply the mixture uniformly over the entire surface of the wall. If possible, choose primer and wallpaper glue from the same manufacturer. This guarantees optimal compatibility of the compositions, which will give excellent results.
Typical mistakes when priming
There are a number of mistakes that inexperienced repairmen often make.
Mistakes when priming:
- You cannot prime the surface with dispersion and water-based paints; these types of compositions do not have the same properties that are needed to create a primer;
- You should not apply the primer in only one layer; you may skip poorly primed areas;
If the type of surface for which the composition is intended to be treated is indicated on the packaging, only prime it; doing it on your own may result in redoing the work
It happens that the first layer is primed, but water-based emulsion or dispersion paint is still applied to the second. But after this, stains, gloss or matte paint structure may be visible through the wallpaper.
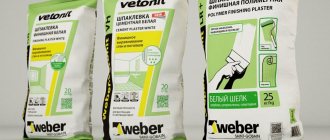
Primer brands
Primers of this brand are represented by the following types:
| Photo: | Description: |
| Deep-penetrating primer. In the form of a concentrate. Water-dispersed acrylic. For interior and exterior walls. Strengthens and increases the absorbency of concrete, brick, and plaster surfaces. Used for laying tiles, plaster, putty. | |
| Colorless primer mixture Super Primer is used for treating walls for painting and wallpapering. Water-dispersed acrylic. Strengthens fragile surfaces, makes walls and ceilings less hygroscopic. Available in the form of a concentrate that requires dilution with water. | |
| Ceresit primer paint is used for processing under thin-layer plaster, putty, and paint. Makes the base uniform and smooth, has good coverage. The composition contains a quartz filler, which helps to increase adhesion during further application of putty or plaster solution. It is produced ready for use, packaged in buckets. | |
| Film-forming primer is intended for problematic surfaces. Used for walls that will be treated with leveling mortar, tile adhesive, and waterproofing. Increases adhesion and dries quickly. Suitable for asphalt, fiberboard, concrete, heated floors, epoxy coatings. Available in plastic bottles. | |
| Adhesive primer composition Betonokontakt for priming a smooth surface. Suitable for priming walls indoors and outdoors. Does not contain solvent. Sold in buckets ready-made. Promotes good adhesion of materials and prevents drying out of materials that will be applied over the primer. The universal superconcentrate primer strengthens and impregnates the bases for further application of finishing material. Due to its component composition it has a wide range of functions. It contains mineral acrylic additives and a water-dispersed structure. Suitable for priming under any finish: painting, wallpaper, plaster, putty. Used both for indoor and outdoor work. |
Universal primer composition
How to apply a primer correctly
Universal primers have an optimal component composition that allows them to be used on any surface. Due to acrylic additives and resins, such a primer well saturates the surface being treated, improving their adhesive abilities and moisture resistance.
This primer is used for treating drywall, concrete, chipboard, fiberboard, metal and wood. Moreover, it is suitable for priming both indoors and outside the building. With so many advantages, the consumption is relatively small - 100-120 grams of material will be needed per 1 sq.m.
In the building materials market, various manufacturers present the buyer with a huge selection of primer mixtures. Experts with extensive experience recommend the use of primers of the following brands: Ceresit, Knauf, Volma, Prospectors, Axton, etc. They differ in price and application features. All this information can be found on the product packaging.
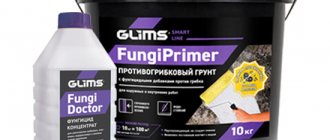
The ideal primer for wallpaper is a white primer from the Pufas brand. It perfectly evens out the color of the surface under transparent wallpaper, photo wallpaper, non-woven fabrics. When processing cement plaster, it will reduce the pH of the surface, strengthen loose bases, and regulate the degree of absorption of walls. This is the best primer for gluing wallpaper. Does not contain harmful solvents. Material consumption is 8 liters per 1 sq.m. Ceresit primers remove dust from the surface, destroy fungal and mold spores, and ensure adhesion of a smooth, non-absorbent surface.
Prime the walls before wallpapering
Tools for applying primer for wallpaper
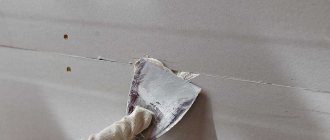
Before you start priming, you need to first prepare the walls and ceilings. A primer before wallpapering will make the walls smooth and even. Preparation consists of cleaning the walls from old paper sheets, putty and plaster solutions. If there are large flaws and roughnesses, they must first be puttied, and the joints and seams of plasterboard sheets, chipboard, etc. must also be sealed.
You should try to make the surface under the wallpaper completely smooth, because if the wallpaper is thin and light, then the flaws will be visible after pasting. And vinyl wallpaper, which differs in density and thickness, still allows for minor irregularities. If there are quite large irregularities on the surface, then it is better to use plaster and treat the entire surface with it. But before plastering, it is necessary to apply a deeply penetrating primer to the walls.
We will apply the primer with a paint roller. To apply the solution in the corners and at the joints, use a paint brush. During priming, the room temperature should be at least 5 degrees. When applying primer, you should try to avoid drips of primer on the surface. To quickly dry the mixture, it is allowed to heat the room with heating devices. After the primer has dried, apply the primer again.
Primer for liquid wallpaper Silk Plaster is used to prepare walls for finishing with silk plaster. The main condition for applying liquid wallpaper is a perfectly smooth and white surface. And Silk Plaster primer will cope with this task perfectly. This composition is applied twice with an interval between applications of up to 4 hours. How long the surface will take to dry depends on the air temperature in the room; complete drying will take from 12 to 48 hours.