Wallpaper is the most common material used for finishing walls. This is due to the wide range of such products. Also attractive is the presence of a rich palette of colors, patterns and textures with a fairly easy and not very long-lasting technology for decorating interiors with wallpaper.
But to ensure that the wallpaper does not crack, bubble, or peel off from the walls, you need to thoroughly prepare the base on which the wallpaper will subsequently be glued. If you need to stick “heavy wallpaper”, then the requirements for its adhesion to the base become even more stringent. To prevent the wallpaper from suddenly peeling off the wall and covering the owners, it is necessary to properly treat the surface on which it will be glued. Therefore, one of the most important stages of wall preparation, which is given special attention, is the primer.
Why prime walls with wallpaper?
The primer on store shelves is presented in a huge variety. All these buckets, canisters and jars can drive an unprepared person crazy. But despite some differences in composition, primer (or primer) always means a liquid or thick suspension that is usually odorless. As a rule, the primer is white or milky in color, sometimes it is transparent, but it can be of a specific shade. The primer is sold ready for application or requiring dilution with water (concentrate). When the composition is absorbed and dries, it should not form a film on the surface. Its task is to penetrate inside the base and fasten it, as it were, from the inside.
Previously, instead of a primer, they simply used PVA glue diluted with water, but this option has a big disadvantage - PVA is not a moisture-resistant material and when humidity increases during the transition periods of autumn/winter or winter/spring and there is no heating, the wallpaper can peel off from the walls. Such a primer is better than no primer at all, but it is much more effective to use specialized compounds designed for use in certain conditions. A modern primer consists of specially prepared water (highly purified), various polymer resins and various additives that give the composition special properties and simplify working with it. Water allows the material to penetrate well into porous surfaces. As it dries, the water evaporates, and the polymer particles hold the base together and give it protective properties.
On the packaging you will definitely see information about the purpose of the primer, application features, consumption and drying time. Primer is not a particularly expensive building material, but many people prefer to save on this expense item. This approach is irrational, since priming walls under wallpaper performs a number of important functions:
- strengthening the base , this is especially necessary for porous and loose walls. The primer also binds dust particles well, which interfere with the quality of the wallpaper;
- prevention of cracking and shedding of the base , since the primer penetrates deep enough and fills the pores well;
- the film on the wall and the pores filled with primer do not allow wallpaper glue , as a result of which its consumption is significantly saved ;
- improved adhesion between the wall and wallpaper glue , therefore the risk of peeling off the glued canvases is reduced significantly;
- leveling the tone of the wall , hiding minor defects, which is important when using thin, light-colored canvases;
- primers with antiseptic allow prevent fungus from appearing on walls and mold;
- The primer allows you to maintain an optimal microclimate; it does not prevent the walls from transmitting moisture vapor, so the surface remains “breathable”.
Is it possible to do without priming the walls? If you want the wallpaper to last on the wall for the planned period until the next renovation and the quality of the work comes first, then it is better not to neglect priming the walls. If you know for sure that in 2-3 years you will be re-pasting the wallpaper, then you can do without primers. This procedure is also neglected in the case of repairs in non-residential premises or when using very light paper wallpaper. But think a thousand times before refusing a primer, which is inexpensive and very easy to apply.
Top 9. Formula Q8 (Prestige)
Rating (2021): 4.50
5 reviews from resources were taken into account: Reviewer
High resistance to freezing The composition remains effective even after 5 freeze/thaw cycles.
- Characteristics
Average price: 239 rub.
- Volume: 5 l
- Type: antiseptic
- Drying speed: 0.5-24 hours.
- Consumption per 1 m²: 50-100 ml
White acrylic primer that leaves no marks during application. Suitable for treating bases made of brick, concrete, as well as plastered surfaces before gluing non-woven, liquid, paper wallpaper. After complete drying, the primer forms a dense, but at the same time vapor-permeable film, resistant to contact with moisture. In addition, the product significantly enhances the adhesion of glue and reduces its consumption. And the liquid does not smell: no irritating odor and no increase in humidity in the room, both during the work and after the coating has dried. True, when processing the base it is difficult to see the uncoated areas. But this drawback is fully compensated by the transparency of the finished protective film and the absence of harmful components in the composition of the soil.
Advantages and disadvantages
- Contains no hazardous solvents
- Without smell
- Does not change the color of the treated surface
- Applies evenly
- When applied, it is not visible in which place the base has been treated and in which it has not.
Types of primers by composition
Gone are the days when the only possible primer was glue diluted with water. Now there are so many different compositions that even a person quite experienced in repair issues can get confused. What can we say about a beginner who decided to hang wallpaper at home with his own hands! To make it easier to navigate the widest variety, we suggest classifying primers according to various criteria.
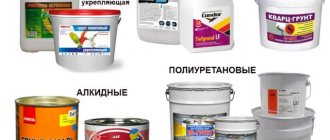
The composition of the primer is:
- acrylic;
- latex;
- acrylate;
- alkyd;
- mineral;
- glyphthalic;
- perchlorovinyl.
Acrylic primer
This is a universal composition that predominates on store shelves. It is made on the basis of a styrene-acrylate dispersion, used for interior work, applied to brick, plywood, wood, drywall, plaster and concrete. The composition is practically odorless, can be used with any type of wallpaper, dries quickly - no more than 2-4 hours. Penetrates deeply into the base. Limitation - ferrous metal cannot be coated with the composition and this type of primer is not very resistant to high humidity and water.
Apply primer in 1-2 layers. When working with drywall, it is better to use two layers: one - under the putty, the second - after the putty, under the wallpaper. This is necessary so that during dismantling the sheets along with the putty are not removed.
Most often on shelves you can find a universal acrylic primer, but adhesive, impregnating primers, deep penetration primers and special solutions that are most suitable for working with a specific material are also produced. Form of sale - ready-made solution or concentrate. The composition may include antiseptic additives. The consumption of acrylic primer depends on the condition of the base and the component composition of the soil, ranging from 80-250 g/m2.
Latex primer
It is made on the basis of synthetic latex, which, like its natural counterpart, has high strength, elasticity and water resistance. Latex primer is ideal for loose substrates ; the composition can even be applied to deteriorating surfaces of wood, plasters and putties using various binders. It is excellent for application on wood, fiberboards , porous wall materials, that is, substrates with strong absorption . In addition, the primer increases the moisture-resistant qualities of the surface. Its adhesive properties are quite high, but slightly lower than those of acrylic primers. The composition is evenly distributed and dries quickly. Consumption – 350-500 g/m2. Limitations - not recommended for use on substrates with high density or poor absorption, such as concrete. Creates a film and thereby greatly reduces the release of moisture vapor from the base.
Acrylate primers
It is produced by mixing acrylic and latex resins with the addition of special additives, such as antiseptics. This type of primer is the most universal at the moment on the building materials market. These primers are recommended for use both inside and outside, on any type of substrate, with the exception of metals and building plastics. This primer is used before plastering, puttying, painting, wallpapering, gluing tiles and forming a screed or self-leveling floor. Other advantages include drying time (4-6 hours), low consumption 80-200 g/m2 (depending on the absorbency of the base), moisture and water resistance, and lack of odor. Limitations - when priming monolithic concrete, it is necessary to dilute with water 1 to 1 (per 1 l/soil * 1 l/water).
Primer Glims PrimePrimer
We recommend using deep penetration primer Glims PrimeGrunt and Glims DeepPrimeGrunt, which perfectly strengthens the base and contains an antiseptic to prevent the development of mold and mildew. The composition can be applied to concrete, drywall, brick, plaster and putty; it perfectly binds dust and reduces the absorbency of the base.
Alkyd primer
Alkyd primers are an ideal solution for treating wooden surfaces (wood, chipboard, fiberboard, OSB) , but are also used when working with concrete and reinforced concrete bases. The composition well fills the pores of the top layer of material, preventing swelling of the wood and penetration of moisture into the concrete.
The primer can be used for interior and exterior work; it forms a sufficiently viscous layer that can cope not only with wallpaper, but also with tiles. The mixture may contain zinc chromate or phosphate. For further work with wallpaper, the second type of mixture is more suitable.
The main disadvantage of the composition is the long drying time, up to 14-16 hours. In addition, the primer has a strong odor and does not penetrate into the material as well as other compounds. It is not recommended to apply it to drywall, plaster and plaster. Primer consumption is 100-150 g/m2; if necessary, the composition is diluted with white spirit or xylene.
Glyphthalic primer
An ideal primer option if you need to treat a metal surface , for example, in a garage. The composition is very durable, does not wear out, in some ways even resembles enamel, and allows you to make the surface more uniform and even. Before applying, be sure to clean the metal from rust. The composition can also be used on wooden surfaces. The primer is absolutely non-toxic, you can work with it without protective equipment, but it takes a long time to dry - from 8-12 hours to a day.
Perchlorovinyl primer
Excellent for treating metal surfaces , it can also be applied to concrete and brick . The composition dries quickly - literally an hour after application you can proceed to wallpapering. It can be applied at fairly low temperatures. The primer has good adhesive and antiseptic properties. The main disadvantage is high toxicity, so the choice of protective equipment should be approached extremely carefully.
Mineral primers
They are made on the basis of gypsum, cement or lime, ideal for working with concrete, gas silicate, expanded clay concrete and brick. The composition perfectly fills the pores of the base and allows you to achieve perfect smoothness. When choosing, pay attention to the main component included in the primer. For example, if the surface contains lime, then choose lime or gypsum soil. The primer has almost no odor, dries quickly (although there are compositions that dry up to 24 hours), and is excellent for initial surface treatment, but such compositions are used infrequently.
How to choose and apply?
There are certain rules for selecting and applying a primer:
- when choosing a primer for wallpaper, be sure to take into account the type of walls, the type of wallpaper and all other factors that may affect the choice of the type of substance;
- If you have already found a suitable type of primer, before purchasing it, ask the seller to let you smell this product. You need to make sure that it doesn’t smell like glue, because otherwise it’s most likely a fake;
- when calculating the required amount of primer material, you need to assume that approximately 0.15 liters of primer mixture will be needed per square meter;
- purchase only high-quality soil, since the quality and durability of the repairs will depend on it;
- after applying the primer layer to the walls, you must wait until it dries completely;
- Apply at least two coats of primer.
Wallpaper glue and PVA as a primer
Some people still prefer not to spend money on a separate primer and use wallpaper glue diluted in water. This solution will somewhat strengthen the surface and reduce glue consumption during wallpapering, but the results cannot be compared with treating the surface with a primer. Wallpaper glue will not be able to strengthen the surface so well, give it antiseptic properties and smooth out imperfections. If this doesn't scare you, then before you get to work, make sure that the packaging with wallpaper glue mentions that the material can be used as a primer. The proportions for mixing with water to obtain a primer should also be indicated there.
Typically, casein-based glue is used for these purposes, but other compositions can also be used. The consumption will be approximately 70-100 g of glue per 1 m2 of wall. The composition dries in about a day.
You can also use the usual PVA glue. It is made on the basis of polyvinyl acetate, hence the name, and to prepare the primer composition, chalk, gypsum, alabaster, drying oil and, of course, water are added to it. It turns out to be economical, but there are some drawbacks - PVA glue tends to turn yellow over time, so if you choose thin, light wallpaper, then this method of preparing walls is definitely not suitable for you. Also, during subsequent repairs, you will have to peel off the surface film of PVA, since you cannot putty and level the walls.
When to wallpaper
Priming the walls before wallpapering is done a few days before installing the decorative covering. Therefore, you should be patient and be sure to wait until the impregnation has completely polymerized. Otherwise, priming will not have the desired effect - better retention of wallpaper on the wall. After which you can safely glue it.
You need to choose the right mounting solution for the appropriate wallpaper. Paper, thin and light wallpaper can be glued with regular wallpaper glue. For non-woven wallpaper - non-woven glue (on a non-woven base). For vinyl, textile and embossed – vinyl. For heavy ones, it is necessary to choose a special mounting solution of increased strength and resistance to moisture. But the most important thing is that priming increases the installation properties of the adhesive.
From all of the above, it becomes clear why there is a primer under the wallpaper. Correctly selected product and high-quality work done with your own hands are the key to the durability of the finish.
Types of primer by purpose
According to their purpose, primers can be divided into:
- universal, water-based, suitable for interior and exterior use, can be applied to almost any substrate;
- deep penetration primers . They are transparent, have a liquid consistency, are designed to strengthen the base, bind dust, and cannot be avoided when working with loose and old surfaces. They are also necessary for repairs in rooms with high humidity. In the kitchen, for example, such primers will prevent the development of mold if the composition contains antiseptics. Depending on the composition and manufacturer, such primers can penetrate the wall to a depth of up to 15 mm. Brick, concrete, gas and foam concrete, plasterboard surfaces necessarily require the use of such soils. You can’t do without them even if you use heavy wallpaper. Deep penetration primers are inexpensive, but due to their transparency they are more difficult to apply, so areas with slightly different adhesive properties may appear on the wall;
- antibacterial and anti-corrosion compounds contain special substances that prevent the appearance and development of pathogenic microorganisms and rust. Such primers are especially valuable when working in rooms with high humidity;
- antifungal agents are also indispensable when treating walls that may be exposed to moisture (kitchen, bathroom, wall adjacent to the street, basements and cellars, etc.) and bases that are already infected with mold and fungi. Until recently, antibacterial liquids based on various acids or solvents were present on the shelves, which had a detrimental effect on people and their health. After use, I had to leave the apartment for several days, and during operation, these liquids continued to emit harmful fumes. But progress does not stand still, and not so long ago new materials based on FUNGICIDES entered the market. They can rightfully be called PRIMERS, since they are practically odorless and do not emit harmful fumes during operation. And the effect of their use is much higher and more durable.
- insulating ones contain adhesives, resins and oils that form a water-repellent film;
- adhesive type concrete contact. Designed to work with poorly absorbent substrates (for example, oil paint or smooth concrete). The primer contains particles of quartz sand, which form a rough film on the surface. This allows for better adhesion to subsequent finishing materials (plaster). Many manufacturers pigment these primers to simplify the application process.
Top 4. Axton
Rating (2021): 4.60
15 reviews from resources were taken into account: Otzovik, Leroymerlin.ru
Low price This is the cheapest wallpaper primer in the rating. The product is not only inexpensive, it also works effectively and does not leave stains after drying.
- Characteristics
Average price: 101 rub.
- Volume: 2.5 l
- Type: for dry rooms
- Drying speed: 0.5-2 hours.
- Consumption per 1 m²: 0.1 l
Environmentally friendly water-based primer. It is distinguished by a very low price for this type of material, as well as ease of application and virtually no odor. Suitable for treating walls and ceilings made of plaster and concrete. Penetrates deep into the base and prevents the rapid absorption of wallpaper glue. The composition is white, not very pigmented, and after complete drying it becomes completely transparent. The primer removes dust from the surface, is compatible with glue for any wallpaper (paper, non-woven, vinyl, photo wallpaper), and is also quite economical in consumption. Users assure that a 2.5 liter bottle is enough for a room of 30-32 m², when the manufacturer says only 25 m². But the primer has one drawback - it is liquid. Therefore, it is better to apply it with a roller, squeezing it thoroughly each time.
Advantages and disadvantages
- Very low price
- Colorless
- Wash off from tools with plain water
- Effectively improves the adhesion of wallpaper to the wall
- Spreads
Types of primer by consistency
Primers can also be divided according to consistency, which determines the depth of penetration of the composition:
- liquid solutions of deep penetration , as a rule, are transparent, penetrate 25% deeper into the base than thick primers, are intended for initial surface treatment, allow you to strengthen the wall well and bind dust. Such primers are inexpensive, but difficulties may arise during operation precisely because of their transparency - it is not visible where a layer has already been applied and where it is not, therefore there may be zones on the surface with different adhesive properties. You cannot do without such a composition when you need to strengthen the base (it is old, loose, may crumble or crack);
- Thick surface primers are white in color and can not only strengthen the surface, but also eliminate minor unevenness, preparing the wall for finishing. Some of these primers contain an antiseptic. Minus - it does not penetrate into the wall structure as deeply as a liquid composition.
Experienced craftsmen use two types of primer, applying a liquid primer as the first layer, and a thick composition as the second.
What is a primer
A primer is a suspension in liquid form. If you treat a surface with it, it is able to penetrate the material by 2 cm or more. Primer solutions are necessary to qualitatively change the properties of the treated surfaces before their final decoration, including before wallpapering.
The primer includes a variety of universal components with fillers and has a uniform consistency. Regardless of the material from which the main surface is made, in order to finalize the wallpaper, it must be primed in any case. As mentioned above, this will strengthen the outer layer, optimize glue consumption and improve the overall quality of the glued sheets.
Primer at home
Ready-made primer is not that expensive, but some do not trust the commercial composition and prefer to prepare the composition themselves. It will be even cheaper, although you will have to forget about some of the beneficial properties of store-bought primer. Here are several options for homemade primers.
Lime and soap based primer
For 7 liters of clean boiled water you will need 200 g of laundry soap, 2.5 kg of slaked lime and 100 g of drying oil. First, pour 3 liters of boiling water into a container, add grated soap and stir until all the soap has dissolved. Then you need to add drying oil. In another container, lime is dissolved in the remaining boiling water, after which both solutions are mixed, mixed thoroughly and filtered through a sieve. It will take a couple of hours for the primer to cool, then it can be used to treat the walls. The downside is that during subsequent repairs you will have to strip the walls almost to the ground, since drying oil, after drying, creates a film over which it is prohibited to apply finishing materials.
Primer based on copper sulfate
The composition has antifungal properties and is able to strengthen the surface. For 7 liters of boiling water you will need 500 ml of wood glue, 150 g of copper sulfate and 1 package of laundry soap, which is best grated in advance. For preparation, it is important to take a container that is not made of aluminum (it will react with copper sulfate). Prepared water is poured into it, heated to a boil and soap is added, bringing it to almost complete dissolution. Now you need to add vitriol and glue, while the container should remain on low heat for 30-40 minutes. The mixture is stirred regularly to avoid lumps. Then it is removed from the heat, filtered through cheesecloth several times, and the primer is ready for application. Minus - copper sulfate is poison for all living things.
PVA based primer
This “recipe” will allow you to prepare a deep penetration composition. For 8 liters of boiled water, take 1.5 liters of construction PVA. All the glue is poured into the water, mixed until completely dissolved, then chalk or cement is added, mixed, cooled and filtered through a sieve or cheesecloth. Disadvantage - it is not resistant to high humidity and creates a film on the base.
What does priming do?
The main task of the process is to prepare the walls before carrying out other finishing work (plastering, painting, wallpapering, varnishing, etc.). The soil has all the necessary properties to remove existing flaws and prevent future ones.
The most important thing is that the mixture can improve surface adhesion. It strengthens the base and helps the coating composition (paint, varnish, etc.) adhere to it.
Prevents the beginning of shedding of the surface, which cannot be stopped by the coating. Strengthens the base and prevents the appearance of microcracks.
A primed wall's absorption properties are reduced. This is justified for porous surfaces, those that have already been plastered or puttied.
Thus, the wall will not be able to absorb a lot of coating, while savings will occur due to the fact that most of it will remain on the surface.
Primer consumption
Primer consumption depends on the type of composition used and the condition of the surface. Typically, the manufacturer indicates the consumption range of its composition on the packaging. If this is a renowned manufacturer, then you can trust his words. If you are looking at a product from a little-known company that assures you of the high efficiency of its product, then you can doubt it and add another 30-40% of the reserve to the indicated figure.
It is necessary to know the primer consumption in order to understand how much material to use. First, calculate the area of the surface to be treated, then, if necessary, apply two layers, multiply the result by two. Multiply the area by the primer consumption indicated on the package, and it is better to multiply the final result by 1.1. So, for example, the wall area is 40 m2, we apply the primer in one layer, the manufacturer indicates a consumption of 100 ml/m2. This means that we will need 4 liters of the composition, but with a reserve it is 4.4 liters, so we can safely take a 5 liter bucket.
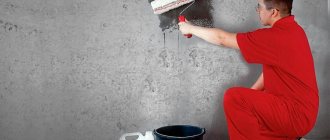
Wall treatment
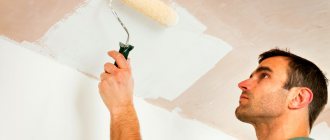
How to prime walls for wallpaper with your own hands? Good question. It's not difficult at all. The work uses a foam roller with a long handle (for ease of distribution of the solution along the height of the wall). We pour a little impregnation into the bath, dip the roller, lightly squeeze it on the lattice side of the bath (so as not to drip), and treat the wall.
Distribute the solution evenly over the entire surface. You don't need to use too much solution, but there shouldn't be any dry spots on the surface either. The first application is completed, put the tool aside and wait for the impregnation to dry. More precise drying time information can be found on the packaging of the product you purchased.
What you should not do is apply a new layer on top of the previous one that has not yet dried. You can believe it by touching it with your hand. Usually a double application is sufficient, but sometimes three or more coats are required.
How to prime walls for wallpaper?
The more carefully each stage is completed, the better and more durable the result you will get:
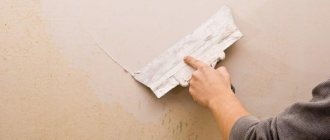
- the process should start with cleaning walls from old coating. It is necessary to dismantle the old wallpaper, wash the plaster or remove peeling paint. You can remove the wallpaper with your bare hands, helping yourself with a spatula or knife (when the canvases are literally falling off the wall), you can pre-soak the wallpaper and pry it off with a spatula, you can also use a special liquid and steam irons. Old paint is removed mechanically (trowel, chisel and hammer, drill, grinder), using solvents or high temperature (iron, hair dryer). As a result, the walls should be completely stripped of their old coating;
- the wall will most likely have various kinds of defects and will require leveling, but first apply the first coat of primer – deep penetration composition. If necessary, the primer is diluted with water (if provided for in the instructions), poured into a container and applied to the wall using a roller. Experienced craftsmen recommend moving from the bottom up, which will significantly save the composition, since it will not splash or flow down the wall;
- when the first layer of primer has dried, move on to leveling the walls. If there are few defects and they are not critical, then you can get by with putty. If the base looks really bad (potholes, cavities and various types of destruction at least 5 mm deep), then you will have to plaster. As a result, you need to get a flat, smooth surface, and the thinner the wallpaper you use, the more carefully you need to perform the work to level the base;
- when the layer of putty or plaster has dried, move on to final priming. The composition is poured into a tray tray, scooped up using a roller (a nap roller is better than velor and foam), remove excess on the grooved surface of the tray and apply the primer to the wall, moving from bottom to top. It is more convenient to treat hard-to-reach places with a brush with artificial soft bristles. It is important to apply the composition without skipping any sections of the walls. If necessary, after the first layer of primer has dried, apply a second one;
- wallpapering when the primer is completely dry. The manufacturer indicates drying time, but it is better to wait a day. Experts advise carrying out the following test to guarantee. A thick polyethylene film measuring 15*15 cm is glued to a section of the wall with masking tape and left overnight. If in the morning there is no condensation under the film, then the primer has dried well, and you can start gluing the wallpaper.
When working with primers with a pungent odor, ensure reliable respiratory protection and also provide a supply of fresh air. This should not be a draft, but high-quality ventilation.
The article was written for the site.
Tags:Wallpaper, Preparing for room renovation
The main reasons for priming walls
Wallpaper can be glued to a wide variety of wall types (brick, wood, concrete). The most important thing is that you can prepare them accordingly. The surface must be strong and reliable, as well as smooth. Experienced craftsmen believe that, regardless of the chosen type of finishing, including wallpapering, the walls must be primed. Experts say that this finishing method should not be neglected, because it is really quite important.
There is no single point of view only in relation to the plasterboard surface. Many people think that this is a pointless waste of money, but experienced craftsmen recommend that in this case, too, apply a primer before filling.
The following functions that the primer performs can be distinguished:
- ensures good adhesion of the wall surface and wallpaper. This is both saving and optimizing glue consumption,
- the surface of plastered walls treated with a primer does not peel off and cracks do not form on it,
- the antiseptic properties of the mixture additionally protect against a variety of pests and also prevent the development of fungus and mold.
Now we list the reasons why using a primer is necessary:
- The surfaces of the walls on which you are going to glue wallpaper most often have a porous or even loose structure, which will ensure very strong absorption of the adhesive composition. As a result, you will have to apply more glue to achieve the desired result. Its ability to securely fix the canvas will also decrease. However, as soon as we cover the walls with soil, it will penetrate into all the pores and fix the surface layer of the material. In addition, a kind of protective film appears that will not allow the glue to penetrate inside; it lays down more evenly, its consumption is noticeably reduced, the benefits are obvious! In addition, the strength of the walls increases and the adhesion of the paintings to the surface increases,
- You've probably noticed that even on perfectly prepared walls there are various dust particles. When applying glue to such a surface, inhomogeneous elements and lumps are formed. All this worsens the quality of wallpaper gluing. As a result, they may begin to peel off. If the walls are primed, then this dust will be isolated under the primer layer and will not come into contact with the glue,
- modern primer solutions contain a variety of antiseptics. Their presence will not allow mold and mildew to form under the wallpaper,
- if you are going to glue light translucent wallpaper, it would be useful to treat the surface with a white primer, this will allow you to get rid of various shades on the wall, remove stains of rust, soot, grease and the like,
- a wall well treated with a primer solution allows the wallpaper to slide for some time when adjusting the canvases. This property makes it possible to optimally place the canvases, which, naturally, will be reflected in the final result - the joints will be smooth, and the canvases will be free of distortions and wrinkles,
- In addition to the above, the primer layer will further protect your wallpaper from temperature changes and humidity in the room.
If you do not prime the walls, this may result in peeling of the panels, as well as the appearance of air bubbles. This is especially possible at corner joints of walls, in particular at the bend of sheets. We believe that in this case there is no need to save time and money, besides, it will not take you very much time, and the primer is quite affordable for the average person.
By neglecting this important stage of wall treatment, you run the risk of having to re-do repairs, and this will require an investment of quite a lot of money and time. Without refusing our advice and priming the walls, you will receive a wonderfully completed repair.
Typical mistakes when priming
There are a number of mistakes that inexperienced repairmen often make.
Mistakes when priming:
- You cannot prime the surface with dispersion and water-based paints; these types of compositions do not have the same properties that are needed to create a primer;
- You should not apply the primer in only one layer; you may skip poorly primed areas;
If the type of surface for which the composition is intended to be treated is indicated on the packaging, only prime it; doing it on your own may result in redoing the work
It happens that the first layer is primed, but water-based emulsion or dispersion paint is still applied to the second. But after this, stains, gloss or matte paint structure may be visible through the wallpaper.
Applying primer to various surfaces
Work on priming any bases must be carried out at low humidity and positive temperatures from 5 to 25 degrees.
If the temperature is too high, the primers dry quickly without being able to penetrate to a sufficient depth.
The technology for applying the primer depends on the base material and the choice of primer mixture composition.
When preparing a solution from a dry or concentrated mixture, follow the manufacturer's instructions.
Mix the ready-to-use mixture thoroughly until smooth.
Thorough mixing requires adhesive soil containing quartz filler, which settles to the bottom.
Pour the solution into a paint tray.
We cover the wall with an even layer of primer using a roller or brush, moving sequentially from top to bottom.
Apply the second layer of impregnation after the first has completely dried, but not earlier than after 4 hours. The drying time of a certain composition is indicated on the packaging. You can begin subsequent finishing no earlier than one day later.
When treating dark bases or uneven color, it is better to paint the walls with water-based paint in white, or in the color of the decorative finish.
Painted walls
It is better to prime walls painted with water-based compounds with acrylic impregnations.
Surfaces painted with oil paint are treated with adhesive impregnations. They will give the surface roughness and improve the adhesion of the decorative coating to the base.
You must first clean the painted walls with light-grit sandpaper and degrease them.
It is better to apply impregnation with a roller, in two or three layers, following the manufacturer’s recommendations.
If there are unevenness, delamination and paint shedding on the surface, it is better to remove the old coating, re-plaster and putty.
Treatment of concrete and plastered walls
Concrete and plastered bases are impregnated in two approaches with a deep penetration primer, with an interval of at least 4 hours.
If the surface is too porous, peeling and crumbling, it is better to use bonding primers.
We repair base defects, cracks and unevenness with cement or gypsum mortar.
To ensure uniform color and uniform impregnation, we putty the walls with gypsum putty.
Apply two coats of primer evenly using a roller and brush.
Plasterboard walls
You can apply liquid wallpaper to drywall after completing all the technological steps:
- surfaces of plasterboard sheets are primed twice to ensure adhesion;
- We fill in uneven spots and grooves from self-tapping screws with putty.
- We glue the joints of the sheets with sickle tape and then putty.
- Perform a continuous putty on the surface of the walls with a thin layer and let it dry.
- Cover the base with two or three layers of primer. In this case, apply the next layer after the previous one has completely dried.
Wooden walls
When preparing wooden structures, it is necessary to take into account the high absorbency of wood, its tendency to deformation and damage by pests, fungi and mold.
For priming wooden walls indoors, deep penetration acrylic primers that are safe for health are suitable. They reduce water absorption of the surface, strengthen the wood and prevent its swelling.
We choose primers that contain antiseptics, fungicides and insecticides, or pre-impregnate the walls with antiseptic compounds.
We coat the walls with primer 2-3 times, observing technological breaks for drying of the previous layers and the manufacturers' recommendations.
A roller, brush or spray gun is suitable for applying impregnation to wooden bases.
Types of surfaces
For each type of surface, manufacturers offer their own type of primer (for loose porous walls). This information is usually contained on the packaging. For plastered walls, you should use an acrylic or emulsion primer. This composition is suitable for various substrates, except metal, it is environmentally friendly and practical.
If you need to cover a surface of wood, you should purchase an alkyd primer. This solution perfectly saturates concrete walls and can be tinted.
If interior finishing involves treating sand-lime brick, concrete and plastered surfaces, you can buy a mineral primer.
If the wooden surface is knotty, you should use a shellac primer.
If the store does not have an acrylic primer, you can treat the walls with a polystyrene compound. However, it must be taken into account that it is not at all harmless to health. If the repair involves not only gluing wallpaper, but also installing the floor (for example, laying linoleum), it is worth buying a composition that is suitable for both walls and floors.
What else is priming useful for?
After nails, screws, baseboards, and all sorts of defects have been removed, a layer of putty is applied to the wall. Next, the wall is primed. The following are reasons why a surface should be primed:
- Final dust removal, removal of dirt that could not be removed during puttying.
- Leveling the surface.
- Reducing the consumption rate of adhesive, as the soil clogs cracks and defects in the material.
- Improving adhesion (cohesion of dissimilar materials).
- Strengthening the bottom layer so that the material does not peel off.
- The coating acquires water-repellent properties.
- The surface retains the ability to “breathe”.
- Protection against mold and mildew
Previously, walls were covered with newspapers or other paper before applying wallpaper. To some extent, this method replaced the primer. However, only modern soils can ensure high quality of work performed and the entire list of the above advantages of a primed wall.
Application technology
The primer is mixed according to the instructions and the specified proportions, and it is mixed very thoroughly.
The mixtures are mainly applied to plaster, either to bare substrates (external and internal) or to drywall with a roller, brushes or spray.
It is usually applied in two layers. The second layer must be applied after the first has dried for several hours. The optimal temperature for performing work is considered to be from +5 to +20 °C with humidity up to 75%.
The mixture is distributed with a roller or brushes thoroughly and evenly, without the formation of puddles.
If necessary, a puttying step should be carried out between the primer layers. This is the case if the walls have a lot of cracks and unevenness.
Before applying the next layer (putty or primer), it is important to strictly dry the previous one. If for soil this period is 2-24 hours, then for putty it is 2-4 weeks
A day after applying the last layer of primer, you can apply a decorative coating.
Useful video:
Tips and tricks:
- Drywall can be primed in one layer and without putty;
- A well-absorbing primer mixture is applied in 2-3 layers;
- Penetrating primer does not need to be applied until it is shiny;
- Primer based on PVA glue does not perform its functions;
- A dirty mark on your finger after running over the wall indicates that it needs to be primed;
- A façade that is too hot from the sun cannot be primed;
- Soil mixtures from different manufacturers cannot be mixed.
Features of application
Now let's look at some points that relate to the use of primers for wallpaper.
How best to apply: we take into account a number of features
The question of how long the primer for wallpaper should dry is of interest to people for a reason. The fact is that an accurate understanding of how quickly the material can dry makes it possible to calculate all the step-by-step work. This helps to better organize all the work, thus saving a significant amount of time. By the way, the technology for applying the composition largely affects how quickly polymerization will occur. Here are some features you should think about when carrying out work:
- The first step is to take into account the fact that the material is applied in a thin layer. At the same time, there should be no smudges or droplets left.
- It should also be taken into account that before starting work, you need to start studying the instructions and recommendations in advance.
- In the case of using a composition with a high level of penetration, it is necessary to apply several layers of it alternately, one after another. It should be understood that the next layer is applied only after the previous one has practically dried.
Other recommendations
So, when drying the primer before gluing wallpaper, as well as during all other work with it, you need to take into account a number of important points:
- If diluted wallpaper glue acts as a primer, then you can stick the wallpaper even when it has not yet completely dried.
- When using other materials, it is advisable to apply them in the evening or in the second half of one day, and glue the wallpaper the next morning.
- Avoid sudden changes in temperature during the drying process.
- In addition, it is advisable to avoid drafts.
- Do not use artificial “accelerators” that would allow the soil to dry faster, as this may slightly reduce the level of adhesion of the working surface.