8206 0 0
Icer August 16, 2016Specialization: master in the construction of plasterboard structures, finishing work and laying floor coverings. Installation of door and window units, finishing of facades, installation of electrical, plumbing and heating - I can give detailed advice on all types of work.
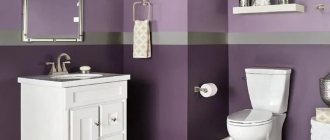
You can use drywall in the bathroom to build a wide variety of structures. Personally, I like this option because the workflow is quite simple and does not require special skills, and the result is very attractive. In this review, I will talk about several types of work that almost any developer can do; you just need to carefully read the recommendations and take them into account.
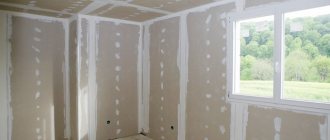
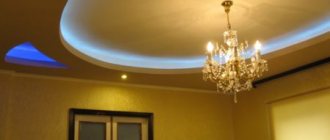
In the photo: finishing with plasterboard is a simple option for renovation in the bathroom
Can I use drywall in the bathroom?
Drywall is produced in various types. It is distinctive in size, thickness, and accessories. There are 3 common and frequently used types:
- Regular plasterboard is gray. The sheet size reaches a maximum of 4.8 m, its width is 1.2 m, and its thickness is from 8 to 24 mm. We can use it as dry plaster for leveling walls, ceilings, creating niches and other objects.
- Green moisture-resistant gypsum plasterboard. Drywall sheets are treated with moisture-resistant agents. They are used to create niches, level walls, ceilings, and produce boxes for pipes in wet rooms. These are bathrooms, toilet, balcony, attic.
- Fire-resistant gypsum board - drywall that does not burn. Used for finishing fireplaces and walls near stoves. It is also used in areas with a high fire hazard.
In the bathroom you need to use gypsum plasterboard. Proper installation will allow you to maintain a neat appearance for 15-20 years. Tiles are laid on the drywall and covered with paint. You can hang shelves and drawers for bath accessories on the wall made of gypsum plasterboard.
Features of sheets made of construction cardboard and gypsum
We paint gypsum board with our own hands
Construction cardboard, laid in layers, serves as reinforcement for the hard but brittle gypsum. By weight, paper makes up about 8% of the composition. Fine asbestos more than 90%. The technical characteristics of the materials are different. What they have in common is their hygroscopicity. GKL absorbs:
- moisture from the air;
- paint;
- primer;
- water;
- other liquids, including dirt.
The paint protects the gypsum board from swelling and destruction. By creating an aesthetically pleasing appearance for the room, applying drywall paint will simultaneously increase the lifespan of the walls.
Drywall is produced with improved qualities due to various additives:
- ordinary;
- moisture resistant;
- fire resistant;
- soundproofing;
- increased plasticity with microfibers.
Regardless of the type, drywall is prepared for painting in the same way. Additives impair the vapor permeability of the material and increase its cost. Therefore, sheets of special plasterboard are used in damp rooms and boiler rooms with good forced ventilation.
Which drywall to choose
To level the wall in the bathroom, 2 options of drywall are used:
- GKLV – green. Sheet thickness 12.5 mm. Height and width depend on the manufacturer. This type is used for leveling walls, hiding pipes, and creating a suspended ceiling.
- Fire and moisture resistant GKLVO. This type is produced by Knauf. It has the property of both resisting moisture and not burning. It is also used for leveling walls and ceilings. In those places where there is a danger of fire in the wiring (old) or in a private house the wall is rough, then this type is applicable.
You cannot use gray plasterboard in the bathroom. Soon it will swell and become deformed. The finishing will become unusable. There is a high probability of fungus appearing.
Under tiles
Moisture-resistant gypsum plasterboard sheets are chosen for tiles on the bathroom floor. It is denser and more durable. Sheets with a thickness of 12.5mm are suitable for walls. There are nuances here:
- GKLV cannot be glued in the bathroom. They are mounted on a metal frame. The frame base is made with transverse horizontal profiles. This serves as a reinforcement for the base, capable of supporting the weight of the tiles and the adhesive.
- The joints must be reinforced. To do this, use reinforcing tape and putty for joints. The putty should be moisture resistant. Let’s say Knauf “Uniflot” is universal, “Fugen” is moisture resistant.
- All metal elements - profiles, fasteners, connectors must be galvanized or coated with an anti-corrosion compound.
- Before creating the frame, the rough base is treated with a hydrobarrier.
If these rules are not followed, moisture will get onto the subfloor and fungus will begin to multiply. The finishing coating will become unusable.
For painting
Green plasterboard is chosen for painting in the bathroom. Installation is carried out on a frame base. The sequence of work will allow you to make high-quality repairs with a shelf life of up to 15 years.
It is necessary to follow several rules that will ensure the duration of the repair:
- Drywall and its components must be from the same company.
- Before creating the frame, be sure to cover the rough surface with a water barrier.
- All joints are reinforced. All fastening points are covered with moisture-resistant putty for joints.
Before painting, coat the surface with a primer for wet areas. This will protect against moisture and give a beautiful appearance to further finishing.
For alignment to the frame
To level the walls with moisture-resistant plasterboard, you need to create a frame base.
But before that, work on the rough foundation. The entire surface is dried. After this, they are covered with waterproofing material and allowed to dry. The frame base is created from galvanized profiles. It is also necessary to install transverse strips, which will give strength and rigidity to the entire structure.
Fasteners must be treated with an anti-corrosion agent. Mostly they are sold in black.
Drywall is fixed with a chamfer and gaps of 2-3 mm. The joints are covered with reinforcing tape and moisture-resistant putty. The fastening points are also covered.
You cannot fix plasterboard sheets with glue in the bathroom. This will shorten the service life.
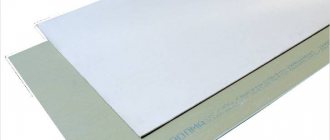
Characteristics and types of material
In construction terminology, plasterboard is dry gypsum plaster in the form of rectangular sheets. This material was invented by the owner of a small paper mill in America almost a century ago. To make drywall, thick, viscous gypsum dough is mixed and placed between two sheets of thick cardboard.
The plasterboard sheet has a standard width of 120 cm, thickness 9.5-12.5 mm. Finishing from this material is used for leveling walls, creating additional partitions, mounting boxes and other construction operations. The following types of drywall are distinguished:
- GLA is ordinary drywall, it is used to repair and decorate rooms with normal humidity and temperature conditions. It is a white rectangular sheet. Ordinary drywall is not used in the bathroom.
- GKLV is a moisture-resistant plasterboard, which is used to carry out repairs in rooms with high humidity, such as a bathroom. During the production process, the cardboard base of the material is impregnated with moisture-repellent substances to protect it from water vapor and liquid. Moisture-resistant plasterboard in the bathroom is used to level the surface of walls under tiles, construct partitions, and make countertops and shelves. It is marked in blue or green.
- KGLO – fire-resistant plasterboard. This highly fire-resistant material is used to decorate walls near fireplaces or other sources of open fire.
- GVL is a gypsum fiber sheet that has increased impact strength due to the inclusion of special fibers in the gypsum dough.
Note! If you are renovating a bathroom, be sure to use moisture-resistant plasterboard, which perfectly tolerates the damp and warm microclimate of this room. Manufacturers produce material with the highest quality indicators, which is marked with the letter “A”, and cheaper, but less stable plasterboard with the mark “B”.
[my_custom_ad_shortcode5]
How to sheathe
The wall is leveled with plasterboard, which is fixed to a frame made of galvanized profiles. To do this, carry out a strict phased work:
- The surface must be prepared. Dry, clean, cover with waterproofing material.
- After this, precise measurements are taken to calculate the number of required elements.
- The next step is marking. To do this, use a laser level, plumb lines, upholstery cord or marker. It is important to ensure the evenness of the intended stripes.
- The profiles are fixed according to the markings. The guides are attached to the floor and ceiling with dowel nails. Hangers are attached to the wall along the markings in 40 cm increments. The PS (CW) rack profile is fixed to them.
- Between the rack profiles horizontally, with a step of 40 cm, transverse ones are attached. They are cut from a rack profile. Crabs are used for fixation.
Each attached element must be checked with a level for evenness.
- The entire created frame is tested for strength and rigidity.
- Sheets of plasterboard are fixed to a metal base. First they are whole, and then they close the remaining windows. The sheets must be fastened in a checkerboard pattern so that the horizontal joints do not coincide.
- Afterwards, the plasterboard wall is coated with a primer and allowed to dry.
- The joints are reinforced, the fasteners are covered with joint putty.
- Next, the entire surface must be puttied and coated with primer again.
The wall is ready for finishing. If everything is done correctly, the surface will be smooth, durable, and able to withstand a certain load.
Advantages of the material
Bathroom renovations require homeowners to focus their financial resources and energy, and moisture-resistant cardboard can save money and time spent on such untidy tasks as dismantling and stripping old wall coverings. Covering walls or ceilings with this inexpensive but durable material reduces the duration of repairs by 20-30%, and also increases the quality of laying ceramic tiles.
The use of drywall gives the following effect:
- The walls and ceiling of the bathroom become perfectly aligned in a matter of hours, without grueling dismantling and removal of large amounts of construction waste. Tile or other finishing materials adhere well to drywall.
- Fungus or mold does not form on the walls under plasterboard sheathing, as it has high air permeability.
- The walls are protected from moisture, so the finishing material lasts longer.
- The use of drywall reduces the time for preparatory work by a third, which allows you to complete the repair in the shortest possible time.
- Only environmentally friendly, safe materials are used in finishing. All components of GKLV are safe for humans, so there is no risk to health.
Professional finishers claim that from moisture-resistant gypsum plasterboard it is possible to create complex, shaped structures that embody any desires of the customer. However, it must be taken into account that this material has low resistance to pinpoint impacts. Therefore, in places where you can accidentally touch the wall with your hand, you need to install drywall in two layers.
[my_custom_ad_shortcode2]
Care
A plasterboard wall does not require special care.
The tiled wall should be wiped clean from water droplets and water should not be allowed to collect on the floor. You can use non-acid detergents as they will corrode the grout between the tiles.
If the wall is painted, you must avoid getting water on it. Otherwise, wipe immediately. Do not use detergents containing acids and alkalis.
Moisture-resistant green plasterboard is installed in the bathroom. It is fixed to a frame base made of galvanized profiles and the frameless method is not used.
Proper installation of the lathing and gypsum boards will make it possible to cover the wall with tiles and hang shelves or drawers for bath accessories on it.
Conclusion
Drywall in the bathroom can be used for a wide variety of jobs due to its ease of use and attractive results. The video in this article will clearly show some important aspects of the workflow and will allow you to understand the important nuances even better. If you still have questions, then ask them in the comments under the review, the topic is vast and it is not possible to touch on all points, there will always be something that requires clarification.
Did you like the article? Subscribe to our Yandex.Zen channel
August 16, 2016
Plasterboard systems, Design, Bathroom and toilet design, Finishing materials
If you want to express gratitude, add a clarification or objection, or ask the author something, add a comment or say thank you!
Preparation for cladding
In what cases is it necessary to cover a bathroom with plasterboard? This material is considered very durable and high quality, so its use is due when:
- the walls have extensive chips, cracks and other defects;
- it is necessary to increase sound insulation characteristics or reduce thermal conductivity;
- it is required to hide water pipes and other communications from prying eyes;
- you need to arrange shelves, niches, partitions and other interior elements.
Scheme of installing drywall on a wall using a frame. It is quite easy to give the walls the proper look using sheets of plasterboard. If all the necessary tools are available, this can be done by a person who has never encountered such work before. The main thing here is to approach the matter carefully and responsibly.
In order to cover the bathroom, you need to prepare the following supplies:
- several sheets of moisture-resistant plasterboard, suitable for use in rooms with high humidity:
- metallic profile;
- yardstick;
- building level;
- screwdriver;
- ruler;
- construction knife;
- electric drill;
- hacksaw;
- sandpaper;
- edge plane.
For use in the bathroom, you will need plasterboard with a sheet thickness of at least 1.2 cm. When calculating the amount of material needed, you need to make allowances for possible defects during work and purchase a little more plasterboard than required. In addition, before covering the bathtub, it is advisable to treat the material with an antiseptic composition, a special primer and protection from moisture. Thanks to this, plasterboard sheets will become even more resistant to humid environments and durable.
Also, we must not forget about the walls that will be lined.
Before work, all surfaces must be washed thoroughly, treated with a fungus and mold remover and dried.
[my_custom_ad_shortcode4]
Tile laying technology
Before you start laying tiles on drywall in the bathroom, here is one important piece of advice from the experts. When cardboard comes into contact with the adhesive composition (which is liquid), it will begin to warp and swell. Therefore, it is necessary to cover the surface with a water-repellent composition, which can quickly dry out. It should take a couple of hours to dry. Therefore, the gaps between the sheets of drywall are first filled with putty (moisture resistant). After it dries, a water-repellent primer is applied, preferably in two layers, to create a thick film. Each primer coat typically takes between 45 minutes and 1.5 hours to dry. It all depends on the temperature inside the room.
So, the installation and preparation of drywall for the bathroom under the tiles is completed, you can proceed to the main process - laying the tiles on the drywall. First of all, a layout scheme is selected. That is, the number of ceramic tiles in the horizontal and vertical rows is determined.
- The vertical row is the easiest to count. It is necessary to measure the side of the facing element that will be laid vertically. Then measure the height of the ceiling in the bathroom, which is divided by the length of the side of the tile. This is the number of tiles vertically. Usually the number turns out to be a non-integer, so the maximum value is taken, that is, rounded. The tiles must be laid from the ceiling so that the lower element can be trimmed, because the area near the floor is considered the most inconspicuous.
- To calculate the number of tiles in the horizontal direction of laying, you need to lay them out on the floor along the wall. The cut tiles should be laid in the most inconspicuous corner of the room. Therefore, when laying tiles on drywall in the bathroom, you should start with a solid element, moving in the opposite direction, laying the cut tiles last.
Attention! If the tile being cut is slightly smaller than the solid one, then it is better to start tiling from the middle of the wall. And along the edges of the row, lay two equally trimmed elements.
The wall is marked for tiles horizontally and vertically. This simplifies the process of installing the finishing material. To apply vertical lines, you must use a regular plumb line. It is optimal if there are several verticals - every 2-3 tiles. And the more there are, the easier it is to carry out the facing process.
Horizontal lines are drawn relative to the lowest drawn line. To do this, the installation location of the second row from the floor is determined by using calculations of the amount of finishing material that was produced above. At this point, a dot is placed on one side of the wall. The second opposite point is set using a level. Now they are connected by a line. Usually a metal profile or a flat wooden strip is attached to it, which becomes the basis for subsequently glued ceramic tiles. After the glue has dried, it is removed.
Now you can lay tiles on drywall in the bathroom. An adhesive composition is applied, which is leveled in thickness with a notched trowel. The tiles are laid in place and pressed by hand. A prerequisite is 100% even installation. Therefore, each facing element must be checked with a level. In the case of installing the first row of finishing, everything is as simple as shelling pears, because it rests on the installed rail, which was previously aligned in a horizontal plane.
Thus, the first row is assembled. Then everyone else. The only thing to consider when tiling a bathroom is to install a maximum of five rows in one pass. After which it takes time for the tile adhesive to dry and adhere the tile well to the surface of the drywall. The lower rows are subject to loads due to the pressure of the upper ones. Therefore, with a large number of laid rows, the lower ones may peel off from the surface being finished.
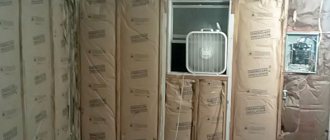
Frame installation
Before covering the bathtub with plasterboard, it is necessary to build a frame from a metal profile. First of all, the frame is attached horizontally along the lines of the floor and ceiling along the entire perimeter of the bathroom walls that are subject to cladding. The guides are attached using an electric drill and dowels.
After installing the guides, the vertical posts are mounted. The profiles are installed first in the corners of the bathroom, then along the entire surface of the walls. The distance between the posts is calculated based on the size of the room, but it is desirable that it be at least 60 cm.
The verticality of the installation must be checked with a building level. As a result of these actions, a frame made of metal profiles is obtained, which will serve as a lathing for drywall.
[my_custom_ad_shortcode5]