All interior finishing work has a similar procedure, especially when using gypsum plasterboard, but to obtain a durable structure, certain recommendations should be followed. A plasterboard ceiling in a wooden house requires a more careful and responsible approach; such installation differs from work with concrete foundations. A high-quality result is achieved only if all nuances are observed.
Features of installing drywall in a wooden house
There are two ways to attach drywall to surfaces: frameless and framed.
Installing gypsum boards directly on timber walls is undesirable, due to changes in the volume of wood depending on environmental humidity. Rigid fastening of the slabs will certainly lead to the appearance of distortions and cracks in the coating. In addition, the uneven relief of the walls and ceiling made of timber does not allow the gypsum plasterboard to be installed perfectly evenly.
Interior finishing of a wooden house with plasterboard is possible only with the help of a frame. A budget option for old, established buildings and country houses is to install gypsum boards on slats or beams made of softwood. In this case, the sheathing should not be tightly adjacent to the floor and ceiling of the room. The gaps are covered with plinth.
The mobility of walls in a new house made of wooden beams can reach 6 cm in height. Therefore, drywall is installed on a sliding frame made of metal profiles. This method allows you to avoid cracks from shrinkage of the house and perfectly level the surface.
Preparatory work
A preliminary calculation of the amount of materials and a detailed plan for covering walls and ceilings with plasterboard will help you draw up an estimate and prepare tools for its implementation.
The first step is to draw a sketch drawing of all the surfaces that need to be leveled. Then the lines for the location of the frame and the places of fastenings are drawn on the plan. At the design stage, it should be taken into account that the vertical joints of the slabs must fall on the profile axis with a horizontal shift in each row. Based on a carefully compiled project, you can easily calculate the number of required profiles, drywall sheets, connecting parts and fasteners.
To carry out high-quality fastening of gypsum boards, you will need a standard set of tools: a level, tape measure, marker and chalk for marking fasteners, a drill, a screwdriver, a knife or saw for cutting.
Guide profiles are installed along the lower and upper perimeter of the room. The first vertical post is fixed at a distance of 30 cm from the corner of the room, then in increments of 60 cm. Horizontal planks are fixed at the same intervals to support the structure. The ceiling plan is marked in the same way.
Installation of frame base and drywall in a wooden house
Fastening the frame begins with precise marking of lines for fixing the guide profiles. In a wooden house, these parts are rigidly fixed only to the surface that is being leveled. That is, the wall frame is not connected to the ceiling and floor.
If your house is still shrinking. then before starting work, prepare sliding fasteners for vertical profiles. A strip is screwed to the first level connector (“crab”) with self-tapping screws, on which the PAZ 2 sliding support is mounted. It is this support that is fixedly attached to the wall of the house. In this case, the crab together with the profile can move freely up and down within 6 cm. Sheets of drywall are cut out so that there is a small gap between the floor and the ceiling. This fastening allows the wall to “breathe” without compromising the integrity of the skin. Shrinkage seams along the floor and ceiling are covered with floor and ceiling skirting boards.
Crab type mount
Sliding mount "PAZ 2"
Fastening with crabs to the wall
If the house is no longer new and the shrinkage is behind us, then the “crabs” can be attached directly to the wall without fear of cracks appearing.
Work order:
- Horizontal guidelines for the guides are carried out at a distance of 10–15 cm from the upper and lower edges of the wall;
- Mark the lines for attaching the vertical posts;
- The guide profiles are rigidly fixed to the beam along the lower and upper markings;
- Sliding connections for vertical supports (4 for each) are secured along the guide lines;
- The main metal profiles and horizontal jumpers are installed on the crabs.
General view of the frame after installation
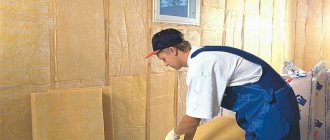
After installing the frame, the electrical wires are enclosed in a metal box so as not to damage them when attaching the KGL. If necessary, heat and sound insulation is placed in the cells between the racks. For this purpose, mineral wool is used.
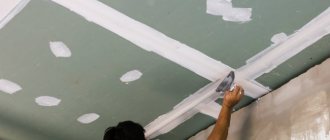
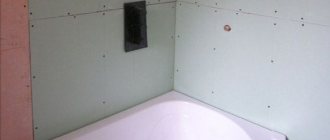
Sheathing the frame with plasterboard slabs is done on metal profiles with a pitch between screws of 30 cm. The fastener caps should be buried 1 mm in the cardboard. Before finishing, the joints and fasteners are puttied, having previously been glued with serpyanka.
Attaching drywall sheets to the frame
Puttying joints using serpyanka
This video explains simply and clearly all the subtleties that need to be taken into account when installing the frame:
The main rules of technology for installing gypsum boards
If you plan to install the product not only on the ceiling, consider the following recommendations:
- start the device from the ceiling, and only then move on to the walls;
- It is strictly forbidden to connect the bases for sheets into one structure; a gap must be ensured.
Important. This gap takes into account possible deformations of the wooden house. It will not spoil the appearance of the room at all.
By adhering to these rules, you will install a durable structure. Now on the construction market there are all kinds of variations of ceiling plinths. With their help, they hide the loose fit of the cladding in a private house. Only one surface is sheathed with this part. Fastening is carried out either to the ceiling plane or to the wall.
Ceiling plinth
This approach will provide the necessary space for the house to shrink. In this case, the effect on the finishing material is almost invisible. Compliance with the above rules will help you avoid problems during the operation of your home and costly repairs.
Main stages of installation
When preparing an old ceiling for installation of a new one, it is necessary to clean it of dirt, paint, plaster and treat it from fungus and mold.
- Surface preparation.
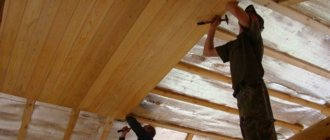
Before starting work, it is necessary to prepare the surface: if necessary, clean it of old paint, wallpaper, dirt, plaster, and then carefully treat the wood with products against dampness, mold and pests. - Installation of additional sheathing. (If there is a plank covering, this point is not relevant, and you can immediately proceed to marking). The distance between the ceiling beams is usually too large for the frame to be installed, so it is recommended to install additional sheathing. It is made from 30x40 bars, placed across the load-bearing beams at a distance of approximately 30 - 40 cm from each other.
- Marking. Now you need to set the level of the future ceiling: to do this, find the lowest point of the ceiling, move 5 - 10 cm downwards from it (depending on how much space is needed to install electrical equipment and thermal insulation), then use the level to set auxiliary marks on all walls.
- Installation of the frame begins with attaching the suspensions to the ceiling (for greater accuracy, the places of their attachment should be pre-marked on the drawing), then the ceiling profile (CD) is attached to the suspensions. The distance between the end of the profile and the wall must be at least 1 cm. After this, the ends of the CD profiles are inserted into the guides (UD). In places where the joints of drywall sheets will pass, it is necessary to install additional jumpers using single-level connectors (the so-called “crabs”).
- Laying drywall. Now that the frame is ready, all that remains is to mark the sheets, cut them into pieces of the required sizes and attach them to the frame using self-tapping screws.
- The final stage is processing of seams. After making sure that the drywall is securely fastened, you can begin the final finishing work - puttying the seams, priming and painting the surface.
Finishing the walls is one of the final stages of construction. Ideally aligned walls provide an advantage for further improvement of the living space. Timber or log wooden buildings are no exception to this. But the interior decoration of a wooden house has its own rules; compliance with them facilitates the installation of gypsum boards.
One of the design options is partial finishing
Houses made of timber are less energy-intensive in this regard, since the walls have a relatively flat surface due to the joining of the timber structure, and drywall is easily installed on them. Log houses, on the contrary, require more time to prepare the supporting frame. Conventionally, according to the complexity of the internal cladding, wooden houses are divided into three types:
- wooden houses made of timber;
- wooden houses made of rounded logs;
- houses made of skinned wood.
Aligning walls with wooden guides
Let's consider the most complex type of finishing, this is a house made of hide wood. For other types, the technology does not change, but requires less labor in preparing the wall for installation and the frame structure for fastening gypsum boards.
Stage 2. Without markings - nowhere
At first glance, it may seem that there is nothing difficult in laying the sheets, especially if you decide to do without a frame. However, it is not. The first thing you should do, after making sure that all the necessary tools are at hand, is to carefully take measurements and make markings.
And if the first ones are not particularly difficult (just measure the required coverage area with a tape measure and calculate how much material you need), the second ones need more detailed instructions.
The optimal deviation from the ceiling is from 8 to 15 centimeters from its lowest point. Mark this distance with a pencil along the perimeter of the room (no need to try to draw lines through all the walls. Strokes in the corners and in the center will be enough).
- The simplest and most budget option is a two-meter level. Set it exactly at the height mark. Align so that the air bubble is horizontal. Have an assistant draw the line. Move along the walls in this way until the lines close. This method is suitable for small spaces and is not particularly accurate - there is a possibility of error, so use this if there is no alternative available.
- You will need a water level and the help of someone from your friends or family. One person stands in the corner - the second opposite him. Next, you will need to open the vessels so that the air can escape and the water can move. Place the first container against the wall opposite the required height, leaning the mark against it. Wait until the liquid levels out and record the result. Tell your partner the mark - he must wait until the water rises or falls to this level and mark this place in his corner. Move around and repeat until the entire room is marked this way. Connect the marks using construction cord. The process is quite long, but the result is considered accurate and virtually eliminates the possibility of error.
- The easiest way is to use a laser level. It must be leveled horizontally (most modern models do this themselves), having previously fixed it. Move it and make notes along the laser lines - quickly, reliably, but quite expensive.
For two-level plasterboard ceilings, the scheme remains the same, however, the profile must be mounted at the desired height. Take this into account when marking.
Having completed the work, proceed to the next stage.
Material selection
The type of drywall used in the firmware is of great importance:
- normal - used in offices, industrial warehouses and apartments (suitable for rooms where there are no sudden changes in temperature and humidity);
- waterproof - does not allow moisture to pass through (if there is an excess of it, then this type will not delaminate, and the hated mold and fungi will not appear on it);
- fire-resistant - this option is used in rooms where there is a high probability that a fire will occur (ordinary drywall,
, fully complies with fire safety standards); - fire and moisture resistant - the most expensive type, its protective level is required exclusively in industrial warehouses.
Finishing with OSB boards
Work on interior finishing with OSB boards actually differs little from work on finishing with plasterboard. The main difference between OSB boards is that they weigh significantly more. Therefore, a more massive profile is needed for them. Typically, in this case, a frame made of wooden beams is used, onto which OSB sheets are attached with self-tapping screws 5 cm long. Upon completion of installation, the surface of the boards must be thoroughly sanded and coated with several layers of varnish.
In addition, OSB boards can also be used for flooring. In this case, the laying and fastening of the slabs is also carried out on logs made of timber.
How to cover a ceiling with plasterboard in a wooden house with your own hands
After the final primer, the ceiling is ready for finishing. This could be painting, wallpaper, or a combination with the design of zonal segments. It all depends on your imagination, design decisions and preferences. For fastening the sheets, ordinary phosphated screws with a length of 32 - 51 millimeters are used (depending on the material of the ceiling panel); they are screwed in so that the caps are recessed into the surface of the sheet by about a millimeter.
The sheets are fastened in a checkerboard pattern, so that the four corners of adjacent sheets do not converge at one point. The figured lines of the ceiling look elegant and impressive. Despite all the apparent complexity, installing plasterboard on an unusually shaped ceiling with your own hands requires only a thoughtful design and careful execution. We connect the suspension to the ceiling strip with four self-tapping screws and a press washer and bend the protruding part inward. The order of fastening the elements is from the corners of the room to the center.
Hint: the wider the larger side of the block, the easier it is not to miss when fastening it. The fact is that the edges of adjacent sheets must be attached to a common sheathing element. Taking into account the curvature of the bars, it will not be easy to fulfill this condition with their minimum width.
Creating a movable frame
The main difference between this solution is that work begins not with the preparation of the coating or marking, but with the development of a drawing. This must be done with your own hands so that there are no questions later. The drawing will be useful to calculate the attachment points and dimensions of the structure. It will give information about the profile sizes. After this, the markings are already performed. They start from the places where the suspensions will be located.
Example of a movable frame
Having finished marking the plane, set the level of the future structure. It is determined according to the same scheme as for a conventional suspended ceiling. The lowest point is selected and transferred to other walls. Next, the fastenings are fixed. They play the role of a supporting structure. The fasteners are placed along the beams of the house. Next, U-shaped profiles are connected to them. They will become the basis for drywall. When placing them, make sure that all elements are in the same plane.
In principle, the frame should be assembled in the same way as for other systems (see the assembly video in the appendix to other articles). But there is one distinctive feature: the profiles are not fixed to the walls, so they will have to be fixed to the frame itself. The PN elements will be adjacent to the PP, therefore they will cover part of the system.
Important! The main feature of such a do-it-yourself assembly is that there will be a free space of about 1 cm between the wall and the ceiling. Its purpose is to allow the structure to move freely.
Assembling the base for fixing the gypsum boards
After constructing the base, they begin laying the gypsum boards. Finishing is carried out as with classic cladding. The only difference in such an operation will be that a little space should also be left between the walls and the edge of the assembled structure. At the end of the work, this gap can be closed with a ceiling plinth, as mentioned above.
Stage 1. Prepare everything you need
It is not enough to purchase slabs - they will require many more construction devices, some of which are necessary, and some of which will simply make your work easier and help you avoid annoying mistakes:
- Metal profiles;
- Construction hangers;
- Connecting crabs;
- There are two types of dowels – anchor and for profiles;
- Screws;
- Screwdriver;
- Drywall knife;
- Drill;
- Building level. Here you can proceed from which one is more convenient for you: water, two-meter or laser;
- Pencil and tape measure for measurements.
Important: Even if you are a construction genius, you are unlikely to be able to install it yourself. You will have to find a volunteer to help, otherwise you risk not laying the sheets evenly, which will ruin the appearance of the ceiling
Think over the drawing - you must clearly understand what sheets and in what quantity you need, how you will lay them.
Incorrect installation can subsequently lead to cracks, which means repeat repairs. Don't know how to cover a ceiling with plasterboard? Read on!
How to arrange a ceiling using existing beams?
Beams are beams that can be of different sections. It is excellent for finishing work, providing the necessary reliability.
It should be taken into account that the ceiling can be attic or interfloor. This difference determines the order in which the materials are used. So, for the first option you will need to use an additional layer of thermal insulation and waterproofing, and for the second you can only get by with sound insulation.
All work begins with determining the method that will be used for sheathing the beams. Sometimes they prefer to leave this design as an additional element of the interior. Then the finishing is done partially, the material is laid between the beams. But this is not always possible, and the ceiling is completely sheathed.
The following product options can be used for work:
- Natural wooden board and a type of lining.
- Panels made from MDF base.
- PVC panels.
- Drywall boards.
- Special ceiling tiles.
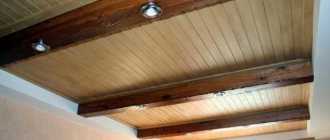
If you do not want to carry out long preparatory and subsequent stages, then you can resort to the help of companies that install suspended ceilings. But different combinations of materials look much more interesting. For example, the lining successfully harmonizes with gypsum board sheets: the first has a different texture, the second provides the necessary evenness.
Selection of bars for wooden sheathing
To create the ceiling sheathing, you will first need wooden blocks. In this case, you can choose any type of wood. The main thing is that the material itself is dry (humidity should not exceed 18-20%).
The size of the bars is selected based on the formed size of the inter-ceiling space, since the design of the suspended ceiling provides the possibility of laying heat-insulating boards or laying communications. But, as a rule, to create a wooden sheathing it is enough to use slats with a cross-section from 20*40 to 80*40 mm. Although you can choose any other size, the main thing is that the height of all bars is the same.
Stage 4. Laying drywall
Compared to previous manipulations, installing the main canvas will seem like easy fun. Sheets of plasterboard, pre-cut into slabs or strips of the required size, are laid on the frame according to the diagram.
For fastening, self-tapping screws with fine threads (length - 2.5 centimeters) are required. Install them in steps of 25-30 centimeters. We recommend that you deepen the caps by about 3 millimeters - the optimal depth that ensures reliability but does not damage the coating.
In this case, the distance from the edge of the sheet should be approximately one and a half centimeters. Lay the drywall so that there is at least 10 mm to the walls.
How to attach drywall to a wooden ceiling
This will ensure the tightest and fastest fixation of the material. You can learn how to do this from photo and video materials. Often the initial state of the surface does not look very good.
Therefore, the use of a skeleton will hide this drawback of frameless arrangement. Flaws:
– Financial costs for materials. To construct the skeleton, you will need the following elements: UD guide profile, CD cross profile and EC bracket (suspension bracket); – An expensive pleasure – metal is characterized by its expense, including the purchase of component elements; – Use of additional tools: screwdriver, hammer drill, metal saw (scissors), building level. To securely attach plasterboard to the ceiling without a frame, it is necessary to carefully level the surface.
- Wood slats fasteners are limited. It can only be used in dry areas. This option is no longer applicable for the kitchen or bathroom.
- The slats may become deformed during use, so you should only use completely dried wood.
- Installation is lengthy, since it is necessary to properly prepare all the slats, treat them with an antiseptic and fire retardant, and drill holes for fasteners.
- Before you start work, you need to attract an assistant; attaching the slats to the ceiling yourself is difficult.
The sheet can be attached to the ceiling without an assistant. To do this, it is enough to tighten the profile or block to the sheathing with two long screws, leaving a gap of several centimeters. The sheet is laid on this support, and its free edge begins to be attached to the sheathing. The seams were reinforced in a somewhat unusual way: instead of serpyanka, I used rolled fiberglass 50 mm wide
The seam seal looked like this: Please note!
There must be a fastening element at the edge of the CD profile, since the UD profile itself cannot be attached to a wall or ceiling. Having correctly assessed all aspects of the work, you will cope with the upcoming task without any problems. However, in addition to this, it is also necessary to take into account the features of wooden floors. A roof assembled with wooden beams is a movable structure. In this regard, the following processes may take place: When arranging the ceiling with sheets of plasterboard, you can choose a similar wall finish. This will look impressive and will significantly extend the life of the interior.
However, it is important to take into account some details. Initially, the sheets of material are installed on the ceiling, and only then on the walls.
In this case, there should be no connection between the ceiling frame and the walls. How to attach drywall to a ceiling depends on whether you intend to attach it to a frame or not. Above we looked at the frameless option. It has both its pros and cons, so the final decision is yours.
This is a good way to answer the question of how to level a ceiling with plasterboard. Fitting plasterboard directly to the ceiling in a wooden house can only be done if there is a continuous board made of unedged or edged boards, OSB, plywood, which are attached to the beams from below. To understand how to attach drywall to a wooden ceiling, it is recommended that you familiarize yourself with this installation technology. It is recommended to apply putty in several layers, allowing time for the previous layer to dry.
The thickness of the applied layer should not be too large. The joints of the finishing material are processed with longitudinal movements, after which the entire ceiling surface is puttied. The principle of working with adhesives (when gypsum plasterboard is attached to a special solution) was described above. However, its installation can be done in another way. It is permissible to fasten gypsum boards with self-tapping screws directly to the ceiling.
Typically, this method is used when the ceiling is made of wood, so that the screws hold securely. There is another method that is used extremely rarely, but it is still worth talking about. Perhaps he will come up with some interesting ideas that he will be able to implement with minimal experience.
Additional information on the topic:
- Installation of a plasterboard ceiling with a niche with a suspended ceiling
- What can you use to glue drywall to a concrete ceiling?
- Which profile is best for plasterboard arches?
- How to lift drywall to the second floor through a window
- Profile size for plasterboard partitions dimensions
GKL installation and surface finishing
As noted above, covering the frame with plasterboard is carried out according to the standard scheme, but with a small nuance - a gap. At the same time, the work must be carried out rationally. It is not advisable to make a rough ceiling from timber if in the future you plan to create a suspended structure from gypsum plasterboard.
Rice. 8. Putty joints
Advice. When purchasing self-tapping screws for securing sheets of drywall, pay attention to their purpose. They can be used for fixing to metal, wood, or intended for dowels.
Finishing the surface of the sheets is carried out after successful installation of drywall. To prevent cracks from occurring, seal seams correctly. To do this, follow the recommendations:
- to hide the seams between the gypsum boards, use plastic putty;
- before sealing, widen the joints so that their outer width is about 0.5 cm, with a bevel angle of 45°;
- Be sure to use serpyanka to reinforce the seams.
Reinforcement of plasterboard sheets
If you follow the technology, then the movements of wooden structures during the operation of the house will not be dangerous for the suspended ceiling structure.
Finishing the ceiling with plasterboard in a wooden house
Therefore, when carrying out installation work, it is necessary to take into account the properties of both wood and the building as a whole and adhere to the following principles:
- it is better, easier and faster to level the ceiling surface in an old house;
- it is possible to install complex multi-level plasterboard ceiling structures to suit any design;
- The principle of a ceiling covering independent of the walls is implemented.
Finishing residential premises with plasterboard sheets has firmly won its fans, since this material provides almost limitless opportunities for creativity when designing interiors, both in city apartments and private country houses. The advantages of using gypsum plasterboard for finishing wooden houses are quite obvious and are as follows: It is necessary It should be noted that when hemming ceilings in a new house, as a rule, the method of attaching the frame directly to the ceiling beams is used, which makes it possible, if necessary, to perform insulation, and also to eliminate additional cladding with boards. Fastening plasterboard to a metal frame is not the only way to install a plasterboard ceiling in a wooden house. Many people worry about the consequences of flooding from neighbors above and, knowing about moisture-resistant plasterboard, wonder whether it should be used on the ceiling. VGKL is less hygroscopic and has additives to protect against mold and mildew, but it will not save you from a serious disaster.
Ordinary drywall will also withstand slight moisture; it will soon dry and return to its original qualities. There are six types of plasterboard, but only ceiling plasterboard is used for ceilings. Its difference from a regular wall one is in thickness: 9.5 mm versus 12.5 mm. Due to this difference of 25%, the weight is lighter, which creates additional convenience for work. In addition, the material has acquired greater flexibility, which is required to create multi-level structures: they make waves, arcs, and curved elements.
After puttying the seams, the entire ceiling is cleaned of dust and primed with a deep penetration compound. When the primer has dried, begin finishing. Painting or wallpapering is more often used. At the end, the ceiling plinths are installed.
For shaped cutting of plasterboard sheets, a jigsaw is used, which is equipped with a wood saw. To cut the material in a straight line, the surface is cut through ¾ of the thickness of the sheet with a stationery knife, and then broken off at the point of the cut. If gypsum plasterboard is sawed rather than cut, a lot of dust will form in the room. It is more convenient to break the sheet on the edge of a table or other surface. After this, the cardboard at the break point is cut with a knife.
After the sheathing has been carried out, the frame can be sheathed with sheets. We always start the sheathing by installing whole sheets, and only then attach individual pieces. Attaching drywall to a metal frame occurs as follows:
- We attach the sheet of material to the profiles and secure it with self-tapping screws;
- the edges of each sheet should fall in the middle of the metal profile;
- the sheet is attached parallel to the existing windows in the room;
- There should be three metal profiles per slab of drywall;
- We install self-tapping screws along the perimeter of the sheet, as well as along the middle profile. They need to be screwed into the material approximately 1 mm. This is done to ensure that the final finish is perfectly smooth;
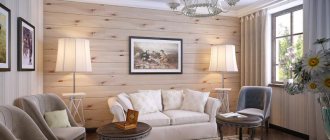
The second most popular and widespread application is attaching plasterboard to the ceiling on a wooden frame. The interior decoration of a wooden house with plasterboard adds to the overall atmosphere of comfort, harmony and the indescribable warmth of the hearth.
Additional information on the topic:
- What is the difference between a profile and plasterboard guides?
- Holes for lamps in drywall should be made before or after puttying.
- Why did the drywall on the wall ripple?
- Finishing plasterboard walls for wallpapering
- Construction of a wooden frame for a plasterboard partition
Advantages and disadvantages of methods
We described the pros and cons of mounting on a wooden base without using a frame above. Now let's talk about the advantages and disadvantages of cladding over metal and wood frames.
Advantages of installation on a load-bearing sheathing:
- environmentally friendly material (both wood and steel are non-toxic materials);
- reliability of the design (possibility of installing any lighting fixtures);
- You can additionally lay thermal insulation material between the frame guides;
- the ability to hide defects in the foundation and laying of utility lines.
In addition, the metal frame has additional advantages - it is resistant to moisture and temperature changes, and therefore does not allow the coating to deform. Using metal profile systems, it is possible to install multi-level coverings with arched, curved and straight configurations of tiers and level differences.
The disadvantage of a wooden frame is that it is used only in rooms with normal humidity, because the wood is deformed due to its changes and rots in a humid environment. Before installation, wooden slats are treated with antiseptic solutions to protect against rot and mold. The high fire hazard of wood is an additional disadvantage of such a frame.
Important! The general disadvantage of any frame system is that the height of the room is significantly reduced. The minimum distance for lowering the ceiling surface is 5-7 cm. If there are built-in lamps and hidden communications, the amount of lowering increases.
The advantages of this method of repair
The most important advantage of this ceiling design option is that to install a new ceiling you do not need to completely disassemble the old one. All that needs to be done with it is to remove the peeling sections of plaster and dismantle the rotten wooden shingles.
Next comes the treatment of the existing base from mold and pests, and after that you can immediately proceed to assembling the sheathing or frame for the plasterboard structure. At the same time, a hammer drill is not required to install the structure, since the ceiling is partially supported by wooden beams, to which the new ceiling composition will be attached.
An equally important advantage will be the cost of repair - decoration using gypsum plasterboard is quite inexpensive compared to a complete repair of an old ceiling, including removing a thick layer of plaster, restoring damaged areas of shingles and applying a new layer of plaster mixture.
If the height of the room allows, drywall will allow you to build multi-level structures that can transform interiors that are familiar to the eye. There are a lot of options for this design and you can choose the right option for any room. At the end of this article, a video will be presented that discusses one of the options for how to cover a shingle ceiling with plasterboard.
Expert advice
If you decide to attach drywall to a wooden ceiling, you will need recommendations and advice from experts in your work:
- To reinforce the seams, you can use rolled fiberglass rather than serpyanka. Material 5 cm wide is cut into strips 1 m long for ease of gluing.
- We putty the seams with gypsum compound in two layers, allowing each of them to dry.
- To sand the seams we use a sander and a mesh number 80.
- We glue the fiberglass with PVA glue diluted with water in a ratio of 1 to 1.
- After gluing the fiberglass, we putty the seam again and sand it.
After completing the rough finishing, the surface is dusted with a brush or rag. Then a deep penetration primer is applied. After it has dried, you can begin finishing.
Advantages of lining a wooden house from the inside with plasterboard
The timber structure is distinguished by relief walls. At the same time, owners often want to give their home a more modern look. Using drywall in a wooden house to level surfaces is preferable to other materials for a number of objective reasons:
- natural composition of dry gypsum plaster;
- high vapor permeability of the material;
- light weight and ease of cutting facing slabs;
- low cost and simple installation on a frame base;
- additional thermal insulation;
- communication wiring hidden behind the casing;
- ideally flat surface for finishing materials.
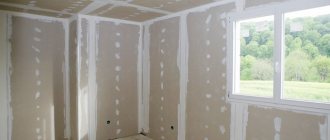
View of a room covered with plasterboard. It is noteworthy that these works were carried out without the involvement of hired professional builders
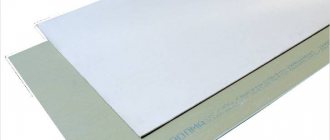
Various types of drywall: standard, fire-resistant and moisture-resistant
The advantages of this choice include covering the wooden ceiling with the same plasterboard slabs.
The universal material allows for bold design solutions - multi-level surfaces of any configuration, zoned built-in lighting, overhead air distribution from the air conditioning system.
In a word - almost everything your heart desires.
How can I hem a ceiling on wooden beams?
Thinking about what can be used to line the ceiling along wooden beams overtakes everyone who is faced with a room with this design. This situation arises when performing work in old multi-storey buildings or private country cottages. These ceilings provide an opportunity to show your imagination, but can create a lot of difficulties, because you need to choose and use the finishing material correctly.
Assembling a wooden frame
If space allows, the frame is assembled in a horizontal position, and then raised and attached to the wall, but more often it is necessary to assemble the structure element by element simultaneously with fastening.
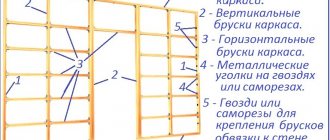
The frame of the separate partition is fixed to the timber frame in the following sequence:
- lower horizontal support beam;
- side racks;
- upper closing beam;
- racks and beams for framing window and door openings;
- intermediate posts or beams;
- spacers
The process of installing a frame under plasterboard
The bars are secured to each other using corners.
Installation of the frame of the partition leaning against the wall:
- horizontal support beam (attached to the floor);
- fastening the main load-bearing elements in a horizontal or vertical layout;
- spacers (attached to the main beam).
Ready frame for drywall
Lathing on hangers
Installation will be speeded up by installing the sheathing on hangers - fastening elements of the steel frame for plasterboard.
Drywall frame with direct hangers
Work order:
- suspension profiles are attached to the enclosing wall or ceiling with dowels;
- then a beam is placed, the sides of the suspension are bent, the horizontal and vertical are checked;
- temporarily secured with nails in several places;
- attach each beam to the hangers with self-tapping screws on both sides;
- install and secure spacers.
If it is necessary to reduce the height of the room, the suspensions are aimed at the ceiling, a beam of the appropriate length is attached vertically to each suspension, guides are mounted to the suspension bars, and spacers are installed between the guides.
Schematic representation of a wooden frame for plasterboard on hangers
Lathing on spacers
In order not to level the wall under the sheathing, unevenness can be leveled with spacers. To do this, cords are pulled vertically and horizontally along the perimeter of the future frame, taking into account maximum irregularities. When shooting the sheathing elements or hangers with dowels, a gasket of the required thickness is laid at each fastening point. The method reduces construction time, saves money, but requires great care and careful alignment of levels.
Stage 3. Attach the profile
If there are no height differences on the ceiling, it is flat and you do not need additional insulation or you installed it from the outside, you can do without installing a frame. You will need to additionally buy a construction adhesive mixture, but you will save on the profile, dowels and screws.
In this case, it is enough to carefully treat the sheets or surface (depending on the selected adhesive) and press the drywall tightly, holding it for the time specified in the instructions. For greater strength, we recommend that you secure the structure with a drill and self-tapping screws. However, keep in mind that the coating must be absolutely even, otherwise the lopsided finish will disappoint you.
The advantages of this method include the absence of concealment of height, speed and ease of operation. Remember that you need to carefully adjust the sheets to each other so that there are no gaps.
If you are not sure that the coating is smooth enough, you want to hide communications or lay an additional layer of insulation, you will need a profile frame. To better understand the process, we recommend that you watch a video with a detailed explanation.
Please note that nails are not the best choice for a wooden house. It is better to use self-tapping screws - they have a higher holding capacity and do not slip out of the wood.
Ceiling fasteners must be attached to the marked areas. Be extremely careful - they take on the entire weight of the structure, and therefore negligence can create an emergency situation.
Already on them, using dowels, construction metal profiles are installed, which form the frame. Be sure to secure the joints with crabs. Regularly check the design for compliance with the markings, otherwise you risk getting misaligned.
Important nuance: In concrete or brick houses, the frame is mounted close to the wall. This is unacceptable in wooden ones.
Since wood tends to dry out, it is necessary to leave about a centimeter to be able to move the plasterboard ceiling a little if necessary. To do this, it is necessary to attach the profiles directly to the end part of the fasteners. The cracks can be sealed with decorative skirting boards.
If necessary, you can lay insulation directly between the frame cells. You can read more about them here.
Having sequentially mounted the supporting structure starting from the highest point of the ceiling (if it has an uneven height), you can proceed to the main stage.
How to assemble a metal frame and sheathe the ceiling
In accordance with the drawings, the suspensions are screwed to the ceiling, and the ceiling profile is attached to them at the next stage. It is important to track the position of the profiles using a level. It is correct when the profile is attached to two opposite sides of the ceiling.
The guide profile is fixed at the ends of the ceiling. The crossbars are secured with crabs. Such jumpers must be installed at all gypsum board joints with a clear location along the central part of the seam.
An important stage is finishing the ceiling with plasterboard, taking into account communications. The easiest way to disguise them is to mount the structure directly on wooden beams. As an option, it is worth considering a combined ceiling, where only part is made of plasterboard with original lighting.
Preparation is important
Many people who have not previously encountered wooden structures believe that the frame for plasterboard on beams should be made on the basis of a rough ceiling. But this is not always true. Thus, installation can only be carried out if the house is residential. It is in this case that the rough ceiling left over from the previous finishing is used. But in the situation of an uninhabited room, it would not be rational to mount a rough ceiling on bare beams for further covering it with sheets of plasterboard. In this case, the beams themselves will act as a rough surface. All you have to do is treat them with special products that prevent damage to the wood by excess moisture, temperature fluctuations or wood insects. This will give you greater strength to your wooden floors.
Ready base
When the beams are dealt with, it is necessary to prepare the materials and tools that will be required during installation. The set of tools needed in this situation includes:
- screwdriver;
- building level;
- hammer;
- knife for cutting drywall;
- metal scissors for cutting profiles.
- drill;
- ladder;
- tape measure and pencil
Of course, you can’t do without the materials themselves. Try to buy materials from the same manufacturer, as they will be best combined with each other. In order to sheathe wooden beams you will need:
- metal profile (UD and CD);
- wooden beams;
- gypsum board sheets;
- suspensions, as well as special connections - crabs;
- anchor dowels and fastenings for ceiling profiles;
- screws;
- screws for wood.
You will also need help in attaching the slabs. Therefore, installation needs to be done by at least two people. This way the work will go faster and the installation will be of higher quality. Having a ready-made base on hand, as well as the necessary list of materials and tools, you can cope with the subsequent installation of sheets on the ceiling surface without any problems.
The main part of the work: ceiling frame for plasterboard
The hangers are screwed according to the drawing. The ceiling profile is already attached to the suspensions. Using a building level, monitor the position of the profiles relative to each other and the horizon. The profile should be located on both edges of the ceiling (opposite).
There should be a gap of at least a centimeter between the wall and the profile.
In order for the ceiling to turn out beautiful and even, it is necessary to carry out all installation work correctly. Then a guide profile is installed at the end of the ceiling profiles. Transverse jumpers are installed using crabs. At each joint of the plasterboard sheet there must be a jumper or longitudinal profile, and they should be located only in the center of the seam. Well, then the frame is covered in the standard way. The sheets are first cut. The fastening points are puttied especially carefully.
[custom_ads_shortcode3]
Stage 5. Final work
Now you can take a breath: there’s nothing left. If necessary, prepare the sheets for painting by cleaning them from dust and construction debris (you will also need to degrease the surface). Install decorative skirting boards to hide gaps.
The most suitable option for finishing the ceiling in a wooden house is plasterboard. In theory, finishing in a wooden house should be subject to the principles of naturalness and environmental friendliness - this is facilitated by the very concept of a private, and even a wooden house. And in this regard, drywall fits perfectly.
[custom_ads_shortcode3]