It is very easy to select and buy the door you like for your apartment; the difficulties begin during the installation process. Installing interior doors is not an easy process that requires certain skills, time and appropriate tools. Special equipment for installing the door leaf must be prepared in advance - if this is not done, it will take additional time. In addition, a hasty purchase of tools risks ending up with a low-quality installation kit.
To determine the list of equipment, you should carefully consider the upcoming set of works: from marking and inserting hinges to finishing door slopes. The basic set for installing interior doors includes about a dozen items, but you won’t be able to get by with just one. To complete the job efficiently and without the need for further adjustments, you need to write a list of devices that will be required at all stages of installation.
All devices necessary for installing a door structure can be divided into two categories: manual equipment and electrical equipment.
How to choose a tool?
Before installation, it is worth considering future actions. Assessing the situation will help determine what tools are needed to install an interior door, and what additional accessories will be needed. Forethought will speed up the installation process and eliminate endless shopping trips to purchase a drill of the required diameter or other consumables.
First, before installation, they inspect the household tools that are available. Check its performance. A power tool lying around idle could become unusable due to exposure to dampness and dust. After checking the functionality, they make a list of necessary purchases.
Briefly about the main thing
To successfully install a door, the master will need a set of tools.
Door frame fastening
These include electrical and battery-powered devices, as well as mechanical devices for modifying products before installation. Installation is also impossible without the use of consumables listed above.
Installation of platbands
Before starting work, it is necessary to modify the opening, measure its dimensions, after which installation is carried out in accordance with the detailed technological map.
Functionality of interior floors
A door is a product consisting of four main connecting mechanisms and assemblies. Even a single absence of one of them will make the carpentry product, at a minimum, defective, and at maximum, inoperable. The instructions for approaching the issue of installing interior door frames, especially on your own, are comprehensive. The complexity of the approach is as follows:
- Assemble the box;
- Cut loops into the product;
- Install a lock (if necessary);
- Install the assembled block into the opening.
This and some subtle points during the installation of doors will be discussed, which will not only facilitate the process of the work itself, which is supposed to be carried out on our own, but will also increase the service life of the doors. It is worthwhile to understand for yourself the functionality of interior floors in a living space. The functions of interior doors, in addition to decorative interior design, are very useful in terms of practicality:
- The interior of a living space is given a finished and aesthetic appearance after repair work when installing doors;
- Insulate living quarters and work areas with your own hands;
- Individual rooms are guaranteed sound and light insulation;
- It becomes possible to maintain a comfortable temperature in residential areas using cooling systems (air conditioners) and heating systems.
The decision to carry out the installation process yourself is a very noble and rewarding task, since currently a master installing an interior door with his own hands will charge an exorbitant fee. Thus, with the hands of a craftsman, the installation work carried out can also be carried out on other types of finishing work, if the thickness of the wall and the door frame do not match.
| Installation work | Installation parameters | Approximate average cost of work (payment to the installation technician) |
| Removing the old door | 2000\600 mm | from $20 |
| Installation of interior door block | 2000\600 mm | from $60 |
| Facing the slope with additional elements | 2000\600\100 mm | from $40 |
| Finishing the opening with plasterboard | 2000\600\100 mm | from $38 |
| Plastering a doorway | 2000\600\100 mm | from $48 |
Solving a given task with your own hands will help save money, and the information provided below on installing doors will be nerve-wracking, since the process requires patience, precision, attention and painstakingness.
Optional equipment
Additional equipment includes the following items:
- drills of different diameters;
- chisels;
- jigsaw files;
- masking tape.
For high-quality and correct installation of the mounting door, you must stock up on the entire list of tools in advance. All this will help significantly simplify the installation process. Each of the materials and tools listed must meet the requirements for quality and reliability. Only in this case can you be guaranteed to have long-term operation of the interior door.
Voted over 414 times, average rating 5
Comments
Unfortunately, there are no comments or reviews yet, but you can leave your...
Add a comment Cancel reply
We recommend reading
Door installation Mechanisms for opening interior doors It is known that a door can make changes in style...
Installation of a door Entrance vestibule in a private house: ideas and recommendations for construction The vestibule is a small room designed for ...
Door installation What comes first: laminate or interior door? Features of repair work Repair involves performing certain actions that depend on each other ...
Door installation Making sliding doors at home with your own hands How to make an interior sliding door with your own hands? Assemble the sliding door...
Preparatory work
The start of preparatory work begins with careful thinking through the upcoming process. Thinking begins with the correct selection of doors that are more suitable for a particular room. Type of doors: will they have one leaf or two, and in which direction they open is better and more convenient for the space of the room. The door block kit should include a door frame, door leaf and trim. The retail offer mainly includes door models with standard door frames, the width of which is approximately 10 cm. The thickness of the walls in standard apartments is 15 cm (+-5 cm). Thus, boxes with similar board widths are rarely presented in retail chains. In order to avoid having to purchase additional door fittings in the future, it is worth ordering the door frame separately from a carpenter’s shop, so that the self-installed door will look aesthetically pleasing. When installation starts, the interior doors should already be in the room. To further carry out the work with your own hands, you need to purchase the following tools (borrowing is also acceptable) and materials:
- To secure the box to the wall of the opening, anchor bolts are needed;
- To wedge interior doors, plastic or wooden wedges are required;
- A container of polyurethane foam;
- Screwdriver or drill;
- Building level;
- Chisel, miter box and hacksaw for wood.
The cost of installation work carried out independently is not large, compared to how much money it would cost to pay an installer.
| Necessary equipment | Size and quantity per package (it is not necessary to purchase a package) | Approximate average cost of material in retail chains |
| Custom door frame | 2200*800*150 | from $20 |
| Anchor bolts | 10*120 mm (50 pcs/pack) | from $16 |
| Fixing wedges | 1.5*1.5*16 mm (100 pcs/pack) | ~ $2,98 |
| Polyurethane foam cylinder + gun for the cylinder | 1000 ml | ~ $12 |
| Screwdriver (can be borrowed) | 900 W | ~ $22.38 |
| Construction level (can be borrowed) | ~600 mm | ~ $2.59 |
| Chisel | 25 mm | ~ $3 |
| Plastic miter box | 233*53*53mm | ~ $2,34 |
| Wood hacksaw | 400 mm | ~ $6.44 |
SNiP standards for installation of entrance doors
The process of installing an entrance door that does not meet the requirements described in SNiP represents a serious violation. Such actions are punishable by a fine and the requirement to reinstall the door. These measures are determined by the purpose of the input material
The design is of great strategic importance during the evacuation process and should in no way create a barrier to the route. Based on this, SNiP determines the external type of opening as the most suitable
However, this condition is applicable only when the entrance doors do not create obstacles to the opening of adjacent doors.
One of the main requirements for entrance door structures is a high degree of tightness of the door leaf in relation to the frame. The opening itself cannot have dimensions less than 0.8 m in width and 1.9 m in height. The ventilation capacity of a properly installed structure cannot exceed 1.5 kg/m2 per hour. High-quality sound insulation is indicated in the standards at the level of 30 dB.
Power tools
When performing complex work related to dismantling an old door frame, widening an opening, cutting grooves for fittings, you need a power tool. It will not only speed up installation, but will also help get the job done efficiently. Depending on the tasks, you will need the following tool to install the door:
A miter saw will come in handy when installing a homemade sash. With its help, it is easy to make longitudinal cuts, trim door frame elements, reduce the size of the sash, and adjust trims and trims. A miter saw can partially replace a jigsaw.
A hammer drill is needed when dismantling an old door frame. Using different sizes of chisels and drills helps to quickly make holes for anchors and break off part of the wall when expanding the opening.
Use an electric drill to drill holes for self-tapping screws, a door handle, and select a groove for the lock if you don’t have a router at hand. It is important to immediately think about what drills are needed to install an interior door.
A screwdriver with a set of attachments is not an essential power tool if you plan to install only one door. A dozen screws can be tightened with a screwdriver.
A jigsaw is indispensable when installing extensions and trims. Using a set of nail files, you can quickly make even cuts when fitting planks made of wood, aluminum, plastic, and MDF.
A grinder is necessary when expanding a doorway. Additionally, diamond-coated concrete discs are purchased.
Using a router to install doors simplifies the process of selecting grooves for fittings. Use a power tool to remove the excess layer of wood. To install interior doors, you will additionally need cutters of different diameters.
Fitting the box and accessories
The main problem when assembling a door frame is to make the joints correctly. Crossbars and jambs, as a rule, have a profiled structure, so the most difficult thing is to make cuts exactly at 45 degrees. In practice, novice door installers actively use hand miter boxes:
Useful to have:
- Protractor and miter box in one (max. plinth height 70 mm) for measuring and taking angles from 85 to 180 degrees Wolfcraft 6948000
- Angle/bevel copier TC133R VIRUTEX 3345634
And more experienced professionals work with miter saws: And undoubtedly the best choice here is the FESTOOL KAPEX 120 saw
Hand tools
You can't do without hand tools to install doors. Even if you have electrical units at hand, it is impossible to dismantle the box without a mount or hammer in a nail without a hammer. To install the doors you will need:
Marking pencil. It is advisable to use a soft rod so that when pressed it does not leave dents on the varnished surface. You can take a marker, but it is difficult to erase after marking incorrectly.
A chisel is one of the main tools for installing interior doors, helping to select recesses for fittings.
A hammer is needed to hammer nails, dowels, cut out indentations with a chisel, and destroy the wall when expanding the opening.
A plumb line and level will help ensure that the door is level. If the box is skewed, the sash will sag. A laser or bubble level, 50 cm long, is suitable.
A hand hacksaw for wood will replace a jigsaw or circular saw. However, it will not be possible to saw a piece of wood lengthwise. A hacksaw will help to shorten the elements of the box, adjust the length of the trims and extensions.
A set of screwdrivers will replace a screwdriver. It is convenient to use the handle with interchangeable attachments of different shapes.
We carefully remove the canvas correctly using our only applied forces from the hinges, which is done in the open state. Next, we independently clean the opening from the old plaster applied around the perimeter and pull out the installed box with our own hands. That's all. The surface of the opening is cleaned and the next stage begins, which is dictated by the installation instructions.
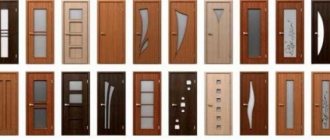
Types of products
The installation features of a door are directly affected by its type and material of manufacture. The following raw materials are used in the production of these products:
- Fiberboard. The wooden frame is sheathed with laminated fiberboard sheets, which provides an aesthetic appearance, light weight, low cost and ease of installation. Products made from fiberboard have disadvantages: low strength, high hygroscopicity, and tendency to deform. They are recommended to be installed in rooms with low humidity.
- MDF. Products made from this material represent the optimal price-quality ratio. They are several times more expensive than their wood-fiber board counterparts, but have high moisture resistance and provide good sound absorption.
- Solid wood is a luxury raw material that is distinguished by its durability, unique design and high cost.
Also, interior interior elements can be made of plastic, glass and steel.
The stage on which aesthetics and reliability depend
Do-it-yourself installation of interior doors begins with local installation of the door frame. It is, of course, worth pre-ordering its assembly at the production site.
If the installation of interior doors is carried out before the final process of finishing the floors or in the future it is planned to lay carpet on the floor, then the thickness of this covering must be taken into account. To the thickness of the carpet, a gap of up to 10 mm is added between the floor surface and the door stroke. This way the installation will happen correctly.
Door frame installation instructions:
- Initial installation of frames, interior doors (panel) are laid on the floor, in such a way as the final appearance in the opening is expected. The size of the box is adjusted to the canvas. To maintain technological gaps, especially remembering the bottom gap, it is recommended to use strips of cardboard.
- The parts are fastened with self-tapping screws; if necessary, the excess is sawed off correctly using a hacksaw.
- Next, you need to install the box into the opening with your own hands and secure it with spacer wedges in the upper gap between the opening wall and the board.
- The most crucial point is the alignment of the box's hinge post level in two planes by forces. The stand is fixed in the rear position using wedges. The false post is aligned in the same way. To control, you need to measure the width between the racks at the bottom and top of the box.
- For the last time, you should make sure with your own hands that the top bar is strictly horizontal; the final installation of the interior doors is applied to the frame. The canvas is being put aside for now, and the box is secured with anchors to the slope. The remaining holes on the board need to be installed with decorative plugs.
Consumables
The set of consumables includes:
- Peaks and chisels for hammer drills.
- Jigsaw files.
Also, to fix the hinges, insert the locking mechanism and install the trims, you will need self-tapping screws.
Some craftsmen prefer to secure the trim with liquid and finishing nails. You can use micropins. They are secured with a special industrial-grade pneumatic device – a pneumatic gun.
This method of installing platbands is one of the most common. If the diameter of the finishing nail is about 2-3 mm, then the size of the micropin is 0.64 mm. They can be used to secure platbands, glazing beads, linings and additional beams. A micropin is a durable, inconspicuous fastening element; it does not have nail heads or rivets. The use of micropins in carpentry allows you to achieve a single, seamless look for the door leaf.
Equipment
Interior doors are often sold without hinges and a locking mechanism, so additional hardware must be purchased. When choosing hinges and locks, it is better to give preference to quality products that will last for many years.
Nuances that come with experience
Some recommendations that many people develop with experience will help you install an interior door correctly:
- Marks are made for the location of the loops. On the loop board of the box, at a distance of approximately 25 cm from the top and bottom, the location of the loops is marked.
To avoid errors, you should take measurements yourself and use one measuring device.
- Using a chisel, small recesses are made at the end of the canvas for the loops. The plane under the loop should ideally be level.
- The hinge structure is disassembled into parts, the lower part (with the bushing) of which is screwed to the frame, and the installation of the upper part (with the leg) is screwed to the door leaf.
- The legs of the attached hinges are lubricated with grease (graphite) or machine oil. Next, the panel is hung on the hinges in the open state.
Do-it-yourself installation was done correctly if the door panel, when ajar, does not open on its own, no matter how much the draft blows.
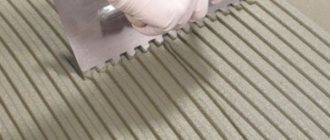
- Before filling the gap between the frame and the wall opening with mounting foam, additional spacers are installed at the level of the hinges and door handle. The foam is applied in a small layer; after final installation, the interior doors are first covered with a protective film, and the wall is slightly moistened with water from a spray bottle for better adhesion of the foam to the surface.
At the end, the door is framed with platbands mounted on “liquid nails” and begins to fulfill its direct function.
Makita LS1040
This powerful model from Makita is one of the best inexpensive broachless miter saws in its class. The professional tool is well assembled, features a reliable, rigid design, cast and durable platform. When the stopper is unlocked, you can set any arbitrary angle; a tilt to the left up to 45° is provided. The maximum width of the workpiece is 125 mm; for the convenience of sawing tall products, there is a special vertical stop that provides additional rigidity of fixation. Also included are two side extensions for installing long elements. With a power of 1.6 kW, a saw blade with a diameter of 225 – 260 mm can be installed on a power tool; the standard fit size of 30 mm will allow you to select equipment from other brands. The miter saw is suitable for installing doors or cornices, on-site installation work, and various carpentry works in the home workshop.
Read also: Scissor lift for garage
Advantages:
- good saw removal system
- reliable and robust design
- quick access to carbon brushes
- dynamic disc brake
- minimum error
- smooth start and stable operation
Flaws:
- The removable workpiece stop can only be used for straight sawing
- Achieving absolute cutting accuracy will require some skill
How to embed a lock into an interior door: step-by-step photos
Before installing a lock or latch, you need to determine the height at which the handles will be located. The recommended height is 90-110 cm. A lock or latch is usually placed in this gap. But when installing a lock into an MDF door, you should not install the lock higher than a meter. The fact is that in budget models the wooden plank into which the lock is installed is 1 meter high. Higher up there will only be emptiness and you will have to re-drill the hole and figure out how to close the resulting hole. Once we have decided on the height, we can begin installation.
Interior doors are usually equipped with locks that can be closed without a key.
Recess for the locking part
Before embedding the lock into the interior door, mark the selected height on the door. Make this more convenient using a tape measure. We place a mark at the end and transfer it using a square or building level to both sides of the door leaf.
- Take the lock/latch and apply it to the end of the door so that the middle of the lock falls on the drawn line. We mark the width of the metal locking part and the level at which the lining ends.
- We take a 16 mm feather drill and apply it to the part of the lock that will be inserted into the door leaf. Using a marker or masking tape, or a piece of electrical tape, make a mark on the drill. This mark should be slightly further than the lock. We will use it to guide us to what depth to make the holes. This is especially important if the lock is installed against glass. Otherwise, you may drill too deep and damage the glass.
We put a mark on the feather drill - this way we will control the drilling depth - Having installed a feather drill, we make several holes one under the other, forming a recess for the lock. The number of holes depends on the size of the lock. In some models 4-6 are enough, in others you will need 8-10.
- The edges of the holes were uneven, and the wood had lifted in places. We take a chisel and remove the protruding wood fibers from the edges, working lightly and in depth (but don’t get too carried away).
The edges turned out uneven, remove the protruding fibers using a chisel - We take a regular 16 mm drill and put it in the drill. Use it to align the edges of the hole made. To do this, move it up and down, pressing lightly on one side or the other of the notch. This operation is needed to speed up the process, but the drill must be strictly controlled. If you are unsure, it is better to level the notch using a chisel and mallet.
Leveling faster with a drill - Insert the lock into the resulting hole. It is usually a little larger, so there are no problems. If necessary, using a chisel or drill it can be increased to the desired size.
- We set the lock to the desired position and attach it to the door leaf using two self-tapping screws (one at the top, the other at the bottom).
How to embed a lock into an interior door: modifying the recess - Using a pencil or a utility knife, trace the perimeter of the lock lining. We remove the lock, take a chisel and remove 1-2 mm of wood, MDF or veneer inside the markings made.
The depth of the recess for the locking part depends on the thickness of the decorative strip. Usually they try to make sure that the strip is flush with the end of the door, but it may protrude a little. Shoot little by little as you work—it’s easier to edit it than to try to restore what you shot.
We put the handles
To finish installing the lock on the interior door, you need to make holes for installing handles. The work is much less than what has already been done, but accuracy is required. Mistakes are not too critical, although it is better to try to avoid them.
The handles come complete with self-tapping screws for wooden doors and tie bolts for installation in a metal door. It is better to replace the self-tapping screws from the kit - they are usually made of soft metal. Unless you bought a branded foreign lock, in which the screws are hardened. And so, buy several good screws with a diameter of 1.5-2 mm and a length of about 1 cm.
- We take the lock and apply it to the side surface of the door, matching the height.
- Using a pencil, marker or awl, we make marks through the slots for installing handles.
We make marks on both sides of the door - We repeat the operation on the other side of the door leaf.
- We install a crown or a feather drill of a suitable diameter on the drill. Place the center of the drill/bit at the marks and make holes. An important point: we do not drill through, but from both sides, towards each other. That is, as soon as the drill falls into the recess made for the lock, we stop the work and start from the other side.
- We remove the shavings from the recess for the lock, put the lock plate in place, and secure it with self-tapping screws.
- We loosen the clamping screws on the handles - the central rod should “move” freely, and install it in place.
We install and secure the handles - Align and fasten with self-tapping screws. It is better to pre-drill holes in veneered doors.
- You just need to tighten the fastening screw that connects the two handles and the lock cylinder. They are usually located on the underside of the handle. Take a screwdriver and tighten the screws on both handles.
Installing decorative trims
Some models have decorative overlays. We align them using a square.
Installing the lock latch
Locks for interior doors usually have a rotating latch on one side that locks the lock, and on the other side there is only a lining with a slot. That is, you can’t just open the door from the outside—you need a special key. Installing this part of the lock takes literally a couple of minutes, but there are some nuances.
- We take the central part, which is inserted into the lock. We insert the side where there is no slot into the cover without a handle, insert this structure into the lower hole from the outside.
How to embed a lock into an interior door: installing a lock retainer - From the side of the room, we put a cover with a wrap on the pin.
- Tighten the clamping screw (before securing it with self-tapping screws).
- We fasten with self-tapping screws, if provided for by the design, and install decorative overlays.
That's it, inserting the lock into the interior door is almost finished, all that remains is to check the work.
Mate insert
The counter part must be installed clearly so that the doors do not play and there are no problems with closing. Therefore, we try to mark as accurately as possible and take a sharpened pencil.
- We close the doors so that the latch tongue rests against the jamb. Mark the position of the latch with a pencil (top and bottom).
- Using a triangle, we draw horizontal lines along the marks.
- We measure the exact distance from the edge of the door leaf to the middle of the lock. The middle of the lock is the middle of the tongue or the center of the fastening hole.
The middle of the castle is easy to find - On the lines marking the position of the tongue, we mark the measured distance (we measure it from the bar against which the door leaf rests). Draw a straight line through these two points. This is the marking for installing the lock mate.
- We take a 14 mm drill or a feather and drill a hole in the jamb according to the given marks. The depth of the hole is slightly greater than the length of the tongue.
- Use a chisel to straighten the hole.
We check the holes according to the marks and refine it with a chisel. - We close the doors, checking whether the tongue fits normally. If you pull the closed door towards you, there should be a small gap - a couple of millimeters - for installing the adjusting tongue on the trim. If necessary, adjust the hole.
- We put the strike plate in place and screw it on.
- We close the doors and check for play. If there is one, we remove this play using the adjusting tongue. Near this tab there is a slot for a screwdriver. We insert a screwdriver into this hole and press it a little. We close the doors and check. Repeat until the backlash disappears.
Removing the backlash of a closed door
You know everything about how to fit a lock into an interior door. The description takes up a lot of space, the process itself takes 25-30 minutes if you’re doing it for the first time. It will take more time if you level the holes with a chisel rather than with a drill. But the total duration will still not be more than an hour.
Additional strips
An extension is a narrow strip used for framing. The part is used if the width of the box is smaller than the wall. There is a groove on the box that helps mark the installation location of the extension.
Methods for placing an element on a frame:
- insertion into a special groove located on the frame of the wall opening;
- independent preparation of the seat (if not provided by the manufacturer);
- installation on the reverse side of the beam (in this case the groove is not cut out, the box is mounted with a fixed extension);
- separate assembly of planks (later the structure is mounted in the form of a frame);
- through drilling of narrow strips without cutting a groove.
The additional material is supplied in the form of 2 m long slats, which are cut with a circular saw.