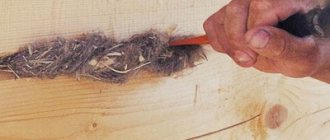
A couple of decades ago, door installers struggled without templates for cutting in door locks and hinges. They cut it out with chisels and a milling cutter. For a long time - more than an hour, all two or three. Depends on the experience of the master. Trying not to make it crooked or sloppy, so that it looks decent. There were no other options.
- More doors appeared. The quality of the material is low - it crumbles with any manipulation. In another case, the door is expensive, you are afraid of damaging it. Clients understand the difference between good work and bad work. They know how it should be.
- New methods and tools for installing fittings have appeared, and it has become impossible to work with the old ones. Without a professional conductor for a router for hinges and locks, amateurs now work using the methods we inherited from our grandfathers.
- Over the past 20 years, a large selection of instruments has appeared on the market. Now you don’t have to suffer yourself, but make the work easier and faster - buy a template for inserting hinges and locks. Let's look at the most popular options.
What kind of router is needed to install a lock?
The insertion of hinges and locks requires samples of very different sizes. For loops – shallow, according to the thickness of the loop web. Under locks – a large and deep selection. Therefore, professionals who install doors most often use two different routers:
- easy to select for hinges;
- powerful with a large cutter for selecting fits under locks.
When choosing a router for inserting locks, the first thing to determine is its ability to complete the task, that is, to reach the bottom of the planting in depth. The following milling cutters are suitable for this:
- cutter stroke from 70 mm and above;
- shank size (collet fit) 8-12 mm, preferably 12 mm;
- cutter length from 110 to 130 mm.
As a rule, milling cutters with such characteristics in terms of immersion depth have a power of more than 2 kW and a weight of about 6 kg. They easily cope with the task, but they are not very convenient to work with due to their large dimensions and weight. Therefore, other, lighter options are selected with the same depth indicators, which are convenient to choose for locks and hinges.
As an example, BOSCH GOF 1600 CE PROFESSIONAL:
- electric motor power -1600 W (1.6 kW);
- cutter speed - from 10,000 to 25,000 rpm;
- the amplitude of the cutter's stroke up and down is 76 mm;
- replaceable collets for cutters with shanks - 8 mm, 10 mm and 12 mm;
- weight 5.8 kg.
There are models with characteristics suitable in depth with the same or greater power, up to 2.5 kW, and from many other brands.
A more powerful and heavier router is less convenient for such work due to its greater weight and dimensions, but it copes with the task more easily, since when cutting deep niches for locks and latching handles, the router experiences significant loads.
To limit the sampling depth, an adjustment stand with three screws at different heights is used. This function is available on almost all models, so when choosing it it is not highlighted as special or separate.
Furniture hinge insertion
To select a large-diameter blind hole with a hand router, you need to make a template yourself. It has a stop bar, thanks to which the tool can be easily positioned on the furniture door. It is done very simply.
Milling for a furniture hinge Source amazon.com
A rectangle with sides 280×140 mm is cut out of plywood 4-5 mm thick. Divide the width in half and draw a line. We retreat 70 mm from the corners along one of the sides along the length and also connect these points with a line. At the intersection we drill a hole with a diameter of 51 mm.
We select a wooden plank for support. Its length is 140 mm, and its cross-section is 5×30 mm. We place the stop at the very edge of the hole, stepping back from the edge of the rectangle by 15 mm. We attach the plank with glue and small nails. The template is ready.
The depth is set on the router to 11.5 mm. The template is applied to the furniture board, and the strip rests against its end. And in several passes the groove is selected. In this way, a blind hole is made for a standard furniture hinge with a 35 mm cup.
Which cutters to use
To insert a lock into an interior door, groove end mills with a cutting edge on the sides and end are used.
There is a specialization - cutters designed specifically for this operation. They meet the requirements for the depth and width of the cut, the cutters are made of hard alloys (type VK8), which equally well select grooves in wood of any hardness, MDF, plastic and composite materials, and cut through laminate well.
These cutters are available in different sizes. Average values:
- height of cutting knives 30 mm;
- diameter of the working part of the cutter is 12 mm;
- total length of cutter 120 mm;
- shanks in three options - 8 mm, 10 mm and 12 mm.
When the cutter stroke on a router is 70 mm, such a cutter can select a groove for a lock with a depth of about 90 mm.
Large cutters are also available:
- working part diameter 16 mm;
- total length 130 mm.
Their cost fluctuates around 1500 rubles, plus/minus 300-500 rubles. But there are copies costing only 150-500 rubles. and over 3000 rub.
The leaves of many modern doors made of MDF, blocks (not solid wood) may have a small thickness of the side bar into which the lock cuts. For example, 50 mm, beyond which the void begins. For such doors it is not necessary to use long cutters with a large cutting depth.
Optional equipment
Additional work when installing interior doors often involves adjusting hinges and finishing slopes. Adjustment is necessary in order to check the tightness of the door to the frame. If necessary, the fastening element is tightened with a screwdriver or loosened. At this stage of work you will need a set of screwdrivers.
To plaster slopes, you need to prepare a kit that includes items such as:
- Spatulas
- Solution bath
- Set of brushes and rollers
- Grouting kit
Ideally, it is better to purchase professional equipment for installing interior doors. Such tools are tested by specialists and are reliable, and therefore guarantee high-quality work done. But the prices for such devices are quite high.
Templates
One-time work can be accurately completed without special complex templates, using only a parallel stop, which limits the displacement of the cutter beyond the markings to one side.
But for professional work with large volumes, special templates are often used. These can be either sets of templates for different configurations of fittings, or universal ones with adjustable sizes.
Both homemade and factory-made ready-made options are used.
An example of the design of one of the factory templates:
The device makes it possible to install and move the router in the position required for sampling exactly in place.
Example of homemade templates:
It makes sense to make such a device when there is a large amount of work to be done.
Briefly about the main thing
To cut a lock with a router or hang hinges on a door, you need to choose the right tool. It is best to use a simple submersible model, since the combined model is heavy. This will create certain inconveniences, especially if there is no experience in such wood processing.
Using a router to cut in fittings is easy. But the process is greatly simplified if there are special templates. Having placed the device in the desired place, all that remains is to set the required processing depth on the tool and install it on top.
When working, you need to carefully monitor the process in order to notice overload in time. It can occur if the wood structure is too hard. Then you just need to reduce the speed of the tool using a special switch on the body.
Ratings 0
How to install a lock on an interior door
Inserting a lock into an interior door always begins with markings. To prevent the cutter from tearing out the edges of the laminate, the slot location is sometimes covered with masking tape and markings are made on it. Or cut with a sharp knife.
The selection for locking is done in 2 levels:
- a small sample for the overlay strip, to the depth of its thickness.
- deep sampling under the body of the castle itself.
First, the height of the lock is determined. Then a lock is applied from the bottom mark upwards, and marks are made along its cover plate.
The markings for the lock itself are applied after a small sample has been made for the overlay strip. The markings for the lock itself are done like this:
- The center of the door leaf is located in thickness. For example, if the thickness is 37 mm, the center is marked 18.5 mm from the edge.
- The thickness of the lock is measured. If it is 18 mm, 9 mm are marked on both sides from the center of the canvas.
- Several such markings are made, then they are connected by a line of a pencil or marker.
The length marking is made according to the actual size of the lock, it is applied and the markings are made according to the fact.
Instrument setup
The setup is carried out two times:
- For shallow cutting under the lock trim plate, the cutter extends beyond the support platform to the thickness of this strip. For example, 2 mm. A parallel stop is set so that the cutter cannot go beyond the edge of the marking on one side, but follows exactly along the marking. The second marking line when cutting without a template is controlled manually, visually.
- After shallow sampling, the cutter is released to the required depth under the deep sampling, under the lock itself.
An approximate progress of work on such an insert can be seen in the following video.
It is approximate because the marking sequence is different here - all the markings for the overlay plate and the lock body are applied at once. But after selecting a niche for the bar, the markings for the lock itself are removed. Therefore, it is better to adhere to the markup order described above:
- Marking for the bar.
- Sample.
- Marking for the lock itself.
Selecting a lock using not just one parallel stop, but a double-sided adjustable template is shown and understood from the following video:
Power tools
List of what is recommended for purchase:
- Hammer. During construction work, this tool is extremely useful. During the installation of the door structure, it is used to level and enlarge the opening, drill holes for the anchor dowel, etc.
- Drill. This tool is used to drill mounting holes of various diameters. If you have special wood pens, you can perform additional operations. Before you begin installation, you need to check the tightness of the drill installed in the drill chuck. If the drill is loosely secured, it may fly out during drilling and damage the surface of the door or, even worse, injure the technician.
- Screwdriver (plus attachments for it). It makes the process of fixing screws in hinges, door handles and locks easier.
- Jigsaw. The main purpose of the tool when installing interior doors is to open the extensions and trims. Used for processing areas that are difficult to reach with saws.
USEFUL INFORMATION: Installation of interior doors: GOST and SNiP
- Manual electric milling machine (plus special cutters). The device is used for inserting hinges and locking mechanisms. They also use it to remove the layer of wood from the door leaf and frame and make seats for the hinges.
What cutters should I use to install hinges?
The hole for the hinges can be made with the same large cutter as for the lock. But, as a rule, groove cutters with a cutting edge at the end and sides of a smaller size than for a lock are used for this.
A special loop cutter looks like this:
It has a shorter shank and a wider cutting part than the locking cutter.
Professionals who have to work with dozens of doors every day use not only a separate cutter for hinges, but also a second lightweight cutter. On it, the required depth is set once according to the thickness of the hinge, and there is no need to change the adjustment for the lock and back for the hinges each time. This speeds up the work.
Marking
The location of the upper and lower hinges is marked on the door leaf.
To do this, use a tape measure or ruler to measure 20 cm from the top and bottom edges. To avoid mistakes, craftsmen draw an arrow indicating where the loop will be directed from the mark. The arrows are directed towards the center of the door end. Place the loop map against the mark and trace its outline with a sharpened pencil. The hinge part must not touch the door leaf.
It is not recommended to simply measure the length and width of the card and draw a rectangle with this data on the end, since the card may not have a strictly rectangular shape - it may be beveled or trapezoidal.
The loop will fit perfectly into the groove made along the contour. In order not to confuse the loops during installation, they are signed with a marker B (top) and H (bottom).
Castle part
First of all, you need to select and prepare a feather drill. The diameter should be 2-4 mm larger than the thickness of the embedded part of the lock. It’s better to give a larger margin: it’s difficult to ideally hold the drill perpendicular to the end of the door; there will probably be a small error due to the fact that the drill may twitch slightly along different fibers . To ensure that the hole does not turn out to be too small, or, conversely, too deep, we wrap the perk with electrical tape at a level slightly larger than the dimensions of the recessed part. Markers and pencils are not very suitable for marking as they wear out quickly.
@youtube.com, channel DIY apartment renovation (Remontkv.pro)
After the nest is ready, we are not in a hurry to choose a recess for the cover. Firstly, we check whether the lock fits into the socket , and secondly, we set up the router on the block. And only then we select the recess.
The hole for the handle is drilled last. And then after we once again assessed the lock against the main frame and made sure that we had not made a mistake with the preliminary markings. Again, take a drill with a diameter of 12-16 millimeters - the handle will block the hole, and no one has canceled the error in measurements.
A common mistake is that the mating part of the lock on the frame is marked until the door is already installed and the mounting foam has dried. Don't do this! The answer will take its position only after installation, so do not try to calculate or guess it. There is no need to rush here, otherwise, most likely, you will have to interrupt it in place - for some reason the lock tongue will not fall into the slot intended for it.
Source
The essence of the technique
Instead of hollowing out a groove in the wood with a hammer and chisel after marking the loop, we resort to another method. Using a finger cutter , we will make these indentations much faster and more beautiful.
@youtube.com, channel Repairman School
Please note: it is better to make a socket for a mortise lock using a feather drill, without making a face or reconfiguring the router. Next I will describe this technique.