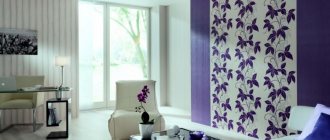
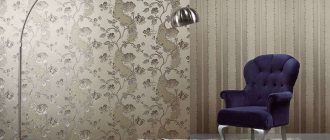
When your apartment hasn’t been renovated for a long time, you really want to change something. This is quite simple to do - you just need to re-glue the wallpaper. And against a new background, even old furniture will seem something interesting and original.
After the materials have been selected and the walls have been prepared, the question arises: “What tools are needed for wallpapering?”
Nothing too expensive or special, suitable only for a certain type of wallpaper or related to the characteristics of the room (unless, of course, you buy a special table). And this is why the pasting tool compares favorably with tools for other finishing work in the house.
All about wallpapering
There are no unimportant moments in repairs that can be ignored or done carelessly. If you want the wallpaper on the walls to be perfectly hung, and the designer renovation of your apartments to be completed 100%, then you need to complete every point.
What tools will you need?
To hang wallpaper you need to prepare the following tools:
- measuring tape;
- tape measure, its length should be greater than the height of the walls;
- pencil;
- a ruler more than 50 cm long, preferably 70-100 cm, you can take a folding ruler;
- cutting scissors;
- stationery knife with blade;
- plumb line for marking the gluing of the first sheet.
These tools are necessary to measure and cut the required length of the canvas, set a mark for placing the first strip.
For gluing you will need:
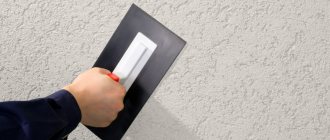
- pressing spatula;
- roller for wallpaper seams;
- roller for applying adhesive to the wall;
- pressure-type rubber roller (required for rolling wallpaper);
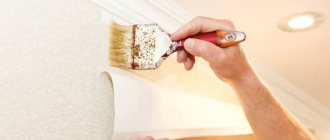
- brush for primer and wallpaper paste;
- paint spatula for removing old plaster or wallpaper;
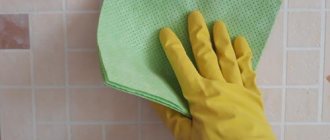
- rags, soft rags for removing glue from the surface of the canvas and excess from the seams.
You also need to take a bucket for diluting the glue, prepare a table or any other flat surface on which to cut the canvases and apply the adhesive composition to them.
What materials are needed
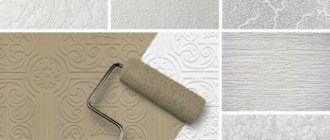
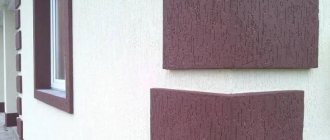
First of all, you need to buy the wallpaper itself. On sale there are non-woven rolls, vinyl, paper, liquid and glass wallpaper. They are chosen depending on the room in which renovation is planned. For the bedroom and nursery, it is better to buy eco-friendly wallpaper based on non-woven fabric or paper; for the kitchen, choose washable ones.
Before gluing wallpaper with your own hands, you need to prepare the walls. You will need to buy putty to seal cracks and a primer, which will ensure better adhesion of the canvas to the base. Applying a primer coat to the wall will also help reduce the amount of adhesive. If there is a mold problem in your home, it is recommended to use a primer with additional anti-mold ingredients. On sale: ready-to-use primer, also in the form of a concentrate or dry, which needs to be diluted with water.
Depending on the quality of the wallpaper, wallpaper glue is chosen. This is an important point! The quality of the glue determines whether the canvas will stick to the wall. You can always find information on the rolls about which glue is suitable. The same can be found on glue packages.
Features of the tool and its design
The roller is designed simply, but has numerous advantages, including:
- convenience. The tool is dipped into paint or glue either entirely or in a certain part if it is necessary to process a narrow surface;
- versatility. They paint, varnish, apply glue with a roller, press the wallpaper;
- indispensability. It is possible to work on any surface - ceiling, wall or floor;
- ergonomics. Without washing the tool, remove the old coat and install a new one - the roller is ready for further use;
- accuracy. During the work process, hands remain clean;
- Possibility of fast surface treatment.
There are also certain disadvantages:
- When processing corner areas, difficulties arise - you have to use a brush;
- only a soft fur coat is suitable for rolling embossed wallpaper;
- it is difficult to track the consumption of the adhesive mixture or paintwork materials;
- For finishing curved areas or complex structures, it is recommended to replace the roller with a brush.
Structurally, a roller for wallpapering consists of a curved handle (yoke), a tube (a rod made of metal material), a reel (a cylinder capable of circular rotation), and a nozzle (coat).
Preparing walls for wallpapering: step-by-step instructions
One of the key points is preparing the walls. It is necessary to remove all nails and screws from them, remove old wallpaper, repair cracks and level the surface. Each defect, if not removed, will be visible under the wallpaper in the form of tubercles or dimples.
Removing old coating
You cannot glue new wallpaper onto the old covering; it must be completely removed. In order for the canvases to move away from the wall better, they are first sprayed with water from a spray bottle. To speed up the peeling process, it is better to use warm water, adding a soap solution and a little vinegar. Fabric softener diluted in water is suitable for removing old coating. After 5-7 minutes the strips will begin to bubble and peel off and can be easily removed with a spatula.
Non-woven fabrics can be easily removed if you roll them with a roller with needles and then moisten them with steam or warm water.
If the surface has been painted, the paint layer must also be removed. Water-based paint and whitewash are easily washed off with water, but other coatings will require some work. Most often, a mechanical method is used using a grinder or grinder with special attachments; you will also need a chisel, hammer and scraper. This work is quite dusty, so it is best to do it with a respirator.
Some types of coatings are removed by special washing or heating the surface with a hair dryer. It is worth considering that these products are quite toxic and after using a hairdryer there will be a pungent smell in the room.
At the next stage, the walls are inspected and tapped, identifying cracks and other defects. The exfoliated fragments are cleaned; if there are too many cracks and flaws, the old plaster layer is completely removed.
Alignment of walls
If the walls are relatively smooth without a large number of flaws, you can only get by with leveling. The surface is pre-cleaned of dust and moistened. Then all holes, cracks and chips are covered with a primer and sealed with finishing putty.
How to properly seal cracks:
- using a spatula, open the gap, making its edges flat;
- dust is removed from the surface;
- a layer of primer is applied to the surface;
- after drying, the gap is sealed with putty;
- after complete hardening, the putty layer is sanded using sandpaper with a grain size of 100-150;
- At the final stage, a thin layer of finishing putty is applied to the walls.
If the plaster was completely removed, then use starting and finishing gypsum putty.
Another option for leveling walls is installing plasterboard sheets. GCR is either glued to the base or secured with a metal profile. Places of joints and dimples from self-tapping screws are puttied, covered with serpyanka on top, a layer of putty is applied and, after final drying, cleaned with fine-grained sandpaper.
Priming the walls before gluing the trellises
After leveling the base, it must be primed. This operation is important and cannot be ignored. The purpose of priming is to close the pores on the plaster layer and prevent deep penetration of the walls with glue. After the primer dries, a thin film forms on the surface of the walls, facilitating better adhesion of the paintings to the wall.
The choice of primers is extremely large. They differ in composition and have different properties. The primer mixture is selected for a specific type of base. Acrylic primers are considered universal; they are suitable for wooden, concrete, and plasterboard bases.
How to properly coat walls with primer
- Prepare a wide paint brush or roller.
- Pour the primer mixture into a suitable container.
- The composition is applied to the walls evenly and without gaps; it is extremely important to cover the entire surface with the composition, including corners and joints with the ceiling.
- The first layer is allowed to dry.
- Apply a second layer of primer; it will make the surface smoother and prepared for further work.
To continue wallpapering the walls, the primer must be completely dry. This takes about a day.
Carpenter's pencil
A carpenter's pencil is necessary for marking the wallpaper for further cutting. Of course, a regular stationery tool may also be suitable for this purpose, but a paint pencil has greater hardness and produces straight lines even on a wet surface. But under no circumstances use felt-tip pens or ink pens as an alternative. Such tools apply the markings too deeply under the layer of paper, as a result of which it can begin to show through on the front side of the wallpaper.
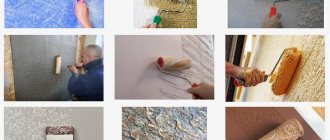
Wallpapering technology for walls
There are certain rules for gluing canvases. But first they need to be measured and cut correctly. If the wallpaper does not have a specific pattern and adjustment is not needed, only measure the height and cut off the required length of the sheet. To ensure that the cut is even and strictly at 90°, a mark is placed on the canvas and the strip is bent so that the side cuts are parallel. Then a strip is cut along the fold.
If it is necessary to join the pattern, first cut off one strip, then apply the canvas to it so that the pattern matches. In this case, the consumption of wallpaper will be greater. If, with a standard wall height of 2.4 m, 4 stripes come out of one roll, in which there is no need to select a pattern, then if the ornament is observed, only 3 stripes will be obtained.
Where in the room do you start wallpapering?
The strips are glued one after another, starting from the window. This rule must be followed so that the joints remain invisible. This is especially worth considering when the wallpaper is glued overlapping. If the stripes are placed end-to-end, you don’t have to adhere to this rule, but use another option.
Usually, wallpapering with your own hands starts from a window, corner or door. The vertical marking will be from the place where the furniture will be placed. Since there may be a small gap between the first and last sheet, the discrepancy in the design will be too visible.
Technique for applying glue and gluing canvases on flat areas
The main condition when working with wallpaper is that windows and doors are closed; drafts must not be allowed to appear. The second rule is to read the instructions on how to properly glue wallpaper. It comes with the rolls. The technique for applying the adhesive and gluing the canvases is different for different types of trellises. The instructions provide a graphic description of the material and how to work with it. And in the instructions for the glue you will find a description of how and in what proportions to dilute.
How to glue the first strip:
- Lay the roll out on a flat surface, preferably on the floor, and cut to the required length.
- Apply glue to half the strip and brush the edges.
- Then fold the half of the coated fabric in half without pressing on the fold.
- The same must be done with the second half.
- The impregnation time is indicated on the instructions supplied with the wallpaper; a thin single-layer material is impregnated in 1-2 minutes, a denser one in 5-7 minutes, for vinyl canvases it will take 10 minutes. If the wallpaper is non-woven, glue is applied only to the wall.
- While the canvas is soaking, it is necessary to lubricate the wall with glue; the adhesive composition is applied slightly wider than the width of the strip.
- Straighten the top part of the sheet, leave the bottom tucked in and attach the top cut to the wall, aligning it with the vertical markings.
- Lightly press the top of the strip and then straighten the rest.
- To glue the strip, use a spatula, following the movement pattern: from the middle to the edges and from top to bottom. All bubbles must be removed with smooth guiding movements.
- Excess material is cut off with a utility knife. To make an even cut, make a fold or go over the cut area with a spatula.
- Next, move on to gluing the next strip.
Single-layer paper wallpapers are glued overlapping, dense wallpapers are glued end-to-end. Go over the joints of the strips with a small rubber joint roller, and remove excess glue with a soft rag or sponge.
Technique for gluing wallpaper in corners
There are no absolutely even corners, so it’s not easy to stick wallpaper in these places. Due to the curvature, distortions and tension are obtained. Therefore, the canvas is pre-cut into two strips.
The first one is glued, going 1-2 cm around the corner, the second one is overlapped. If the wallpaper is too thick, press the double strip with a spatula and draw it into the corner with a knife, cutting two strips at once. The top and bottom trims are removed, and the edges are pressed with a staple or roller.
The technique for gluing external corners is no different. When gluing one canvas, it is brought around the corner, the second - overlapping. Then apply a ruler to the corner and draw it with a knife, cutting off the edges from the strips. The trimmings are removed and the sections are glued to the corner. Go along the seam with a roller.
The nuances of gluing wallpaper near windows, doors and behind radiators
If you are gluing wallpaper in a circle and have reached the door or window, the excess wallpaper is simply cut off. But this must be done carefully. For this:
- press the canvas to the trim or frame;
- make a cut diagonally to the corner of the casing;
- wrap the material to be cut along the opening;
- cut off the excess fabric from the top and sides with a knife;
- Use a knife to place the cut under the frame or trim.
How to glue wallpaper to window slopes:
- if the material is thin, the strip is glued with a bend onto the vertical slope;
- in the upper corner of the slope, the canvas is pressed tightly and cut with a knife;
- cut out and glue the top strip of the slope, taking into account the upward bend of 1 cm onto the wall.
If you are working with non-woven wallpaper, these overlaps will be visible, so they will need to be cut exactly along the window opening.
It is extremely difficult to carefully glue wallpaper behind the battery without removing it. To do this, you need to take all measurements and cut a strip of the required width and height. On the pattern, mark the places where the radiator is attached and make straight vertical cuts. The canvas is smeared with glue, allowed to soak, and then placed behind the radiator and pressed. Folds are straightened with a soft cloth.
How to perfectly match wallpaper
It is not easy to ensure that the joints between the strips are invisible. Maximum care is required here. It must be remembered that wet sheets stretch well, but when dry they shrink and a small gap may form. The strips are glued close to each other without overlapping, but when gluing, you should not stretch the wallpaper too much. If after drying a small seam or base of the wallpaper is still visible, this defect can be hidden with a corrector.
If, when gluing the strips, the seam turns out to be quite noticeable and cannot be stretched in any way, do not be afraid to remove the strip and glue it again, moving it slightly in the desired direction. The convex seam can be removed if you go over it with a special roller.
If you glued the strips overlapping and the seam turned out to be too voluminous, you can eliminate this defect as follows. Let the canvases dry a little, but not completely. Then place a long ruler along the seam and use a utility knife to cut off both layers. The knife should be as sharp as possible so that the cut is smooth and neat. The trimmings are removed.
Where to start gluing?
Before cutting the wallpaper, you need to mark the room, marking the places of future joints with lines. If the room is glazed, the first strip is glued level with the window. Next, the stripes are marked to the corner, and so on in the same direction to the door. Having gone around the doorway, the strips are laid further to the same window. The places under and above it are pasted over last.
When the preparatory treatment of the walls in a corridor or other room without windows is completed, the walls are also marked before gluing the wallpaper. In this case, the doorway can serve as a starting point (if there is enough space nearby to lay a whole strip without a longitudinal bend). Another way is to glue wallpaper from the corner.
The nuances of working with different types of wallpaper
If you've ever had to glue wallpaper, you've probably noticed that the wallpaper "behaves" differently every time. It's all about the quality of the canvas. This affects the final price, so you should choose wallpaper for the type of renovation. How much an elite apartment renovation or cosmetic renovation costs depends on the type of wallpaper in particular.
How to glue paper wallpaper
The paper type of materials includes thin single-layer simplex and multilayer duplex. The first one will quickly get wet if you hesitate, and can creep apart. Therefore, it is allowed to soak in glue for no more than 1-2 minutes. Glue it only with an overlap.
Duplex is easier to work with. It is smeared with glue and allowed to soak for 5-7 minutes. Canvases are glued only end to end.
Vinyl wallpapering
When working with this material, the type of substrate is taken into account and rolls are produced on a paper or non-woven base.
Vinyl sheets on a paper base are glued in the same way as paper wallpaper, the gluing technique of which we discussed above. You can find out which adhesive to choose for this type of wallpaper by reading the insert instructions.
If you choose non-woven vinyl wallpaper, the gluing technology will be different. The canvases are not impregnated with glue, since they have sufficient plasticity and sufficient weight. The adhesive composition is applied only to the wall and the strips are immediately glued to it, joining them one to one without overlapping.
Technique for gluing non-woven wallpaper
For this type of material, choose glue marked “for non-woven fabric”. The peculiarity of this glue is in its characteristics, since it is applied only to the wall, but not to the wallpaper. This glue is intended for non-woven fabrics. Wallpaper of this type is produced mainly in meter widths. Since the strips are quite heavy, it is extremely difficult for one person to hold and straighten them, so it is best to glue them together.
How to glue photo wallpaper
The technique for gluing photo wallpaper depends on the quality of the material. They are produced on paper or non-woven basis. Before starting work, you need to decide on the location of the decor. Photo wallpaper can be in the form of stripes or in the form of rectangles, so it is important to make appropriate vertical and horizontal markings. All fragments are glued end to end. If there is a white edge on the strip, it must be cut off.
It is important that the walls are thoroughly cleaned; there should be no bumps, scratches or chips on them. On smooth glossy wallpaper these defects will be very visible. Such defects can only be hidden with thick, embossed photo wallpaper. If the photo wallpaper is non-woven, it can be glued to other wallpaper, but the base should not peel off.
Is it possible to glue wallpaper onto wallpaper?
This wallpapering technique is used extremely rarely. But if the previous wall decoration was done with high quality, this option can be used.
The technique for gluing wallpaper onto wallpaper is as follows:
- Before gluing a new layer, you need to check all the joints on the old coating and, if necessary, glue the places where there are errors.
- Apply primer or glue to the old substrate.
- Apply glue to the new canvas.
- Glue the strip.
- Level with a spatula.
Introduction
The article will help you avoid situations when, in the process of gluing wallpaper on the wall or ceiling of a room, you encounter unforeseen moments that force you to “take off” and go to the hardware store to buy the same narrower spatula, or run around the floors and beg your neighbors for a shaped screwdriver . Read our article and select for yourself the necessary tools for wallpapering.
Wallpapering tools
Technique for gluing wallpaper onto drywall
Before carrying out work, you must make sure that the joints of the gypsum boards and the places where the screws are screwed in are sealed and well cleaned. Then you need to apply a 1-2 mm layer of putty to the drywall. This will prevent the sheets from being destroyed during subsequent removal of the decor. You can glue wallpaper without puttying the plasterboard, but to do this, apply several layers of primer to the surface.
How long does it take to dry?
Drying time depends on the density of the materials and the room temperature. Under normal conditions, in accordance with the type of wallpaper, the time indicated in the table should pass until complete drying:
| Type of wallpaper | Time until completely dry |
| Paper | 8-12 hours |
| Non-woven | 12-18 hours |
| Vinyl | 18-24 hours |
| Liquid | 24-36 hours |
Wallpapering the ceiling
You can paste over not only the walls, but also the ceiling. The technology is the same as for gluing vertical surfaces. The base must be cleaned of the old coating, puttied and primed.
Before starting work, markings should be applied to the ceiling. The most convenient way to do this is with a dye cord. Tapestries are glued to the ceiling in two directions: parallel to the flow of daylight or perpendicular to the window. In the first option, the strips begin to be glued from the wall, moving parallel to the window. In the second case - from the center of the ceiling. Determine the center point of the ceiling and set it aside on both sides along half the width of the canvas. The guide lines must be strictly perpendicular and parallel to the walls. The technique for gluing rolls on the ceiling is the same as on the walls.
How to calculate the number of packs of glue and rolls of wallpaper
Before you start work, you need to find out how many rolls of wallpaper and packs of adhesive are needed. When calculating rolls, you do not need to use standard tables, because these wallpapers are produced in non-standard widths. To make calculations, you need to calculate the area of the wall planes; to do this, the length of one surface is multiplied by its height, then everything is added up. Then the area of door jambs and window frames is subtracted from the calculated amount. Next, this number must be divided by 1 roll.
Now we need to calculate the required number of packs of adhesive. The main feature of adhesive compositions for non-woven trellises is that it is written on the pack how much adhesive powder is required for a wall area of m². Thus, the area of wall surfaces must be divided by the consumption of adhesive powder in m², according to the instructions on the packaging. The resulting coefficient can be rounded upward.
Calculations must be made by calculating the area of the wall planes.
Construction mixer
This tool is used to create a uniform adhesive mass by mixing wallpaper paste with water. Instead, many builders use a regular wooden stick, but it does not give the same quality result as an electrical device. Just a few minutes of using the mixer is enough for the mixture to be ready - and no lumps inside! The most important thing is to take your time and work at minimum speed, gradually pouring glue into the water in small portions (it is not recommended to pour out all the powder at once).
Advantages
How to properly glue wide wallpaper is a completely understandable question, because this type of wall covering first appeared not so long ago, like, for example, ordinary paper wallpaper with a narrow stripe. This type of wall covering has both a lot of positive aspects and some disadvantages. The advantages include:
- Wallpapering made easy. Instead of 4 or 5 strips, you can glue only 2, which is much faster.
- The price for such wallpaper is relatively low. You can see the particular benefit from purchasing one meter roll: compared to two 53 centimeter rolls, 1 roll of wide wallpaper is much cheaper.
- A seamless effect is quickly achieved.
And now about the disadvantages:
- The hardest thing to do with such wallpaper is to get around the corners and windows. A wide stripe is whimsical in this regard and it is worth knowing how to deal with it without spoiling the entire look of the room.
- It's not just windows that can interfere with gluing. If the owner purchases wide wallpaper, he must be prepared for additional expenses: such wall covering is used only on perfectly smooth walls. Therefore, before gluing, they will have to be leveled, puttied and primed.
- Pasting with wide wallpaper cannot be done independently; an assistant will be required. A wide strip requires some effort, not only when you need to cover a corner or window. It is difficult to glue such a strip on your own and on a flat surface.
Thus, wide wallpapers have both pros and cons. This is not to say that gluing them will take much longer than gluing ordinary narrow strips of wallpaper. However, narrow wallpaper is still simpler in some elements. for example, they are easier to use when you need to seal a corner.
Other features of gluing corners
Pasting corners with wallpaper will not be a difficult task if you take note of tips from masters involved in finishing work.
- Carefully treat the corners with primer. Instead of a special primer, you can use wallpaper glue applied a few hours before starting work.
- Apply glue in the corners only with a brush, this will help avoid unwanted gaps.
- Heavy and thick wallpaper is glued with a special transparent glue.
- Smooth the wallpaper in the corners until all air gaps disappear.
- Carefully move the edges of the sheets after cutting the seam and coat them with glue, because along with the removed trimmings the adhesive mass will be removed.
Installation of skirting boards
Between the wallpaper and the ceiling I glued a ceiling plinth made of foam polystyrene.
We attach a floor plinth between the floor and the wallpaper.
So we hung the wallpaper ourselves. Nothing complicated. Good luck!
Ruler
Using a pencil without a ruler is almost pointless, since you won't be able to draw straight lines with it. A long metal ruler, suitable for construction and repair work, will help you cope with this task. Alternatively, you can use a plastic or wooden tool, but be aware that the corners on these tools tend to break, especially with regular use. In addition, a metal ruler is ideal for working in tandem with a stationery knife - there is no chance of curvature appearing on the cuts.
Level
The building level is a multifunctional tool that will be of great benefit when hanging wallpaper. The principle of its operation is the presence of several reservoirs of liquid, in which there is a small gas bubble. If the level is on a flat plane, the bubble occupies a central position. Thus, with the help of the tool, you can check whether the walls are even, and also draw perfect straight lines even without using a ruler. In addition, the level can serve as a guide when gluing wallpaper (similar to a plumb line).
Stationery knife
A regular utility knife is best suited for cutting wallpaper, as well as trimming the bottom and top edges of baseboards. Unlike a kitchen or hunting knife, a stationery knife has one significant advantage - the thickness of the blade is no more than 2 mm. Thanks to this, the cuts are perfectly straight. If the blade becomes dull, it is enough to break off its lower tip (there are notches every centimeter). When choosing a knife, try to give preference to Russian or European tools, since Chinese models are not of the best quality.
Scissors
Where a stationery knife cannot cope, ordinary scissors designed for working with cardboard will help. It is especially convenient to use this tool to create holes for sockets, switches, gas pipes and other geometric shapes that cannot be cut with a knife. The main requirement for the tool is the sharpness of the blade. It is unlikely that the work can be done efficiently if you use old, dull scissors. So before wallpapering, don’t skimp on setting aside 100 rubles to purchase new scissors.
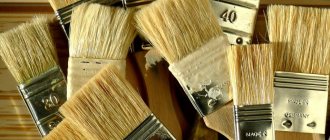
Paint brush
A paint brush is used to evenly apply wallpaper glue in the most inaccessible places where a roller cannot reach - corners, joints between a wall and a floor or a wall and a ceiling. This tool is also often called a “Fleitz brush” - keep this in mind when choosing it in the store. The paint brush consists of a wooden handle with a metal frame, as well as pile bristles. However, if you have dealt with painting work, then this device should be familiar to you. The optimal width of the brush is 4-6 centimeters.