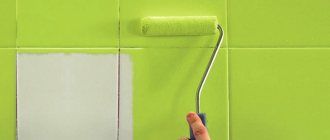
In this article I would like to talk about my experience of laying ceramic tiles on the kitchen floor. I purchased tiles measuring 60×60, seven packs of eight pieces. In total, 17 thousand rubles were spent on installation. In principle, for a kitchen measuring twenty square meters this is an acceptable amount.
Choosing tiles: I am not a professional tile maker. You can say that I am new to this business. The main nuance of a kitchen floor is an uneven floor. Initially, there was no talk of a self-leveling floor in the kitchen.
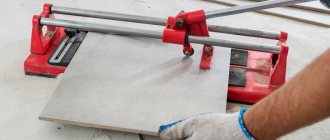
List of required tools
Tools for laying tiles
High-quality tiling depends on the chosen tool for laying tiles. Porcelain stoneware, glue and a hammer are not enough for the work. Professional tilers use special equipment. If you are planning one-time work and need to reduce the burden on your budget, rent a tool.
To cover an uneven floor, you will need basic equipment: a hammer drill with a whisk attachment or a mixer, a tile cutter, a grinder and wire cutters.
Additional accessories:
- rubber hammer for tapping;
- trowel and notched trowel;
- ladle for adding glue;
- scraper, construction knife;
- a set of plastic crosses or SVP;
- extension cord and pencils;
- roller for applying primer.
Auxiliary tools: tape measure, squares, water or laser level (spirit level), aluminum rules 2.5 and 1.5 m.
Grouting kit:
- bucket 2 l.;
- grout spatula;
- rubber and felt gloves;
- hard washcloth;
- foam rubber and 10 liter capacity.
When performing construction work, follow safety precautions. When using an angle grinder, wear glasses. A respirator will prevent dust from entering your respiratory tract. Use gloves to protect your hands from minor injuries.
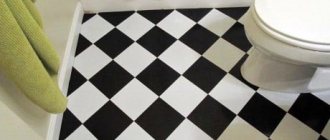
How to lay tiles diagonally
Why is it even worth using laying tiles diagonally, why complicate the repair process for yourself, because it’s more complicated, there’s a lot more cutting, and, accordingly, the consumption of material that costs money? Because diagonal laying of tiles has undeniable advantages:
This floor covering looks very original, beautiful, impressive, and immediately attracts attention; Visually expands the room, “pushes” the walls apart”; Perfectly hides all the imperfections of the floor and opposite walls, which will definitely be visible in the case of classical installation.
First, you need to prepare the base for the tiles: level the floor, perhaps using a self-leveling mixture, and then, when it hardens, prime it. Choose high-quality tiles, because the floor covering will be subject to serious loads. We select the adhesive composition depending on the type of tile. Today, epoxy and polyurethane compounds are often used, which are elastic and easy to use.
Important! Don't forget that diagonal laying is exactly the case when tiles need to be taken with a reserve! You will have a lot of scraps, so add at least 10% to the amount you need. The tools you will need are: notched spatulas for the adhesive, one regular small one for grouting (will be needed later), a container if you need to mix the glue (often it is sold in ready-to-use form), a tile cutter, a mallet, a level, a rope, a marker and a ruler , spacers and crosses that fit between the tiles
The tools you will need are: notched spatulas for the adhesive, one regular small one for grouting (will be needed later), a container if you need to mix the glue (often it is sold in ready-to-use form), a tile cutter, a mallet, a level, a rope, a marker and a ruler , spacers and crosses that are placed between the tiles.
Important! Most often, square tiles are laid diagonally. They are easier to cut as needed than rectangular ones.
Before starting installation, you need to mark. Traditionally, all rows of tiles are located at an angle of 45 degrees relative to one of the walls. There are two options for starting the layout:
- From the corner. Draw a diagonal line from corner to corner of the room using chalk or a marker, as well as a rope or laser level. And we start laying with the first corner tile, cut diagonally. This is the most important point, then the installation starts from this first tile, which should fit perfectly in relation to the walls. Choose the angle that is most noticeable from the side of the door;
- From the center of the room. It is determined by drawing two lines from the corners, the intersection is marked with chalk or a marker. This place in the room may be the most noticeable if it is not filled with furniture, so we start laying from here, using whole tiles turned at the desired angle. It turns out that your tiles will diverge in different directions and the need for trimming will appear only when you reach the walls.
Important! Laying diagonally can be done in any room. But most often this method is used in small rooms - on loggias and balconies, in bathrooms and toilets, as well as corridors and hallways
As we wrote above, diagonal laying will visually expand these cramped spaces.
If you have rectangular tiles, you can use them just fine. If the tile is square, then when cut you will get triangles, which should be laid with the hypotenuse down.
In general, the installation process itself does not differ from the usual one: the adhesive is applied with a notched trowel, the tiles are laid in place and pressed down with light blows of a mallet. Do not forget to check the evenness of the coating with a level and insert crosses between the tiles.
After finishing the work, you will have to grout the tile joints and clean up. But you can definitely handle this without any problems! published econet.ru
If you have any questions on this topic, ask them to the experts and readers of our project here.
How to choose the right porcelain tile?
The floor is the foundation of any room. Depending on the functional purpose of the space, the material from which the floor will be made is selected. Thus, porcelain stoneware is a very heavy and dense material.
Please note that when using porcelain tiles for residential premises, the main requirements
for the hallway floor are water resistance.
Such a coating should not be afraid of dirt and mild chemical influences (for example, salt, which is sprinkled on sidewalks in winter). It must have mechanical strength and be wear-resistant. The main requirement for a kitchen floor is mechanical strength and wear resistance. It is important that the surface is immune to cyclic temperature changes. It must be resistant to chemical cleaning agents.
The same characteristics are relevant for the bathroom . But an additional point will be, of course, resistance to humidity and non-slip on the surface. In the living room, the floor should first of all have a representative appearance.
It is safe to say that porcelain stoneware coating copes with all of the above tasks. Of course, this is a universal flooring in such residential premises. In addition, the qualities inherent in porcelain stoneware make it possible to successfully use it for covering boiler rooms, workshops, and garages. However, matte rather than polished porcelain stoneware is used here. In particular, since it has a rough surface that does not slip. Its distinctive feature is increased strength and maximum resistance to moisture and increased loads.
In addition, it should be noted that porcelain stoneware is resistant to low temperatures. Therefore, it can be used for laying surfaces outdoors.
Tile laying tools
High-quality execution of tile work requires certain skills. The craftsman will also need special tools for laying tiles. Of course, not all of them may be needed. If there is little trimming, a regular glass cutter is enough, and instead of a laser level, a plumb line and level will do.
Finishing profiles and strips are widely used to decorate the lined surface. They are easy to use, and the effect they create can satisfy the most demanding esthete.
One of the most common means of fastening tiles is special adhesive mastics, which are diluted in water to a paste-like state. Liquid diluted mastitis can also be used for preliminary priming of surfaces.
A laser level allows you to control the accuracy of tile laying throughout the entire process.
A notched trowel is necessary for leveling the mixture on the tiles and facing surfaces.
A rubber hammer is often used to hammer down tiles. It is especially needed when laying large tiles.
For small tile cuts that do not require special precision, you can use an angle grinder.
To cut holes for the passage of protruding pipes, you will need a drill with a special bit of the required diameter.
A regular putty knife is used for filling joints and other similar work.
For more complex shaped work, you need an electric tile cutter that allows you to accurately cut fragments of the required shape.
A manual tile cutter allows you to quickly and efficiently cut tiles in any direction.
An indispensable tool is the level.
With its help, you can constantly monitor the plane and relative position of the tiles.
A cordless screwdriver makes it easier to install and fasten various elements.
To cut out small fragments of tiles, it is convenient to use special nippers.
Ceramic tiles are cut using specially coated discs.
Like many other materials, ceramics undergo elongation when exposed to heat. Therefore, expansion joints should be installed when laying ceramic tiles to compensate for the difference in elongation of the materials. Expansion joints also serve to compensate for subsidence of the floor after laying the tiles.
The required thickness of the joints can be achieved with special devices that are inserted between the tiles.
To decorate corners, special plastic or metal profiles are usually used.
To lay tiles from a certain level, a supporting metal profile or a flat wooden strip is fixed to the wall.
The separation of planes vertically and horizontally can be done with small tiles or special borders.
Grouting of joints is done with a special trowel and a soft sponge.
Marking the tiles can be done with a regular pencil or a special felt-tip pen using a metal square.
Methods and options for laying porcelain stoneware
Depending on the surface on which you plan to lay porcelain tiles with your own hands. Typically, there are two options for work. They are often used in practice:
It is quite obvious that these are completely different methods of laying porcelain stoneware, requiring different preparation. Thus, the process of installing raised floors and ventilated facades can be classified as work that is performed by specialists. Unfortunately, without the skills, you will not be able to cope with this work yourself. And it is quite possible for a person to master the technology of installing porcelain tiles without special training. Accordingly, anyone can lay porcelain stoneware. In this process, it is most important to make the right choice of materials and carefully follow the installation technology. Taking advantage of all the advantages of porcelain stoneware plays an important role. This will ensure that the work is completed as easily, quickly and efficiently as possible.
To successfully achieve this goal, it is necessary to go through a number of stages, such as:
Preparation of the main surface
First of all, furniture, plumbing fixtures and other things that interfere with installation are removed from the premises. The room should be ventilated in advance, because during the work the entry of fresh air into the room is unacceptable, as well as increasing humidity and cooling the air to negative temperatures. Therefore, while leveling the floor, all windows in the house must be closed.
To ensure the best quality flooring, the subfloor must be thoroughly cleaned. All dust, construction debris, dirt, and oil stains must be removed. To get rid of dust, it is better to use a construction vacuum cleaner.
It is extremely important to remove all remnants of the old coating
Defects in the concrete base - chips, cracks and other surface defects, as well as cracks in the joints of floor slabs - must be repaired with putty yourself. After the putty has dried, the floor can be covered with two layers of primer, which will saturate the floor, clog all the pores in this material, smooth out minor surface imperfections and ensure the best adhesion of the leveling mixture to the base.
After cleaning, repairing defects and priming, the floor can be measured and marked. It is most convenient to use a modern laser level for this, which will provide the best accuracy. This device creates a zero level projection on the walls and floor. You need to install it at the highest point of the base, and then screw the screws into the floor to mark the desired level. A thread is stretched between these screws, which will make it easy to navigate.
Before leveling the floor under the tiles, it is worth laying a metal reinforcing mesh on the base to strengthen the leveling mixture. Laying is done overlapping, the individual sheets are connected with ordinary wire. This mesh is usually used when leveling differences in height exceeding two centimeters, since in this case it is necessary to improve the adhesion of the floor covering to the base slabs. If the unevenness is minor, there is no need to reinforce the floor.
Why is it undesirable to combine ceramics and wood?
It is recommended to lay the tiles on a strong, solid base. If this is not possible, other options must be considered. Many people wonder whether it is possible to lay tiles on a wooden floor.
To do this, the following factors should be taken into account:
- tile is considered a “cold” material, wood, on the contrary, retains heat well, for this reason it is not advisable to cover it with such cladding;
- when installing wood, you should provide it with the ability to “breathe”, then the material will last much longer, and ceramics do not allow air to pass through;
- tiles are rarely laid on a wooden floor, because cladding of this type exceeds natural material in terms of service life, as a result the base will quickly collapse, and along with it the decorative coating will be damaged;
- wood is not static, which makes it an unsuitable option for flooring if you plan to cladding it with ceramic products;
- When wood expands or dries out, the surface of the finishing material is deformed, and first of all, the integrity of the seam joints between the coating elements is damaged.
Dry screed
This option requires a minimum of time, since after installation you can immediately begin facing work. However, first remove excess old building material and repair large cracks, if any. For additional protection against moisture and fungus, the floors are impregnated with an antiseptic and primer.
To level the surface for laying tiles using the dry method, use sand and expanded clay chips as the main substrate. The thickness of the bulk layer is exactly as much as required to remove all protrusions on the surface. In order to compensate for the expansion of the mass, a damper tape is installed around the perimeter of the room. Next, the dry materials are carefully compacted and leveled using the rule. Sheets of plywood or fiberboard are laid on top of this screed, so make sure in advance that their thickness fits into the workspace.
Grouting the joints as the final stage of installation
The final stage of work is grouting the joints.
What is important to pay attention to? Before you start grouting, you should make sure that the seams are clean and there are no laying materials or dirt residues on their surface. It is also important that the adhesive solution is completely hardened and dry. If there is a large area of workspace, it is necessary to divide the work into stages (sections). The grout mixture is applied using a trowel diagonally towards the seams. Excess grout is removed diagonally in relation to the seams. Remaining filler is removed using a clean, damp sponge. This process cannot be delayed. Otherwise, prolonged contact between the joint compound and the porcelain tile surface may cause damage to the tile surface. In conclusion, I would like to remind you: do not use metal spatulas when grouting tiles. They can scratch the surface of the canvas and the appearance will be left unsatisfactory.
Source
Determining the stacking height
As you can see, one row of tiles is missing on the side wall.
I specifically carried out the installation from the second row to eliminate the influence of an uneven floor. And when I place the bottom row tile, its bottom border will show me the height level of the floor tile. Of course, I won’t forget about the spacer crosses that are located at the top and bottom of the tile.
This way we will get the desired level, and from there we will continue with all subsequent installations. And for convenience, I will glue a few wall tiles of the first row and continue laying them on the floor. This approach helps to avoid numerous undercuts of the first row of wall tiles.
Preparing the floor surface
To achieve the best result, it is necessary to lay the tiles on a perfectly flat floor surface. Otherwise, existing irregularities will be noticeable even after installation.
If there are small irregularities on the surface intended for laying tiles, then the following steps can be taken to eliminate them:
- Using tile adhesive, carefully seal all the cracks and cracks in the floor (especially in the corners). This is necessary to ensure reliable waterproofing.
- Carefully remove all debris resulting from the preparatory work.
It is possible to lay “tiles on tiles”, but only after making sure of the strength of the old coating and provided that it is even. But it is not recommended to lay it on uneven floors.
If the surface needs to be radically leveled, then for concrete floors you will have to make a screed, and on wooden floors a sheet of plywood or OSB board (chipboard) is laid. Is it possible to lay tiles on chipboard, plywood and other wooden substrates? - Can.
A little about waterproofing
After finishing work on leveling the floor surface, you can begin installing waterproofing. This is a fairly important stage in laying floor tiles, especially if such work is carried out in rooms with high humidity, such as showers, kitchens, baths, toilets, bathrooms, etc. Despite the fact that quite often, in order to save money when doing DIY repairs, owners skip this important stage, experts still do not recommend laying tiles without preliminary coating waterproofing. This is especially true for rooms in which pipes for water supply or heating systems are laid.
Waterproofing installation work is carried out in the following order:
- The floor surface is treated with a primer;
- Apply a waterproofing coating to the floor and adjacent walls. It would be correct to “raise” the insulation on the walls to a height of 10-20 cm.
There are the following methods of applying waterproofing, the differences of which are mainly due to the type of insulating material:
- Pasting. This method is most convenient when you have to “raise” the waterproofing on the walls to a certain height.
- Smearing. If it is necessary to protect only the floor, then it is possible to apply waterproofing using a coating method, which involves applying its protective layer using a roller or brush; a spatula is used in corners or other hard-to-reach places. The protective layer is applied in several layers with a time interval of 5-7 hours. To do this, you first need to prepare the required solution from the dry mixture and water.
- Coloring. For this method, a special waterproofing paint is used. The main disadvantage of this method is the fragility of the resulting insulation layer. The advantages, in turn, include its maximum simplicity.
We also recommend paying attention to PVC tiles - they completely imitate porcelain stoneware, are cheaper, and have all the advantages of linoleum
Preparation of tile adhesive from a dry mixture
Today, construction stores have in their assortment an extremely large number of different mixtures for preparing tile adhesive. It is quite difficult to understand this abundance at first glance, however, if you look a little closer, you can see a clear classification of these materials.
First of all, a distinction is made between dry and ready-to-use mixtures. The first ones are made on a cement base, sold dry, and can be used for laying tiles on surfaces that have minor unevenness. At the same time, ready-made mixtures, which are made on a polyurethane basis, are designed for laying tiles on a perfectly flat surface. When using such mixtures, very high strength of fastening of the tiles to the surface is achieved, however, the cost of such materials is much higher than their dry counterparts.
Read more: How to choose the right tile adhesive, what to look for, the most popular brands. When choosing tile adhesive, you should pay attention to its characteristics, which should be indicated on the packaging
It is necessary to take into account the operating conditions of the floor covering, the size of the tiles, what material they are laid on, as well as the rate of hardening of the adhesive mixture; it is not recommended to choose a composition that dries too quickly
When choosing tile adhesive, you should pay attention to its characteristics, which should be indicated on the packaging. It is necessary to take into account the operating conditions of the floor covering, the size of the tiles, what material they are laid on, as well as the rate of hardening of the adhesive mixture; it is not recommended to choose a composition that dries too quickly
Type of tile: is it so important to consider?
Before laying tiles on an uneven floor, you should think about their choice. Spending a lot of time so that the first cracks appear in a couple of months is a dubious benefit.
First of all, you need to make sure that the tiles are intended for the floor! This material by default has sufficient strength and thickness, and also has good abrasion resistance. Tiles of this kind will retain their aesthetic and practical qualities for a very long time.
It is necessary to glue only the option that is suitable for the intended operating conditions. In particular, you need to choose the right product. Floor tiles can be:
- antibacterial;
- frost-resistant;
- with increased wear resistance;
- with a sliding surface.
All characteristics are indicated on the box. The tile must be certified - this is the key to the quality of the product and, accordingly, allows you to expect a long service life of the product.
Size doesn't matter, but gluing large slabs is much easier. The thickness of the tiles is important - the thicker it is, the stronger and more reliable the floor will be.
It is especially important to take these details into account if you plan to glue ceramics in the kitchen - one of the busiest rooms in the house. It is here that the most stringent requirements for strength, wear resistance and aesthetics are put forward to the quality of the coating.
What happens when laying tiles on an uneven wall
It’s worth noting right away that installing tiles on an unleveled surface is a dubious pleasure. Not only will such work lead to unexpected expenses (glue is much more expensive than dry building mixture), but also during the drying process the surface may become deformed. Let's figure out why this happens.
PHOTO: YouTube.com If the wall is uneven, all holes are filled with tile adhesive
The main problem is that the thickness of the adhesive under the tiles will vary. This means that when drying, it will attract the finishing material with different strengths, creating completely unnecessary tension. And even if the surface remains flat, the tension in the tile will not go away. As a result, the slightest physical impact on the finishing material will lead to cracks, chips or complete destruction.
Another fact against laying on an uneven wall
It’s even worse if the installation is not done in one day. Let's imagine that the bottom row of tiles has already dried, and the top row is only being laid today. In this case, leveling the material by level makes no sense at all. Due to the difference in the acting forces, the top row will still go deeper, which means a step will appear. Here, high professionalism will be required to initially lay the top row with a certain protrusion. Only then, after drying, will the rows be leveled.
PHOTO: YouTube.com This is what can happen when styling on different days
Well, now it’s time to move from theory to practice.
Uneven planes: what's the problem?
It is important to understand that tile is a material that initially needs a flat surface. Just like for parquet or laminate, unevenness provokes unwanted deformations. By flat we mean a plane on which there are no reliefs or slopes.
Mounting on a slightly inclined surface
The biggest problem is the relief, since the tiles will not lie on such a surface even with a thick layer of glue. In this case, you will have to take leveling measures, otherwise it will not be possible to lay the selected tile. Even if this succeeds, then soon:
- cracks will appear;
- depressions may occur;
- chips form;
- ceramics will come off.
The costs of work will not be justified if you do not take care of a quality base. Moreover, savings on rough preparation sometimes result in large costs for repairs or complete replacement of the tile covering. And this is problematic when the premises are already in use.
Diagonal installation example
The situation is considered much more favorable when the only problem is the slope of the surface. Laying floor tiles on it is much easier, since the glue in this case acts as a screed. Sometimes tiles are laid at an angle, for example, as a drain in showers or baths. But in domestic conditions such unevenness is undesirable, since at best they will provoke the accumulation of moisture or dust, and at worst they will cause injury to people using the room. The last danger is especially relevant for bathrooms.
How to lay tiles on the floor correctly
Before laying the tiles, a layer of primer is applied to the cement base. This is done to ensure better adhesion of the tile adhesive to the surface.
Typically, ceramic tiles are used as flooring in apartments and private houses.
After priming the surface, the tiles are laid out on the floor. This is done in order to determine how much of the tiles located along the edges will have to be cut. You need to plan this in such a way that the rest of the drawing does not lose its aesthetic appeal. In addition, laying out tiles on the floor allows you to clearly understand whether enough material has been purchased to install the flooring of the selected room.
Laying begins from the corner of the room farthest from the entrance. To ensure even laying of rectangular tiles, you need to draw lines on the floor using a corner and a ruler. In this case, you should take into account the distances that the width of the seam between the tiles will occupy. Its recommended value is within 2-3 mm.
The adhesive mixture is applied to the floor using a special notched trowel. The thickness of the solution layer should be approximately 10-15 mm. You can apply the glue with a trowel, but after that you still need to make grooves in the resulting layer using a notched trowel. After this, the tile is pressed tightly to the surface and lightly tapped with a rubber hammer for better fixation. Under no circumstances should any cavities remain unfilled with mortar under the tiles.
When laying tiles with your own hands, you should pay attention to its back surface; there may be arrow-shaped indicators that show in which direction this tile should be laid. By following these tips, you can achieve the correct distribution of color shade, even if at the moment this is not noticeable under the existing lighting
With a perfectly flat floor surface, the glue consumption will be the same everywhere. To form even seams, special crosses are inserted between the tiles.
After laying each individual tile, its correct installation must be checked using a level. Remains of tile adhesive are immediately removed without waiting for it to dry.
In the process of laying tiles, there is always a need to cut them to the required size. The cut edges of the tiles can be hidden under the baseboard if you turn them towards the wall. The use of such parts will significantly save material.
Cutting tiles is a separate art, and on our website there is a separate article dedicated to this process: How to cut tiles at home (basic methods). The article describes in more detail the methods of using both improvised and professional tools.
Depending on the availability of a special tool designed for cutting tiles, one of the following methods can be used:
- Trimming with a diamond glass cutter. To do this, place the tile on a flat surface, after which, using pre-applied marks, apply a ruler to it and draw a straight line with a glass cutter. After this, the tile can be broken into two parts. If the fracture site is not perfectly smooth, you can refine it with a file.
- You can also cut tiles using a hacksaw. However, using this method it is very difficult to obtain perfectly smooth edges of the tiles.
- If you have a mechanical tile cutter, the process of cutting tiles can be significantly accelerated. As a guideline, it may be advisable to briefly submerge the tiles in water before cutting.
- Another type of tool that can be used for cutting ceramic tiles is a grinder with a diamond wheel. Its disadvantage is some difficulty in ensuring reliable fastening of the cut parts of floor tiles, a large amount of dust generated during work, as well as an increased risk of injury to this tool. The advantage of using a grinder is the ability to easily cope with cutting even large types of tiles.
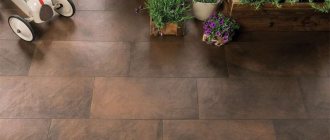
How porcelain tiles are made
The production of porcelain stoneware imitates the process of stone formation. Quartz sand, feldspar, clay and dyes are mixed dry. They are pressed, dried, and then fired. The result is a durable, non-porous material that is highly hard (harder than natural granite) and durable.
There is porcelain tile, similar to ceramic tile. Look at the cut. If the material is dense, without voids, it is definitely porcelain stoneware
Modern porcelain stoneware can either be immediately molded into slabs of the required size, or produced into blocks, from which slabs of the required format are then cut. In the first option, the material really looks more like tiles, in the second - like stone cut into layers. The appearance is varied. There are types that imitate wood, there are those that look like natural stone or marble, and there are those that look like nothing else. Here everyone chooses what he likes best.
Instructions for laying tiles on uneven floors
Before starting work, read the standard “Insulating and finishing coatings” (SNiP 3.04.01-87/SP71.13330.2011). The surface of the concrete floor must be dry and free of debris, dust and oil. Work on laying floor tiles takes place in three stages: marking, cladding, grouting.
Marking
The markings will help to lay the tiles evenly.
The tiles are laid using one of 3 methods: “seam to seam”, “staggered” and diagonally. The markup depends on the selected type. The first two options involve calculating the amount of material taking into account the seams. Leave diagonal installation to professionals.
Markup rules:
- In the far corner of the room, mark the first row of tiles with a straight line.
- Mark the location of the material. If the tile has a pattern, place all the elements for complete drawing.
- Near the entrance, the marking of rows is done taking into account entire fragments. Depending on the parameters of the tile, a distance from the far wall may be required.
- When laying out, consider the size of the seams.
- For precise marking, lay the tiles over the entire floor surface.
Make reference marks and stretch the beacon cord along the wall. Avoid creating wedges near other surfaces. To make the lines clearly visible, use bright markers.
Facing
The evenness of the cladding must be checked with a level
Before laying tiles, treat the floor with deep penetration primer. After 2-3 hours you can start working.
Laying tiles with your own hands on an uneven floor:
- Prepare the adhesive mixture according to the manufacturer's recommendations. If the surface is curved, make a thick composition. The volume of the batch should not exceed the amount of mixture per 1 m².
- Using a notched trowel, spread the adhesive onto the floor and then onto the tiles. The furrows of the mixture are placed perpendicular to each other.
- Lower the prepared fragment onto the surface, lightly pressing it to the desired level. Control the horizontal position of the spirit level. Take a rubber hammer and tap lightly to compact the tiles. Movements must be fast and precise, since it is not recommended to remove the tiles after installation.
- In a similar way, you need to lay tiles on a curved floor along the following lines. Level the surface to the level of the first row.
Grouting joints
The grout should be lighter than the tile itself
The final stage of work is grouting the joints, which is not carried out when laying tiles end-to-end. Before proceeding, wait until the glue has completely dried. Remove crosses or other alignment system. Clear the surface of large debris and vacuum the floor.
To grout, use a cement-based mixture according to the following scheme:
- Cover the edges of the tiles with masking tape - this will avoid contamination and make cleaning easier.
- Dilute the mixture with a rubber spatula. Using movements perpendicular to the seam, apply grout, applying light pressure to fill cavities.
- Remove excess mixture.
- Wait until completely dry and remove the tape. Wipe the surface with a damp sponge.
Grout is an element that influences the design of the room. Choose materials one tone higher or lower than the color of the tiles.
Leveling the floor with tile adhesive
I would like to immediately answer a frequently asked question: is it possible to level a concrete floor with tile adhesive? If you have planned tiling work, then the glue is definitely at hand, so there is no need to run or go to the hardware store.
You can level the floor with tile adhesive in two ways:
Simultaneously with laying the tiles (read about this in this section). In this case, the tiles are laid “on a layer”; the layer of tile adhesive is adjusted individually for each tile.
If the surface is uneven, first lay the tiles on the floor without adhesive to see where the differences are and what layer of adhesive is needed. In this case, you need to constantly check the plane using a building level.
If you see that you have sunk a tile compared to others, remove it and increase the layer of tile adhesive. And if any tile protrudes, excess glue must be removed from the back surface.
Small filling using beacons. The lowest and highest points of the surface are determined, after which beacons are set. Along the beacons, the floor is poured according to the level. Due to the high cost of tile adhesive, it is logical to carry out such filling in a small area.
Recommendations from the experts
The work of tiling the floor yourself includes selecting materials, preparing the surface and giving the coating a finished look. At each stage you need to adhere to technology and study the features of the procedure.
Expert recommendations:
- before marking, calculate the coverage area;
- Install first along the long wall;
- clearly mark the location of the drawing;
- To save grouting material, use a syringe or pastry bag.
Follow the technology and recommendations to simplify the process of laying floor tiles. Make sure tools and materials are available. Taken together, this will lead to the expected results. If difficulties arise, seek advice from a specialist.
Criteria for choosing adhesive for tiles
It is recommended to choose glue with platinators.
The selection of glue depends on the installation location - indoors or open space. For example, outdoor compositions can withstand temperatures from +40 to -40°C. For closed rooms, such characteristics are not taken into account.
The range on the market is no different, but when leveling the floor it is recommended to choose glue with a plasticizer. A thick layer allows you to lay the tiles efficiently and avoid uncoupling during work.
Preparing the surface and using a self-leveling mixture costs less than the cost of tile adhesive. An additional plus is that ceramics lay down easier.
What to do with uneven planes: solutions
As mentioned above, significant relief must be removed, otherwise the tile will
won't lie down. A self-leveling screed is useful for this. This product will make it possible to easily achieve a very smooth surface, although it does not take 1 day to dry. Specialized mixtures speed up the process, but the work stops for two to three days. You need to understand that this will cause the floor to rise and, as a rule, you will have to correct the surface level throughout the house.
Level control example
The screed will also be a lifesaver in case of a significant tilt. Unfortunately, it will also eat up space, but gluing the tiles will become much easier.
In general, the screed has its own positive qualities:
- perfectly aligns;
- fills open voids in the rough base;
- has an antifungal effect;
- makes it possible to hide the heated floor system;
- provides additional noise and heat insulation.
If this option is not very suitable, then it is possible to do without alignment. In this case, the tiles are laid on the floor according to special rules that differ from traditional tile laying options. Otherwise, you don’t need to count on a solid and good result: the first flaws will appear in the first month of operation. However, when implementing the recommendations, even on such a poor base, the tiles
will serve for more than a dozen years.
Tiles are cut before use
Frame wall alignment
The weakly adhering finish is removed from the wall, the bulges are cut off, primed, and then the depressions are roughly rubbed. If gypsum plasterboard is used for leveling, even moisture-resistant, it is better to waterproof the wall, easier - penetrating. To make the frame, wooden blocks are used after antiseptic and hydrophobic impregnation, or better yet, a thin-walled steel profile for gypsum plasterboard, galvanized or painted.
To ensure that the base for tiling is sufficiently rigid, the pitch of the profile or bar in the frame is no more than 40 cm, and the coating is often made of two layers of plasterboard.
Laying tiles on gypsum board, fiber board or flat slate is done in the same way as on any stone base. The disadvantage of this alignment is the loss in room dimensions due to the use of a frame.