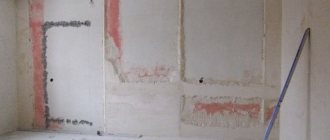
Before carrying out facing work, remove all defects on the walls. If a similar task becomes the main task for painting or wallpapering, tiles are laid without careful preparation. Of course, this will worsen the final result, but will save time and building materials.
Sometimes it is impossible to level the walls due to limited space, since drywall and plaster significantly “eat up” the space.
But even with this method of laying tiles, carry out at least minimal work on leveling the walls. They do this in one of the following ways:
- Plaster. Apply to problem areas. Additionally, work the wall with a thin layer of the mixture.
- Drywall. Used in eliminating serious depressions. Here a frame is not needed; only a piece of material of a suitable size is cut out and glued to the wall. The edges are slightly smoothed, and the joint is covered with plaster.
- Bulgarian. It is used in the opposite problem - eliminating convex areas; with its help, concrete sagging is removed. It is not advisable to touch the fittings.
- Net. It is pre-attached to the wall with nails or self-tapping screws. Fixes glue and tiles in problem areas.
Although such methods do not guarantee perfect alignment of the walls, they improve their condition and allow for better installation of tiles.
Ways to level walls
Why level the wall?
You can lay tiles on an uneven wall, what's the difference? Will it stick to glue and be pleasing to the eye thanks to its unusual installation pattern?
The problem is the reliability of the adhesion of the tiles to the base. The glue exhibits significant shrinkage. Much depends on the thickness of the layer. If it is uneven, then you will have to adjust for each tile, and this will take a lot of time.
- In fact, an experienced craftsman can do this kind of work.
- But a beginner, as a rule, does not take into account the shrinkage of the glue.
Therefore, after drying, trouble is possible, since the tiles may arrange themselves in steps, which is very unsightly and dangerous due to an unexpected collapse.
Therefore, it is more profitable to level the surface before laying the tiles.
Advantages and disadvantages
Let's first mention the advantages:
- Simple and easy installation. Even a non-specialist can handle the job.
- High decorative functions. The front side of the product successfully imitates natural stone and other materials.
- Low cost. Some people do it themselves.
- Little weight. Decorative tiles can be glued to drywall.
- Gypsum is an environmentally friendly material.
Disadvantages of gypsum tiles:
Low frost resistance.
- High water absorption. Plaster absorbs moisture. Therefore, the material is used only for interior decoration. The room must be dry.
- Problems with cleaning. Dust can accumulate on the embossed surface of decorative gypsum tiles, which is difficult to remove. To protect the surface from dust, the material is treated with varnish.
- Poor quality products. A number of manufacturers offer low-quality products for sale.
Problems when installing on an uneven wall
If tiles are laid on an uneven surface, serious problems can arise. In part, we have already realized that glue shrinkage occurs, but the difficulty is not only in this moment.
Problems after laying on an uneven surface:
- Cracks. The tile is subjected to tensile load. That's why cracks appear.
- Peeling tiles. Due to poor connection to the wall and uneven distribution of the glue, voids may appear. The material may peel off.
- The seams are not created correctly. If construction crosses are not used, then damage may occur due to shrinkage of the adhesive and movement of the material.
- The solution appeared on the tile. This problem occurs if there is too much glue or strong pressure is applied during installation.
Preliminary leveling of the wall prevents the occurrence of these troubles.
Grouting joints
After laying rectified tiles, small joints of only 1 mm remain. These seams need to be processed.
You should choose a grout that has an elastic and moisture-resistant composition to ensure that no deformation occurs upon contact with water. Also, the composition must be liquid enough so that the grout can flow into such narrow gaps.
The seams can be filled with grout using a trowel or rubber spatula. After the substance has dried, it is important to use corrugated cardboard and walk it over the entire surface. In order to achieve an even plane, it is necessary to process the seams with transverse movements.
Preparing an uneven wall
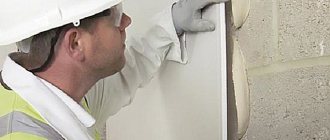
If you decide to lay it on an uneven concrete surface, then you need to tap the wall to identify the peeling area. This defect is removed with a hammer and chisel, since it will then collapse along with the tile.
The place is sealed with cement mortar. Levels as much as possible with a spatula.
In the case of wood, upholstery with roofing felt will be required. A steel mesh is fixed on top and covered with 15 mm of plaster.
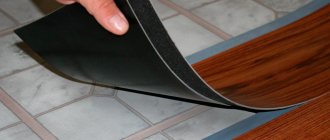
Preparing the base
The floor must be clean and dust-free.
The preparatory stage is the main part of any construction work. Ensure that the floor surface is level, otherwise it will not be possible to lay the tiles perfectly. A prepared base helps to achieve high-quality cladding.
A large layer of adhesive will not help hide unevenness. If there is an old coating, dismantle it, then form a screed and waterproofing. For leveling, you can choose any method: dry, wet or warm floor. An important point is to follow the work technology.
Dismantling involves removing thresholds, baseboards, old tiles and other irregularities from the surface that prevent installation close to the wall.
Installing tiles on an uneven wall
It is necessary to measure the differences on the wall. To do this, use a plumb line from the ceiling to the floor. All sizes are recorded.
Why are measurements taken:
- This is necessary to identify uneven areas of the wall. During the installation process, thanks to the information received, amendments are made to each row of laid tiles. This is done by changing the amount of glue or different angles of the decorative coating along the rows;
- The most convex areas are identified; less glue is used for them; strongly concave areas require more fastening consumables. This allows for balance and reliability of installation. Decorative elements will be able to maintain the overall integrity of the surface;
- It is important to count the number of rows. Prepare work tactics. The trimmings are used in corners or on the floor. We start from the top with a solid tile.
Without markings, a hopeless situation is possible. An uneven wall may create a condition where there is no room left to add an increased layer of adhesive. It's even worse if there is no space to add glue. In this case, the reliability of the entire structure will be compromised. And it will not be possible to provide an attractive and smooth decorative surface.
Therefore, it is important to perform the correct calculations in advance. In addition, otherwise, you may have to install trimmings in the window area, ceiling, and sides. This will significantly spoil the aesthetic perception.
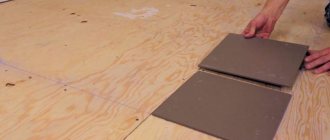
Stages of laying tiles on a nerve wall:
- The glue is evenly distributed over the surface. The layer is selected based on previously taken measurements;
- The adhesive is applied to the surface of the tile. You can't go over the edges. If required in certain places, a second layer is added taking into account the identified unevenness on the wall. Thanks to the toothed trowel, special grooves are created;
- The tile is pressed against the surface. If connection is required, correct with a rubber hammer.
After taking measurements and developing tactics for laying tiles on an uneven surface, the work becomes noticeably easier and becomes predictable.
How to eliminate unevenness
Let us consider in the table some methods for quickly eliminating level differences and their characteristics:
| № | Way | Characteristic |
| 1 | Installation of construction mesh | We fasten it to the wall using self-tapping screws. Facilitates installation in problem areas. |
| 2 | We eliminate the difference with the help of an angle grinder | We cut off the protruding areas. |
| 3 | Apply drywall to large dents | We cut out the material to the required size, glue it to the wall, trim the edges, and cover the transition area with putty. |
| 4 | Putty | Apply to the most problematic areas. The best option is to plaster the entire wall with a thin layer. |
These methods do not guarantee a perfectly flat surface, but they allow installation to be carried out more quickly and efficiently.
Useful tips from the master
Let's look at the nuances of laying tiles on an uneven surface. Some tricks can greatly facilitate the process of laying decorative material.
Tricks to make laying tiles easier:
- If there is no time to thoroughly level the wall, then you need to quickly tap it to remove defects. Otherwise, they may crumble along with the tiles. During the inspection process, it is worth repairing potholes that are too uneven;
- The wall can be leveled using tile adhesive. The uneven area is covered with the necessary layer. Shrinkage will occur within 24 hours. After this, installation on a more flat surface is allowed;
- When installing on an uneven surface, it is advantageous to glue the tiles in one go. The problem is that it may give an unexpected sediment after the glue dries. Therefore, it is unacceptable today to have one row and then another. This will lead to confusion, since even from the beacons it will be difficult to determine the amount of glue for subsequent installation, so that it turns out smooth and beautiful after the next shrinkage of the adhesive;
- The glue spreads a little further than the size of the tile;
- Gaps must be controlled by the building level. Otherwise, there may be unevenness and the possibility of collapse of part of the masonry as a result of air penetration and the formation of voids. It is worth using a special system for tilers.
We now realize that tiles can be laid on uneven wall surfaces. But for this, minimal preparation, measurement, development of work tactics and special installation techniques are required. If you use the tips, then even a beginner can do this.
Necessary tools and material for work
Before starting masonry, assemble the following tools:
- Tassels.
- Drill.
- Construction mixer.
- Bulgarian.
- Grouting spatula.
- Hacksaw.
- Level.
- Construction pistol.
- Notched and regular spatula.
- Sponge.
- Sandpaper.
- Miter box.
You will need to purchase the following materials:
Adhesive composition.
- Varnish.
- Primer.
- Grout for forming joints.
- Dye.