Today, creating an individual design in accordance with your own tastes no longer requires long trips to specialized stores and searching for exclusive wallpaper. Now almost anyone can apply a design or pattern they like to the coating.
This way you can make your interior unique
Idea 1. Painting walls using a stencil (+ master class)
Stencils come in handy when you need to outline the contours of a complex image, draw letters, numbers or any repeating patterns.
To paint the walls, you can use a ready-made template or one made to order in a printing house. Such stencils can be flexible or rigid, one- or two-layer (to create a multi-color pattern), self-adhesive or glueless. They are generally durable, fit tightly to the wall, and are designed to be reusable.
- Do you want to purchase a super-fashionable and unusual stencil? We advise you to search for it in the international online store Etsy using the query “stencil” (price from 10 to 100 $).
However, you can make a simple single-layer stencil for painting walls with your own hands, following our step-by-step instructions.
What you will need to make a stencil: office paper, plastic film or thick paper (for example, whatman paper or wallpaper), pencil, scissors, a stationery knife or a special knife for cutting stencils, masking and transparent tape, as well as a printer and some kind of graphic editor (vector or raster).
What you will need for stencil painting of walls: paints (preferably water-based acrylic), a synthetic round brush (7 cm in diameter for painting large designs and smaller ones for finer work), a sponge (can be used instead of brushes) and paper napkins for removing excess paints.
Instructions:
Step 1. Find a suitable vector(!) stencil on the Internet, for example, on the website https://www.getpattern.ru/. Please note that it is advisable to choose a contour image (or make it as such, following these instructions), because colored areas will only waste ink when printed.
- It is also important that the stencil does not have bridges that are too thin, otherwise the paint underneath may leak and ruin the design. Or they may simply break.
Step 2. The selected picture must be scaled to the desired size and printed. This is very easy to do if the stencil size does not exceed A4 format. However, if you need to print a large template, then you need to break it into several parts, following these instructions. Next, all you have to do is assemble the picture as a mosaic.
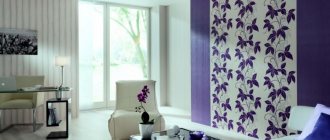
- If you are using transparent vinyl film, then you just need to lay it over the original design, trace its contours with a felt-tip pen or pen, then cut out the unnecessary segments (see photo).
12
Step 3. At this stage, the A4 paper stencil must be covered with transparent tape on both sides and overlapped (!) to protect the paper from getting wet. Finally, use a craft knife to cut out all the segments intended for painting.
If you have printed several A4 sheets for a large stencil, then at this stage you can immediately start cutting, but keep in mind that you will have to paint the stencil with an almost dry brush so that the paper does not get wet. But in order not to take risks, it is advisable to laminate the design or copy it onto a denser base (for example, vinyl wallpaper). To do this you can:
- Use carbon paper (place it between the base and the printouts, and then trace all the lines with a pencil).
- Cut out all the holes for painting from the printed drawing, and then transfer its contours to the base. Next, you need to take the knife again and cut out segments for painting, now on the base.
When cutting out the stencil, be sure to protect the table from scratches by placing some kind of backing on it, such as glass.
Step 4. Now it's time to glue the stencil to the wall. To do this, try on your template to the selected location, align it with the building level and glue it with tape. If necessary, for example, if you need to draw repeating elements at equal intervals, you must first make markings using a building level.
- If the stencil has thin and movable bridges, secure them with small pieces of double-sided masking tape (you can twist a piece of regular masking tape into a ring).
- A more convenient way to fix the stencil is with a low-adhesion spray adhesive, which allows you to remove the template easily and without a trace (sold in craft stores).
Step 5. Hurray, the most labor-intensive work is left behind, it's time to start painting.
- If you are using a sponge: dip the sponge into the paint, wipe off the excess on a napkin, then begin painting the stencil using a tamping motion.
- If you are using brushes: dip the brush into the paint, then roll it around a little on a cloth to remove the excess (the bristles should be almost dry), then start painting in a circular motion. Be careful when painting areas near the very edges of the stencil so that paint does not bleed under the holes and ruin the outline of the design.
- If you are using spray paint: spray the paint carefully, in thin layers and in several passes to avoid smudges.
- If you are using a roller: place the roller in the paint trough, wipe it on a napkin, then start painting. Along the edges of the stencil, move the roller from side to side, not up and down.
Step 6. When the drawing on the wall is completely dry, coat it with matte varnish to protect it from moisture.
See also: Decor and design of the dining area
What do you write on with acrylic paints?
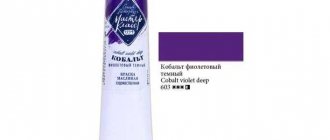
Acrylic is such a universal paint that it can be used on almost any surface. The only exception, perhaps, can be paper, for example, watercolor - but this applies more to works with a thick, impasto application of paint.
Show your imagination and draw on any surface you like!
And with acrylic paints you can paint on anything:
- canvas;
- cardboard;
- thick paper;
- textile;
- wool and felt;
- glass and ceramics;
- tree;
- concrete.
Of course, this is not the entire list; I am sure that the artist’s imagination will not be limited to these materials and will go further. But for now, let's focus on these listed ones.
Idea 2. Painting checkered walls (+ master class)
As you know, check is the most versatile print that never goes out of style. It fits perfectly into both classic and modern interiors, both into the interior of the kitchen and children's bedroom. You can decorate one or more walls with a cage using wallpaper or painting.
- Painting checkered walls with your own hands is somewhat more difficult than gluing checkered wallpaper, but painting gives a better result: the painted surface can be washed, repainted, and most importantly, it does not have seams that risk peeling off.
The easiest way is to paint walls in a large Vichy checkered pattern, as in this collection of photos.
Painting walls in Scottish tartan requires a little more effort, but still, it is accessible even to beginners - after all, the accuracy of the markings, rather than painting skills, is what is important here.
And now we suggest you familiarize yourself with the step-by-step instructions for painting walls with your own hands in tartan, as in the photo below.
What you will need: 4 paints of the same color, but in different tones (in this project we used light olive for the background, a slightly more saturated marsh shade for vertical and horizontal stripes, an even darker one for the intersections of stripes, as well as two paints of contrasting colors), brushes , roller, masking tape and laser level, stepladder and other basic painting supplies.
- It is best to use blue masking tape for painting walls, which can be removed without leaving a trace, without damaging the wall covering, and is marked “for clean lines.”
Instructions:
Step 1: Prepare the wall for painting, then paint it with the background color using a roller. In this master class, the background is a light olive tone of paint. Allow the background layer to dry before moving on to the next step.
Step 2. Mark vertical stripes of equal width on the wall using a laser level and masking tape. Then paint them with a paint darker than the background and let dry.
To ensure that the lines are smooth and clear, and the paint does not flow under the masking tape, use a small brush to paint along the tape and a larger brush to paint the main body of the strip. It is important to ensure that there is no excess paint on the brush. The movement of the brush should not be up and down along the tape, but left and right (across the tape).
Step 3. Now mark the horizontal stripes in the same way, paint over them and leave to dry.
Step 4. Paint the intersections of the stripes in an even more saturated shade to create the effect of layering threads of the same color in the checkered fabric (as if that made the cells darker than the stripes).
- By the way, if you want to paint the walls in a Vichy checkered pattern, then at this stage the work can be considered completed.
Step 5. It's time to draw the contrasting thin stripes that are required for the tartan check.
To do this, again use the laser level and masking tape, mark a line along and in the center of the vertical stripes. Next, paint over them and let dry. Then use the same paint to draw lines along the horizontal thick stripes.
Step 6. Finally, we draw cells of a different contrasting color (in this master class it is blue). The technology is still the same, but the cell becomes larger, since the stripes are drawn along the lines of the first background layer.
Step 7. All that remains is to coat the painted wall(s) with matte varnish to enhance its moisture resistance and strength.
See also: Decorating walls with plates - master class and 100 photos for inspiration
How to do the work yourself
Before you apply a pattern with liquid wallpaper with your own hands, you should definitely prepare the space. Cover the floor so that the solution never gets on the floor. If the pattern will be applied to the wallpaper and not to the surface of the wall, then it must be primed before doing so.
After that, use one of the methods presented in the article to apply the image to the wall surface. This will allow you to create a high-quality and beautiful interior design that will delight you for many years.
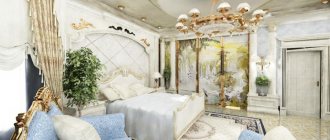
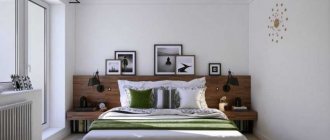
Idea 5. Painting with chalk on a slate wall
By decorating one or two walls with chalk wallpaper or slate paint, you will have the opportunity to change the pictures on the wall every day, write down foreign words, to-do and grocery lists, instructions for household members, motivating or just funny phrases. A chalk wall looks especially cool in the interior of a children's room and kitchen.
- If you want to keep your chalk painting forever, you just need to coat it with matte varnish.
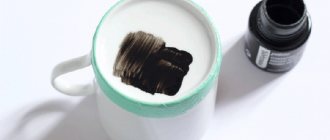
- You can (and should!) draw on a slate surface not only with crayons, but also with chalk pencils, markers and paints.
- Lettering (the so-called painted words) looks especially impressive on a dark wall. True, if you are not a professional font designer or an artist, then it is unlikely that you will be able to write words beautifully, but you can do this with the help of a homemade stencil. The main thing is to find a suitable blank on the Internet.
Liquid wallpaper
What it is?
You can make drawings on wallpaper using liquid wallpaper. Hearing the name, most people think that this type of wallpaper is a liquid mixture. However, in reality they look like dry mass. They acquire a liquid consistency during the process of dilution and subsequent application to the coating.
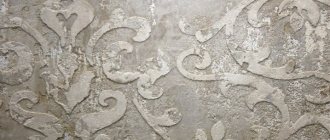
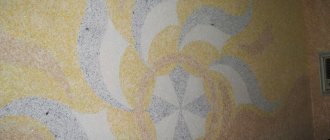
Drawing from liquid wallpaper
Drawings made from liquid coating look really chic due to their volume.
- Apply the first shade of material following the outline of the stencil.
- Wait until the drawing is completely dry.
- Trim the borders with a utility knife.
- Apply the next shade of liquid coating, wait for it to dry and enjoy the end result.
Idea 6. Striped wall
Striped walls not only look cool, but also visually correct the shortcomings of the room. For example, vertical stripes “raise” low ceilings, while horizontal stripes increase space and push walls apart.
It’s very easy to paint walls with stripes with your own hands; the main thing here is to carefully stick the masking tape and correctly calculate the optimal width and number of stripes.
- To find out the required number of stripes of the same width, but alternating in color, you need to divide the height or width of the wall by the desired width of the stripes. But there is one nuance - if the number of stripes is even, then along the edges of the wall the stripes will be of different colors. To make the number of stripes odd and the wall design symmetrical, you can “play” a little with the width of the stripes or simply divide the height or width of the wall by an odd number. For example, a wall 270 cm high can be decorated with 17 stripes 16 cm wide.
In order for the stripes under the ceiling and above the floor to be the same color, there must be an odd number of them
- It is desirable that the stripes have a width of 10-30 cm. A width of less than 10 cm will be too narrow, and more than 30 cm will be too wide and heavy.
- The best way to paint stripes is to use blue masking tape that can be removed without leaving a trace, without damaging the wall covering, and labeled “for crisp lines.”
- To ensure that the lines are smooth and clear, and the paint does not flow under the masking tape, use a small brush to paint along the tape and a larger brush to paint the main body of the strip. It is important to ensure that there is no excess paint on the brush. The movement of the brush should not be up and down along the tape, but left and right (across the tape).
Removable elements
For those who do not want to take risks or like frequent changes, you can use removable wall decor elements. These can be various wooden, glass, metal or plastic ornaments that are attached to the walls using hooks or nails.
You can frame pieces of fabric, newspaper clippings, photographs and drawings, embroidery or other items and hang them on the wall. Small mirrors inserted into homemade frames look interesting. If such massive elements do not fit into the overall design concept, you can do without frames by attaching drawings or pieces of fabric to cardboard or thin plywood.
This method of decorating walls is good because the decorative elements can be changed, and the wallpaper will not be damaged one bit, with the exception of the holes for fasteners. In addition, volumetric compositions look very impressive.
The final design of the room depends on your choice. Don’t be afraid to experiment, but don’t get too carried away so that after your creativity you won’t have to redo the renovation.