Foam ceiling tiles are an inexpensive and easy-to-install coating, which is why they are very popular. Installation of this finish is carried out on a concrete, plasterboard or wooden base. The tile is simply glued to the base using a special adhesive mixture. When choosing adhesive for foam ceiling tiles, you need to be especially careful, because some adhesives contain solvents that destroy the material. Also, when choosing an adhesive, it is worth considering the type of base to which the slabs are glued, because the strength of fixation and the quality of adhesion depend on this. We will tell you which is the best adhesive for ceiling tiles.
Choosing adhesive for ceiling tiles
When figuring out what is the best way to glue ceiling tiles, you need to take into account that a good composition for installing foam plastic boards should have the following number of qualities:
- High adhesion;
- Correct viscosity level;
- White color;
- Versatility;
- No solvents in the composition;
- Minimum hardening time.
Any adhesive for foam ceiling tiles, regardless of specifications, must have all the qualities described above.
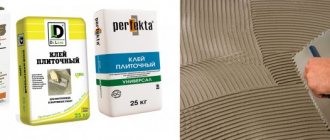
Universal glue
This category of compounds includes several varieties:
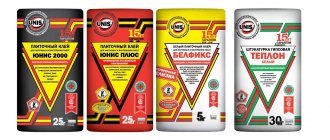
- Eltitans
. This adhesive option is used for joining wooden, concrete and plaster surfaces. After application and drying, the glue forms a fairly strong and elastic layer. It takes quite a lot of time for such compositions to completely harden. - Titan
. The most popular option, which is used almost everywhere. It is advisable to use this glue for joining plastic, metal and glass products. The structure of the composition is quite viscous, and hardening occurs quickly. - Master
. A cheaper analogue of the previous option. Master adhesive for ceiling tiles differs from the previous version in its characteristic odor and long hardening period. - Moment
. Expensive, but very reliable glue. Moment adhesive for ceiling tiles dries quickly, does not emit odors and provides the strongest connection between parts. The disadvantage is that the glue consumption is too high, so it is recommended to use dispensing guns for application.
You can find other glue options on sale, but they will all have similar classifications and characteristics. Based on the parameters, you can choose a good analogue of the compositions described above and decide exactly what kind of glue to use for gluing the ceiling tiles.
Liquid Nails
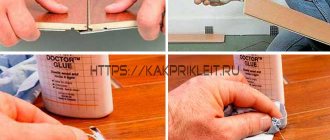
Liquid nails are quite suitable for installing foam parts. This fastening material is good not only for connecting two surfaces, but also for filling seams and joints left after installation. Liquid nails have gained great popularity due to their versatility and high performance.
To work with such a composition, in addition to the glue itself, you will also need a dosing gun that allows you to squeeze out exactly as much of the composition as you need. The consumption of adhesive for ceiling tiles directly depends on the individual characteristics of the ceiling to which it will be glued. So, in the case of an even base floor, you can only apply glue to the corners and the central part of the tile, and if there are any defects on the base, the consumption of the adhesive composition will increase sharply.
In order for ceiling tiles mounted on liquid nails to hold up well enough, when purchasing glue you need to pay attention to two parameters:
- Firstly, the glue should not contain solvents;
- Secondly, good glue is white (this parameter is especially important when working with thin tiles).
When we glue ceiling tiles with liquid nails, they need to be applied in neat portions so that the material consumption is not too great. To do this, you should smear the glue at a short distance from the edge of each tile. In the future, it will be best to coat the seams between the tiles with glue.
How can you dilute dried glue, how can you remove it from clothes, ceilings and other surfaces?
Thickened glue does not glue materials well, so to restore its performance properties, you can dilute it with medical or industrial alcohol, but in no case with acetone or isopropyl, since the glue completely deteriorates when combined with these substances. Diluted glue takes longer to dry, so it is better not to let it thicken: you need to close the lid tightly or buy the smallest container.
To clean clothes from fresh stains of universal glue, you need to remove it with a napkin and quickly wash the item. To remove old glue, substances such as vinegar, acetone, white spirit, Dimexide, etc. are used, but you need to first test them in an inconspicuous area so as not to completely ruin the clothes. Apply the solution to the stain, leave for 30 minutes and wash as usual. You can try to cut off a thick layer of glue with a thin sharp knife or blade.
To remove traces of glue from the ceiling, use grinders, grinders with special attachments, spatulas and chisels to clean hard-to-reach places.
To protect the respiratory tract and eyes from dust, use goggles and a respirator. For the same purpose, spray the ceiling with warm water from a spray bottle. To make cleaning easier, before work you need to cover the furniture and floor with oilcloth.
The hardest thing to get rid of is dried “liquid nails.” Rubber-based assembly adhesive can be removed using solvents. You can try to clean leather items with petroleum jelly or vegetable oil by wiping the stained area with a cotton pad until the stain disappears or becomes less noticeable. The tiles are cleaned using solvents and rubber spatulas. It is easier to prevent the formation of stains, so before working with glue you need to cover the furniture with polyethylene and change into old clothes that you don’t mind getting dirty.
Polyvinyl acetate glue
When figuring out which adhesive is best for gluing ceiling tiles, you can’t ignore polyvinyl acetate compounds. This group of adhesive compositions includes PVA and bustylate. The distinctive features of these materials are the absence of characteristic odors and ease of application, which does not require specialized tools or specific skills. However, the noted advantages are compensated by a noticeable disadvantage - the consumption of polyvinyl acetate compounds is quite high.
In order for the connection between the tiles and the ceiling to be sufficiently reliable, Styropor adhesive for ceiling tiles must be applied to both surfaces. The foam coated with glue is pressed against the ceiling and held in this state until the glue sets. Obviously, this technology requires a significant investment of time, since polyvinyl acetate compositions do not set instantly.
Acrylic putty
Acrylic-based putty is rarely used for installing foam tiles - and completely in vain, since the reliability of the connection is quite high. The finishing acrylic putty has high viscosity, which ensures high-quality fixation of elements on the ceiling surface. Also, this material will be the best answer to the question of how to glue foam ceiling tiles of minimum thickness.
The installation technology when using acrylic putty is quite simple. First, a thin layer of material is applied to the desired area of the ceiling. When the adhesive is leveled, the ceiling tile is pressed against it. If the work is carried out carefully, there will be even seams between the individual tiles, and the tile itself will not show through.
Harm of polystyrene
To understand whether ceiling tiles are harmful, it is worth taking a closer look at what they are made of. Expanded polystyrene was invented for the needs of the military industry, thanks to polymerization. It was used as a heat and sound insulator. Little thought was given to the dangers of what was invented. Subsequently, the economical material became widespread in the construction and packaging industries.
This monomer causes irritation of the mucous membranes of the nasopharynx, severe headaches, and disruption of the nervous system. It has a negative effect on hematopoiesis and leads to leukemia. Destroys the liver, leading to toxic hepatitis. Possessing an embryogenic effect, with systematic contact it causes disturbances in the intrauterine development of the fetus.
Another dangerous property of styrene is its ability to accumulate in the body, so even small doses pose a threat. In addition to the above, when oxidized by oxygen, which is part of the air, formaldehyde is released, which is included in the list of carcinogens. When microscopic portions are inhaled daily, the skin becomes pale, an inexplicable loss of strength and depression occur. International organizations to combat cancer indicate a connection between formaldehyde released by polymer coatings and the risk of developing nasopharyngeal cancer. These processes accelerate with increasing temperature.
During fires, even those samples that are recognized as low-flammable begin to melt, emitting toxic smoke. Fatal intoxication can occur in a few seconds, so the chances of survival in a room decorated with foam elements are minimal. Thus, the harm from pasting ceiling tiles is beyond doubt.
Recommendations for installing foam ceiling tiles
In addition to questions about what kind of glue to use on foam ceiling tiles, you also need to consider some points related to installation technology. Laying ceiling tiles can be done in a variety of ways - it all depends on the characteristics of the room, its decoration, the selected materials and individual wishes. However, there are a number of recommendations that should be used regardless of the parameters mentioned above.
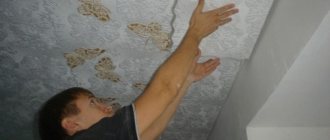
So, work should always begin with preparing the ceiling:
- The layer of old whitewash must be removed before gluing the ceiling tiles;
- If the ceiling is covered with oil paint, then it needs to be washed thoroughly;
- Residues of water-based paints must be completely removed using a spatula;
- The wallpaper needs to be torn off (before doing this, it should be moistened with warm water, which will greatly facilitate this process), and the glue remaining on the surface of the ceiling should be carefully scraped off.
The ceiling from which the previous coating has been removed must be washed, dried and degreased. Only after all these operations have been completed can you figure out what kind of glue to use to glue the tiles to the ceiling and proceed directly to installation.
Water based
One of the most popular types of adhesive for polystyrene foam tiles is water-based.
However, this is a whole segment of adhesives - from the popular PVA to specialized mixtures such as “Titan”, “Adhesin A 7088”, “Bustilat” or “Format”.
Attention: Some enthusiasts try to make their own water-based glue - for example, based on potato starch. We strongly recommend that you do not do this - if the hitch is not strong enough, the slab may fall and injure someone.
Its structure is an aqueous solution of microscopic polymer particles (for example, latex or acrylic). After the moisture dries, the particles harden, providing reliable adhesion between the two surfaces.
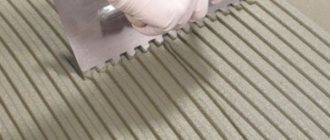
It is better to glue water-based adhesives using the contact method, lubricating both surfaces for better adhesion.
A distinctive feature of this glue is its versatility. It can be used on concrete, wood, drywall. In addition, aqueous adhesive mixtures adhere well to plaster - the main thing is to pre-level it for better adhesion.
Another name for aqueous adhesive mixtures is universal polymer adhesives. They grip most materials, are affordable and easy to work with. Depending on the type and thickness, you can choose the application method: glue gun, brush, spatula. Focus on your preferences and structures that need fasteners.
For example, it is better to work a large area of the ceiling to install a wide foam plastic board with a roller, and a glue gun will help ensure accurate installation of baseboards.
High adhesion is ensured by the thick consistency - the glue hardens quickly, but leaves about ten seconds to level the tiles.
Separately, it is necessary to note the water-based polymer adhesive “Titanium Styrofoam”. If the surface of the ceiling is rough, it is better to take it - thanks to its thickness and plasticity, it also works as a mastic, smoothing out unevenness up to three millimeters.
Diagonal tile laying
Ceiling tiles can be positioned either parallel or diagonally. In the first case, everything is quite simple and clear, but diagonal laying has a number of features. As a rule, this installation is used in situations where there is a need to visually compensate for uneven walls. Seamless tiles are not suitable for implementing such schemes.
The technology for diagonally laying foam tiles is as follows:
- First of all, you need to stretch two threads between the corners of the ceiling to find the center point;
- Installation of tiles must begin precisely from the center of the ceiling, and the tiles themselves must coincide with the corners of the marking lines;
- During further installation, you need to build on the axes that were formed in the center;
- At the junctions of walls and tiles, the latter must be trimmed so that they exactly match the dimensions of the free space.
After installing the tiles, all that remains is to install skirting boards around the perimeter of the ceiling and paint the finishing materials if necessary. If the wallpaper is already hung, then the baseboard needs to be painted before installation. Otherwise, skirting boards can be painted even when they are already installed.
Technology for gluing foam tiles to the ceiling
Foam tiles are a universal finishing material that can be used in any room - bedrooms, living rooms, baths and kitchens. For installation in wet rooms, it is better to choose products with a water-repellent coating - for example, appropriate seamless tiles - and decide in advance what kind of adhesive to use to glue the ceiling tiles. The shape of the tiles also does not matter - the ceiling can be decorated with both square and rectangular products.
The installation technology common to all types of tiles consists of the following steps:
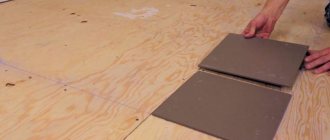
- First of all, you need to prepare the ceiling surface for installation;
- Next, the ceiling is treated with a primer;
- Then markings are applied;
- After completing all previous work, you can begin gluing the tiles.
When the ceiling finishing work is completed, it will be possible to do any other work in the room.
Preparing the surface for installation.
It is necessary to remove from the ceiling everything that was there before: lime, wallpaper, paint. If necessary, we cover with putty or plaster mixture all existing damage or cracks on the ceiling and level it. We prime the surface; you can use a deep penetration primer (the primer can be applied in several layers). After the surface has been prepared and dried, markings must be applied. It is necessary to apply markings, since it is very difficult to glue the tiles evenly without guides.
1. Clean the surface from whitewash
2. Apply a layer of putty