Painting process
If you need to paint foam tiles on the ceiling, then you need to adhere to the following action plan:
- Using putty, cover all existing joints. Thanks to this, it is possible to apply the paint evenly and give the ceiling the appearance of a plaster structure.
- Now you can start preparing the paint. To achieve the required shade, you should mix several colors of the coloring composition, and only then apply it to the surface. If you add a little sand, you can achieve a rough structure.
- It is worth painting from any angle; do it with a roller. If there are certain unpainted parts, you can paint them over with a brush.
The video shows how you can paint foam ceiling tiles:
There are several ways to glue foam:
- Glue them to the surface and secure them with dowels.
- You can first place the foam on glue, and then strengthen it with special umbrella dowels.
- Place in the sheathing
- Glue directly onto the ceiling plane
- Mechanical fastening using mushrooms, anchors and studs, etc.
Bonding polystyrene foam ceiling tiles to the ceiling
The tile ceiling is done in stages. First you need to measure the surface area of the ceiling and calculate, taking into account the adjustment, how many slabs you need to purchase. Before you start gluing foam, you need to stock up on the necessary materials and tools.
- Use a drill and a special attachment for a construction mixer to stir the mixture and glue.
- With a spatula-comb.
- With a narrow spatula.
- Use a wide metal spatula to level the surface.
- Primer needed to prepare the surface to be repaired
- Hammer with a 10 mm drill.
- A plastic container for preparing the solution if a dry mixture will be used.
- Wide primer brush.
- Knife or other tool for cutting slabs
- With a hammer.
Sticking on a whitewashed ceiling
You can finish the ceiling surface with tiles on almost any base covering. But it is not always possible to glue ceiling tiles to a whitewashed ceiling. In this matter, everything depends on the following points:
- type of whitewash;
- features of applying old coating.
If chalk whitewash has been applied, then it is better to refuse tiles as a ceiling finish. The material will definitely start to come off.
Next, we’ll tell you how to stick tiles to the ceiling after whitewashing using lime. Old whitewash will have to be removed if:
- old finishes easily come off the surface;
- there are several layers of lime whitewash on the ceiling that are already peeling off;
- Frozen lime was used as whitewash, reminiscent of the chalk coating method.
The tiles used in the case of an old whitewash coating can only be light. These can be profiles made of polystyrene foam or extruded polystyrene foam.
Installation of tiles consists of several stages:
- preparatory work;
- primer of the cleaned surface;
- marking;
- installation of foam profiles with finishing.
Let's take a closer look at how to properly glue tiles to a whitewashed ceiling.
Preparatory work
Preparatory activities consist of the following:
- run your hand over the old whitewash coating and make sure that the whitewash does not smudge;
- then the surface is cleaned with a brush, then wiped with a damp sponge;
- After the previous steps, you need to check again how well the old layer holds up. Using a spatula, remove any suspicious areas of whitewash. If the lime begins to fall off, then you need to remove these parts, capturing a few extra centimeters.
The preparatory work has been completed and priming work can begin.
Applying primer
The primer improves the adhesion between the base ceiling surface and the adhesive.
The primer is applied as follows:
- before using a deep penetration primer, the composition is shaken and poured into a special container from which it can be taken with a roller;
- the roller is impregnated with primer and lightly squeezed. Then you need to roll over the cleaned whitewash surface of the ceiling. The layer is applied thinly. To reach hard-to-reach areas, use a brush;
- you need to wait for the primer layer to dry completely, then apply a second layer.
If large defects are found on the surface, they need to be puttied.
Marking
The quality of the future finishing of the foam cladding depends on the correctly applied markings.
The markup is done like this:
- mark a point at the intersection of the ceiling diagonals. This will be the center mark;
- Next, lines are marked along which you need to align the foam tiles. The location of these lines depends on the installation method.
You don't have to mark the entire ceiling surface. You can mark only two central lines, then align the remaining profiles along them.
Sticking
Before installing the panels, you need to cut off any burrs from them. It is better to use liquid nails or polymer glue as an adhesive.
Installation is done like this:
- installation starts from the center of the ceiling;
- glue is applied around the perimeter and center of the profile;
- the profile with applied glue is aligned with the markings and pressed against the ceiling;
- This is how a square of panels is laid out, and subsequent foam profiles;
- gluing in corners, at joints is carried out after trimming the profiles;
- After the glue hardens, the gaps between the profiles are puttied.
To finish and seal putty joints, you can paint foam tiles. If the profile has a rough rather than glossy structure, then the surface is pre-primed. The paint is applied in two or three layers using a roller. The first layer goes along the direction of the light, the next one goes across the natural light.
Diagonal tile laying
Ceiling tiles can be positioned either parallel or diagonally. In the first case, everything is quite simple and clear, but diagonal laying has a number of features. As a rule, this installation is used in situations where there is a need to visually compensate for uneven walls. Seamless tiles are not suitable for implementing such schemes.
The technology for diagonally laying foam tiles is as follows:
- First of all, you need to stretch two threads between the corners of the ceiling to find the center point;
- Installation of tiles must begin precisely from the center of the ceiling, and the tiles themselves must coincide with the corners of the marking lines;
- During further installation, you need to build on the axes that were formed in the center;
- At the junctions of walls and tiles, the latter must be trimmed so that they exactly match the dimensions of the free space.
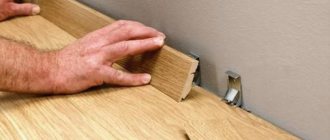
After installing the tiles, all that remains is to install skirting boards around the perimeter of the ceiling and paint the finishing materials if necessary. If the wallpaper is already hung, then the baseboard needs to be painted before installation. Otherwise, skirting boards can be painted even when they are already installed.
Features of choosing adhesive for foam boards
The main criterion for choosing an adhesive base that can be used for installing tiles is the ceiling material. The design features of the room can also affect the adhesive ability of the substances used. You should carefully read the instructions, which clearly state which surfaces (chipboard, wood, concrete, drywall, etc.) this adhesive mixture works best with.
You can glue tiles to the ceiling using various mastics; all of them are suitable for such work, but you need to take into account some features. Water-based glue takes a long time to dry. It cannot be used in rooms with high levels of humidity, since microorganisms and pathogenic fungal infections quickly multiply in the space between the slabs and the ceiling.
Because of this, fungicidal-bactericidal additives are sometimes added to the mixture, which is not beneficial for human health. It is not recommended to use this composition at low temperatures, because then it will dry for too long.
Most often, adhesive is used for foam ceiling tiles using various solvents (acetone, toluene, alcohol, etc.). They dry quickly and do not leave marks or streaks on the surface of the tile covering. These mixtures are economical and apply in a thin layer, so it is not recommended to use them on uneven surfaces. For rooms with high humidity and temperature (kitchen, bathroom, etc.) such adhesives are well suited. It is better not to use them in finishing the ceilings of living rooms (bedroom, children's room), since solvents are unsafe.
Polymer compound adhesives based on a polymer dry out extremely quickly, so the composition should be mixed in small portions and used immediately. The mixture hardens, taking the shape of the material. This allows the glue to be used on uneven surfaces, as it smoothes out defects. The created moisture-resistant film perfectly protects against corrosion and will serve as a good waterproofing for foam tiles.
Hot melt adhesive belongs to the group of thermoplastics that must be well heated before gluing. You won't be able to apply it with a spatula or brush. You will need a special glue gun. It is not recommended to use hot melts when installing foam boards in bathrooms and kitchens, as there is a risk of the adhesive being softened by heated air.
It is better suited for bedrooms, because it does not contain toxic impurities. Viscofluidity and plasticity make it possible to avoid thorough preparation of the ceiling surface, because the hot melt fills microcracks and small irregularities.
Features of ceiling tiles
You need to know that with whitewash almost all substances do not have the best adhesion. Therefore, before gluing the ceiling tiles, it is necessary to first clean the surface with a spatula and treat it with a deep penetration primer. Thin material will require especially careful handling, since dark spots on the ceiling and the glue itself can be seen through it. Therefore, it is better to choose transparent or white mixtures. The adhesive should be applied to the tiles along the entire perimeter, and not in separate strokes or spots.
Ceiling tiles should be started from the corner that is most visible when entering the room. The slightest irregularities and deviations from parallelism in relation to the walls will be evident. For this reason, in irregularly shaped rooms, tiles are laid using a different method, which makes it possible to level out the lack of proportions. Pasting begins from the center of the ceiling (where the chandelier hangs), then goes to the walls diagonally, and not along them.
Technology for gluing foam tiles to the ceiling
Foam tiles are a universal finishing material that can be used in any room - bedrooms, living rooms, baths and kitchens. For installation in wet rooms, it is better to choose products with a water-repellent coating - for example, appropriate seamless tiles - and decide in advance what kind of adhesive to use to glue the ceiling tiles. The shape of the tiles also does not matter - the ceiling can be decorated with both square and rectangular products.
The installation technology common to all types of tiles consists of the following steps:
- First of all, you need to prepare the ceiling surface for installation;
- Next, the ceiling is treated with a primer;
- Then markings are applied;
- After completing all previous work, you can begin gluing the tiles.
When the ceiling finishing work is completed, it will be possible to do any other work in the room.
How to glue tiles to the ceiling: two technologies
Foam or polystyrene ceiling tiles are attractive because they allow you to quickly and inexpensively tidy up a less than ideal ceiling. If the ceiling is relatively flat, the tiles are glued with special glue. It is applied in a thin layer, but provides reliable fixation.
This method will not work with uneven ceilings: the tiles simply will not stick if there are large differences, or the appearance will be deplorable. There is not always time, desire or opportunity to level. Moreover, this finishing option is often considered temporary, with plans to then make a suspended or suspended ceiling. Therefore, there is no point in wasting time and money. In this case, another technology is used - using adhesive for drywall or putty. They work no worse than glue, at the same time leveling the base.
After gluing the ceiling tiles you will get something like this:
Before starting work, unpack all the material, make sure it is the same color and size. If there are irregularities or sagging, they are cut off with a blade or a sharp knife. Now you can begin installing the ceiling tiles on the ceiling.
How to glue on a flat ceiling
If the ceiling is flat, use regular adhesive for polystyrene or foam tiles, the technology is as follows:
- Apply a thin strip of glue around the perimeter of the square and diagonally. There is no need to coat the edges of the tiles.
- Place the tile in place and smooth it with your hand.
- We hold it for a while until the glue “sets.”
- We repeat the same with the next tile. We apply it to the edge of the already pasted one, if necessary, combine the pattern, and then press the rest of the part. Docking must be carried out as accurately and carefully as possible so that steps do not form later. Align the edges to the nearest millimeter.
- Repeat with the remaining fragments.
- If necessary, the ceiling tiles can be trimmed. It is convenient to do this on
As you can see, everything is very simple and these are all the rules on how to glue tiles to the ceiling. Just one caveat: you need to press one square to another tightly. If you have already glued it and there is a gap left, you can move it by pressing a wooden strip to the free edge. If you try to do this with your hands, you can break the foam or polystyrene, but it’s easier to achieve what you want with a flat bar.
If the ceiling is uneven
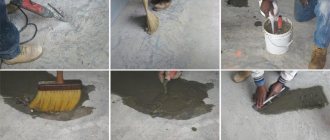
If the ceiling has significant unevenness, gluing the tiles with regular glue will not work. To remove significant differences, use drywall adhesive or putty. The mixture is diluted to a paste-like state, applied to the ceiling, and grooves are formed using a notched trowel. The amount of glue depends on the overall curvature, but it is advisable to start with a minimal layer. The area on which glue is applied at a time is approximately 4 fragments. During this time, the composition will not have time to set, and leveling such a fragment is not difficult.
Apply a thin layer of putty to the ceiling
The tiles are laid on a layer of glue. It sticks well and moves without problems. Having aligned the edges of the laid fragments, take a rule or a building level (preferably one and a half meters) and align the tiles in the same plane. Just press the fragments harder in the right place.
Then the composition is applied to the ceiling again, and, again, to about 4 tiles. All of them are set in the same plane, or at least so that there are no sudden changes. Only in this case you need to make sure that the required layer of glue does not grow too quickly - it is better not to apply more than 3-5 mm, otherwise everything will fall.
https://youtube.com/watch?v=eZPYhhpCoyI
Cleaning and caulking
You know how to glue tiles to the ceiling, but there are still some nuances, without knowledge of which a decent result is unattainable. When working, adhesive often gets on the front side of the tile. It must be removed immediately and completely. You can use a sponge or a soft, non-fading cloth. Wipe the surface immediately after placing the fragment in place. After just a few minutes, this will no longer be possible and traces will remain. Therefore, while working, keep a bucket of water and a sponge/rag on hand.
Carefully sealed seams do not spoil the look
If there are small voids left between the slabs, you can fill them with the same mastic or putty (if it is white), but immediately remove the excess. Another option is white acrylic caulk. It perfectly masks all crevices and adheres well to polystyrene foam and polystyrene. You can fill thin cracks with a rubber spatula, and immediately wipe off any excess with a damp cloth.
Ceiling plinth for stretch ceiling
The Leroy Merlin catalog offers more than 120 options for ceiling plinths that can be used when installing suspended ceilings in a room. Similar elements are offered at prices ranging from 17 to 1,087 rubles.
Their width can be 12-2000 mm, height - 2-2000 mm. In this case, different types of materials can be used for production: polyurethane and polysyrene, duroplast and duropolymer.
The color range of the products is white, beige, yellow. Most of the proposed elements are impact-resistant and can be used under an LED strip.
If necessary, you have the opportunity to select an element that can additionally be repainted.
Product brands: Opak, Martinplast, Dekomaster, Decor Design, Format and other manufacturers.
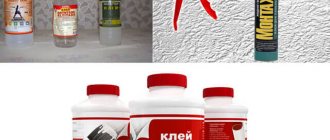
Characteristics and consumption of types of adhesive for ceiling tiles
There are several types of mixtures for decorative installation on sale:
- Universal. This is Titan adhesive for ceiling tiles, format for polystyrene foam.
- Liquid Nails. Environmentally friendly composition that does not cause allergies.
- Acrylic putty.
- PVA.
- Solvent-based adhesive mixtures.
You can also work with melt or compound - both types require preheating.
When choosing what is best to glue ceiling tiles to, it is important to take into account some nuances:
- Pot life rate and bond strength. If the composition dries faster than 15 seconds - this is not enough for a beginner, there will be no opportunity to move or adjust the tiles. If grasping takes more than 30 seconds, your hands will get tired of holding the fragments to the ceiling.
- Safety. Toxic mixtures can negatively affect health, it is better to avoid them.
- The presence of solvents such as acetone, toluene, white spirit. The compositions are not suitable for foam tiles; they melt them.
As for the viscosity of the mixture, too liquid will require a long drying time, while thick will increase glue consumption. The tile must adhere to the ceiling immediately, the fixation is tight so that the part does not fall off, therefore the optimal degree of viscosity is the consistency of medium-fat sour cream.
Glue Titan
Good viscosity and high drying speed are advantages; the composition can be used for finishing metal and glass bases. A mixture that is too thick can be made suitable for work if you know how to dilute Titanium adhesive for ceiling tiles. Masters use ethyl or salicylic alcohol, denatured alcohol. But the consumption of the mixture is not large - about 0.5 liters per 1 m2.
The price of Titan adhesive for ceiling tiles is approximately $4 (280 rubles) per liter, while the user receives a really high-quality composition suitable for finishing any base substrate and the adhesion strength of the tile to the ceiling. The elastic mixture ensures that the seams remain stable - they do not stretch or contract under the influence of temperature.
Glue Moment
This is a high-quality ceiling adhesive that, like Titan, can be used on concrete, plaster, wood and metal bases. High viscosity, quick setting, reliable adhesion are advantages. In addition, Moment firmly adheres the tiles even in areas of small differences in ceiling height, but you will have to work without delays - the composition dries in 15-20 seconds.
The disadvantages are the high price and the need to buy a gun; squeezing the mixture out of the tube is quite difficult. The cost starts from $3.5 (250 rubles) for a volume of 0.75 ml, consumption up to 6 kg/1 m2.
Liquid Nails
A popular adhesive for foam ceiling tiles, the price of which starts from $2 (135 rubles) per 300 ml. Can be used for a wide variety of surfaces, including homogeneous and non-uniform, without damaging the material or leaving marks on the surface. Resistance to microorganisms, transparency, and quick setting are advantages, but you will have to buy a construction gun so as not to squeeze the mixture out of the tube.
PVA glue
If the question is what kind of glue to use to glue ceiling tiles to tile a children's room, PVA will do just fine. This is a harmless water-based mixture with latex or acrylic components, which are needed for stronger adhesion to the base surface. Application is recommended for tiles and ceilings, so PVA is not used for finishing large rooms - the costs will be high. In addition, the water mixture takes longer to set, but there will be no unpleasant odors during work and the composition will not bleed through the tiles - this mixture is white or colorless, which does not turn yellow over time.
The advantages of the substance include its thickness and the ability to stick to any base. You don't need a gun; PVA is applied with a spatula or paint brush. The composition costs less than $1, consumption is no more than 200 grams. per 1 m2. The only disadvantages are the need to coat the ceiling and tiles, as well as the long setting time - you will have to keep the tiles against the ceiling longer.
Liquid Nails
Liquid nails are quite suitable for installing foam parts. This fastening material is good not only for connecting two surfaces, but also for filling seams and joints left after installation. Liquid nails have gained great popularity due to their versatility and high performance.
To work with such a composition, in addition to the glue itself, you will also need a dosing gun that allows you to squeeze out exactly as much of the composition as you need. The consumption of adhesive for ceiling tiles directly depends on the individual characteristics of the ceiling to which it will be glued. So, in the case of an even base floor, you can only apply glue to the corners and the central part of the tile, and if there are any defects on the base, the consumption of the adhesive composition will increase sharply.
In order for ceiling tiles mounted on liquid nails to hold up well enough, when purchasing glue you need to pay attention to two parameters:
- Firstly, the glue should not contain solvents;
- Secondly, good glue is white (this parameter is especially important when working with thin tiles).
When we glue ceiling tiles with liquid nails, they need to be applied in neat portions so that the material consumption is not too great. To do this, you should smear the glue at a short distance from the edge of each tile. In the future, it will be best to coat the seams between the tiles with glue.
Criterias of choice
First of all, it is necessary to thoroughly clean the ceiling from dust, fragments of old repairs, loose pieces of putty and similar unreliable elements that can interfere with the normal gluing of the tiles and the ceiling. There is a list of criteria, meeting which will help you glue the tiles to the ceiling, even if the glue is homemade.
These characteristics include:
- Fast hardening. The tile is attached to a horizontal surface, and until the glue dries, it will not stick without the help of a specialist. It cannot hold more than one tile at a time, so it is better to choose glue that hardens within a minute or two - the speed of the work and the level of its complexity directly depends on this.
- High viscosity. The tile has a certain weight, albeit small, and therefore a substance that is too liquid will not be able to hold it at all - it simply will not set. The denser (and heavier) the finish, the thicker the adhesive is needed.
- "Invisible" color. As a result of the renovation, the owners probably want to get a single-color ceiling, on which dots or strips of glue would not stand out in a different color. You can hide the effects of gluing using white or transparent glue.
- Versatility in materials. Many types of glue have high adhesion only to a certain type of material, while gluing ceiling tiles involves connecting fundamentally different surfaces - polystyrene foam with concrete, plasterboard, wood. The adhesive must be able to adhere to the materials used in the room; the minimum condition for purchase in the case of most apartments is guaranteed high-quality gluing of foam plastic slabs to concrete.
Experts say that the format of the surface to which the polystyrene ceiling tiles will be glued also matters. On a new, smooth surface (this is often a newly installed plasterboard ceiling), the slabs fit better due to maximum contact, but there is nothing for the adhesive to grab onto.
Ceiling plinth made of polyurethane in Leroy Merlin
Ceiling plinth, for the manufacture of which polyurethane was used, is offered in the construction hypermarket catalog with products whose pricing ranges from 640 to 1,087 rubles.
The width of the products is offered in the range of 13-2000 mm, height - 25-122 mm. All products are made in white. Most of the range is intended for use when installing suspended ceilings. It is possible to select an element with or without impact-resistant properties. If desired, the surface can be additionally painted in the desired color.
Most often, such elements are used to decorate rooms in a classic style. Curves, lines or stripes can be applied to the surface of the element. The plinth is attached to the wall using a special adhesive.
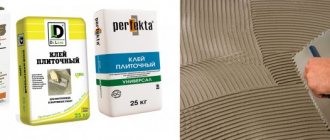
Types of adhesives for ceiling finishing: consumption and characteristics
To glue polystyrene foam boards to the ceiling, use one of the following compositions:
- universal mixtures (these include the Format solution for working with polystyrene foam or Titan adhesive for ceiling tiles);
- hot melt adhesive;
- PVA;
- compound;
- solvent-based mixtures;
- acrylic putty;
- liquid Nails.
When choosing an adhesive mixture, pay attention to the following indicators:
- Quick drying and reliable adhesion to the base. For gluing to the ceiling, solutions that dry in no more than 30 seconds are ideal. The longer the glue takes to dry, the longer you will have to hold the tile with your arms up.
If work is carried out in a residential area, then it is important to choose compounds that do not release harmful substances into the air. It is prohibited to use adhesive mixtures based on solvents such as toluene, white spirit and acetone, because they react with the foam and dissolve it. Use solutions with good viscosity to ensure reliable fixation of the element to the ceiling.
Glue Titan
Thanks to its high viscosity, the adhesive easily copes with fixing heavy glass and metal products on any surface, so it will securely fasten lightweight foam panels to the ceiling. The solution dries quickly, and the thickened mixture can be diluted for further use
It is important to know how to dilute Titan adhesive for ceiling tiles
Suitable for these purposes:
- salicylic alcohol;
- denatured alcohol;
- ethanol.
The consumption of Titan brand glue is small and amounts to 0.5 liters per square meter of surface. One container is enough to glue the coating over a large area, which is considered the main advantage. Additional advantages of Titan are transparency, moisture resistance, and stability of seams. When applied to tiles, the product does not stretch or deform.
The solution can be used for gluing finishing to a base made of gypsum, concrete, cement and other materials. Since the elasticity of the composition is not affected by external temperatures and humidity, Titan is suitable for use indoors and outdoors.
Glue Moment
The advantages of this expensive and high-quality mixture include the following:
- setting speed;
- good viscosity;
- reliability of the adhesive connection;
- suitable for working with expanded polystyrene;
- speed of work.
Since the glue is sold in a tube, you will need a glue gun to squeeze it out of the container. Another disadvantage of the Moment is its rather high cost. In addition, the consumption of the mixture is quite impressive and amounts to 6 kg/m².
Liquid Nails
In the production of liquid nails, synthetic polymers and rubber are used as the basis. “Nails” glue homogeneous and foreign materials equally well. They are also suitable for gluing foam tiles.
The advantages of liquid nails are as follows:
- There are no components in the composition that aggressively interact with the foam and melt it.
- High drying speed.
- There are no visible marks left on the surface. The glue does not show through the finish.
- The solution does not change color or turn yellow over time. The adhesive seam is not susceptible to damage by microorganisms and mold. It does not rust and does not react to high humidity and direct contact with water.
- Water-based and solvent-based mixtures are available for sale. For residential premises it is better to use the first one, because it is considered harmless. But solvent-based liquid nails are suitable for use in places with changes in temperature and humidity.
PVA glue
Water-based compositions with latex and acrylic particles harden quickly after the water evaporates and bond the bonded surfaces well. Since all water-based adhesives are recommended for contact use, the mixture is applied to the tiles and base.
Due to the contact method of connecting surfaces, the mixture is not suitable for use over a large area, because the time required to complete the work significantly increases, as well as the consumption of the adhesive mixture. But in a small room this glue provides many advantages - it is odorless and does not harm health.
Positive aspects of using PVA:
- ease of application (you can use a spatula or brush);
- good adhesion to any substrate, even plastered;
- thick consistency;
- reliable grip;
- optimal setting times, which allows you to change the position of the product;
- reasonable price (less than $1 per kilogram);
- economical consumption – 0.2 kg/m².
How to cut a corner on a ceiling plinth
If necessary, you can cut off a corner on the ceiling plinth yourself. In this case, you can use either a special miter box or make the cut yourself, using a made template.
Initially, you need to prepare the tools that will be needed for the work: a miter box or a prepared template for cutting, a hacksaw or a sharp construction knife, a ruler and pencil, a special square (if the work will be done manually).
It is much easier to get the job done if you use a miter box. If everything will be done manually, initially make a template on cardboard or any convenient material (use a pencil and ruler to mark the angle and place of the cut, taking into account the parameters of the element). Place the template and material on a hard surface and make an incision. The work is carried out as carefully as possible.
Surface preparation
Before installing ceiling tiles made of expanded polystyrene, the base surface must be prepared, peeling elements are removed from it, and depressions and cracks are sealed with mortar. If the thickness of the finishing material is small, it is recommended to putty the ceiling, otherwise the old coating may show through the tiles. If there was previously wallpaper on it, it is removed.
If there is whitewash, it is recommended to clean it, as it does not always become a reliable basis for fixing the ceiling tiles. Furniture is removed from the room in advance, and the floor is covered with a special film. Before removing the whitewash, it is recommended to wet it with a wet roller or brush and allow time for the liquid to be absorbed. This allows you to significantly speed up, simplify the process, and make it less dusty.
To create a high-quality layer in contact with the base surface and adhesive that can reliably hold the tile, it is advisable to apply a deep penetration composition to the ceiling, which you can make yourself. To do this you will need PVA glue, water, and laundry soap. The cooking process is as follows:
- Take a container of suitable volume.
- Water is pouring in.
- Add one piece of grated soap and 0.5 liters of glue.
- The mixture is cooked for half an hour.
During the cooking process, the mixture should be stirred regularly to form a homogeneous mass. Once cooked, allow it to cool completely before applying it to the ceiling with a brush or roller.
Requirements for tile adhesives
The choice of adhesives in finishing goods stores is large. Tile adhesive must meet certain standards and requirements; only in this case will it reliably hold the polystyrene material. Here are the standards by which you should select a product:
- Moderate viscosity. The glue should be thick enough, not too viscous, but not liquid. If the consistency of the glue is liquid, it will not hold even the lightest polystyrene foam tiles. Glue that is too thick is inconvenient to apply and the consumption is too high.
- Good adhesion. High adhesive properties will allow the tile to adhere firmly to the surface of the walls and ceiling.
- Environmental friendliness. High-quality adhesive for foam panels does not contain additives or solvents harmful to humans.
- White or transparent color. Most types of tiles are white, so the adhesive composition should not stand out in a darker shade.
- Convenient drying speed. The surface of the ceiling should become dry in a short time, because holding foam tiles with your hands for a long time will be difficult.
- Economical price. If the new ceiling has a large area, then purchasing expensive compounds is unprofitable. The glue must have an optimal price-quality ratio.
- Versatility. Such adhesives are suitable for any surface - they easily glue tiles to concrete, ceilings, plasterboard floors, and other materials.
Harm of polystyrene
To understand whether ceiling tiles are harmful, it is worth taking a closer look at what they are made of. Expanded polystyrene was invented for the needs of the military industry, thanks to polymerization. It was used as a heat and sound insulator. Little thought was given to the dangers of what was invented. Subsequently, the economical material became widespread in the construction and packaging industries.
This monomer causes irritation of the mucous membranes of the nasopharynx, severe headaches, and disruption of the nervous system. It has a negative effect on hematopoiesis and leads to leukemia. Destroys the liver, leading to toxic hepatitis. Possessing an embryogenic effect, with systematic contact it causes disturbances in the intrauterine development of the fetus.
Another dangerous property of styrene is its ability to accumulate in the body, so even small doses pose a threat. In addition to the above, when oxidized by oxygen, which is part of the air, formaldehyde is released, which is included in the list of carcinogens. When microscopic portions are inhaled daily, the skin becomes pale, an inexplicable loss of strength and depression occur. International organizations to combat cancer indicate a connection between formaldehyde released by polymer coatings and the risk of developing nasopharyngeal cancer. These processes accelerate with increasing temperature.
During fires, even those samples that are recognized as low-flammable begin to melt, emitting toxic smoke. Fatal intoxication can occur in a few seconds, so the chances of survival in a room decorated with foam elements are minimal. Thus, the harm from pasting ceiling tiles is beyond doubt.