Preparation for finishing slopes
The window slopes are essentially the top and side walls of the opening.
Since, when installing a window, we divide the opening into two parts - external and internal, the slopes can be divided into two types, respectively: external and internal. The quarters of the opening act as external ones. Finishing of external slopes is most often limited to the installation of decorative corners and cosmetic repairs to the surface of the quarters (puttying, painting). Internal slopes require more serious treatment, since they are part of the interior of our home and should look, let’s say, decently, harmoniously combined with the impeccable appearance of a modern plastic window.
External slopes
The technology for installing external and internal slopes is basically the same, so only the finishing of internal slopes will be described below. Regarding external slopes, it should be said that there is no need for preliminary insulation of the walls of the opening (quarters), as is done when installing internal slopes. This simplifies the process somewhat. However, installation of external slopes is less convenient than internal ones, and on the upper floors, as you understand, it is also dangerous because you have to work halfway out of the window. When finishing the quarters with plastic panels, it may be difficult to adjust the lower edge of the side panels to the ebb, which is at an angle. But, if we turn to the topic of installing side corners, then there should be no problems here. And finally, the last thing regarding external slopes: if you plan to install them, you need to make the ebb ears large enough in advance :
to the width of the panel of future slopes, otherwise it (the panel) will unattractively protrude beyond the edges of the ebb.
Internal slopes
So, internal slopes. Based on the materials used, they can be divided into three most common types: plaster
,
plasterboard
and
plastic
.
Plaster ones are far from modern, but the cheapest. Perhaps price is their only advantage. Everything else can be attributed to disadvantages:
- long duration of finishing (several days), accompanied by a large amount of debris and dust;
- the need to then regularly tint the surface of the slopes;
- the plaster constantly cracks where it meets the plastic;
- the slope turns out to be cold and susceptible to freezing and mold.
Plasterboard slopes are in perfect harmony with a plastic window, but are easily soiled and require regular painting. If the walls of the opening are not insulated enough, the drywall may become damp in the cold and become moldy. When installed correctly, such slopes are a good option for office and ordinary residential premises.
Plastic slopes are perhaps the most affordable and fastest way to interior finish plastic windows. Given the simplicity of the technology, quite a decent result is achieved with little cost and time. Plastic slopes are ideally combined with a PVC window, as if merging with it into a single whole. In addition, they are practical and durable. If necessary, over time they can be easily and relatively “painlessly” replaced with new ones.
Preparatory work
Before you begin installing plasterboard or plastic slopes, you need to prepare the window and opening. Preparatory work includes installing a starting profile and insulating the walls of the opening.
Start profile
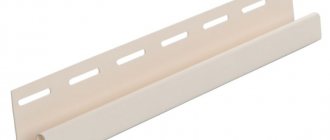
To pair the plastic panels with the window, a special U-shaped element, starting profile,
.
The start is attached to the window frame, and the panel is stuck into it with its rear edge. There are various types of starting profiles, including those specially designed for plastic windows ( start-clip ).
This starting profile has an additional edge with a latch, which is attached to the side groove of the window frame: In order not to bother searching for a start that matches the profile of your window, use the universal one ( L-start
), which is shown in the following figure:
It fits perfectly with plastic panels for finishing slopes, sandwich panels, and 10 mm thick plasterboard. This L-start is attached to the window along the edge using self-tapping screws with a pitch between them of approximately 150 mm. Self-tapping screws with a flat head base and a drill at the end, size 3.5×9.5 or 3.5×11, are best suited:
If you use a start clip, you must install it on the window frame. After clicking into the groove, such a start must be additionally screwed with self-tapping screws to the ends of the window to prevent the possibility of it falling out of the groove when installing the panels. You can do without self-tapping screws by spreading out the window installation over two days: on the first day, mount the window and foam the gaps, on the second day, start finishing the slopes. The dried foam will reliably press the starting profile to the frame and will not allow it to fall out when installing the panels.
You should pay attention to the following point: L-start is structurally designed for a small angle of rotation of the panels, therefore it is well suited for small installation gaps between the frame and the opening, when a large rotation of the slopes is not required (dawn). As for the snap-on start, some manufacturers make it with a noticeable turn and it is advisable to use it at large slope angles, for example, in the case of large installation gaps.
Let's focus on the universal L-start. First of all, the upper starting profile is screwed along the entire width of the frame:
Then the side launches are screwed on (docked to the top one from below):
The narrow shelf of the profile should face the inside of the window, the wide one should face the walls of the opening. You should try to screw the screws exactly into the center of the profile without tilting, visually checking the tightness of the start to the frame.
There is also a “no-start” method of installing slopes. In this case, the panels, like a window sill, are inserted a few millimeters behind the frame and pressed tightly against it with some elastic material, for example, pieces of dried foam. After this, the gap between the rear edge of the panel and the wall of the opening is evenly foamed from the inside so that the foam reliably fixes the slope. From the outside, the line where the panel joins the frame is coated with sealant. Unfortunately, such a joint does not retain its original flawless appearance for long and soon either darkens if silicone was used, or cracks (liquid plastic).
The starting profile is free of this drawback, and when used, the sealant will be applied only to the joints of the panels among themselves (above) and to the joints of the panels with the window sill (below). If desired, the lower edge of the side panels can also be framed with a starting profile, then the sealant will be applied only to the upper joints:
In this case, it is advisable to connect the side starts (on the frame) with the bottom ones (on the panels) at an angle of 45°. To do this, you need to prepare the lower ends of the side starts in advance - cut them at an angle of 45°, as in the following figure:
It is better not to frame the upper joints between the slope panels with a starting profile, but to coat them with liquid plastic, since the slopes on top are least susceptible to deformation from temperature changes, and cracking of the sealant (liquid plastic) is almost impossible there. And a joint carefully coated with sealant looks, believe me, more beautiful than one framed with a starting profile.
In general, I recommend using the start only around the perimeter of the window, and treating other joints (slopes between each other and with the window sill) with liquid plastic. Later during the operation of the window, the cracking sealant can be periodically restored (updated) if necessary.
Methods of fastening plastic slopes
One of the most common materials for finishing window and door slopes are plastic panels. There are various ways to attach slope panels. The choice of fastening method determines the appearance of the final result, ease of installation, speed of installation and cost of the material. Some of the following fastening methods depend on the selected material for finishing the slopes (special fasteners).
Content
- 1 Fastening the slopes to the frame 1.1 Initial profile
- 1.2 Profile clip
- 1.3 Bracket
- 2.1 Polyurethane foam
Fastening the slopes to the frame
Initial profile
The initial (starting, L) profile is attached to the frame along the entire height and width of the window block (where it is planned to install slopes). To attach the initial profile to the frame, screws (sometimes glue) are often used. This profile is a PVC material in 3 planes. Two of them are parallel and have different widths. This was done for ease of mounting the panel into the profile. The larger side of the profile is installed to the installation seam and is the point of emphasis for the slope panel when inserting the panel into the profile. The smaller side remains visible (front) and serves as a guide for the penetration of the slope panel into the profile. The third plane of the profile connects two parallel parts, is the base of the profile and is intended for attaching the profile to the frame. Screws for fastening the starting profile should be used with a semi-cylindrical head, since the diameter of the head of such a screw is significantly smaller than the width of the profile base, which eliminates its deformation, and the flat base of the head facilitates a tight fit of the profile base to the frame. The length of this screw can be 10 (+-1) mm. The profile is fastened with screws in increments of 30cm and no more than 5mm from the edge. This type of fastening to the frame can be used with any slope panels.
Profile clip
The purpose of this profile completely coincides with the initial (starting, L) profile. The difference lies in the way the profile is attached to the frame. If the initial profile is attached with screws, then this profile has a special clip that snaps into the groove of the window profile. Along the perimeter of the window profile, on the side of the mounting seam, there is a groove for the mounting hook, into which the profile clip is installed. Since there are a large variety of PVC window profiles and the dimensions of the mounting hook groove may differ, the clip profile must be selected to match the PVC window profile from which the window blocks are made. Because of this feature, this type of fastening of slopes to the frame is profile-dependent.
Bracket
One way to install slopes is to install the panel outside the frame of the window unit. To fix the panel tightly to the frame, improvised materials (dry foam, remnants of PVC panels, wooden wedges) were used for a long time. This led to wasted additional time and unstable quality of panel fastening. The bracket is installed in the groove of the mounting hook, in increments of 20-30 cm, and presses the panel to the frame of the window unit. Since the installation location of the bracket is the groove of the mounting hook, the bracket is a profile-dependent part. Unlike the profile clip, the bracket is much smaller in size and can be adapted to fit the groove of the mounting hook by mechanically removing excess plastic from the bracket lock.
Attaching slopes to the opening
Polyurethane foam
One of the most universal ways of attaching slope panels to an opening is to fill the space between the panel and the opening with foam. This method can be used when installing panels of any material, since polyurethane foam has good adhesion to all known materials. Also, the material from which the opening is made does not limit the use of this type of fastener, be it brick, concrete, foam block, wood, metal, etc. Another advantage of this type of fastening is the ability to minimize the time spent on leveling the slopes relative to the window block. First, the slope panel is secured to the opening with adhesive tape (tape), which subsequently holds the panel in place, thereby preventing the panel from moving under the influence of secondary expansion of the foam. The space between the panel and the opening is filled with foam no more than 20% of the width of the slope. This is enough to firmly attach the slope panel to the opening and leaves free space for secondary expansion of the foam. After the foam has dried, the tape is removed. Excess foam is trimmed and covered with a decorative element or putty. When choosing foam for fastening slopes, you should pay attention that it does not have a large secondary expansion. The disadvantage of this method of fastening is that it is worth highlighting that you will have to wait some time before the foam polymerizes and you can proceed to the next stage of finishing the slopes. This time depends on the characteristics of the polyurethane foam and environmental conditions (humidity, air temperature, opening temperature, etc.).
Screws
The slope panel can be attached to the opening with screws. Most often, this method is used in wooden openings that do not require prior leveling. In other cases, a guide rail is pre-installed at the place where the panel is attached to the opening and the panel is attached to it. If the opening requires alignment, this is taken into account when installing the slats. The guide rail is also attached to the opening with screws. The screw is screwed into the panel at a distance of 10-15 mm from the edge of the panel. This is due to the fact that the decorative element (PVC corner or finishing profile), which subsequently covers the screw heads, looks more beautiful if it does not exceed 30 mm.
Platband. Frame. Lid
PVC profile, specially created for attaching slope panels to the opening. This type of fastening consists of two parts, a body and a cover. The casing frame holds the slope panel, is bent and screwed to the wall. The cover snaps onto the body, thereby covering the bolt heads. In this case, the alignment of the slopes occurs by choosing the location for attaching the screw to the wall. The advantage of this fastening method is that in addition to the fastening function, it is also a finishing decorative element.
Special fasteners
Special fasteners are fasteners designed for a specific slope system. If materials such as PVC panels, sandwich panels and others were invented as universal finishing materials, then some manufacturers began to produce a product that was originally designed for finishing slopes. Today these are the Qunell slope system and the Exter system of external and internal slopes.
In the Qunell system, the fastening function is performed by a latch. The slope panel has a locking system for connecting with a latch. After placing the panel in the opening, the latch is installed in the lock and fixed to the wall, in increments of 300-500mm. Subsequently, the platband and corner cover are attached to this part.
Exter slopes are attached to the opening using a nipple, which is secured to the opening with a screw (4 mm, countersunk head) with a pitch of 300 mm. The slope has a groove that aligns with the fixed nipples. By slightly pressing the slope, it snaps onto the nipple.
Peculiarities
The plastic starting profile for PVC panels looks like a U shape, one side of which is usually slightly shorter than the other. As a rule, installation of the entire structure begins with its installation, which is why it is also called initial. It “sets” the direction of the entire plastic finishing structure. This molding is used to cover the ends of panels, and, in addition, in cases where the PVC sheet is adjacent to the openings of windows or doors. Its use can significantly save time and materials for finishing and installation work.
Such elements have a number of obvious advantages. They generally exhibit resistance to ultraviolet rays and can avoid yellowing for up to 10 years. The material is elastic, but not brittle, so when cutting you can prevent the appearance of cracks. The composition is good because it contains a minimal amount of chalk and substances harmful to the human body.
The moldings are easy to install and, thanks to their convenient shape, fit smoothly even with uneven walls.
What to consider when choosing?
When choosing the size of the starting profile, you need to consider a number of points. Structural elements with different dimensions are available for sale. They are always indicated in millimeters. When choosing, it is important to consider the size of the drywall sheets. Most often they have a thickness from 12.5 to 95 mm. For wall decoration, 12.5 mm sheets are most often purchased. The thicker the drywall, the larger the size of the starting profile should be used when creating the structure.
The complexity and overall weight of the structure are also taken into account. The higher these indicators, the more powerful the profile should be. This is necessary in order to create a rigid, durable frame. Additional jumpers are also added. They are needed for stability.
When choosing a profile, be sure to calculate the degree of load on the frame. If you plan to create complex structures, shaped elements on which heavy objects will be installed during the operation of walls or ceilings, you need to purchase a large profile.
Finishing methods
There are several ways to tidy up your window. These may be the following options:
- Finishing with plaster. This method is quite old. Its main disadvantage is the complexity of the work. Plastering is time-consuming and requires careful cleaning of the area after finishing. When a house shrinks, it may crack.
- Application of drywall. This option is not bad, but it is only suitable for interior work. The room must be dry and warm, otherwise the sheet of drywall will begin to collapse.
- PVC profile for slopes is the best option. It is not afraid of moisture, temperature changes, is easy to install, and can be used both outside and indoors. This is an excellent solution for plastic windows, as it matches them perfectly in terms of material; the PVC F profile for slopes is very easy to install. It is quite possible to do this yourself. With other materials, for example, wood, the profile may not look so harmonious, although you can order wood lamination, and the differences will not be noticeable.
PVC profiles for slopes
Application of products
There are two types of slopes: one of them is located outside the building, the other is located on the inside. Both types require proper finishing. The slope is intended not only to give the windows an aesthetic appearance, it performs important protective functions.
Plastic windows are attached to the opening using mounting foam. It deteriorates under the influence of moisture and is gradually carried away by the wind, which is why it is important to install a slope profile that can protect the structure from adverse weather conditions. Otherwise, the foam may become deformed and damage the window frame.
Application of F-profile for finishing the external slope
Read more on our website about the types of platbands for metal-plastic window structures. How to finish the slopes of plastic windows with your own hands, see the link. We choose the most “correct” slopes for plastic windows. Prices for different types of slopes, consumer reviews
When replacing windows yourself, do not forget about installing sills for plastic windows.
Features of installing slopes
The starting profile for PVC windows should be used according to the existing algorithm. Preparatory activities are required. During this process, you need to properly prepare the wall surface. Usually, when installing PVC windows, a gap is formed between the frame and the wall, which is sealed with polyurethane foam. Such foam is divided into two categories:
- simple;
- professional.
The first option is very easy to use and is equipped with a special nozzle tube for squeezing out the foam.
And the professional foam is equipped with a collet mount for installation on a special gun. The gap must be foamed from bottom to top very slowly. When the foam has hardened, cut off any remaining foam from the frame using a sharp knife .
The listed types of foam differ both in quality and cost. When doing repair work, it is best to use a professional option, despite the fact that it is not cheap.
Varieties
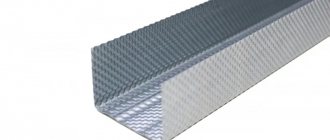
There are two main types of starting profile for drywall. They may have different markings. The first of the starting profiles is used when creating ceiling structures. It may be called CD or PP. This is the most popular type of guides.
If you correctly select the sizes of the profiles of this group, you can rationally plan the space in the room. At the same time, when using structural elements of the PP (CD) type, a minimum amount of waste remains.
For installation of partitions, a CW or PS profile is used. It is worth noting that the quality of the product can be determined by the notch. It is needed to facilitate the laying of communications inside the frame. Responsible manufacturers create similar notches in the starting profile. Some products are provided with an additional stiffening rib, which looks like a bent edge.
F-profile for slopes
This profile is made in the shape of the letter “F”, which provides a lot of convenience during its installation. With its help you can install:
- Plastic slopes;
- Slopes made of sandwich panels;
- Slopes made of decorative materials;
- Slopes made of plasterboard.
The profile is installed around the entire perimeter of the window. At the joints, the profile must be cut at an angle of 45 degrees, which will ensure perfectly even joints and allow the slopes to be installed as accurately as possible.
Installation of the F-profile is carried out only after the surface has been completely cleaned. Next, the gaps are foamed and excess foam is cut off. For this purpose, you can use a special construction knife.
Very often, the F-profile is placed on a special adhesive base. But such installation of the profile is a mistake, since over time, cracks may appear at the joints through which cold will penetrate into the room.
Classification of starting structures
Starting forms differ from each other in cross-sectional shape. Plastic slopes are installed by analogy with constructors. All parts need to be unified as much as possible to make the design functional. Each part has its own function and purpose. Starting profiles for slopes are used to fasten plastic panels to the load-bearing base and join them to each other. They are made from both PVC and their metal.
Depending on the design, they can be designed for fastening decorative elements using different methods and in different parts of the opening. They are designated by letters. The following varieties are available on the market:
- I - profiles;
- F;
- L;
- P.
The I-profile has a cross-section in the shape of the letter I - one central shelf and two side ones. It is installed directly on the wall and plasterboard or plastic slopes are attached to it. Thanks to its special shape , such a part can be attached to the opening in almost any position.
The most common type of plastic starting profiles is the one made in the shape of the letter F. It is equipped with one long shelf and two short ones, which are adjacent to the long one at one edge.
Using these forms you can install slopes made of various materials. For example, sandwich panels, PVC, wood-based composite materials or plasterboard sheets.
The design of this profile allows it to perform two functions at once:
- decorative;
- fastening
Thanks to the second narrow shelf, you can close the joint of the facing panel without the use of putty, decorative corners and other additional elements .
Using the L-profile, you can install standard plastic or plasterboard slopes with a thickness of 10 mm. The section includes three shelves - one wide and two narrow. It should be fastened perpendicular to the window plane, while the wide shelf will be adjacent to the wall of the opening, the narrow shelf will be adjacent to the window frame, and the long narrow shelf opposite is used as a mask for the joining seam where the panel fits. And the U-profile in terms of use and design is similar to the previous one, but the difference is that such a part has two wide shelves, which are connected by a narrow one. It can be used to cover uneven or wide seams.
Installing slopes on windows yourself
Preparation of the slope surface
Before you begin installing the slope, you must wait at least 24 hours after installing the window unit. The wall surface must be cleaned of all protrusions, remove dust with a wet cloth, and allow to dry. It is advisable to treat the surface with some means to improve adhesion (a solution of silicate glue, for example).
The mounting foam protruding from the space between the wall and the window frame must be cut off with a sharp mounting knife so much that it does not interfere with subsequently attaching the starting profile to the frame. We recommend treating the surface of the foam with a sealant to prevent vapors from entering the pores.
Preparing the surface for installing a plastic slope
Installation of the starting profile
The starting profile is sold either three-meter or six-meter. Take the second ones, it’s better to leave them, but you won’t have to join them in the middle of the window. There is an inclined “start-clip” profile, it is intended for slopes made at an angle. For straight slopes, it is better to choose a regular L-shaped profile. The width is selected according to the thickness of the panels.
To install the profile you will need:
- roulette,
- pencil,
- fine-toothed saw for plastic,
- screwdriver with screwdriver attachment
- self-tapping screws – “bugs”, 15 – 20 mm with a tip – drill. The horizontal top profile is installed first. It can be made from wall to wall and screwed with self-tapping screws exactly along the edge of the frame in increments of 20 - 25 cm. With the accuracy with which the windows are installed, a level may not be needed. Vertical side profiles will require more precision, so use a tape measure. The gap can be made at the bottom, at the window sill, and the upper joint can be made as even as possible. Screw with the same distance between the screws, departing 4 - 5 cm from the joints.
Installation of the starting profile itself
Lathing along the slope wall
Wooden slats 20x40 mm, screwed to the walls of the slopes, after 40-50 cm and next to the joints of the panels, will give the necessary rigidity to the structure. Before installation, we recommend treating the material with protection against rot and insects and drying it. In the walls, two holes will be required for each slat; the slats are attached to them with dowels - nails. When installing the sheathing, the ends of the slats should not reach the edge of the wall and panel, because a couple of centimeters will be required to secure the F-shaped profile - the cover.
Installation of lathing on the wall
Installation of panels on slopes
You can buy special panels for slopes (honeycomb structure) or make them from sandwich panels. The thickness of sandwich panels is from 10 mm, like slope panels, but they seem warmer due to the polystyrene filler. Sold in sheets 3000x1500 or 3000x2000 mm.
Before installing the panels, decide what material you will use to insulate the slopes. If it’s polyurethane foam, then more on that later. If you decide to use mineral wool, we recommend buying several mats. When installing panels, lay the space between the panel and the wall with plates cut to size.
The top sheet is installed first. Cut the panel to the length of the starting profile (or, if there is none, so much that it reaches the walls), insert it into the starting profile and screw it to the sheathing slats with short self-tapping screws with flat countersunk heads. PVC is flexible, so tighten the screws until the heads sink. If you do not want to mount the panel with self-tapping screws, glue the panel to the wall with tape during installation.
Installation of the panel in the starting profile
The side panels are cut to length from the window sill to the top sheet. To cut plastic, you need a sharp mounting knife or a large utility knife with a short blade. PVC cuts perfectly in any direction, so making a clear cut is not difficult. We recommend using a metal strip like a long ruler as a cutting guide.
Insert the panels into the starting profile, check the connection to the window sill and the top panel, insert insulation into the opening and secure with self-tapping screws along the outer edge. If the junctions are not completely tight, putty with liquid plastic (PVC dissolved in acetone). It hardens quite quickly in air, “welding” the panels to each other.
Fastening the panel to the slope sheathing
If you decide to insulate the slopes using polyurethane foam, we warn you in advance that the foam can expand greatly. To ensure reliability, the panels need to be spring-loaded with reliable spacers while the foam hardens. Before filling the space with foam, spray the wall with water from a household sprayer. The foam will expand less and adhere better to surfaces.
High expansion foams can push out the panel, so work very carefully or look for low expansion foam. These are high-quality foams, produced “for a gun”. The manufacturer indicates the expansion coefficient on the labels. Everyone knows the Macroflex brand; it is a popular brand with good characteristics. Competition among professionals comes from Titan O2 foam, which does not differ in price. The main destroyer of polyurethane foam is ultraviolet light, so all junctions must be insulated from sunlight.
Installation of the final slope profile
After installing the panels, all that remains is to close the ends of the panels with the finishing profile (F-shaped). A three-meter profile is sold with a price per linear meter. The price depends on the width of the shelves.
First, the upper profile is measured with an accuracy of 1 - 2 mm, the upper shelf remains wider, with the calculation of sawing “at an angle”. With light blows of the palm, the profile is fixed to the panel along its entire length. Then cut the side profiles to size with the same tolerance. For a better joint, saw the internal flanges of the profile with a fine-toothed saw at an angle of 45 - 50º. The upper wide shelves on the wall overlap each other at the junction. Place a profile lining under them so as not to saw the wall, and carefully saw off along the crosshairs at 45º. You will get an excellent joint. On the second side profile, do the same.
When fixing the finishing profile on sandwich panels, there is no need to glue it, but if you are using a regular corner, then purchase “liquid nails” glue. Glue the corner to both the panel and the wall.
Do-it-yourself plastic slopes are ready
Do-it-yourself plastic slopes are ready
Fitting sizes, possible colors
Ceiling made of PVC panels
The fittings may have different sizes, but they are all systematized. The following sizes are used for standard panels:
- for simple corners – 15x15; 20x20; 30x30; 40x40 mm;
- for ceiling skirting boards – 6 x 0.5 m.
However, the dimensions used must correspond to the format of the panel products, without detracting from the attractiveness and functionality of the cladding.
Accessories for PVC panels
When choosing PVC wall panels, the modern buyer, first of all, pays attention to quality and size. He is usually of little interest in the colors of the fittings, and, as practice shows, this is in vain.
There are many examples when, when decorating interiors, moldings and other fittings made of wood or plaster are painted to match the color of the walls. This is done in order to emphasize the classic style in its purest form. In this case, the moldings that create and decorate a certain architecture do not stand out from the general background.
Important! Cornices, moldings and other components are considered to be required to be painted. Even if they are white, paint them white. This is done so that there are no joints. However, plastic fittings cannot be painted, as over time they lose their attractiveness.
PVC molding
Plastic wall panels are in high demand due to such properties as versatility, unpretentiousness, and a large number of possible design options. Components such as joining and connecting profiles, internal and external corners, ceiling or floor plinths:
- allow for high-quality fastening of wall panels;
- provide a fast and waste-free construction method.
Installation of panels using components takes three times faster than traditional framing. We invite you to watch a video on the topic.
PVC panel design: choice of color and texture
The advantage of plastic panels is the wide range of colors and textures. It is not difficult to choose a material that ideally matches the style of the window profile. Modern finishing technologies make it possible to produce panels with a surface that imitates natural materials - brick, stone, metal, marble, granite.
PVC can be combined with window profiles, walls or fittings. Depending on the chosen style in the room, use plain or colored materials, varnished, laminated with glossy or matte film.
Advantages and disadvantages of plastic slopes:
The disadvantages of plastic slopes are relative, because they are easy to prevent or eliminate. These include the risk of breakage as a result of a strong impact or the impossibility of local repairs: to eliminate a cut or crack, it is necessary to remove the entire panel
Definition
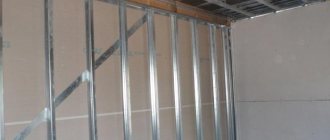
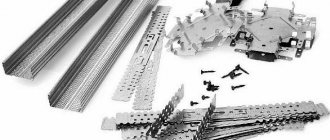
The profile for the wall under plasterboard is made using a special technology. Structural elements of this type are made from galvanized sheet metal. It is processed using the cold-rolled method. The result is strong and durable products that are used in the process of construction work at various sites.
Galvanization allows you to give metal structures the necessary strength, protecting them from corrosion. As a result, the durability of drywall profiles is significantly increased.
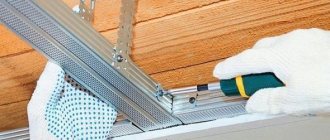
Two groups of profiles are produced. The first category includes load-bearing (rack-mount) structures. All profiles that will be mounted horizontally are called starting or guides. They have certain markings. If a rack profile is used to create ceilings, it has the index CD. For partitions, structural elements of this group marked CW are used.
Why should you choose plastic products?
Plastic is the most common and versatile material.
Plastic slopes are most often installed
This is due to its performance characteristics and ease of installation. The advantages of plastic slopes include:
- Easy to care for the surface - just wipe the plastic with a cloth and soapy water;
- High-quality plastic does not fade when exposed to sunlight;
- Plastic looks best combined with the profile surface of plastic windows;
- The service life of these products is calculated in decades;
- For plastic slopes, when insulating them, you can use mineral wool. In this case, heat loss through the window structure is reduced and the effect of window fogging is eliminated;
- The moisture resistance of the plastic is obvious, so it does not collapse under the influence of condensation;
- Simple installation - the parts just need to be treated with adhesive and fixed to the surface of the base.
Installation
Plastic slopes can be glued in the traditional way - on polyurethane foam. This installation has some differences from that used for plasterboard slopes.
- At the initial stage, a starting profile is installed around the entire perimeter of the window opening . In order for the connection to have sufficient tightness, when attaching the profile, its back side is covered with a thin layer of silicone sealant;
First, the starting profile is fixed. Parts are cut out of sheet plastic 8 mm thick. The window is measured in the same way as when installing plasterboard parts;
A plastic part is cut to size. A frame made of bars is installed around the perimeter of the window;
A wooden block is installed around the perimeter of the window. A starting profile is attached to the wooden frame;
The starting profile is fixed to the wooden frame. The resulting parts are inserted into the U-shaped starting profile. First, a layer of polyurethane foam is applied in a wave-like manner to the entire plane of the base, thus completely filling the space between the block and the frame;
The gap between the block and the frame is foamed. The plastic elements are fixed with masking tape while drying.
After installing the slopes while the foam dries, they are fixed with tape
Advantages of plastic profiles
Profiled plastic elements have a number of advantages that make the installation of window and door slopes much easier and more technologically advanced. For more information about the advantages of plastic models, watch this video:
- Using PVC profiles, you can easily and quickly level the plane of a window (door) opening without the use of plaster or putty compounds.
The planks can be easily secured with simple self-tapping screws - Easy to attach start profiles to the wall. To do this, you can use either self-tapping screws or assembly adhesives - “liquid nails”.
- High decorative properties. When installing slope panels using starting profiles, you can get perfect joints without sealing the seams with putty.
- Ease of processing. Plastic profiles can be easily cut using scissors, a grinder, a jigsaw, and even a regular stationery knife. Also, PVC profiles are easily bent, taking the shape you need.
Such manufacturability is achieved due to the unique physical properties of polyvinyl chloride.
What does the slope market offer?
Absolutely all slopes are divided into external, that is, those located on the street side, and internal, which are installed indoors. Their construction technology is the same, the only difference is that not every material can be used for external structures.
Plastic slope
This is the simplest and cheapest type of slopes. If for some reason you don’t want to spend a lot of time and effort on arrangement, then this option is perfect. If you have the tools and material, installing such a finish will take 3–4 hours. But I would not recommend arranging external slopes in this way.
What's good about plastic:
Plastic trim is the easiest to install.
- Low cost , the material will cost literally pennies;
- The structure of the finish is similar to the structure of the window, so there will be no gaps here due to temperature changes;
- Fast and relatively simple installation;
- Absolute moisture resistance;
- PVC panels do not require additional finishing , they are simply mounted and that’s it.
But the disadvantages here are much more significant than the advantages:
- Even the highest quality PVC panel is highly susceptible to mechanical damage. It won't be difficult to break through the plastic;
- In case of damage, local repair is impossible; the panel will have to be replaced completely;
- The finish turns out to be hollow, so condensation will collect in the cavity under the panels and sooner or later fungus may appear;
- Modern panels supposedly do not burn, but in any case, when there is a fire, they emit asphyxiating gas;
- If you skimp on the quality of the panel, then within a year it will begin to turn yellow.
The shaped plastic profiles look quite decent.
Sandwich panel
In fact, it is the same plastic, only with insulation. This panel is made like a sandwich, where a layer of polystyrene foam is laid between two PVC sheets. Thanks to this innovation, this coating is an order of magnitude better than conventional PVC panels.
Sandwich panels were originally conceived as insulation, so they can be installed both outside and inside, only for the street you need to buy special external panels.
The advantages of these panels are:
One of the installation schemes for sandwich panels.
- Although the material is more expensive than regular plastic, the price is still reasonable;
- The strength of the sandwich panel is equal to the strength of drywall;
- The coefficient of thermal expansion here is the same as for windows;
- The installation technology is not much more complicated than that of conventional plastic;
- The panels do not need finishing.
In fact, there is only one minus here - if you spare money on a high-quality panel, then over time the plastic will turn yellow.
Wood and MDF
Both of these materials are quite specific. As a rule, they are used only when arranging windows in a wooden house. The fact is that the finishing material must be in harmony either with the window itself or with the walls.
If you install wood or laminated MDF between a plastic window and block walls, then this finish will look like an alien inclusion.
Slopes made of laminated MDF and wood look best in a wooden house.
Plus, from brick or concrete walls, the wood will be saturated with moisture, and the worst thing is that all three materials have different coefficients of thermal expansion, which means there will definitely be cracks. Therefore, if you have a wooden house, then choose between wood and MDF.
Drywall
Almost half of all modern slopes are made of plasterboard. People here are attracted by speed, ease of installation and decent appearance. But drywall has both undeniable advantages and disadvantages.
The advantages include the following:
- The material is durable and quite lightweight;
- Installation of drywall is accessible even to a beginner;
- All materials are relatively inexpensive;
- You immediately get a perfectly flat surface;
- The surface can be repainted many times.
Any drywall requires finishing.
Opponents of drywall point out the following disadvantages:
- Installing the structure is only half the battle; then there is still finishing work to be done, and this will require some skill;
- If you do not install insulation, the perimeter will freeze. But, in my opinion, this minus is untenable, since no one is stopping you from insulating the slope; later I will tell you how.
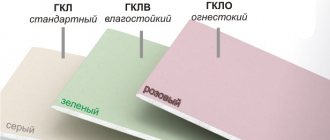
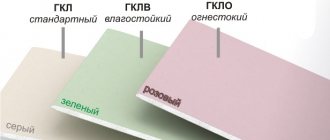
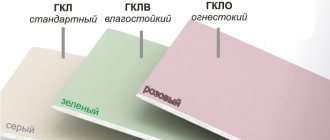
Many craftsmen categorically prohibit installing drywall outside. So, if you take a waterproof gypsum board sheet and putty it with compounds for exterior use, then it will stand perfectly. I have had such external slopes on plastic for about 15 years.
GKLV sheets can be mounted either with glue or on a frame.
Plaster as slopes
This is one of the oldest and most proven types of finishing. No matter how many new materials appear, plastering was, is and, most likely, will be their main competitor.
Advantages of plastering:
- Thus, any slope configuration can be created. Arched and other curved structures are still finished this way;
- Absolute environmental cleanliness;
- In terms of durability, there is no equal to plaster;
- Complete fire safety;
- You can repair a pothole or chip in 15–20 minutes;
- You can repaint as much as you like;
- The finish is sealed.
Most figured surfaces are plastered.
Disadvantages of plastering:
- All wet technologies are considered dirty, and it will take a long time to clean up after such work;
- The process itself is quite long and labor-intensive, if you do everything as expected, then without skill you can carry it for at least 2 days;
- Plaster and plastic have different coefficients of expansion, so cracks between the frame and the finish are inevitable. Once every 1–2 years you will have to coat the joint with sealants;
- The plaster freezes quickly; it is impossible to insulate the perimeter of the window in this way.
Plastering the perimeter of a window from the outside is still considered one of the most reliable methods of arrangement.
