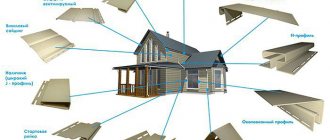
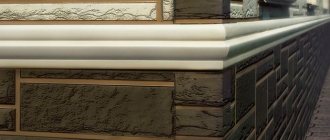
Siding is one of the most popular, modern and versatile materials for finishing the external walls of buildings for various purposes. Residential buildings, industrial buildings, warehouses and much more are finished with siding. However, in order to install the siding panels correctly, and also to make the entire building look beautiful, harmonious and complete, it is necessary to purchase various components and additional elements. For example, to design window openings and doors (and for a number of other works), a J-profile for siding is needed.
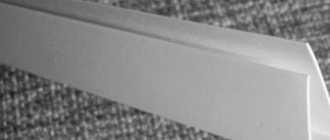
J-profile for siding
How much do you need to buy
In order not to overpay extra money and not to purchase excess material, before installing the siding, you should make accurate calculations of the quantity of each element, including the J-profile. It’s easy to calculate: if you plan to use it only to design window openings, then calculate the perimeter of each window and each door, sum up all the resulting numbers and take so many meters of profile to cover all the perimeters. The number of parts can be easily calculated by dividing the final figure by the length of one profile.
Window opening measurement
If a soffit is installed, then the sum of the side lengths of the soffit is added to the resulting figure after calculating the sum of the perimeters.
If you plan to use the J-profile also on the end parts of the house and roof gables, then additionally measure the lengths of both sides of the gable, as well as the height of the wall to the roof from each corner. For one corner of the house, instead of one special corner profile, two J-profiles are used. That is, as a result, double the number of J profiles goes to the ends of the house.
The J-profile is attached to the walls using nails or self-tapping screws. At the same time, to install 100 m2 of siding panels, quite a lot of them are consumed - about 1600 pieces. The same fasteners are used to fasten the J-profile. In this case, nails should be purchased with a head of about 8 mm and a length of at least 40 mm, and self-tapping screws should be purchased with a head of at least 25 cm and a head diameter of 8 mm.
Installation of siding panels
Popular brands
DEKE Lux J-profile cedar
The market offers products from foreign and domestic manufacturers.
Döcke:
- (Russia);
- length: 3050 millimeters;
- color palette: “ice cream”, “pomegranate”, “chocolate”;
- approximate cost: 620 rubles per piece.
"Alta":
- (Russia);
- length: 3000 millimeters;
- color palette: golden, brown, peach, light gray, “light oak”;
- approximate cost: 167 rubles per piece.
“GRAND LINE” J-profile for spotlights:
- (Russia);
- length: 3000 and 3050 millimeters;
- color palette: white, beige, vanilla, yellow, blue, golden sand, caramel, cream, brown, light green, peach, dark beige, gray;
- approximate cost: from 190 to 600 rubles per piece.
In order not to run into a fake, the product should be purchased at trusted retail outlets after reading the quality certificates.
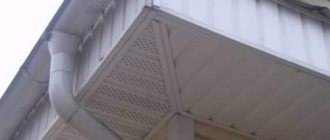
Installation of J-profiles on gables
Let's consider how this element will be installed on a gable roof. A gable roof is the same gable roof that is familiar to us. In houses with such roofs, the walls often smoothly transition into gable walls. Therefore, the pediment of such a structure is often called a gable.
Tong
Usually, installing a profile in this case is not difficult, but in general terms the installation process is worth describing. Particularly difficult here is the junction of two profile parts at the ridge of the roof - the angle here will not necessarily be 45 degrees. On the contrary, he is more likely to be stupid.
In order not to make mistakes when cutting the J-profile, prepare a joint template from two unnecessary profile trims. One of them is applied in the area of the roof ridge, and then the second piece is placed closely under the roof overhang. On the first section of the J-profile, mark the roof slope line with a marker. The template is cut as indicated in the diagram.
Installing the J-profile on the tong
Next, according to the prepared pattern, a section of the J-profile is measured, which will then be used on the left side of the roof. Place the template at a 90-degree angle, face up, on a section of the J-element and make a mark, then cut off the excess completely along the drawn line.
Turning the homemade template face down, mark the second segment of the J-element. Once trimmed, it will be installed on the right side of the roof.
The resulting sections of profiles are joined and secured to the wall using self-tapping screws, the first of which is screwed into the top point of the uppermost hole for fasteners. Other screws are screwed into the central part of the nail socket. The pitch between fasteners is about 25-30 cm.
The siding must be fastened in the center of a special hole.
Installing siding on the gable
DIY home decoration
Professionals in the field of building cladding will complete the work much faster than the average person, but it is so interesting to try your hand at all areas of construction, especially if the house was built with your own hands.
Installation of siding begins with the preparatory stage, namely cleaning the walls from overhanging elements. Everything needs to be removed - drainpipes, trim, shutters. Then precise markings are made according to the building level and the building is sheathed using a thin beam. They are attached to a wooden house with self-tapping screws, to a brick or stone house using a hammer drill using dowels.
After this, the rest are attached - in the corners and for cashing doors and windows, you need to set the j option. In this case, it is necessary to leave a small distance to the lower and upper edges of the building, since the profiles can be cooled or heated and either shrink or expand due to temperature changes. If the latter happens and the product rests on a hard surface, then it may crack and burst, and this will lead to deformation of the entire cladding. It is better to fasten the profile to the wooden casing with press washers, since when using nails, a hammer can also damage the material. They need to be slightly loosened so that the gap allows the product to move easily when the temperature changes.
The correct installation of j profiles for doors and windows is as follows: first attach the vertical strips and only then the horizontal ones. At both ends, the upper material is bent and placed on the vertical ones.
All preparatory work has been completed and only now the installation of siding panels begins. First the bottom one, which will close the starting profile, and then the subsequent ones. They are inserted into the products and snap securely, and are also fixed with press washers. One of them is pushed into the oval slots of the panel in its center, which is also not screwed in, as in the case of fastening profiles.
The j type is mounted under the roof slopes, and the starting type is mounted on the eaves. Work continues, as with the cladding of the house itself. The panels can be overlapped, but it is better to use an H profile.
Adviсe
A few words about the color of the J-profile. As a rule, the element is produced in the same color variations as the siding itself, so choosing this element according to shades is usually possible without any problems. But in some cases, when decorating a house, a profile can be used in a different, contrasting color. Despite the fact that designers often use this technique and consider it one of the successful ways to decorate a building, you should still experiment with colors carefully
It is important to remember that such inserts do not always look harmonious
Pink siding trim
Vinyl siding trim
You also need to remember that dark elements will get very hot in the sun, so siding and profiles of such shades should not be used on the sunny side, even in small quantities. Due to exposure to sunlight, they can bend and lose their appearance (we are talking about plastic parts).
Covering the gable with siding. One of the options
Sometimes profiles on the roof gables may not be installed at all, motivating such a decision by the fact that this allows you to save certain funds, but the decorative elements are still not visible. But still, you should not neglect the use of the J-profile in this place: the fact is that during heavy rain, moisture will penetrate through the remaining cracks between the wall of the house and the siding, as a result, the cladding of the building will not be able to perform a protective function - the wood will still be redundant become moisturized and lose their qualities.
Manufacturers
After you got acquainted with the J-profile, quickly learned about its main features and specific application, you probably eventually came to the main question: how to make a choice? And which manufacturers should you give preference to? We invite you to understand this difficult issue by considering the main characteristics of the products of leading manufacturing companies in the modern building materials market, which, for your convenience, we have collected in the table below.
| Profile view | J-profile Döcke (Deck) | Alta profile | Grandline |
| Firma-, Russian Federation | "Alta-profile", Russian Federation | "Grandline Retail Network", Russian Federation | |
| Length (mm.) | 3045-3051 | 2700-3000 | 3045-3051 |
| Color solutions | Shades of red and brown predominate: pomegranate, chocolate, etc. | The predominant colors are gold, brown, apricot and gray. | The predominant colors are various shades of white, yellow, red, blue, etc. The range of color solutions is very wide. |
| Price (rub/piece) | 500-700 | 170-200 | 180-700 |
Cornice and pediment overhangs and their purpose
Depending on the shape of the roof of the house, roof outlets can be implemented both in the eaves area (hip and hipped structures) and on the gable side (gable roofs).
The eaves overhang is formed by a rafter system that protrudes relative to the walls of the house at a certain distance. Its value is determined by the project or can be set at the request of the developer. If there are additional vertical supports, the eaves outlet can serve as a canopy over the porch or a small veranda.
The gable overhang is made from the end (side) side of the building. Its optimal width is 60-70 cm, the minimum is 30, the maximum is no more than 100 cm. The carrier for the outlet is the roof sheathing, so it is not recommended to make it too wide.
Roof extension options: on the left - cornice, on the right - pediment
In both cases, overhangs serve not only as a decorative finishing element for finishing the house, but also protect the walls, base and foundation of the building from excessive wetting. This point is especially important when using plaster as a façade material, which is more sensitive to moisture. Therefore, it is necessary to hem the gables and cornices under the roof. Otherwise, the protruding part of the roofing “pie” becomes vulnerable to rain and wind. Exposed wood construction and insulation may deteriorate. Strong gusts of wind in an unprotected place can weaken the roofing fasteners or completely tear off the material. Proper finishing of the overhanging part of the roof does not require further maintenance over a long period of operation.
Dimensions
This parameter may vary depending on the brand of product. However, in general, the profile dimensions can be called standard. Depending on the types described above, the size ranges of the slats are as follows:
- classic profile – width from 23 to 25 mm, height from 45 to 46 mm;
- extended (for platbands) – strip width from 23 to 25 mm, height from 80 to 95 mm;
- flexible (with notches) – profile width from 23 to 25, height from 45 to 46 mm.
The indicated indicators, depending on the manufacturer, may differ by an average of 2-5 mm. Taking into account the specifics of the finishing material itself, such deviations, as a rule, can be considered insignificant. However, they should be taken into account when calculating the required number of elements, which will avoid additional costs and unpleasant surprises during the installation process. An equally important parameter is the length of the profile. Most often, planks with a length of 3.05 and 3.66 m go on sale.
What is it and why is it needed
There are a lot of components that are used when installing siding panels. Each of the elements has its own purpose, a certain appearance and a specific shape. The J-profile is also a necessary part that is used for several purposes. This could be covering a row of siding panels on the side, creating door/window openings, and so on. For example, a J-profile can be strengthened along the edge of the facade of a house, and siding panels are inserted into its “heel” (special groove). In general, it is used where the siding line ends, and is needed to give the siding a finished and neat look.
Types of profiles for installing panels
J-profile
The J-profile can be called universal - due to the peculiarities of its structure, it can often replace other elements necessary for the installation of siding panels. This is one of its main advantages. At the same time, the profile is quite cheap.
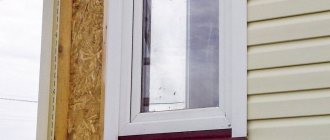
Installation of siding around windows and doors
What can the J-profile be used for?
- Decorating and covering the end parts of a number of installed siding panels.
Absolutely any cuts, be they at the end of the house or near a window, can easily be hidden by an element such as a J-profile. In general, this is its main purpose. You can also use it to decorate the gap between two types of different finishing materials. For this purpose, both wide and standard narrow profiles can be used. Areas of application of the j-profile - Replacement of the finishing element, which is very similar in shape to the J-profile. That is why it can be easily replaced with this bar.
- Completion of the gables.
The J-profile is most often used under the roof along the sloping side lines of the gable. The fact is that a regular finishing profile will not cope with the task of fixing a row of siding panels in this place, but the J-profile will perfectly perform this task and give a finished look to this part of the house. Of course, there are also special gable finishing strips on sale, but they are rarely found in stores due to their unpopularity. Schematic photo of J-profile installation - Replacement of corner elements. If you use two J-profiles at the corner of the house, you can do without a specially designed corner one. This is a fairly economical option and is allowed if there is not much money for upholstery of the house. However, the quality of the corner connection in this case leaves much to be desired. For reliability, the corners are glued with roofing felt.
- Framing horizontally located cornices. On one side, the soffits can be covered with a J-profile. In this case, the element itself is mounted first, and only then the soffits are installed.
- Plug the corner element from the outside in its upper/lower part, if necessary. To do this, you can cut a piece of J-profile so long that it is equal to twice the width of the corner element. A corner should be cut in the center of the strip, and then the piece is folded so that it neatly and smoothly goes around the corner that should be closed.
Bypassing the window with siding
It is also not recommended to use two J-profiles connected to each other instead of one H-element. The fact is that water, dirt, and dust will constantly accumulate between the joints, which is why the element will look untidy and ruin the appearance of the house.
J-profile for siding 3050 mm NORDSIDE, white
J-profile joint
Varieties
The group of J-elements includes 3 types of parts:
- The J-profile is used for cladding openings and the joints of the gable and roof. Element width 23 mm, height 46 mm, length can vary from 3.05 m to 3.66 m.
- J-rails come in two types. Flexible slats are designed for framing arched vaults over openings and cladding shaped fragments of cladding. Narrow slats are used to install soffits and side edges of siding panels. The standard height of such an element is 45 mm, width 13 mm, length 3.81 m.
- J-bevel or windshield is designed to trim the edges of roofs. It can also be used to frame recessed openings. The standard height of the plank is 200 mm, width 25 mm, length 3.05-3.66 m.
Using siding of different textures
Of course, you can cover the entire house with the same material, but there is such a type as alpha siding. This type is more durable and is used on the lower part of the building. The alpha profile will cover any foundation, with the only difference being that with a strip sheathing, the sheathing is attached to the concrete itself, and if the house is on stilts, you will have to make a suspended sheathing. The decorating process is like two peas in a pod, similar to the cladding of the house itself. The only thing that is necessary, in addition to cleaning the foundation itself, will have to do the same with the surface of the land.
For a more beautiful design, different textures are used. If the entire house is finished with ordinary, single-color material, then the foundation can be highlighted with siding similar to natural stone or brick. Old, time-worn wood also looks good. It is even impossible to distinguish real stone from siding made for this material in the photo.
When facing a house, to make it more attractive, you can use one product, but in different colors, or two, for example, stone and board.
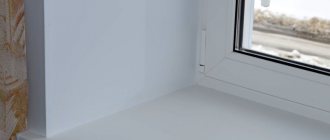
Installing a J-profile around the perimeter of the window
How is the J-profile installed around the perimeter of a window or door? Let's look at the work being done using a window as an example.
Step 1. According to the size of the window opening, the J-profile is cut into the required sections. For each window, measurements are taken individually. When cutting corners to fit them together, an allowance must be made - thus, the size of each part is increased by 15 cm.
First you need to cut the J-profile
Step 2. Corner joints are cut on each section of the J-profile at an angle of 45 degrees.
Cutting corner joints
Step 3. “Tabs” 2 cm long are made in the upper element in order to protect the inside of the cladding from the negative effects of the environment.
“Tab” 2 cm long to protect the inside of the cladding
Step 4. Installation of the J-profile on the window begins from the bottom. Install the first part along the lower border of the window, securing it with self-tapping screws.
Attaching the J-profile at the bottom of the window
Step 5. Then install the side sections of the J-profile.
Installation of J-profile side sections
Step 6. Install the upper element of the J-profile of the window opening.
Installing the top element of the window opening
Step 7. “Tabs” are inserted into the side sections of the J-profile.
The “tongue” is inserted into the side section of the J-profile
We install frames of openings
Installation diagram of a siding panel near a window under the finishing strip
For most inexperienced craftsmen, difficulties arise precisely at the stage of framing window and door openings. The order of work will vary depending on how the openings are arranged in relation to the plane of the wall.
Openings in the same plane with the facade
Method of connecting near-window profiles
In this case, we do the following.
First step. We waterproof openings.
Second step. We attach platbands or J-profiles to the openings. We equip each opening using 4 platbands: a pair of vertical and a pair of horizontal.
Third step. Connecting profiles.
Method of connecting near-window profiles
To make the connection of the platbands as neat as possible, we do this:
- we create bridge cuts on each side of the upper profile;
- bend the bridges down so that precipitation is diverted into the profile below;
- remove pieces of material on the side elements that prevent connection with the casing at the top;
- We connect the side and top profiles. As a result, the bridges should be inside the profiles.
The platband at the bottom is connected in exactly the same way, only the bridges will need to be cut and bent on the side elements for their further laying on the profile below.
Openings are recessed into the facade
The location of the sheathing slats around the perimeter of the window for attaching the finishing siding profile. The location of the finishing siding profile on the frame of the window opening.
When installing near-window profiles, we follow the same recommendations as when installing platbands, i.e. We create cuts on the profile corresponding to the depth of the opening, and then bend the bridges and insert them into the finishing elements.
Take the time to understand the principles of bending such bridges. We make them so that they cover the joint of the cladding elements. As a result, moisture will not be able to penetrate inside.
A technique for creating bridges (or tongues) to remove precipitation and moisture from profiles
Types of cornice filing
In accordance with the architectural preferences of the developer, the installation of roof lining along the eaves can be done in two ways.
- Along the rafter system (without box)
- Perpendicular to the wall of the house.
In the first case, the rafter legs extending beyond the walls are lined from the inside with lathing for further decoration of the overhang with boards or soffits. Thus, it looks more aesthetically pleasing due to the natural continuation of the roof.
Option for hemming along rafters
But this method is not always convenient, because... Most specialized finishing materials and components are made for the horizontal finishing option, where the roof overhang and the wall are located perpendicular (at an angle of 90 degrees) to each other. To do this, a special box is mounted, onto which finishing material is subsequently stuffed.
Roof release with box
In the photo on the left, the cornice box ends flush with the wall, and on the right it continues to the gable projection.
Installing the finishing strip for siding under the eaves step by step instructions
We will describe the process of installing the finishing strip for siding in the form of step-by-step instructions.
Step 1.
Prepare the walls of the house for the installation of sheathing and siding - get rid of old paint and plaster, remove all protruding elements.
Step 2.
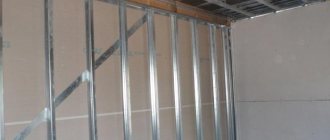
Form a smooth and strong sheathing of wooden beams or metal profiles on the surface of the walls.
Step 3.
Insulate the walls of the house with mineral wool. Place it between the sheathing elements and secure it with disc-shaped dowels. Stretch a steam and windproof film over the insulation on top.
Step 4.
Proceed with the siding installation process itself - install the starter, corner and H-shaped strips, and begin laying the panels themselves between them.
Step 5.
Start installing the finishing strip after installing the penultimate panel. Determine how many pieces of this additional element you will need and what their length should be. Cut using a fine-toothed hacksaw.
Step 6.
Climb under the eaves along with one of the sections of the finishing strip and install it there so that the surface with the mounting holes faces down and the lock for the siding panel faces up.
Step 7
Secure the finish strip in place using screws or nails. Fasteners must have an anti-corrosion coating or be made of appropriate materials. Wrap screws and nails in the middle of the holes made on the finishing strip. They are necessary to compensate for the longitudinal expansion and contraction of the additional element when the temperature changes. The interval between fasteners should be from 3 to 5 such holes.
Step 8
Measure the distance from the second to last siding panel to the top edge of the finishing strip. Subtract 3 mm from the resulting figure.
Step 9
Using the measurements from the previous step, measure and cut the siding panel to the appropriate height. Then make rectangular holes in its upper part using perforating pliers. The interval between them should be 10 cm.
Step 10
Go under the eaves and insert the bottom of the last siding panel into the locking piece of the previous one. Then carefully place the top edge of the panel (the one you previously made holes in) into the locking part of the finishing strip. Check if the contact between them is reliable.
After completing all the operations indicated above, carry out the installation and edging of the soffits, which are necessary to finish the inside of the cornice hanging over the wall.
Using the same principle as stated earlier, install the finishing strip when laying the siding vertically. Only in this case, install the additional element together with the corner profile, and their mounting holes must coincide.
Using the instructions presented above, you will successfully install the finishing strip and end up with a beautiful and durable finish for your façade.
Description of components
The composition of components for siding includes elements for different purposes - from mainly decorative (accessories) to exclusively structural ones. Some elements are interchangeable, i.e. it is possible to use some parts instead of others.
This mainly applies to the design of external and, especially, internal corners. In addition, there are several ways to design window and door openings, which are selected depending on the depth of installation of the window or door block relative to the outer plane of the wall (the width of the slopes).
The main condition for the use of add-ons is full compliance of all cladding elements, which requires that they be manufactured by the same manufacturer and belong to a single line of material.
Some companies produce standardized additional elements suitable for all types of siding that are produced by this company. This unification is convenient for the consumer, who is insured against unpleasant mistakes when purchasing cladding materials.
NOTE! The specificity of using additional elements is that each of them is created for a specific task and has a specific installation method. Therefore, there is little point in talking about components as a whole; we must consider them separately.
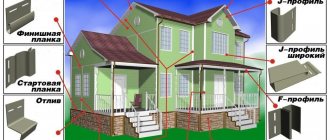
Starting bar
The starting strip is used as a supporting element for installing the bottom row of panels. In accordance with its purpose, it is installed first, i.e. the name speaks for itself - the entire siding installation process starts with it. Structurally, it consists of a lock for connecting to the panel and a nail strip for fixing to the subsystem (sheathing).
J-profile
A universal element, which in cross-section resembles a bracket that covers the edge of the panel. It can be used for various purposes - from decorating corners (in the absence of special profiles) to finishing the canvas along the top edge. Also, J-bar is used when designing large-depth window or door openings to connect siding to the window frame.
Corner profile
The purpose of the corner profile is to design the internal or external corners of the house, finishing the perimeter of window or door openings, building ledges, etc. For basement siding, corner profiles are made taking into account the pattern of the panels, although structurally elements with different patterns can be used (sometimes this is used for decoration).
In addition to the corner profile itself, a special support element is often made that replaces the sheathing - it is installed on the wall and serves as a support for the profile. This design makes it easier to create sheathing, since the requirements for corners are higher - the subsystem must correspond to the siding elements.
If necessary, the corner profile can be replaced with two J-bars, the shelves installed tightly next to each other in the right place. This method is usually used to save money in inconspicuous places, since from an aesthetic point of view the corner profile is much preferable.
The listed elements are the most important and necessary for installing siding.
The full list of extras is much wider and includes such elements as:
- Window strip.
- Finish bar.
- Platband.
- Soffit.
- Docking strip.
- H-profile.
- Wind board, or chamfer.
- Drain strip.
- Accessories.
The use of all elements is determined by necessity (the presence of appropriate components); installation is carried out in accordance with all general rules for working with siding.
Most often, all of them are installed before installing the panels, since they serve as additional fixing elements for them. Most of them are not produced for basement siding, but the specificity of these elements allows for use with non-standard panels.
Tools needed to work with finishing siding strip
Before you begin installing siding and finishing strips, you need to prepare not only the materials, but also the tools to work with them. All of them are shown in the table below.
Table. Tools needed to work with siding panels and trim strips.
| Tool name | Why is it needed? |
| To control the vertical evenness of walls. Without these tools, it is impossible to make high-quality sheathing for siding and finishing strips. | |
| To control the position of certain elements of sheathing and finishing horizontally and vertically. | |
| To measure length and distance | |
| For cutting metal sheathing profiles for siding | |
| For cutting vinyl siding and its additional elements, including trim strips | |
| For punching holes in siding panels for their installation and fixation with the finishing strip. | |
| For driving dowels and adjusting some parts | |
| For drilling holes in the wall for dowels that hold the sheathing in place | |
| For tightening self-tapping screws when installing finishing strips and other finishing elements | |
| For additional tightening or, conversely, unscrewing screws when installing the finishing strip |