Plasterboard finishing can be done in two ways: with or without a frame. In the frameless version of use, the gypsum material is fixed with glue, and the walls themselves act as the base. This technology has a lot of limitations in its application, and it can be used quite rarely.
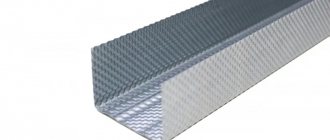
Ready assembled frame made of profiles
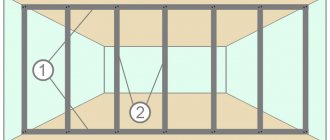
Installation of gypsum boards on a frame, on the contrary, is more universal. It is possible to assemble a base for further cladding in almost any situation. To do this, you just need to select the appropriate types of materials and adhere to technological requirements. The basis of any plasterboard structure is two types of parts - a rack profile and a guide. It is with the help of such slats that you can make complex complexes or simply decorate a room.
Existing types of profiles
This is what the guide profile looks like. So, what should you know about the materials for the frame for drywall?
Manufacturing materials
The main materials for making profiles for drywall are steel and aluminum. As a rule, there are steel profiles, galvanized, as well as ordinary ones, although they are quite rare. As for aluminum profiles, they are quite expensive, although they have very good characteristics.
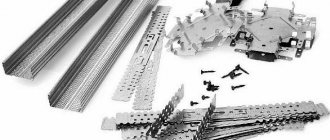
These are the main types of profiles for gypsum boards
Steel profiles can be not only galvanized, but also ordinary ones, which are used in rooms with normal operating conditions. As for rooms with high humidity, it is better to use galvanized profiles in them, although they are somewhat more expensive than conventional steel profiles.
Single-level suspended ceiling made of plasterboard (video)
As you can see, there is nothing complicated in installing a suspended ceiling. To install the structure, you just need to stock up on the necessary parts and patience. When choosing materials, pay attention to the features of your home. For example, if you have limited space in your room, then suspended ceilings on a single-level frame will harmoniously fit into the interior. If you are planning to install suspended ceilings in a spacious room, two-level structures are suitable for you. If desired, you can decorate the ceiling with original pendants.
Types of profiles
Profile for drywall: you need to know, sizes, types, purpose
Construction stores sell not only drywall, but also various profiles that differ in both shape and size. Each type of profile is intended for certain technological stages, and together they form a certain type of frame, to which the drywall is then attached.
Profiles for forming a frame
The following types of profiles exist:
- The guide profile PN (UW) has a U-shape and smooth side surfaces. Other types of profiles are inserted into this profile. Mounted around the perimeter of both vertical and horizontal surfaces. There are profile guides with dimensions of 28x27 mm, 50x40 mm, 65x40 mm, 75x40 mm, 100x40 mm.
The guide profile for gypsum board can be distinguished by its smooth shelves - Rack profile PS (CW). This profile is inserted into the guide profile, thus forming a frame. Jumpers are made and attached from the same profile. Characterized by a complex U-shape. This profile is also called load-bearing, and therefore must have increased rigidity. Similar profiles are produced in the following sizes: 50x50 mm, 65x50 mm, 75x50 mm, 100x50 mm.
The rack profile for gypsum board has additional stiffening ribs and shelves - Ceiling profile PP, as well as PPN - guide PP (UD) and load-bearing PNP (CD), respectively. These profiles are shaped like the letter “P”, while the supporting one has a more complex configuration, since it is distinguished by the presence of shelves and stiffeners. The ceiling supporting profile is characterized by smaller dimensions compared to the rack profile, since ceiling plasterboard has less weight and puts less load on the entire system. The guide (UD) profile has dimensions of 28x27 mm, and the ceiling carrier (CD) has dimensions of 60x27 mm.
The ceiling profile can also be guide or load-bearing. Differ in smaller sizes (compared to wall ones) - The arched profile has a more complex design, since the side shelves have cuts, thanks to which the profile easily bends, creating various shapes of mounted surfaces.
These profiles are quite enough to create a frame for attaching drywall, and of various shapes, if the craftsmen have certain skills.
DIY drywall. Profile for drywall. Types of profiles for drywall
Additional items
To mount a full-fledged frame, profiles alone are not enough. There are a number of additional elements that allow you to assemble a plasterboard system, ensuring all technological stages. These elements should include:
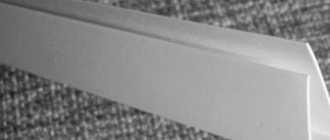
- Corner profile, which allows you to design the corner of a plasterboard system. In turn, profiles for corners are:
- With perforation on both shelves, which allows the corner to be securely held in the layer of plaster (putty).
- With a special mesh glued to the corner shelves, which allows you to strengthen the corner structure.
- On a paper basis, when two metallized strips are glued onto thick paper. It is mainly used to decorate corners that are not used under high loads.
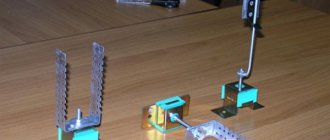
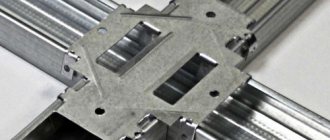
Corner profile - for forming and protecting the corners of plasterboard structures - Perforated hangers, which are intended for fastening and resemble a perforated tape divided into 3 parts. The middle part is not perforated, but has holes for attaching this element to the base. The perforated sides are bent at an angle of 90 degrees and are used for attaching supporting profiles.
Perforated hangers and methods of using them - Anchor hangers for forming the frame of plasterboard ceiling systems. Often such suspensions are called springs, and with their help it is easy to adjust the level of plasterboard ceiling systems.
Anchor suspension - for easy adjustment of suspended ceiling height - PP hangers (crabs), both single-level and two-level. Designed for reliable fixation of places where profiles are connected at an angle of 90 degrees in opposite directions. Used in suspended plasterboard systems.
Connectors - single-level and two-level - Extensions, in the form of brackets, which are intended to lengthen supporting profiles.
When forming a frame, they often do without some additional elements, such as “crabs” (suspensions for fixing intersecting profiles), as well as extensions, replacing them with segments, for example, guide profiles. Unfortunately, this takes a lot of time and such savings are not always justified.
How to connect/extend a profile for drywall
How to properly lengthen a profile, Express connection method, how to connect a profile
Often, instead of perforated hangers, cut profiles are used, which are bent in the shape of the letter “L”. This element is more rigid compared to “P” suspensions. This is especially true for fastening profiles in corners or in places where it is not possible to fully install a natural fastener element.
Two ways to fix rack profiles to the wall - using a perforated hanger and a piece of profile
Perforated hangers can be used both for ceiling systems and for wall ones, while wall hangers are more powerful than ceiling fastening elements.
Profile length
In retail outlets, profiles with a length of 3 and 4 meters are mainly found, while the most common are profiles whose length is 3 meters.
Profiles longer than 3 meters are used if the dimensions of one side of the room are in the range from 3 to 4 meters. In all other cases, preference should be given to profiles 3 meters long. It is more convenient to work with them in every sense. If it is necessary to increase profiles, then this should be done in a checkerboard pattern so that the reliability of the entire structure does not suffer.
DIY suspended ceiling lathing
For lathing a suspended ceiling, a wooden or metal profile is used. If you are going to install a suspended ceiling in the bathroom, then a metal frame is suitable for you, since it does not deform under the influence of water vapor and moisture. It is not difficult to install profiles yourself.
When installing, adhere to the following algorithm:
- The first thing to do is choose the height of the suspended ceiling.
- Then you need to use a pencil to draw a horizontal line on the wall. Remember that correct marking is the key to successful installation, so take this operation very seriously.
- After you have drawn a horizontal line, mark the entire room. To ensure that the lines are straight, use a level.
- Then you need to install metal profiles along the borders and attach them to the surface of the walls using galvanized screws and specialized plastic dowels.
- Next, install the ceiling profile to the direct hangers. Remember that its ends must be installed in the guide profiles. Suspensions must be attached in increments of no more than 60-70 centimeters.
DIY suspended ceiling: lathing (video)
Profile selection criteria
In addition to the type and size of the profile for drywall, you also need to choose the thickness of the metal and the manufacturer.
As a rule, when you come to a hardware store, you can see that there are profiles that differ in cost, although their sizes are the same (standard). The most expensive are profiles from Europe, and the cheapest are from China. Profiles from a domestic manufacturer have an average price.
Depending on the thickness of the metal
It is not difficult to understand the difference if you pick up these elements of plasterboard systems. Some, the most expensive, are made of metal with a thickness of 0.5 mm, while others, especially Chinese ones, are made of very thin metal, since they do not withstand various loads well, although in some designs this does not matter much.
The choice of profiles depends on what type of plasterboard building structure is planned to be erected. If this is a partition, then it is better to take these elements as thick and reliable as possible.
The dimensions are standard, but the weight of the same profile may be different - due to the different thickness of the metal from which it is made
Thicker profiles should also be chosen if the height of the walls is more than 2 and a half meters, since the higher the partition, the greater the load on it. The structure of the partition can be strengthened by installing load-bearing profiles more often. As a rule, they are installed in increments of 60 cm, but it is also possible in increments of 40 cm. The main thing to consider here is that the width of the plasterboard sheet is standard and is 1200 mm. The joints of the plasterboard sheets should be located on the profiles. This is especially true if two layers of drywall are installed and the load on the frame doubles.
Depending on the manufacturer
Naturally, well-known manufacturers, such as, are quite scrupulous about the quality of their products, but the quality components of such systems also cost accordingly. It is a pleasure to work with high-quality products, especially since the result is very obvious. Unfortunately, not everyone can afford such a “luxury” and many buy either cheap (Chinese) or domestic ones, which have an average price, although everything is absolutely arbitrary.
This is a screenshot with prices for drywall profiles from one of the online stores
As a rule, domestic products do not meet many quality indicators, especially since there are many manufacturers who are not particularly “obsessed” with their authority and stupidly produce low-quality products that few people want to work with. The main problem is the discrepancy in many sizes, as well as the poor quality of the metal and coating, which is sometimes noticeable to the naked eye. In addition, the thickness of the metal does not correspond to the declared value. In other words, domestic firms are simply deceiving their potential clients. If you count these negative aspects, then the price does not correspond to what the manufacturers set. Despite this, for many, quality is not a priority because savings are a priority.
Domestic manufacturers produce profiles with a corrugated surface, which increases the rigidity of the profiles, but the presence of these “bumps” significantly affects the quality of the joints, since these, although insignificant, bulges do not allow the joints to be reliably tightened. In addition, the cost of profiles is almost at the Knauf level, while they are much more difficult to operate. In any case, the owner makes the decision.
Profile for drywall: how to choose and not overpay
Installation of guides for a suspended ceiling: step-by-step instructions
Installation of guides is a very important process, because the durability of the structure directly depends on it. The metal profile guides must be secured evenly around the entire perimeter of the room. In this case, in the places where the product comes into contact with the wall, you need to glue the profile using a specialized sealing tape. This technique is needed to extend the durability of the structure.
Pay special attention to the configuration of the dowel-nails. It is desirable that they have a mushroom-shaped cap. Fastening with such dowels will be more durable and will strengthen the contact between the profile and the wall. It is advisable to install such dowels by screwing the product. Read more about choosing dowels for fastening in the review: whitestrip.ru.
There should be no gaps between the guide profiles. Otherwise, the structure may collapse.
Which is better: heated floors or radiators?
Warm floorBatteries
Counting the number of profiles
Before you go to a retail outlet for building materials, you need to correctly calculate the number of all profiles, especially if you know the purpose and type of these profiles. Although this process takes up some useful time, it is necessary to do this in order to imagine what the entire structure will look like. To do this, you need to take a piece of paper and draw all the profiles on it, indicating all the sizes. In any case, it is better to take elements of plasterboard systems with some reserve.
How to calculate a profile for drywall
Calculations for one wall
Uneven walls can always be leveled using drywall. To do this, it is enough to mount the frame, aligning it strictly to the level and sewing it with sheets of plasterboard. At the same time, we should not forget that plasterboard systems take away part of the living space, which is especially critical for our apartments, which are not large in size and every centimeter counts.
Calculations are carried out according to the following principle:
- Profile guides (PN) are located along the perimeter of the wall, so it is enough to measure its length and height, multiplying, after adding these indicators, by two. If there are windows or doors, the dimensions of these elements should be added to the calculations.
This is what the frame for the partition looks like - Rack profiles (SP) are installed every 0.6 meters, but this figure should not be reduced. If the outer opening is at least 10 cm larger than 60 cm, you should definitely install another rack profile. It is imperative to take into account the height of the wall, although this figure is unlikely to be more than 3 meters.
- The presence of jumpers, which are made from a rack profile. They are placed at a distance of 75 cm from each other, and the upper jumper should be at the junction of the plasterboard sheets if the sheets are not long enough in height. Therefore, the dimensions of all jumpers are added up and added to the rack profiles.
Considering this calculation method, the number of profiles can be easily calculated for any wall or for several walls at the same time. We should also not forget about additional elements of plasterboard systems, if necessary.
Calculation of the number of profiles for the ceiling
The calculation methodology is almost the same, with the exception of the type of profiles used.
The calculation approach is as follows:
- The total length of the guide profiles (UD) must correspond to the perimeter of the ceiling. The length and width of the ceiling are added together, after which the result is multiplied by two. In any case, you need to take profiles so that there are enough of them. If you need 14 meters of profiles, you will have to take 15 meters, since the length of each profile corresponds to 3 meters.
First, guide ceiling profiles are installed - The footage of load-bearing profiles (CD) is calculated in almost the same way as for walls, but one should take into account the fact that it is better to place ceiling profiles not every 0.6 meters, but every 0.4 meters, which makes the structure more reliable.
- Jumpers are made from the supporting profile, which pass at the joints of plasterboard sheets. When the supporting profiles are located every 40 cm, there is no need to fence any grids. The lintels are mounted taking into account the length of the plasterboard sheets, so they can be placed every 2 meters and every 2.5 meters, since you can purchase ceiling plasterboard with dimensions of 2000x1200 mm and 2500x1200 mm. We should not forget about the hanging elements, which must be sufficient to support the weight of the suspended ceiling and ensure that the entire structure is strong and reliable.
Suspended ceiling on a metal frame: features and installation
The suspended ceiling design can be made on a single-level or two-level metal frame. Each method has its own parameters and advantages.
If your room is small and you want to save as much space as possible, then give preference to a single-level metal frame. It consists of two types of profiles - connecting and main. This structure is secured using special brackets and hangers. Connecting profiles are attached exclusively crosswise.
When installing a suspended ceiling with a single-level structure, maintain the distance between the wall and the outer profile. The optimal distance is 180 mm. It is recommended to cover the finished structure with plasterboard sheets with high moisture resistance. During sheathing, lay the sheets strictly perpendicular to the supporting profiles.
The suspended ceiling, made on a two-level metal frame, consists of two types of profiles - main and load-bearing. Products are placed perpendicular to each other.
If you have opted for a two-level design, take into account the following nuances:
- To tightly fix the metal frame, it is advisable to use self-tapping screws.
- The frame of the suspended ceiling and the frame of the wall must be sheathed in a similar way.
- To fix gypsum board sheets, use T-shaped supports.
How to make a plasterboard ceiling with your own hands - detailed instruction article
Compared to the advantages, their number is quite modest. However, you still need to mention them - so that before the actual installation you weigh all the pros and cons and make the most convenient decision for you:
- guide profiles;
- ceiling profiles;
- direct ceiling suspensions;
- “crabs”;
- metal scissors;
- adhesive sealing tape;
- anchor wedges;
- dowels;
- painting cord;
- laser level (can be replaced with a hydraulic level);
- perforator;
- screwdriver;
- metal screws with frequent pitches of 25-35 mm;
- self-tapping screws with a press washer;
- roulette;
- hammer;
- knife;
- spatulas wide and narrow.
Perhaps the last item on our list will have the most impact on someone, but this will not overshadow the fact of the numerous advantages that you receive. If you are still in doubt about the choice, here are the main advantages of the material that allow it to be among the leaders in the market of finishing materials for walls and ceilings: In order to properly decorate a plasterboard ceiling, there is only a little left - in fact, to lay this plasterboard. Below is how to do it yourself, so that you don’t have to regret the mistakes you made later. The next stage of installing a plasterboard ceiling involves covering the entire perimeter of the room with guide profiles (PN).
The size of such a profile is 2.7 x 2.7 cm. Of course, this process has its own peculiarities: the PP is mounted from the wall and inserted into the guide profiles. Then they mark the horizontal level of the location of the ceiling profiles (a level is used for this purpose), and then attach it using a double-sided connection to the U-shaped suspension.
In this case, for such a connection, metal-to-metal screws (self-tapping screws) are used.
How to treat the surface → Room decoration → How to choose the right paint → Surface treatment technologies → Leveling and finishing the walls → Selecting and applying a primer → Removal from the surface → Stretch ceilings and technologies → Reviews and testimonials