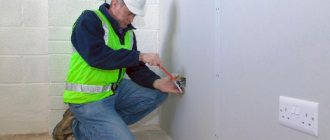
Drywall is one of the most popular and versatile materials for interior decoration. With its help, you can level the walls and ceiling, hide all the unevenness, wiring, and create original decorative elements. To install wiring under drywall, special fire-resistant pipes must be used - corrugated hoses, as well as a junction box for drywall.
Classification
In order for the product to fit perfectly when installed in the walls of your type of room, you need to thoroughly understand the classification of options that are currently on sale.
Products are divided depending on the material:
- metal;
- wooden with fire-resistant impregnation;
- made of self-extinguishing plastic.
Buyers can choose a model that is more suitable in shape:
- round;
- square;
- paired - 2-3 or more boxes are completed (for example, a pair of outlets for the lid and one for the socket).
What is a regular junction box?
- The standard option is a cylindrical design used for installation. It is fixed to the inside of the wall, after which the electrical wiring element is secured with it.
- Special antennae are attached to the screw. Fixation is carried out in the cavity using the clamping method from the inside. Plastic or metal is used to make antennae, but there are no significant differences in operation.
- Different models vary in size. These days, manufacturers not only make mounting boxes of different sizes, diameters and depths. They are often made specifically for sockets from a particular manufacturer, even for certain models of sockets.
- The distribution box for drywall with a lid may have inaccuracies in dimensions. In this case, it is important to ensure that the installation elements exactly correspond to the required parameters. If this correspondence does not exist, then certain problems may arise during installation.
It is best to purchase both the junction box and the element being installed at the same time. Thus, when installing in hollow walls, you will avoid problems with mismatched dimensions and sizes of fastening elements.
Description of paired mounting components
- On store shelves you can often find an outlet box made in the form of 2-3 sections. This is a fairly practical solution, thanks to which you can save your budget. Boxes of this type provide more comfortable operation.
- If you decide to purchase paired products, then make sure that the components are placed in the compartments freely, without touching. In products of this type, the distance parameter from the center of one radius to another is indicated. Focus on it when choosing a socket and switch.
Pay attention to the material from which the junction box is made. Modern models are made of plastic, which has self-extinguishing properties. To ensure a higher level of security, you should select this option.
Types of boxes
In their structure, installation boxes resemble a cylindrical housing with a lid, on the outer sides of which there are special clamps, metal screws or bolts for fastening, making it easier to install the element into the wall. For drywall, special products are produced with antennae in the back, which securely hold the product in the hollow wall due to the frame.
The box is made from:
- Metal;
- Wood with fire-retardant impregnation;
- Impact-resistant, self-extinguishing plastic.
The type of installation differs:
- External - installed on top of the wall;
- Hidden - mounted by chipping into the wall itself.
By form:
- Round;
- Square;
- Paired, in which 2, 3 or more boxes are combined (for example, 2 outlets for a cover and a separate outlet for a socket);
- Single.
The installation box is available in various diameters and depths. The choice of these indicators before installation is important and is dictated by the following factors:
- Material of manufacture. Plastic boxes are smaller, metal boxes are more often used for wiring in large industrial premises;
- Open or hidden installation method. For open boxes, plastic boxes are more often used, since they have large variations in shapes and methods of external decoration to improve their aesthetic perception in the interior;
- Wall material. The drywall box is selected to the same depth as the distance between the original wall and the sheathing, so that the product does not fall into the hollow space;
- The nature of the distribution of wiring. Larger boxes are used for the inlet box, since they contain a larger number of units than for the end box.
Twin box
Why are distribution boxes needed?
When installing electrical networks indoors and outdoors, you cannot do without special devices called electrical boxes. Their purpose is to accommodate cables, connections, outlets, etc.
Two types of boxes are used: distribution boxes, necessary for installing wire branching points, and installation boxes, used for placing switch mechanisms, sockets and other products in the wall. Installation products can also perform the functions of distribution boxes.
To connect the wires to the points of electricity consumption, it is necessary to route them from the distribution board. For these purposes, the electrical wiring must be divided into mains.
At the points where the supply and consumption wires are connected, distribution boxes are installed, inside which the electrical wires are switched (as shown in the photo). They are enclosures with side inlets and a lid.
Wire junction box
PUEs provide for connecting wires by welding, soldering, crimping, using clamps and terminal blocks. Some are accustomed to limiting themselves to just twisting, but without the use of soldering this method is not considered absolutely reliable.
The choice of connection method depends on the number of wires, the cross-section of the wires (the same or not) and their material. After the connection is made, the wires are insulated and placed in the box so that there is no contact between them.
Soldering wires in the junction box
The box can be equipped with terminal blocks for easy connection of wires.
Junction box with installed terminal blocks
The main purpose of the boxes is to ensure the fire safety of the building and the people in it. The places where wires are connected are the most dangerous in terms of fire risk.
The junction box isolates the assembly from finishing materials that have the potential to ignite. In addition, the device protects conductors from external influences and protects people from electric shock if they accidentally touch exposed contacts. The secondary task of the products is to decorate the not very aesthetically pleasing type of wire connection.
Electrical installation product with cover
Distribution boxes are of internal design (hidden), used for installation in the wall, and surface-mounted, designed for installation on the surface of the wall (used for open wiring).
Open Wiring Box
According to the requirements of the PUE, it is necessary that after installation of the products, access to their contents is provided for inspection or repair. To do this, when installing boxes inside the wall, it is necessary to fix the installation location and, if necessary, ensure quick dismantling of the cladding. If boxes are installed behind the surface of the suspended ceiling, inspection hatches should be provided.
Important! You can not use junction boxes, but connect all points of electricity consumption with a separate cable to the electrical panel. But this method of constructing an electrical network involves the use of a large amount of materials and time. In addition, the aesthetics of placing bundles of wires (with open wiring) is also questionable.
Features of purpose and designation
The origin of the term junction box was based on the name of the process of connecting wiring, which was used everywhere at least 10-20 years ago and was considered the most reliable - soldering or “disconnecting” wires from each other. The role of the box was played by a tin can, which was mounted into a wall made of concrete, brick or plasterboard. However, over time of use and under the influence of direct current, it succumbed to corrosion, the wiring became hot, which increased the risk of electric shock or fire.
Even earlier, wires were connected by twisting, where the exposed wires were wrapped with insulating tape. This installation method was less labor-intensive, but also brought much more trouble due to the high risk of short circuiting.
With the development of technology, with the advent of improved materials and variations in their use, the installation box has changed, as well as the technique for connecting the wiring in it. Now they are speeding up installation and making it more comfortable and safe in subsequent use by:
- Self-clamping terminals;
- Connecting insulating clamps;
- Pressed sleeves.
Although the process of welding and soldering wires is still used by many electricians to save money on these materials.
Many variations in wiring connection techniques have influenced the difference in the name of the “solder point”. So a junction box in one place of sale and another is called a distribution, installation or branching box. Although all these terms define the same product.
Decorative junction box in retro style for outdoor installation
What parameters are used to select boxes for drywall?
- The manufacturing material must be selected according to the operating conditions. Plastic samples are more suitable for domestic premises, and metal products are used for wiring industrial structures.
- Installation method. With the open method, plastic products are more often purchased, since they are produced in a wide range of forms. There are also more opportunities to choose the appropriate option according to the aesthetic requirements of the room; the box will look better in the interior.
- Features of wall fastening. When choosing a suitable box, you should pay attention to the distance from the drywall to the main wall. In accordance with this indicator, the depth of the product is selected. If this parameter is not observed, the box may fall into the cavity.
- Type of electrical wiring distribution. The introductory one requires the use of larger distribution boxes containing a larger number of catches than is necessary for the end one.
Junction box installation
The video in this article will help you learn all the intricacies of installation.
The wiring is placed before the installed frame is covered with plasterboard.
Laying electrical wiring wrapped in a corrugated pipe in a metal wall frame
Installation of distribution boxes is carried out after finishing covering the walls with sheets of plasterboard. Installation of products in a hollow wall refers to a closed-type wiring device.
Important! When drawing up a layout of mounting products, you must ensure that they do not fall on the frame elements.
The easiest way to do the work is to use a drill and special plasterboard bits: the dimensions of the tool are selected in accordance with the dimensions of the junction boxes. Accordingly, if the box has a diameter of 68 mm, it is most convenient to work with a crown of the same size.
Crown for working with drywall
If you don’t have crowns, you can get by with a drill or a construction knife. But in this case, the process will take a little longer, and in addition, the edges of the drywall will not be perfectly smooth.
The hole can also be cut with a knife.
In addition to the tool for making holes, you cannot do without a level, marker, screwdriver or screwdriver.
Step-by-step instructions for installing junction boxes:
Location of electrical components
Marking the locations of the boxes
Drywall bit 68 mm for making a hole for a junction box
Extracted wires
Connected ends of wires
Finished box with lid
All types of work on the installation of an electrical network in a room are inextricably linked with the installation of boxes for switching wires. They are an important link, and their proper placement will ensure a high-quality supply of electricity to the facility. As you can see, distribution boxes for drywall can be installed by a person even without special knowledge and skills.
Workflow Stages
Installation of electrical wiring under drywall is carried out in the following sequence:
- Preparatory work;
- Cabling;
- Fastening distribution boxes;
- Installation of sockets and switches.
Let's analyze each stage separately.
Stage 1 - preparation
First, you must decide where the wiring will be laid - on the ceiling or on the walls. Based on this, all subsequent work will be planned.
Once you have decided on the installation locations, you need to draw up a diagram. All switches and sockets are marked on it, as well as cable laying locations and clearances from the ceiling and floor. An example is shown below, it may be simpler for you, it all depends on the room and the amount of electrical equipment used in it.
It is important to provide for all wiring elements in order to know the location of structural elements and calculate the exact amount of materials and components
You can even make markings on the walls so you can see where the cable will go, where boxes and other elements need to be attached.
Having a diagram in hand, you can carry out calculations of everything necessary. To work we need the following:
| Illustration | Description |
| Wiring cable . It can be aluminum or copper; the second option is more expensive, but its quality is higher. As for the section, it is selected according to the project; you do not need to decide on your own which option to lay. The documentation always contains data that you should use. | |
| Corrugated pipe . Used for laying wires; the size is selected based on the number of cables to be laid. The quantity of corrugated pipe will be the same as the quantity of cable; it is made of PVC, so you can easily cut pieces of the desired size as you work. | |
| Fastenings for corrugated pipes . Either special clips can be used, as in the photo, or dowels with tie clamps can also be used. Fasteners are sold in electrical stores and are selected according to the diameter of the corrugated pipe. | |
| Distribution boxes . The junction box for drywall differs from structures installed in walls. It is secured with four screws and provides easy access to connections if necessary. | |
| Socket boxes. Used for mounting switches and sockets. They also have a fixation system in the plasterboard sheet. | |
| Connecting terminals. There is no need to twist the wires by hand or wrap them with electrical tape. If there are special connectors with which the work can be done faster and better. |
The tool you need is the following:
- Hammer . Used if you need to secure a corrugated pipe to a concrete surface. It is equipped with a drill according to the diameter of the dowels;
- Screwdriver . With its help, self-tapping screws are tightened and holes are cut for distribution boxes and socket boxes;
- Side cutters and knife . Used for cutting wires, stripping insulation and cutting corrugated pipes.
Stage 2 - Cable Laying
Laying the wire under the drywall is done in the following order:
| Illustration | Description of the stage |
| Holes are drilled in the profile . This option is used when the wire is laid in a plasterboard partition. The partition itself is sheathed on one side, after which you can begin to lay the cable in the corrugated pipe. | |
You can mount the corrugated pipe on the wall or ceiling. This option is used if you are covering the surface with gypsum board, the process is simple:
| |
| The cable must first be tightened into a corrugated pipe . To do this, steel wire is used, it is pulled through the sleeve, after which the end of the cable is tied and pulled inward. | |
| This is what wiring looks like in drywall . If the elements pass through the profile, then there is no need to secure them additionally, everything will stay in place as is. |
Stage 3 - installation of distribution boxes
The distribution box for drywall is installed as follows:
| Illustration | Description of the stage |
| The location of the boxes is marked . Holes can be made both in advance - before attaching the sheets, and afterwards. The main thing is to mark the material in the right places so as not to spoil it. You can cut drywall with a regular construction knife. It is important to do the work carefully so that you do not have to putty the damage. | |
| The item is being tried on . Make sure the drywall junction box fits into place and adjust the slot if necessary. The element should fit tightly and be positioned evenly. After fitting, the box is taken out, and the ends of the wires are taken out from under the sheet. | |
| The wires are pulled into the box and connected . It is important to do everything according to the diagram and fasten the cable properly. For work, you can use different types of terminals; the photo shows an option using a special tool. The instructions will help you understand how to use it. | |
| The finished connections are placed in a box . Just carefully place all the wires and close the structure with a lid. |
Stage 4 - installation of socket boxes
When the electrical wiring is laid under the drywall, you need to remove the sockets and switches. For their fastening, special elements are used, which are called socket boxes; their price is low, but installation is greatly simplified.
Doing the work yourself:
- Holes are drilled . For the work, a special crown is used, the diameter of which is selected to match the socket. If there are several sockets nearby, then the required number of holes is made;
Drilling drywall is very easy using a special crown
- Wires are being pulled . The ends of the cable are pulled out, after which they need to be pulled into the box. Leave as much cable as you need to connect an outlet or switch;
The wires are pulled out and inserted into the box
- The box is placed in drywall and fixed . To do this, you need to tighten two screws on the sides so that they move the spacer apart and thereby secure the element. The photo below shows what the mount looks like from the reverse side.
Such a simple system ensures reliable fixation of boxes in drywall
Dismantling is carried out in the reverse order: the screws are unscrewed, after which you can carefully remove the box.
What is the protection index?
When performing electrical installation work in modern conditions, many nuances have to be taken into account. Thus, the use of materials that provide protection from aggressive environments is becoming increasingly important. Boxes for sockets and other electrical installation elements may have different degrees of protection.
It is known that walls can be made of different materials that, to varying degrees, successfully withstand the effects of dampness caused by leaking pipes or high humidity in the premises, provided there is a constant source of water (in plumbing rooms). For more successful fastening and operation of the box, you should select a model in accordance with the conditions of use.
There is an indicator to indicate the ability of the box to withstand aggressive influences. The IP (Ingress Protection) code is used to designate it.
It can be found on the component packaging in the form of a set of two numbers:
- Resistant to dust particles and solid elements.
- Resistance to humidity.
This is how the marking of the first digit is deciphered:
- 0 - no protection;
- 1- withstands particles of 50 mm;
- 2 - particles up to 12.5 mm;
- 3- solid elements up to 2.5 mm;
- 4- elements up to 1 mm;
- 5- dustproof;
- 6 - impenetrable.
The marking of the second digit is deciphered in the same way. Numbers from 0 to 8 are used here, and they indicate the level of resistance of the product to the aquatic environment, which can reach the ability to function in conditions of complete immersion. For mounting in a concrete or plasterboard wall, it is optimal to select markings with an indicator from 2 to 6.
Installation methods
There are two main installation methods, for each of which a specific type of product is selected.
Hidden installation
Round models with a diameter of 60 cm are more often used. This choice is due to the fact that it coincides with the standard diameter of socket boxes and switches. The holes are drilled using a tool with a crown of a suitable diameter.
Initially, the wall is marked, the axis with the horizontal is marked at a distance of at least 20 cm from the floor. Next, a hole is cut and polished, the box is inserted and secured, and the wires are pulled in.
Laying external wiring
This type involves carrying out work in the upper part of the rooms at a distance of 10–20 cm from the ceiling. At the same time, a couple of holes are made for the dowel, into which the box is inserted and fixed with screws for fastening.
Installation is also possible without the use of junction boxes, with a separate wire supplied for each device. Instead of a distributor, a special shield is used to provide the necessary safety. However, this method is more complicated to perform and requires more tools and time. Video
