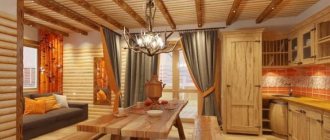
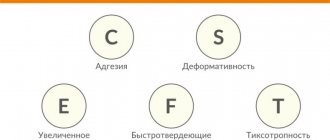
Block house is a facing material that can be used to cover the internal and external walls of a house. These boards have an impressive rounded profile that imitates a log. The radius of curvature may vary. Narrower and flatter panels are used for cladding interior spaces; for finishing facades, a wide house block is needed.
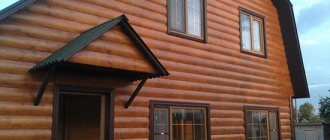
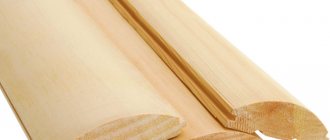
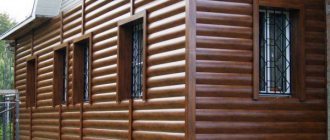
Finishing the facade of a block house
An example of façade finishing with a block house
Requirements for a block house
Before purchasing a material, you should inspect its structure. It is better not to buy boards with such defects as:
- cracks and splits;
- blue spots;
- bent branches;
- presence of moldiness.
The tar should not be more than 3 mm deep and 7-8 mm wide. You should pay attention to the growth rings. It is desirable that they are located closely - this indicates good quality.
Also, when choosing, you should pay attention to the following points:
- if possible, test the humidity of products with a hygrometer;
- look at the products and layer them on flat surfaces, this way you can determine the warping of the boards;
- check the functioning of the locks - they should snap easily and be moderately tight;
The selection of the section is determined by the place where the boards will be used. Products with different sections are used for internal and external cladding.
Consumption of block house and additional elements
The number of blocks is calculated based on the area of all the walls of the facade. From the total area of the facade, subtract the dimensions of the openings. To determine the number of boards, it is necessary to calculate the area of one panel. Next, divide the total surface area by the area of the board, thus calculating the number of products.
When calculating the area of the block, it is necessary to take only the working width, the tenon is not taken into account.
Based on the height of the wall, the amount of material for the frame is calculated. The profile is installed at a distance of 50-60 cm. U-shaped suspensions are installed vertically at intervals of 60-100 cm. For each suspension you will need three to four self-tapping screws. To connect the profile to the suspension you need two or three self-tapping screws.
Assembly of full-fledged scaffolds.
4. When working on the facade, take the time to create convenient scaffolding and scaffolding over the entire wall area. Ideally, it is better to cover two adjacent walls with scaffolding so that the interface of the planes can be properly designed. If you use grade 2 boards or TU timber as blanks, the scaffolding will be quite reliable, but inexpensive. We recommend an article on the rules for assembling scaffolding Construction of scaffolding from coniferous wood. When installing scaffolding near walls, leave 30 centimeters of free space to make installation convenient.
Required Tools
Before starting work, it is advisable to prepare the following tools:
- mallet;
- screwdriver;
- hammer;
- screwdriver;
- self-tapping screws;
- metal cutting scissors;
- hacksaw;
- jigsaw;
- Bulgarian;
- laser and construction levels;
- roulette;
- plumb line;
- pencil, chalk or marker.
A universal list of tools is provided that are suitable for installing any panels. Some may not be useful when choosing a specific option. Before work, tools should be checked for serviceability and cleaned of dust and dirt.
Protective and decorative treatment.
When the installation of the blockhouse is completed, all that remains is to open the wood with transparent varnish or tinting impregnation. It should be noted that the coating must be repeated, since the first layer is applied to each lamella before installation work. The best product would be one that combines antiseptic and tinting properties in one paint - Krasula.
Krasula impregnation colors
Internal corner
External corner
Preparatory stage
Facade preparation begins with a visual inspection. If the structure is made of wood, you should pay attention to the condition of the lower crowns. Check if there is damage or fungus on them. Under any circumstances, before cladding, the log house is disinfected with antiseptic agents. If it is damp, give it time to dry.
It is better to inspect the facade of a building made of brick, aerated concrete, cinder block and other materials for the presence of cracks. If through cracks are found, it means there is a problem with the foundation. If no damage is found, the surface must be treated with an antiseptic and work can begin.
Before carrying out work, it is necessary to dismantle all hanging structures from the facade, this will make it easier and more convenient to attach the block house from the outside.
Fixing the brackets.
In some cases, you can use a hanger for gypsum boards (this is a good option if the frame is made from galvanized profiles for gypsum plasterboards). But it is better to give preference to sliding corners. The spacing of the brackets is on average about 0.75-1 meters; they are attached to anchors (dowels and nails) or to self-tapping cap screws - if the load-bearing base is made of wood.
Installation of the frame on gypsum plasterboard profiles
Installation of the frame at sliding corners
Installation of vapor barrier and insulation
The cost of turnkey installation per square meter depends on the region and varies on average from 1000 to 5000. You can save money and do the work yourself.
Before installing the facing blocks, it is necessary to make hydro- and thermal insulation. The waterproofing layer consists of one or two parts. Single-layer waterproofing is performed when there are no plans to use insulation. The facade is covered with a vapor barrier material before the frame is installed.
If insulation is used, a layer of vapor barrier material is mounted directly on the wall. It performs the function of protecting the wall from condensed moisture. The second layer is applied to the gap between the outer cladding and the insulation. Its functions are similar to the first.
Mineral wool is laid between the profiles. To avoid the need for additional fastening to the wall, it can be compacted.
Installation of sheathing
Before installing the sheathing, the walls are first marked using a level and plumb line. They begin marking from the longest wall, first stretch the line at the top of the wall, and level the lower part along a plumb line.
Tree
In this case, wooden blocks measuring 40x40 mm, 25x50 mm are used, it all depends on the thickness of the insulation. For fastening to the log house, self-tapping screws are used, but if the house is brick or concrete, then the bars are attached to the wall using dowels.
When using wooden blocks to create sheathing, they, like a block house, must be treated with antiseptics and fire retardants.
This type of lathing is most often used for cladding wooden houses; it is usually used on the outside of the building; if leveling is necessary, it can always be trimmed. Among the disadvantages, it is worth noting that the cost of wood is higher than that of a metal profile and it requires additional processing.
Metal
For this purpose, a special galvanized profile is used. First, the hangers are attached to the wall, and then the sheathing from the profile is mounted on them leveled using self-tapping screws.
Since the load-bearing capacity of a metal profile is less than that of wooden blocks, they are mounted in increments of 35-50 cm.
Metal lathing does not require additional processing, but its load-bearing capacity is lower. This type of lathing is usually used to secure a metal block house.
Plastic
This is a relatively new type of sheathing; it is attached, like wooden elements, using self-tapping screws, and has a higher load-bearing capacity compared to galvanized profiles.
The disadvantages of plastic elements are that they are still quite difficult to find on the market and if the walls of the building are uneven, then they cannot be used.
Panel installation
Work on installing the panels can begin immediately after installing the frame, insulation and waterproofing. The panel installation technology is quite simple. The process starts from the bottom corner of the building. The boards are attached only horizontally. The vertical method has many disadvantages.
Instructions for installing panels outside the house:
- Clamps are used for fixation.
- The clamps must be secured to the sheathing with self-tapping screws and the first board must be inserted into the holes of the fasteners, placing it with the groove down.
- The groove of the subsequent panel snaps onto the tenon of the first. Clicking occurs without difficulty, and with further expansion of the wood, such adhesion becomes very tight.
- Subsequent blocks are attached using the same scheme.
If you decide to abandon fastening with clamps and sheathe the facade using self-tapping screws, then you must first prepare holes for them on the board. The fastening step is 50 cm. It is screwed into the tenon at an angle of 45. After finishing the work, it is better to hide the screws so that the panels look aesthetically pleasing. This can be done with wood putty or masking overlays.
Acclimatization of the material.
The rule is simple: before installation, any lumber must be kept for a day or two in the conditions in which it will be used. For example, when covering the facade, a blockhouse from a heated garage should be taken outside under a canopy and freed from the packaging film.
Calibrated blockhouse
How to make corners
Rounded elements are produced for external and internal corners. The finished products will fit well to the base only in the upper part, which is why there will be gaps in the casing. Any gaps during cladding are unacceptable, and this is the main disadvantage of ready-made skirting boards.
It is more correct to use planed timber 50x50 mm for finishing corners. It is fixed before the sheathing begins. The boards can be attached to a block - this will ensure a good fit to the surface and will look beautiful. Joining a block house in the corners is not difficult. You can round the outer part of the beam to a semicircle.
Creating corners.
The outer corners between adjacent planes of the blockhouse are either covered with a wooden corner, or the planks are cut to each other at 45 degrees. By the way, cutting is the only option if the angles between the walls are not straight (for example, if there is a bay window).
The internal corner can be decorated by installing an equilateral corner plinth (boat type). Alternatively, you can move the parts relative to each other and perform trimming. The easiest way is to first secure a planed block in the corner with a thickness equal to the thickness of the house block.
The same method is often used when you need to join several planks longitudinally on a long wall.
Cashing installation
Platbands are used for finishing door and window openings. Their range is quite wide. Everyone selects something suitable for the facade of the house. Cash deposits can be curly, rounded and ordinary flat. There are also decorative ones, with interesting carved patterns and ornaments; they will look very original and stylish.
Platbands are classified depending on the method of fastening: overhead and telescopic. Overhead casings are secured with nails and self-tapping screws. After attaching the casings, the holes must be masked with a special putty. Telescopic ones have protrusions that fit into holes on the frames. The second type is convenient and simple, and in this case there is no need to hide the holes from the nails.
Stretching beacons.
Nylon cords are usually used as beacons on the facade. They are fixed horizontally on pins so that the frame bars then barely touch the threads with their outer surface. Sometimes beacons are made after installing the two outer beams of the frame and fixed on the surface of the lumber.
It is important to immediately provide the necessary distance from the base so that insulation of the required thickness can be installed behind the racks (or between the racks).
Stretching beacons
Is it necessary to paint the outside of a block house?
PVC and metal log boards do not need to be painted or varnished. But wooden ones require additional processing. First, the wood needs to be impregnated with an antifungal compound, it is applied 2-3 times, each layer is given a drying time of 3-5 hours. Then you can apply varnish or paint. The coating will highlight the texture of the wood and protect against moisture. The service life depends on what coloring agents are chosen.
Coloring liquids:
- Oily substances will protect the tree from any negative influence of the external environment.
- Water-based acrylic compounds. They are rarely used for outdoor work, as they have practically no protective properties.
- Acrylic impregnations. Protect wooden panels from the negative effects of the external environment and mechanical damage. The main disadvantage of such substances is a strong unpleasant odor during application.
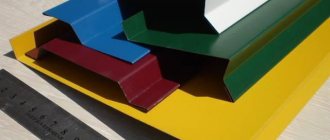
Acrylic and oil preparations are suitable for painting facades. Painted blocks last many times longer than unpainted ones. Block houses are often used for cladding private houses. There are several varieties - vinyl, wood and metal. Each has its own advantages and disadvantages that should be taken into account when choosing.
You can do the preparatory work, installation and painting of the blocks yourself. To do this you will need standard construction tools that almost everyone has. Having understood the nuances of the work, you can do the finishing no worse than the masters.
Features of fastening inside the house
If the finishing is done inside the house using wooden panels, then they need to be given time to get used to the conditions of the room, this is at least 2-3 days.
First, a vapor barrier film is attached to the walls , and all joints are properly taped. Then the sheathing is installed, which can be wooden, metal or plastic.
The planks are screwed onto wooden walls with self-tapping screws, and onto others they are secured using special hangers.
Typically, the distance between the vertical bars of wooden sheathing is 60 cm.
After installing the sheathing, insulation is laid between it and covered with a film to protect it from moisture, all joints are also properly taped. After this, a counter-lattice is made and the house block can be installed on it.