Tile adhesive is a type of finishing material , but its application is wider than its name suggests. The composition of this glue allows you to glue a wide variety of materials, so when working with ceramic tiles, everything is not limited.
Tile adhesive was widely produced in Soviet times, but then its consistency was determined by GOST, i.e. No third-party ingredients could be added to it, otherwise it could no longer be called tile adhesive.
Now the situation is somewhat different, so on sale you can find many different brands of glue designed for bonding to the surface of a variety of facing materials.
Homemade tile adhesive
Homemade adhesives are still produced today, with a huge selection of various chemical compounds for attaching tile products from different materials with different weights.
This is caused by the need to use existing houses, previously purchased and unused building materials. You can make tile adhesive yourself to save money.
The result will be no worse than when using expensive mixtures, if we are talking about ordinary wall tiles of a standard size for interior decoration.
If you need to attach tiles (to the ceiling, drywall), or heavier porcelain tiles, you shouldn’t skimp on glue. Such materials were not used before.
Special glue is needed in rooms with high humidity and significant temperature changes (for example, a bathroom).
External finishing work requires frost-resistant, water-repellent mixtures that can also withstand strong temperature changes. There are special products for such conditions, and they need to be used.
What characteristics does it have?
Brands that differ from each other have different characteristics. Characteristic for cement:
- Attaches to smooth (applied in one layer) or uneven (two layers) surfaces.
- Suitable for gluing horizontal or vertical planes.
- The wall or floor must first be degreased.
- Available in the form of a ready-made paste or dry powder that needs to be diluted.
- Safe for health.
- Big choice.
- Applies to concrete, brick, or worse, drywall.
- Available for purchase, low cost.
- Hardens without shrinkage.
- Quickly releases moisture.
- Not suitable for chipboard.
- Rarely used for external processing.
The dispersed product differs significantly in quality properties:
- Suitable for external and internal renovation activities;
- pronounced adhesion;
- lays on drywall, plastic, cement planes;
- does not allow moisture to pass through, is thermally stable, the connection is super strong;
- there is no need to pre-treat the surface with a primer;
- flexible and elastic, can cover walls that sag over time;
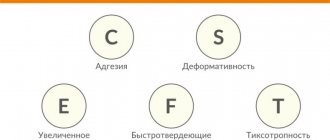
- thixotropic;
- high price;
- high consumption.
Epoxy adhesive grades adhere slabs most firmly. At the same time, they are moisture resistant, withstand sudden temperature changes, withstand pressure, and do not shrink when gluing. It does not crack when hardening and adheres to materials of different nature. The special product glued with it lasts a long time. Among the disadvantages: a pungent unpleasant odor that increases toxicity, as well as extreme high cost, sometimes several times higher than other equipment.
Features of modern tile adhesive compositions
However, there are different situations. During repairs, many people face financial problems, since not always everything can be foreseen in advance:
- The price of building materials is rising,
- Errors are allowed in calculating what is needed,
- Unforeseen expenses arise due to breakdowns,
- Hidden defects that need to be eliminated.
All this leads to the fact that there is not enough money or time to buy new equipment, but work needs to be done. Sometimes this is beneficial, strength and knowledge are mobilized and available means are used. This saves space (since they no longer need to be stored), time and money.
Homemade adhesive can be quite high quality. When making it, it is important to strictly observe the required proportions, work quickly, and prepare everything possible in advance to avoid premature hardening of the mixture.
Important points - cost, manufacturer, expiration date
The quality of the tile masonry determines what kind of tile adhesive the builder plans to use. Generally accepted standards for tile adhesive mortar are high plasticity and adhesion, uniform consistency and moderate drying time. The optimal consumption is always indicated in the instructions, but in reality it is adjusted due to the characteristics of the base and in accordance with the level of professionalism of the master.
Advice from practice - 5 kg of dry matter is enough to cover a surface of 1 m². The laying technology slightly changes the glue consumption towards decreasing or increasing.
Based on cost, tile adhesive is divided into 3 groups:
- Economy These mixtures consist of a minimum amount of ingredients to provide the required technical characteristics.
- Standard. These adhesives include components that give it elasticity and flexibility, heat and moisture resistance, extending service life and preserving external qualities.
- Elite They contain substances that justify their use on surfaces subject to deformation.
Manufacturers offer tile adhesives that satisfy a wide variety of consumer requirements and wishes, designed to suit any budget level. Among the most popular brands are Ceresit, Polimin, Bergauf, Henkel, Vetonit, Knauf . They guarantee high quality of the manufactured product, suitable technical and operational characteristics. This factor ensures the durability and reliability of the final result.
How to choose the best tile adhesive composition
The most common "homemade" tile adhesive can be prepared with:
- By adding PVA (polyvinyl acetate) or wallpaper glue based on CMC (carboxymethylcellulose);
- Liquid soap or washing powder;
- Paints.
In all cases, the above products are added to a mixture of cement and sand, in which one part cement and three sands (1:3). It is important to create a well-mixed substance with the consistency of thick sour cream.
When adding PVA, the glue must be diluted with water in a ratio of 2:1 - add one part of water to two parts of PVA. This compound is gradually poured into a pre-prepared container with dry cement and sand, stirring thoroughly.
When using liquid soap, you also need to prepare a solution: use 50 to 100 g of liquid soap per bucket of water. More than 100 grams of soap should not be dissolved, as efflorescence may form.
Carefully, stirring constantly, pour the resulting liquid into a container with a mixture of sand and cement, diluting it to the consistency of thick sour cream.
- You can add old, but still intact, paint to the mixture of sand and cement.
- You will have to be careful when working with paint-based glue.
- If it does not match the color of the tile, the tile must be laid without joints, avoiding paint showing through.
- Also, the work must be done quickly, avoiding premature hardening of the adhesive. The paint-based glue will be quite strong.
- In most cases, oil paint is used, but enamel is also acceptable.
- The latter dries out faster. This must be taken into account during work and speed it up as much as possible.
Using such simple recipes, you can make your own tile adhesive for laying tiles, saving money, as well as using unnecessary materials available at home, which would soon lose their qualities and would have to be thrown away.
Varieties
- Cement. This is a universal adhesive composition suitable for tiles of any size for walls and floors. It is very easy to dilute it - take 1 part glue and 3 parts water. It is distinguished by its versatility, impeccable quality and competitive price.
- Polymeric. This type of glue is divided into two groups - acrylic and epoxy. The adhesive mass based on acrylic resin is immediately ready for use; it is used in areas subject to severe mechanical stress. Epoxy compounds require an accelerated pace of work, as they set instantly in the open air. This property is regarded by consumers as both an advantage and a disadvantage.
- Polyurethane . Polyurethane-based tile adhesive securely attaches to any surface, is easy to apply and has economical consumption. It is plastic and moisture resistant, retains its characteristics for a long time and can be used on complex surfaces of metal, wood, plasterboard and plywood.
- Mosaic. For mosaics, you need to use only special glue. It is distinguished by its flexible and plastic structure, as well as its white color, which creates an excellent background for glass or smalt decorative mosaics.
Advice A modern manufacturer relies on a cement adhesive for tiles. Compared to polymer and special adhesives, its price is an order of magnitude lower. The finished composition will always be more expensive than glue, which requires preliminary mixing and curing.
Required qualities of tile adhesive
Ceramic tiles are quite heavy items. The glue for it must be good at gluing surfaces, which are often completely heterogeneous. In most cases they are vertical, which makes the work more difficult.
- The glue must have high adhesion, that is, quickly bond two surfaces.
- Tiles with high-quality adhesive do not move or fall.
- It has low fluidity and is resistant to slipping: the tile remains in the place where it was attached, there are no unwanted displacements.
The glue provides elasticity if it adheres well to the surfaces being glued. It should not dry out for a reasonable period of time so that slightly misaligned tiles can be straightened.
Sometimes you need to quickly spread a little more glue to finish the job. At the same time, it should be possible to correct the tiles laid last, which may slide slightly.
Basic rules at work
So that the rules do not look like general recommendations, let us take as an example adhesive compositions containing cement. In order for the composition to set properly and also retain all its properties on the surface, the following nuances must be observed:
- the room must have an acceptable temperature for work . To stick the tiles, it must be in the range of 5 to 30 degrees Celsius;
- It is necessary to maintain the correct amount of water when diluting the glue. On average, to obtain a normal consistency you will need about five liters of water per 25 kg bag;
- You need to apply the correct amount of compound to the tiles. As a rule, 3-15 mm of glue is applied;
- The average lifespan of glue, so to speak, is 3-4 hours. At the same time, after gluing the tile to the surface, we will still have about 10 minutes to adjust the position of the tile;
- As for the hardening time, it is about 24 hours , after which you can safely walk on the tiles or perform any other manipulations.
Profitable use of existing materials
Preparing tile adhesive is simple; it is only important to carefully observe the required proportions. As a result, you will be able to get the job done while saving money.
Making your own adhesive is also beneficial in cases where the tiles need to be installed on a not very flat surface. It is known that there is a thick-layer cement adhesive and a thin-layer one.
Thick-layer is also used to level the surface under the tiles. Its consumption is greater, so it is more profitable to dilute it from existing materials.
Knowing how to make your own tile adhesive is useful. This powerful product can be used for cosmetic repairs of premises, as well as for gluing other objects, without turning to specialists for help. At a small cost, everything in the house will remain beautiful and well-groomed.
Consumption and drying time
The composition consumption is indicated on the packaging with the material. Consumption may be more or less depending on weather conditions, base curvature, professional skills and type of tile.
The packaging also contains similar professional terms:
- Adjustment time – tiles can be adjusted after laying on the mortar;
- Open working time - the time from applying the solution to the base until it sets; Long operating time allows you to apply glue over a large area at once.
- Suitability time for work - from preparing the solution to setting.
For urgent work, choose a material with minimal adjustment time, but for a novice master, this is just the thing.
Photo of the best tile adhesive
What does the choice depend on?
As you might have guessed, there is no single best glue that can be used absolutely always. The choice depends on several factors:
- tile type and size;
- type of base;
- operating conditions (indoors or outdoors, high humidity, high temperatures, etc.);
In any case, a good tile adhesive should be flexible and have high adhesion rates.
Supplements
When making an adhesive solution for tiles, in addition to (or instead of) PVA, CMC and detergents, you can add special additives such as: MasterTherm, superplasticizer - C3, liquid glass, dibutyl phthalate, resin additive DEG1, superplasticizer D5, etc.
They will give the glue such unique properties as: frost resistance, heat resistance, moisture resistance, resistance to chemicals, plasticity, increased adhesion, etc. The method of using these additives will be described in the instructions supplied by the manufacturer.
And finally. To understand whether the adhesive composition prepared by yourself is ready for use, it must be applied to the tile, and if the tile moves freely along the floor in any direction, then the adhesive can be considered ready.
Company financial plan
The business plan for the production of dry mixtures contains information on the volume of capital investments and cost items for maintaining the project. By comparing income and expenses, it is easy to determine the payback period of the enterprise and profitability.
Investments and costs for maintaining the project
Capital investments at the start (amounts are indicated in rubles) include:
- paperwork – 10,000;
- arrangement of the workshop - 50,000;
- purchase of equipment – 1,600,000;
- transportation costs – 100,000;
- other expenses – 50,000.
The total amount is 1,810,000 rubles.
The company allocates funds monthly to support the project:
- salary with deductions – 200,000;
- workshop rent – 30,000;
- purchase of raw materials – 500,000;
- advertising campaign – 50,000;
- expenses for utility bills – 10,000.
Total: 790,000 rubles.
Calculation of profit and profitability of production
Even if the enterprise does not operate at full capacity and produces only 3 tons of products per hour (120 bags of 25 kg each), then 960 bags of dry mixtures will be produced in 1 shift. The workshop will produce 24,960 packages in a month.
The average cost of a bag of dry mixture on the market is 200 rubles, and the cost is 70 rubles. The income from the sale of 1 package at a wholesale price is 100 rubles, respectively, the income for 1 month is 100 x 24,960 = 2,496,000 rubles.
Calculations show that the company will reach the break-even point after 3 months of operation. In the future, the monthly profit of the workshop will be 1,300,000–1,800,000 rubles. However, it is worth considering that it will be possible to achieve such indicators only after developing a client base. By constantly expanding production and increasing the range of building mixtures, the company will be able to increase production to 10–12 tons of products per shift.
The business of producing dry mixtures is economically attractive, but it requires large investments. If you have a limited budget, you should start with small production volumes, purchasing equipment with a capacity of no more than 5 tons/hour. The main difficulty of this project is promoting products in a market that is already saturated with similar products. A competent marketing strategy will allow you to gradually occupy your niche and win the trust of consumers.
How to glue tiles to the floor
Required Tools
Knee pads and gloves will be required
The tiling process requires diligence and accuracy, because the slightest defects are clearly visible on the tiled surface, especially if the tiles are of the correct shape and monochromatic. Let's look at how to glue tiles to the floor to get a high-quality coating.
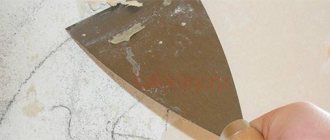
Step 1. The floor surface must be thoroughly cleaned - scrape off dirt, paint stains, putty, and vacuum.
It is necessary to scrape off dirt and small irregularities
Dust removal of the base
Step 2. Next, wash the floor with water and detergent to degrease the base and dry it.
Step 3. Draw a straight line from the center of the doorway to the opposite wall.
Line drawing diagram
Step 4. Lay out the first row of tiles along a line on a dry floor, observing the width of the joints.
Laying the first tile without glue
First row layout
Step 5. A second marking line is drawn along the outer edge of the last tile - perpendicular to the first. Laying will be carried out from the point of intersection of the lines.
Marking scheme
Step 6. Prepare an adhesive solution according to the manufacturer's instructions.
Step 7. Apply glue with a trowel along the marking lines slightly wider than the width of the tile.
Applied glue
Step 8. Level the adhesive layer, then run it over it with a notched trowel, forming a relief.
Relief formation
Advice. If the tile is large-format, a thin adhesive layer is also applied to its back side. For standard tiles, an additional layer of adhesive is not needed.
Applying adhesive to tiles
Step 9. Take the first tile and lay it on the glue so that its sides exactly coincide with the marking lines. A wooden block is laid on top and hammered with a rubber hammer so that the tile lies evenly.
Laying tiles
Aligning the first tile
Step 10. Insert crosses for seams on the sides and continue laying the first row, controlling the placement of the tiles using the rule and level.
Cross between tiles
Step 11. Having completed the first row, proceed to the next one. During the work, it is very important to maintain the width of the seams and do not forget to control the plane.
Horizontal control using a long rule
Step 12. When cutting tiles, you need to mark the cut line with a pencil, having first measured the required distance. It is most convenient to cut the material with a tile cutter, manual or electric.
Cutting with a manual tile cutter
Cutting tiles with a power tool
Advice. If a shaped cutout is needed, first mark it with a pencil on the surface of the tile, and then divide the part that needs to be cut into squares. After making cuts along the lines, remove excess fragments, and break off uneven edges using pliers.
Marking for figured cutting
The remaining pieces are broken off with pliers or wire cutters.
Step 13. A ceramic plinth is fixed around the perimeter of the room, placing crosses underneath for the seams.
Applying glue to the baseboard
Gluing the baseboard
Step 14. A day after cladding, the joints are grouted. The mixture is applied across the joints, carefully filling all the irregularities. As soon as the grout has set, the floor should be wiped with a damp, clean sponge. The remaining residue after drying is removed with a dry cloth.
Application and distribution of grout
Cleaning tiles with a cloth
Final cleaning of the floor with a damp sponge
Finishing the bathroom floor with ceramic tiles
Prices for tile adhesive "Unis"
Unis tile adhesive
