Areas of application of Bustilat
Glue is used for arranging various coatings inside the house if strong fixation of finishing materials is required. Thanks to its elasticity, the adhesive seam will serve for a long time, because it is not subject to destruction due to vibrations, fluctuations, and mechanical loads. The product is perfect for the following reasons:
- concrete;
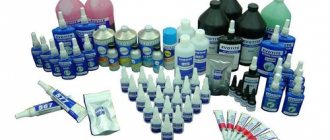
- wood;
- bricks;
- Fibreboard, chipboard;
- stone;
- plaster.
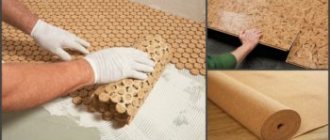
Bustilat is used to glue various types of wallpaper, including the heaviest ones. It is suitable for fixing carpet, other pile coverings, linoleum with a fabric and felt backing. The adhesive is suitable for fastening polymer and ceramic tiles, panels, stucco moldings, baguettes and other decor, wood trim. The glue is also useful for working with asbestos-cement slabs. Another product is added to cement during various repair work, which will increase the strength of the mortar or screed.
What it is?
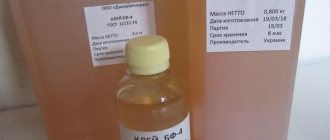
The popular synthetic adhesive mixture Bustilat was developed more than half a century ago by employees of the Moscow Construction Research Institute. It is a one-component creamy mass with a latex binder base, the addition of chalk, water, carboxylmethylcellulose (CMC), which serves as a thickener, and modifying additives to give the final product optimal properties.
In the process of repair or finishing, situations often arise when the use of nails, screws or construction staples is unacceptable for some reason. In these cases, adhesive mixtures come to the rescue, capable of fixing various materials together and attaching decorative elements to different types of bases without violating the integrity of the materials being joined. Of particular value are universal-purpose adhesives, which are equally successful in joining wallpaper, floor coverings, tiles and decor. In addition to the widespread polyvinyl acetate (PVA) emulsion, such abilities are also inherent in Bustilate, which has proven itself to be excellent when laying linoleum.
The product is indispensable for fixing:
- synthetic pile coverings;
- ceramic tiles;
- linoleum tiles (PVC tiles);
- linoleum coverings on felt or textile base;
- relina - two-layer wear-resistant linoleum made of rubber;
- parquet and parquet boards;
- carpet;
- wallpaper;
- decorative elements made of wood;
- asbestos-cement products.
The high performance properties of Bustilat make it possible to combine the listed finishing materials with the following types of surfaces:
- stone;
- concrete;
- brick;
- wooden;
- plasterboard;
- from fiberboard/chipboard/CBF boards.
Types of glue
There are several varieties on sale that differ in properties. The choice of a specific model depends on the needs and operating conditions
It is very important to buy the right brand so that it can withstand the climatic conditions in the area of use. The following modifications are available:
- — “Bustilat-M” glue — is a special frost-resistant mixture;
- — “Bustilat-N” glue — designed for materials with poor adhesion and contains special additives that increase the adhesiveness and strength of the adhesive seam;
- — adhesive “Bustilat-D” — has increased strength and is especially used for installing heavy materials or gluing to a base;
- — Bustilat-Lux glue — used for gluing polymer materials.
Within one modification, there may also be varieties with a numerical designation, which will indicate the degree of manifestation of the main distinctive property. In general, it should be noted that existing models make it possible to fully cover the repair needs for the installation of finishing materials. At the same time, Bustilat glue for linoleum and other elements will cost much less than modern substances. The economic indicator is very important, so in this sector there are simply no competitors for this glue.
Features and Specifications
Bustilate belongs to one-component adhesives. It does not contain solvents.
Latex is used as a base in the production of glue. Chalk, modified cellulose, preservative, water, thickener, as well as special additives are added to the base. The result is a thick, creamy mass with optimal properties, grayish-white in color, and without a pungent odor.
Characteristics of bustylate glue
In addition to its environmental friendliness, we are attracted by such characteristics of Bustilat adhesive as the ability to dry quickly, high bond strength, excellent adhesion properties, as well as:
- Economical. On average, glue consumption ranges from 80 to 200 g per square meter.
- The time for complete hardening ranges from 1 to 1.5 days.
- There is no need to restore the adhesive layer if mistakes need to be corrected. This condition can only be met until the initially applied adhesive layer has completely dried.
- Lack of coloring on the surface of the material (paper, non-woven wallpaper) after the glue has hardened.
- Non-flammable and unresponsive to open fire.
Based on the presented characteristics, the reputation of a reliable universal glue is well deserved. However, there are some disadvantages that affect the possibility of using Bustilat, depending on the conditions:
- If there are special requirements for durability, then in this case this adhesive is significantly inferior to multicomponent mixtures.
- If the work is planned to be carried out in an unheated room, it is better to choose a different composition, since Bustilat freezes quickly due to the presence of water in the composition. There is no reaction to low temperatures only after the adhesive layer has completely hardened.
How to make a cheap primer for PVA walls?
to make a cheap primer for walls using PVA glue with your own hands .
To do this, you just need to add ordinary water to the PVA glue at the rate of 1 part glue to 2 parts water. The result is a whitish liquid composition that can be applied to walls as a primer. However, it should be noted here that a self-prepared PVA primer will not have all the qualities of professional primer compositions and provide equally reliable protection against mold formation. But a PVA primer will do an excellent job of ensuring that the surface is receptive to the application of new paints and varnishes.
You should also know that you should not prepare too much PVA primer at once, since the longer such a primer sits, the more noticeably its bonding properties will deteriorate.
It’s not difficult to do; first, PVA glue is poured into a container, water is added to it and mixed thoroughly, the proportions are 1 to 2 (two parts water).
That’s actually the whole “primer”.
But I don’t recommend using such a primer, unless there is complete hopelessness, there is nothing, there is only a can of PVA, you have to work.
Such a “primer” can come off over time along with the plaster or putty, because a film forms on the surface.
Under PVA the wall does not “breathe”.
PVA does not penetrate deeply into the surface of plasters and putties, strengthening it (the surface is how deep penetration primers work.
PVA only improves adhesion, and all other qualities of primers are not available to it.
It is also important to consider what surface we are priming.
For example, clay must be strengthened with deep penetration primers, lime plaster too.
It’s better to “walk” on concrete with Betonkontakt and so on, but PVA with water is “pampering”, not a primer; during the Soviet Union they primed PVA out of despair, and not because it was the best.
If you have a choice, it’s better to buy construction PVA
Before you start making a primer from PVA glue, you should evaluate the pros and cons.
Of course, such a primer will be very cheap, because to make it you will only need PVA construction glue, which will need to be diluted with water.
But it is worth knowing about the disadvantages of such a primer; it is not absorbed deeply, only a few millimeters, and is not able to strengthen the surface.
Such a primer may peel off; moreover, it does not have antiseptic properties, and fungus may appear.
PVA primer may appear as yellow spots over time.
If you took into account all of the above and decided to use PVA glue as a primer, then the process of preparing it will not take much time.
Material care
Oilcloth is a very low-maintenance type of cladding. When it gets dirty, simply clean it with water and any detergent. Some stains are difficult to remove. In such cases, you can use alcohol-containing compounds or regular vodka.
Oilcloth has won the love of customers due to its cost-effectiveness and ease of installation. This coating can be easily re-glued or individual sections replaced. It does not require special care and is completely waterproof. Using film, you can quickly and effortlessly change your boring bathroom design.
In addition, the choice of such materials is very wide. This provides owners with the opportunity to implement any creative ideas during bathroom renovations.
Assortment of self-adhesive film Selecting oilcloth for cladding bathroom walls Oilcloth with backing Plastering bathroom walls
Instructions
In order to determine how much oilcloth you will need, take measurements of the room, that is, the number of pieces for pasting should be equal to the number of meters of wall length (you can ignore window and door openings).
If the room has been wallpapered previously, completely remove all previous coatings. If there is paint on the walls, moisten them with water and remove the plaster, plaster, paint, and then dry thoroughly.
Now take the oilcloth panels themselves and spread them with glue evenly over the entire area, without missing a single area, otherwise bubbles may form.
If you glue oilcloth
on chalk whitewash, then first apply glue to the walls using a brush, otherwise, when drying, the layer may begin to lag behind the plaster. Apply glue to both the wall and the canvas, and then smooth it out with gauze.
Start from the corner. If you are gluing with an overlap, always point the edge of the fabric towards the window. Apply the cloth coated with glue from top to bottom, from the ceiling to the floor. To smooth the edges, use a roller or rag, being careful to ensure that the pattern on adjacent panels aligns correctly.
Glue the oilcloth strips with a slight overlap, coat the edges well. Using a damp cloth, smooth and wipe off any excess glue. Take strips of paper, coat them with wallpaper glue and place them over the seams. Once dry, lightly moisten with water and remove. Secure the top of the oilcloth in the ceiling area with strips of paper that will match the color or, conversely, create contrast.
Related article
After you have mastered the technique of gluing wallpaper on a flat wall, it's time to learn how to glue the corners. At first glance, there is nothing complicated in this process. However, upon closer examination of the case, this process becomes a real curse for some. Therefore, it will be useful to read this article to the end. Below are some recommendations for wallpapering corners.
Instructions
I would like to say right away that gluing a whole canvas into a corner is extremely undesirable. In practice, there are very few absolutely straight nodes in apartments. That is why, with almost one hundred percent probability, the corners of your wallpaper will wrinkle, the strip will skew, and the next strip will also lie unevenly. What can I say? The process stalled, your mood deteriorated and you had to run to the store for a new roll of wallpaper. A depressing prospect. Therefore, to prevent such incidents from happening, glue the corners correctly.
So, what is the basic principle of wallpapering corners? The canvas should be glued in such a way that there is a slight overlap on the adjacent wall (literally 1-2 cm). The next strip will lie end-to-end on the other wall towards the corner and you will have an even corner. If you are gluing heavy wallpaper (vinyl, non-woven and other similar ones), then it is necessary, using a plumb line and making a centimeter overlap on the adjacent wall, to paste the strip of wallpaper strictly vertically.
These were the basic requirements regarding the process of gluing wallpaper in the corners. These requirements apply to both paper and other wallpapers. The exception, perhaps, is glass wallpaper. They will have to be cut exactly along a plumb line that runs right along the corner. The whole “trick” here is that glass wallpaper is glued exclusively for painting, so the junction of two canvases in the corner after the process of painting the wallpaper will become almost invisible.
Video on the topic
how to glue glass wallpaper in corners in 2019
In the process of gluing wallpaper, novice repairmen often have doubts about the strength of the glue used. At this moment, first of all, they remember about PVA glue. But how justified is its use?
How to glue wallpaper over paint?
For those who don’t like to read to the end, I’ll answer the question right away. Is it possible to glue wallpaper on painted walls? Yes you can! But at the same time, you need to take into account several factors and do some simple preliminary work.
Let's start with the risks. But there may be two risks. 1. Paint does not adhere well to the wall. It does not matter whether the paint is oil or water-based. If the plaster does not adhere well, then your pasted wallpaper will fly off along with the remnants of plaster and paint completely. And in this case, you will need to do two jobs at once: re-plaster and re-glue the wallpaper. Therefore, carefully check in several places whether the plaster layer is wobbly. Are there any cracks or swellings that will lead to peeling? Does the paint adhere firmly to the wall in all places? If everything is ok, then we proceed to the second risk, which does not affect walls painted with oil paints.
2. If a water-based emulsion is applied to the wall , then there is a possibility that when wet, the layers of paint may swell, peel and peel off. This property immediately indicates that it is not worth trying to glue wallpaper on such a wall. How to check? Wet a small area on the wall several times. After a few hours, repeat the procedure. If, after drying, the painted surface behaves unstable and you can easily remove the paint from the wall, then you should also not glue wallpaper to such a wall.
If you are not afraid of both risks, then we will proceed to the gluing stages.
Washing and priming the wall
1. Wash the wall. Since we mostly see painted walls in kitchens (and less often in hallways), we need to take into account the factor of cleanliness. The wall in the kitchen is highly susceptible to contamination: fats, soot, food, etc. Therefore, you need to thoroughly wash the painted wall. In this case, it is enough to use soapy water or a small amount of detergent. After which the wall must be washed with ordinary clean water to avoid soap stains. If the wall initially has no problems with cleanliness, then skip this point and move on to the next one.
2. Level the wall. Usually painted walls have many small and very small irregularities. These irregularities need to be eliminated. If this is not done, then gluing even medium-density wallpaper is very risky, not to mention thin paper or silk wallpaper. Leveling the wall should consist not only of removing bumps, but also of filling depressions and chips. We also recommend that you read the post What wallpaper is best for uneven walls? If the wall is ready to accept wallpaper, then move on to the next point.
In the meantime, I would like to talk about such a procedure for preparing a painted wall as “sanding”. Very often, craftsmen advise going over the paint with coarse sandpaper in order to increase the roughness. This advice applies specifically to oil paints. This can be done and will not cause harm. But you need to understand that this will take a lot of your time and effort. In any case, it's up to you.
3. Primer the painted wall. It is precisely this point that can save you from using abrasives (sandpaper) in preparing walls. The choice of primers is huge to suit every taste and budget. Be sure to read the instructions before purchasing. You can use almost any, but it is better to take “concrete contact” and light gray or white. I'll explain why. Concrete primers are specifically designed for working with concrete walls and provide one of the best paint effects. Now about the color. Since our walls rarely have a white or light gray monochromatic color, there is a possibility that the wall will show through the pasted wallpaper and spoil all the raspberries for us. Therefore, we must prime the painted surface so that the color becomes uniform with minimal contrasts. This may require applying several layers of primer.
How to use?
To lay linoleum or carpet, the adhesive solution is applied to the floor using a spatula.
Immediately after this, finishing material is laid on the base.
The cladding must be pressed firmly to the base. Upon completion, it is necessary to leave the finish for three days until the glue has completely dried. The optimal composition consumption in this case is from 0.5 to 0.7 kilograms per m2.
Advice from an expert: You can add cement mortar to the glue. This will help speed up the hardening process of the layer if it is necessary to carry out the work in the shortest possible time. Proportions – 1: 1. To prepare the mixture, you need to mix one part cement and three parts sand.
When using an adhesive composition for laying ceramic tiles, the composition must be carefully applied to the back side of the finishing material. The optimal layer size is about 203 millimeters. Afterwards, the tile must be firmly pressed against the wall and fixed in this position until the glue sets. Complete hardening of the glue occurs after three days. At this time, under no circumstances should you influence the finish. From 0.4 to one kilogram of glue is consumed per square meter.
Bustilat is actively used for installing wallpaper from various materials.
If the glue thickens over time, it should be diluted a little. Add one-seventh of pure water to the mixture; this is the maximum allowable volume. If the product is fresh, there is no need to dilute it.
It is worth noting that the frozen layer of Bustilat cannot be removed with hot water, so washing off old wallpaper and treating the base in this way does not make sense.
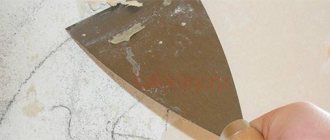
The most popular, affordable and effective method is mechanical cleaning, which is carried out using a metal spatula or a sharp scraper. You can also use a grinder that has a special attachment in the form of a metal brush. This method will help get rid of glue residues, but during operation there is a lot of dust and noise. Protect your respiratory tract with a respirator while working.
The second method is to wet a cloth with water and heat the cloth with a hair dryer or iron. Under the influence of temperature, the crust of the layer will become elastic. This is an efficient and silent, but time-consuming process.
- Before starting work, thoroughly ventilate the room.
- The working surface should also be prepared by cleaning it from dirt, traces of grease and various compounds. If necessary, a priming procedure is carried out (if the base has a porous structure).
- Be sure to read the instructions for use of the product. All necessary information is indicated on the packaging.
- The price of glue depends on many factors: manufacturer's markup, store percentage, type of composition. The minimum price per kilogram is about 100 rubles.
During repairs, it is impossible to do without adhesives. This is justified by the fact that the use of elements such as nails or screws can make the material unsightly. In order not to spoil the appearance of the room after renovation, they often use Bustilate Glue: we will find out the main properties and use cases below.
The glue is used for gluing wooden and ceramic products, wallpaper, linoleum and other structures. It is worth noting that this substance has been on the market for about 50 years, however, even today the use of bustylate glue has not lost its popularity. This proves that boostilate is a high-quality material that is available to any category of builders, as well as to those people who do their own repairs.
What and how to remove?
Removing wallpaper glued with Bustilat and washing off the remaining composition from the walls can only be done mechanically using a sharp spatula, scraper or brush. Attempts to soak the frozen film with hot water will lead to nothing. It is most convenient to use an angle grinder with a special brush attachment. The downside in this case is the formation of a large amount of dust, so you will have to use a respirator.
If this method does not suit you, then you can resort to the following: apply a wet cloth to problem areas and iron them or heat them with a hair dryer. Thermal effects will cause the film to soften, which can be removed with a scraper or spatula. The process is slow, but also dust-free.
Varieties
Types of bustylate glue (click to enlarge)
You can find different types of glue on the market. The choice will depend on what types of work will be carried out. Below are the main types of adhesive composition.
- "Omega". This type is used for fabric or felt material. For example, it will perfectly stick fabric wallpaper to the wall. In this case, there will be no stains, since the substance will not penetrate deep into the fabric. Perfect for working with paper. It will help to glue a broken tile or a broken wooden object.
- "Bustilat-M". Capable of gluing concrete, brick, ceramics. Will withstand very low temperatures. Used when finishing tiles and wallpaper, can stick linoleum. This glue is perfect for wood. Sometimes used when priming walls.
- "Bustilat-N". It has excellent elasticity and retains its adhesive properties even when the object is deformed. Can adhere to materials that do not adhere well. For example, these include synthetic coatings.
- "Bustilat-D-super." Prevents the development of mold in the material. This adhesive can be used to attach vinyl linoleum. It is also suitable for polymer materials with a smooth surface. This substance is non-toxic and safe. There is no difference between the expensive adhesive and Bustilat-D-super. He copes well with his tasks.
- "Lux". Used for materials with a polymer base. This includes siding.
Watch the video to know how to glue linoleum with it:
Bustilat and PVA are often confused. Both are used in construction and can glue the same materials. But these adhesive compositions have different compositions and technical characteristics.
The expiration dates for these products are different. "PVA" is stored for less than six months. Bustilat glues better. But as far as environmental friendliness is concerned, Bustilat is still inferior to PVA, which is therefore used in children's institutions.
What to add to cement mortar to make it stronger than the brick itself
What do handymen add to cement mortar? This question may be of interest to many, because not everyone can afford special cement mixtures. But we have to build it somehow. We offer an interesting construction solution originally from the Land of the Soviets, which definitely helped our grandfathers out more than once.
© Freepik
What is added to cement mortar
Even if there are store-bought mixtures that you can just fill with water and begin construction, this is not always available to everyone. Perhaps this is why people choose the classic version of a homemade mortar made of cement and sand. It turns out cheap and cheerful.
© Pixabay
Secret ingredient
What is this unique component ? In fact, everything is much simpler, because it is ordinary PVA glue. It is believed that such a solution will dry faster and adhere better, due to its more plastic consistency. Is it true? Quite. A mortar with the addition of glue can be used for both brickwork and plastering work.
© Pixabay
Moreover, during the Soviet Union, a fairly common additional component for sand-cement mortar was bustilate or wallpaper glue . The masters assured that this would definitely be beneficial. For example, when screeding floors, a solution with these unusual ingredients will better fill all kinds of voids.
© Pixabay
What do experienced craftsmen add to cement mortar?
Of course, not all builders liked this idea. Some are sure that this is a useless waste of money, while others are convinced that this is a banal self-deception that came out of nowhere. This is argued by the fact that PVA glue is afraid of moisture, and its use is fraught with the appearance of an unsightly “cobweb” of cracks , for example, on plaster.
Based on this point, builders advise using a cement-sand mixture with the addition of PVA only for interior decoration in dry conditions or for small crafts. Let's say, if you want to use cement mortar in a room where various floods or mold are impossible, then act boldly. Well, you shouldn’t skimp on cement. Add more of it.
© Pixabay
New is well forgotten old
Do not forget that in the old days, not everyone had access to modern hardware stores and the money for it. So we had to get out. But the current assortment of thematic hypermarkets will allow you to choose more advanced and reliable products. We are talking about various plasticizers for concrete and building mixtures.
© Freepik
Before purchasing such products, it is better to consult with professionals at a hardware store. Talk about the surface for which the solution will be used, seek advice and purchase a suitable cement option. And then an excellent result will not take long to arrive. We wish you a successful repair.
vote
Article rating
Bustilat glue: application
Before using the adhesive composition, you need to carefully prepare the surface:
- remove dust and dirt from the surface;
- if necessary, the surface can be washed;
- if the surface is porous, then it needs to be opened with a primer;
- the room temperature should be above zero;
- Prepare the glue by mixing it thoroughly.
Working with floor coverings
To glue linoleum or carpet to the floor, you need to apply a thin layer of the adhesive mixture to the floor using a spatula. The prepared, straightened coating is carefully laid according to its dimensions on the floor covered with glue.
Every centimeter of the covering is carefully pressed to the floor and smoothed out. It is advisable not to enter this room for 72 hours to allow the glue to dry completely. To glue the floor covering, you need to know that the consumption of the adhesive mixture for such work is 500–700 grams per square meter.
Laying tiles
To lay tiles on the wall, you need to put 1-3 mm of the compound on the back side of it. Depending on the condition of the wall, you may also need to apply an adhesive composition to it.
Align the tile and lightly press it against the wall. It is advisable not to touch this surface for 72 hours so that the adhesive layer is completely dry. And the glue consumption per square meter ranges from 400 to 1000 grams.
Wallpapering
If you have just opened the glue, then you do not need to dilute it with water. And if you have already opened it and thickened a little, then it is advisable to dilute it. The homogeneous mass obtained after mixing is applied in an even layer to both surfaces using a brush or roller. Ten minutes, after that, you just need to wait, and then glue the surfaces. You need to get rid of all air bubbles using a dry towel or a special spatula.
There should be no drafts in the room where the work was carried out. It is advisable to close the room for the whole day. The consumption of bustilate for wallpapering a room will be 300–400 grams per square meter. You can also use PVA adhesive.
How to make paste yourself
First, pour the flour into a glass bowl and, pouring a glass of cold water, stir thoroughly with a whisk or fork until a homogeneous mass is obtained.
After this, pour the mixture into the pan, add the rest of the water and mix thoroughly until a homogeneous mixture is obtained. Turn on the stove over low heat and let our mixture cook for at least 10 minutes, making sure to stir continuously; for this we use a long wooden or plastic spoon.
After this, you can say that your paste is almost ready. All you have to do is wait until it cools down completely, and a very important point is not to put the glue in the refrigerator so that it cools faster. It should cool down on its own. And only after that you can start wallpapering. A very important point is that after cooling, use the glue no more than 2 hours in advance, since after 2 hours or more it loses its adhesive properties. Therefore, prepare it just before pasting.
DIY wallpaper paste (video)
Instructions for using glue
Before carrying out work, it is necessary to ensure good ventilation of the room by opening the doors and windows.
To prepare the surface for gluing, it must be cleaned of dust and dirt. If the base is porous, it is recommended to pre-prime it with a special solution.
Works with linoleum
- To glue linoleum or carpet, a thin layer of adhesive is applied to the floor with a spatula, and the prepared coating is laid on top of it.
- Next, you need to carefully press it to the base and leave it for 72 hours to dry completely.
- The glue consumption in this case will be about 500-700 grams per square meter.
To speed up the drying of the glue when gluing linoleum or tiles, you can add cement mortar in a ratio of 1 to 1. Prepare the solution from 1 part cement and 3 parts sand.
Working with tiles
- When using adhesive to decorate walls with tiles, you need to apply a layer of 1-3 mm of the composition on the back side of the tile.
- Next, press it firmly against the wall. Drying occurs within 72 hours, and glue consumption varies between 400-1000 grams per square.
Wallpaper
- For gluing wallpaper, Bustilat does not need to be diluted if it has not thickened. Otherwise, add 1/7 part water, but don't overdo it.
- The glue consumption will be 300-400 grams per square meter.
Bustilate and PVA - what is the difference?
Construction PVA and Bustilat are two common adhesives that differ in chemical composition and some performance characteristics.
Both compositions glue the same materials and surfaces, and their advantages include low cost, but there is a slight difference between them:
- Bustilat glue is stored longer than PVA (12 and 6 months, respectively);
- PVA is more environmentally friendly, so it is not prohibited to use it when renovating children's institutions;
- In terms of adhesion, Bustilat is slightly superior to PVA.
As you can see, the differences between the two adhesive compositions are insignificant, so you can choose any of them for repair work.
Are there any analogues?
Bustilat glue has almost no analogues, considering the price-quality ratio, but there are improved varieties of adhesive composition.
Different types differ in such parameters as:
- thermal resistance;
- frost resistance;
- immunity to moisture.
Let's look at the main varieties:
Bustilat-M
An adhesive with frost-resistant characteristics, suitable for gluing finishing tiles, carpets made of synthetic materials, heavy wallpaper and linoleum, and it is also often used for priming internal and external walls of buildings.
Bustilat-N
This adhesive composition is used for gluing tiles, heavy wallpaper, borders and linoleum without a base. The material has high waterproofing properties. To obtain the desired viscosity, Bustilat-N must be distributed with water according to the instructions before use.
Bustilat-D-Super
This type of glue is characterized by improved adhesion, minimal toxicity and non-flammability. It is considered the best option for gluing linoleum or wallpaper.
Bustilat-Lux
It is designed for gluing finishing and building materials based on polymers, PVC film, various types of wallpaper and linoleum. Bustilat-Lux is often used in construction areas, but it is also used by carpenters and joiners.
How to remove old Bustilat from walls?
When it is necessary to remove wallpaper glued to Bustilat and remove residual glue, you need to prepare. Let us immediately note that trying to soak frozen Bustilat is pointless - even hot water cannot soak it.
The only possible and effective method is mechanical removal of wallpaper and glue.
You can use a metal scraper or a sharp spatula.
The glue is removed well with a grinder with a metal brush attachment, but this work is very dusty, so you need a respirator.
There is another trick you can use to remove Bustilate: wet a rag and apply it to the surface, then iron or heat it with a hairdryer. The glue will soften and you can peel it off with a spatula. The work is not fast, but not dusty.
“Bustilat” is a synthetic universal construction adhesive, which is intended for gluing wallpaper, carpeting, fiberboard, chipboard, asbestos-cement and ceramic and polymer tiles, linoleum. Bustilat glue allows you to easily connect walls, floors and ceilings with decorative elements without damaging them with unnecessary holes. The adhesive is intended for interior use only.
How to clean the surface from old Bustilat
If it is necessary to dismantle the old wallpaper that was attached to Bustilat and free the surface from glue residues, preparation is required. Frozen “Bustilat” does not dissolve even in hot water, so you should not soak it.
The most effective method is mechanical, using a sharp scraper or spatula.
A grinder with a special attachment in the form of a metal brush removes residues perfectly. A respirator is required to protect against dust.
There is another method for removing dried glue. Moisten a cloth with water, then apply it to the base and heat it with an iron or hairdryer. The adhesive crust will become softer and easier to remove with a spatula. The process is long, but not dusty.
Bustilat glue is very popular, and if you use it correctly, you will achieve good results in home repairs.
Often during repairs there are times when it is not possible to carry out facing work mechanically. Then they resort to gluing materials and decorative elements to various bases. For such work, universal adhesive compositions are valuable, but Bustilat glue can cope with such tasks. Before use, you must read the terms of use.
General information about Bustilat
Bustilat is a universal construction adhesive of synthetic origin. Good adhesion indicators and harmlessness to health are the main qualities that make it suitable for use inside human housing. The glue cannot be used outdoors, but indoors it is used for finishing walls, floors, and ceilings, allowing you to securely fasten decorative elements and avoid drilling unnecessary holes. “Bustilat” is an invention of Russian scientists from the Mosstroy Research Institute, but now it is produced by different companies:
- "Bright colors";
- VGT;
- "Expert";
- "Aquest";
- "Rhoda Color";
- "Satellite";
- "Akvit";
- "Diola", etc.
The most popular glue remains Lakra M 20 from, which can be found in any hardware store. High-quality glue always has a certificate of conformity. Many companies produce glue in accordance with GOST 24064-80, but its production is also permitted according to specially developed specifications.
This is interesting: Choosing tile adhesive for exterior work: we consider it in detail
Manufacturers
Bustilate is considered a highly sought after adhesive. Its production is established at many enterprises.
The highest quality, according to buyers, are the compositions of three manufacturers:
- "Lakra." This manufacturer produces the universal Bustilat M20. The substance is characterized by high adhesive strength, good frost resistance and water resistance. Packaged in containers of 1 and 2.5 kg.
- "Palette". The manufacturer offers glue under the name “Bustilat TURI”. It glues synthetic carpets, carpets, linoleums on a pile basis. Packaged in 1, 3, 4, 10 and 20 kg.
- "Yaroslavl colors". The product is sold in 10 and 21 kg buckets and has standard characteristics for this type of adhesive.
Bustilat from any manufacturer will help carry out high-quality repairs without overpaying for the purchase of adhesives.
Storage
Bustilat glue is stored in a hermetically sealed container and in a place protected from high temperatures.
For this substance, repeated freezing (up to 5 times) with further thawing at room temperature is acceptable during transportation and storage.
Before use, the substance is thoroughly mixed.
The shelf life in the original sealed packaging at an ambient temperature of + 5-20 degrees C is 12 months from the date of manufacture.
Installation of floor, wall or finishing coverings indoors is not always possible with the help of fasteners. Despite the wide selection of screws, nails, bolts, studs, self-tapping screws, their presence can significantly spoil the appearance of the coating and complicate its further operation. The use of adhesives helps solve the problem. Especially appreciated are universal adhesives, suitable for gluing wallpaper and floor coverings, and placing decorative elements made of various materials. Thus, the use of Bustilat glue in the process of laying linoleum provides a high-quality coating due to a number of technical characteristics of the adhesive composition.
The domestic manufacturer offers many options for bustylate glue
How to work with glue
The composition should be used strictly in accordance with the instructions, which detail the operating rules. Before application, the composition must be thoroughly mixed. You can choose any suitable tool: roller, brush, spatula, cotton swab.
Before application, the composition must be thoroughly mixed.
Surface preparation
Preparatory work begins with thorough cleaning of the surface from dirt and old finishes. They carry out leveling, puttying, sanding, and covering with a primer. If Bustilat is not equipped with antifungal elements, you can additionally coat the surface with a suitable agent.
Preparatory work begins with thorough cleaning of the surface from dirt and old finishes.
Working with floor coverings
When the floor covering is glued, the composition is applied to the base itself. Then the covering, pre-cut to the size of the room, is laid on a layer of glue. It must be rolled with force with a roller to obtain the desired fixation.
Operation of the premises can begin in three days.
When the floor covering is glued, the composition is applied to the base itself.
Laying tiles
When laying tiles on the wall, apply a 2-3 mm layer of adhesive to the tiles. It is pressed against the surface and leveled. Complete drying occurs after 48 hours.
When laying tiles on the wall, apply a 2-3 mm layer of adhesive to the tiles.
Wallpapering
Newly opened packaging can be used without dilution; if the product has been standing for a long time, you can add water to reduce the thickness. The adhesive solution can be applied to the wallpaper or the surface; the choice is made based on the instructions for the wallpaper. The wallpaper is glued ten minutes after coating with glue, waiting for it to be absorbed. The canvas is leveled with a suitable tool. Windows can be opened after 24 hours.
The wallpaper is glued ten minutes after coating with glue, waiting for it to be absorbed.
Advantages and disadvantages
To compile this list of pros and cons, experts studied reviews from real customers, expert opinions, as well as data declared by manufacturers.
The practicality and reliability of the adhesive composition has been confirmed by several decades of its use.
This is how long the product has been on the shelves of Russian stores. Over such a long period, professionals carefully studied the effectiveness of the product and confirmed it in practice. Despite the huge selection of adhesives, consumers still choose Bustilat.
Due to the absence of toxic and dangerous elements in the composition, the glue is considered a safe product. This characteristic allows you to safely use the composition in residential buildings.
The price of the product is affordable for the average consumer, and given the popularity and wide distribution of glue, it will not be difficult to find it in any specialized store.
The adhesive layer has excellent elasticity.
Even if the elements and surfaces being glued are deformed, the glue will retain all technical characteristics and, most importantly, its fastening properties.
Regardless of where you use the composition, the glue will fulfill its obligations in full. Whether it's wallpaper, tiles or other individual materials, the composition will firmly connect the elements to the base.
To appreciate the full range of product benefits, purchase only certified products. Glue from the Lakra brand is widely used on the Russian market. If you doubt the quality of the product, check with the sellers for certificates.
No significant disadvantages were found in this composition, however, the product has certain disadvantages.
“Bustilat” cannot be used at sub-zero temperatures, given the fact that there are many adhesives on sale that can withstand this temperature. During its existence, many improved analogues have appeared on the market, which are superior to the product in certain indicators.
Additional tips and tricks
To achieve success in using glue, you should follow these recommendations:
- clean the surface of old material, level and putty it;
- coat with primer;
- prepare wallpaper, linoleum or tiles;
- move the glue well until smooth;
- apply glue;
- wait 10 minutes;
- align the material with the surface.
Bustilate is considered an effective composition that is popular with many craftsmen.
To achieve good results in its use, you should follow a number of rules.
Precautionary measures
Bustylate glue is a synthetic mixture based on a chemical compound. Therefore, when working with this type of glue, you must follow some rules for its use. Remember to protect your hands with gloves when working with this substance. After finishing work and the glue has completely dried, be sure to ventilate the room. If glue accidentally gets into your eyes, rinse immediately with warm, clean water, and then try to see a doctor.
Before pasting with such materials, it is necessary to prepare the surface: seal the grooves in the wooden chopped walls with plaster lime-gypsum or gypsum-sand mortar, or seal them with slats, and then line the walls with plasterboard sheets.
Fastening with nails
. If chintz with an ornament or pattern is used, it is necessary to ensure their alignment when preparing the panels. Having cut the material into pieces of the required length, sew the panel to the size of the wall, in which holes are cut for windows and doors. First, the panel is attached at the top, near the ceiling, pulling it tightly. Nails are driven in at least every 25 cm. After this, the panel is fastened below, near the baseboards, making sure that the material is stretched without wrinkles near the window and door openings. It needs to be attached especially well in corners.
Velvet is upholstered in the same way.
Chintz and velvet can be nailed down, without sewing the panels together, in separate pieces, driving nails into the edges. The edges can be laid one under the other and the nails placed in one row; You can also nail the edges of each panel separately.
Gluing
. For this purpose, various glues and mastics are used, but the best is an ordinary paste made of flour or starch with the addition of 100-150 g of wood glue to it (per bucket of paste). Gluing on paste is convenient because if you need to remove chintz or velvet, you just need to moisten them with water, and as soon as the paste gets wet, they can be easily removed. It is not always possible to soften other types of adhesives and mastics.
You can glue in large panels or individual panels, the latter are more convenient to use. You cannot smear the fabric like wallpaper: the paste will penetrate the front surface and when smoothed, it will become shiny. Therefore, the surface is covered with the prepared paste and allowed to dry until it is tack-free, that is, to a state where the fingers will still stick to it, but without the paste sticking to them. Place the fabric on this paste and smooth it well. The velvet is smoothed through paper or struck with a dry brush. Hands should always be clean and dry, without traces of paste.
You cannot drive a nail into stone, brick, or concrete surfaces, but although it can be easily driven into plaster, it can also be removed very easily. Therefore, you should do this. Thin slats with a width of 20 mm are made and material is attached to their back side with thin nails, and then the slats with the material are attached to the wall. They are attached in the same way at the bottom. If the material is nailed to the face of the slats, it will not fit tightly to the wall.
The slats are attached to the walls like this. First, holes are drilled or punched in the walls, wooden plugs are inserted into them so that they hold firmly, and nails are driven into them through the lath.
Some strengthen the panels by hanging them on a strong thread. Near the corner, nails are driven into the wall from above and below. A thin, strong nylon thread (fishing line) is passed through the sewn cloth, pulled tightly, secured firmly to the nails and the material is straightened. This is how they fix the walls on all four sides.
It is advisable to first carry out a test gluing by gluing a small piece of chintz onto cardboard or plywood.
Pasting walls (ceilings) with oilcloth
. Oilcloth is much easier to apply than chintz and velvet. Adhesives and other contaminants are easily removed from its front side. In practice, it is glued in the same way as linkcrust, but it is not soaked in water.
Oilcloth can be used to cover not only walls, but also floors. However, it is not recommended to cover the walls to their full height, but 1.5-1.7 m from the floor, as if arranging a panel. The oilcloth can either be glued or nailed.
Regular nails are used. The oilcloth is cut into sheets of the required length, hung on the walls, attached in several places with nails at the top and bottom. The top edges are covered with a layout, i.e. a strip no more than 30 mm wide.
It can be painted with oil or enamel paint or varnished. In order for the edges to fit tightly against one another, they have to be cut along a ruler. Oilcloth is glued to the floor using strong adhesives, mastics or pastes.
So that the fresh cement mortar sticks to the old one
Fresh cement mortar , as is known, does not stick, does not lie on old concrete, and high-quality repair of concrete products would seem impossible to carry out. But there is a way out. Special compositions of solutions (all in bulk parts) will help solve this problem. 1. Carbinol syrup -100, Portland cement 300-400, benzoyl peroxide 2-3. Carbinol syrup is commercially called “balsam” or “ Nesterov’s balsam ”.
2. Epoxy glue -100, Portland cement -100, hardener 7-8.
3. PVA glue 0.4-0.6, epoxy resin ED-20 - 0.04, polyethylene polyamine (hardener) - 0.04, Portland cement M 400 - 1, fine sand - 3, water is added to the consistency of a batter.
4. Cement grade M 400 -1, fine sand - 2-3, the mixture is mixed with a 2-3% solution of monosodium glutamate to the desired consistency. (Wear rubber gloves.)
When preparing solutions, you need to take into account that mixing a large amount of the mixture at the same time can cause it to heat up and instantly harden. Cooling the mixture while mixing almost completely eliminates instant hardening.
Adding 25% by weight of acetone to epoxy adhesive also significantly reduces the possibility of instant curing and does not affect the quality of bonding.
In recipes 1, 2, 3, the hardener is introduced before using the composition.
Warning: the compositions whose recipes are given above cannot be repaired on concrete rings of wells and other parts that come into contact with drinking water and washing water.
5. Bustilat glue -1, cement grade M 400 and higher -2.
6. Bustilat glue - 0.4 - 0.6, Portland cement brand M 400 - 2-3, add water until the batter is thick!
7. Bustilat glue - 100, ammonium caseinate - 2, fine quartz sand - 150-200, mix everything and apply.
8. PVA glue - 1, cement grade M 400 and higher - 2.
9. PVA glue - 0.4-0.6, Portland cement brand M 400 - 1, fine sand - 2-3, add water until the consistency of liquid dough.
10. Cement grade M 500 and higher - 97, calcium chloride - 3. Mix everything with water until the consistency of sour cream.
Repair of reinforced concrete (concrete) parts consists of coating both parts, gluing them together, with one of the compounds (preliminarily cleaned and degreased with acetone) and, if possible, tightening them together.
When repairing chips, dents , etc. into the composition (recipes 5, add 30-50% by weight of fine dry sand. The sand is mixed with dry cement, and then sealed with glue with a small amount of water. A chip, dent or simply old concrete surface is cleaned, degreased and coated with appropriate glue, then rubbed prepared composition, like ordinary concrete mortar.
Recipes 3, 4, 6, 7, 9 are used more like putties for gluing and repairing concrete products.
By leaving a comment you agree to the Privacy Policy
Advantages and disadvantages
The advantages of Bustilat include the following:
- Composition safety. The substance does not harm the human body.
- Easy to use. The product can be combined with different types of materials. This is very convenient, since only one composition is enough for repairs. In such a situation, there is no need to buy several special products.
- Excellent elasticity and high adhesive properties. Thanks to this, it is possible to achieve high strength of fixation of materials over a long period of time.
- Low shrinkage and excellent adhesion. These parameters ensure high reliability of adhesion with natural and artificial materials. As a result, it is possible to obtain a strong and even seam.
- Multifunctionality. The composition can be used as an adhesive or primer. It can also serve as a waterproofing mixture.
- Affordable price. This is due to cheap raw materials and optimization of the production process.
The product has no serious drawbacks. The only drawback is considered to be low durability. In this case, it is worth giving preference to modern multicomponent compositions.
Types of glue
The chemical industry does not stand still. Modern compounds are added to many formulations of drugs that are used in everyday life. The famous glue has also undergone changes. To improve its moisture resistance and frost resistance, special additives were added to its composition.
Depending on the use of the adhesive composition, its varieties are distinguished:
- "Bustilat-M" - the adhesive composition includes frost-resistant additives. Used as a primer and adhesive. Linoleum, carpeting, various types of tiles and wallpaper are glued.
- Bustilat-N is specially designed for materials with poor adhesion. It contains special additives that increase the adhesiveness and strength of the adhesive joint. It is used for gluing linoleum without a base, synthetic carpets, non-woven wallpaper, etc.
- "Bustilat-D-super" - has enhanced strength. It is specially used if you need to secure heavy materials or for gluing linoleum to a base.
- “Bustilat-Lux” - this type is intended for joining polymer materials: PVC film, linoleum, etc.
One type of glue may have different numerical values, which indicate the degree to which the main distinctive property is manifested. Thanks to its varieties, all repair and finishing work can be completely done. It is worth considering that if Bustilat is used for linoleum and other various elements, it will cost much less than other modern substances. This fact remains very important; This glue simply has no competitors in this sector.
Types and areas of use
Using the “M” marking, manufacturers designate a product that has excellent resistance to low temperatures. Experts recommend using such compositions for work in unheated premises, such as utility rooms and sheds.
It is also allowed to be used for finishing country houses that are used at certain times of the year. Recently, glue is often used as a universal primer.
Composition “D-super” is an adhesive with excellent bonding strength.
The main purpose of the product is gluing massive and large products: heavy dense wallpaper, baseboards, decorative elements and much more.
Product “N” is a special modified composition.
Manufacturers have designed it to bond materials to substrates with poor adhesion. To achieve this effect, special components were added to the composition. The composition layer is characterized by increased adhesion and reliability.
The main feature of the product is that after drying the glue remains elastic and flexible. Due to this characteristic, Bustilat can be used in areas that are often subject to dynamic impact.
Glue marked “Omega” is used to fix elements on fabric and felt bases.
This will ensure a reliable connection for any substrate. The main area of use is laying carpet, linoleum, gluing fabric wallpaper.