Pasting hard-to-reach places during wallpaper installation is the most difficult task. This applies to pasting at the joints with the floor and ceiling, near door and window openings, in places where pipes pass, etc. These manipulations require not only accuracy, but also trimming the wallpaper after gluing. Let's consider individual installation cases that require cutting the wallpaper sheet directly on the wall.
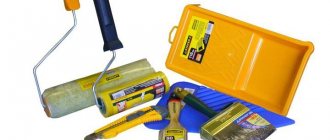
Cutting tools
Cutting wallpaper
If you choose a knife to cut wallpaper, then it should be easy to use and as sharp as possible. Knives with segmented blades have these properties. Typically, they are used for cutting drywall. With this tool you can cut plastic, drywall, strip wires and even sharpen construction pencils. With its help, it is convenient to cut wallpaper and trim them in the corners.
For high-precision cutting you need to get a ruler. It should be long enough. In addition, it should be convenient to guide the knife along it. A construction spirit level with a length of 1.2-1.5 m can play this role. With its help, you can guarantee pressing of the blade along the entire length, safe and accurate cutting, as well as ease of operation.
Construction knife
Some craftsmen prefer to use scissors to cut wallpaper. Well, perhaps this is not the worst option. You can use almost any of their analogues, with the exception of manicure ones. Scissors must be of medium length and must be sharp. Hairdressing or household scissors will do.
How to cut an edge correctly
Trimming edges
Thin wallpaper is glued overlapping. This means that the edge should be cut on one side. Scissors or a construction knife can be used for this. Thick wallpaper is glued end to end. In this case, the edge is cut on both sides. It is important to do this carefully, using a knife and a ruler (construction spirit level).
After cutting, the finished canvases are laid on a flat, dry surface free of dust and dirt. Now you need to inspect the edges of the wallpaper for possible defects that may form if the edges are removed incorrectly. Now you can start cutting the wallpaper.
Trimming at window slopes
An important step in the final aesthetics is the careful cutting of the wallpaper near the window opening. In this situation, follow the following sequence of actions.
- Paste the wallpaper with a slight overlap: part of the canvas should protrude beyond the edge of the window opening.
- Carefully bend the canvas towards the window so that a clear bend line is formed on the wallpaper.
- Attach a metal strip, construction ruler or other tool that has a clear horizontal line that coincides with the end line of the slope to the bend.
- If in doubt, you can draw a line with a pencil.
- Using a sharp knife or blade, carefully trim the overhanging edge of the sheet in line with the edge line of the slope.
- Remaining glue should be removed with a soft cloth.
To protect the window opening trim from glue, you can use masking tape.
Cross cutting wallpaper
Cross cutting
At first glance, the whole cutting process is incredibly simple - measure the distance in height, mark it and cut off a piece of wallpaper. But it was not there! If the first cut is made crooked, then the remaining cuts will be crooked!
Note!
In addition to the length of the blade, it is very important to observe the cutting angle. The ideal angle is 90°, otherwise there will be great difficulties when wallpapering.
In view of this, a protractor is needed to cut the canvas. It does not necessarily have to be a school protractor. Here you can get by with any object that has an angle of 90°. For example, this could be a CD case. Alternatively, you can use a drawing square. Each time you should align the edge of the blade with the edge of the workpiece. This way you will have 2 angles, each 90°.
Selecting a wallpaper pattern
There are several ways to select a pattern. The first of them is that the first strip is cut and glued to the ceiling or wall, and then the rest of the wallpaper is selected to match this pattern. With this calculation, the waste from the roll will be from 1 to 1.5 m. Therefore, not every master is satisfied with this approach to selecting a pattern on wallpaper.
Fit according to pattern
The second way to select a pattern is to completely unwind one roll on the floor, and then select the pattern, looking for matches.
Note!
When choosing a pattern for wallpaper, it is important not to forget about the mirror reflection from the ceiling or walls. When selecting a design, stand facing the wall for which you are selecting a design. If you plan to wallpaper the ceiling, then you should visually imagine how the finished drawing will look on it. Otherwise, the pattern on the wallpaper may not match.
The two above methods for selecting patterns on wallpaper are universal. They are suitable not only for marking paper, but also non-woven and vinyl counterparts. There is a third, innovative approach to cutting wallpaper when selecting a pattern. To do this, you need to cut 40 cm of wallpaper from two rolls. From the first - from the beginning of the strip, and from the second - from the end. Why is that? Everything is due to the fact that when the machine cuts wallpaper, it leaves a margin of 0.5 m and is included in the square meters of the roll. This is provided for more precise coordination of the pattern, as well as to facilitate its selection. This factor should be taken advantage of. Thus, the design is selected from two rolls at once, and not, as many are used to, from one. If two rolls are not enough for covering the walls of a room, then the third roll does not need to be cut off at all. The pattern will match on its own. Thus, the average roll waste will be reduced from 1 m or more, to only 20 cm per 1 roll.
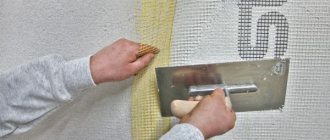
Preparing corners (step by step)
In most cases, the corners in apartments or houses are not straight. There are several ways to level corners; professional builders use them. Having examined them in detail, a beginner will be able to independently make the corners even.
Method No1
To make the corner even, first find the most protruding place of the adjacent wall. This can be done using a rule or a metal profile. The rule or profile is applied closely to the wall and held only in a vertical position.
Once the bulging area is found, an angle spatula is applied to it. And a profile for him. Using a plumb line, we check that the profile is strictly in a vertical position. Next, hold everything tightly and make marks for the dowels.
Next, I use a hammer drill to make holes in the wall. Install dowels. The profile is secured with self-tapping screws.
- After installing the profile, it is necessary to apply putty. Professionals recommend gypsum-based putty; it is considered the best.
- Before starting work, moisten the wall with a small layer of water. The putty should be applied using an angle trowel.
- It turns out to be a perfectly even angle; as soon as the material has dried, it is sanded with zero-grade sandpaper.
Method No. 2
Construction stores have special perforated corners. They can be metal or plastic. A special mesh is attached to the edges of such corners.
This corner is attached strictly vertically. It is fixed with putty. After drying, it is rubbed with sandpaper.
These methods will allow you to quickly and efficiently level the corners in your apartment. This will allow you to easily and efficiently paste the wallpaper.
Cutting wallpaper in corners
Many also doubt their knowledge of how to properly cut wallpaper in corners. Well, the answer to this question is important, because otherwise the appearance of the wallpaper will suffer greatly. So, after the sheet of wallpaper is pasted, according to the markings of the walls, you should cut the corner. For this, a spatula with a width of no more than 15 cm is used if the walls are curved. In cases where the walls and corners are smooth, the spatula can be wider.
How to glue wallpaper in corners
The spatula is pressed tightly into the corner, the blade of the construction knife at this moment exactly follows the line. The blade must be as sharp as possible, so it must be broken off regularly. This step will prevent damage to the wallpaper. After this, you can remove the cut side of the wallpaper; it is no longer needed. Now the next sheet of wallpaper is glued along the line previously marked on the wall. There should be an overlap of about 1.5 cm in the corner. Then you need to press the wallpaper at the top and stretch the glue. For this, a special soft spatula is used. The corner is carefully leveled. In the same way, a spatula is placed on the ceiling plinth from the wallpaper side, and the excess is cut off with a knife. The overlap is carefully trimmed and the wallpaper sheet is finally leveled. The implementation of this work can be seen visually in the video tutorial.
As you can see, cutting wallpaper is not that difficult. If you have any additional questions or do not understand any points stated in the article, please write your comments. The specialists working on the site will prompt you with the information you are interested in.
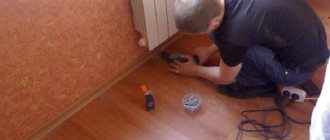
Trimming at the baseboard
When performing cosmetic repairs with existing floor skirting boards or in circumstances where a suspended ceiling and ceiling skirting boards are pre-installed, difficulties arise with the installation and joining of the wallpaper sheet with the skirting board. In this situation, the following algorithm of actions will help to trim the wallpaper evenly.
- Measure the wallpaper so that it extends slightly onto the surface of the baseboard;
- Using a metal spatula, press the sheet onto the surface so that a clear bend is formed at the point of contact with the baseboard;
- Apply a long metal spatula, ruler or other device of suitable length with a straight horizontal line to the bend;
- Using a sharp utility knife or blade, carefully cut the wallpaper along the bend;
- Carefully remove any remaining glue on the cut with a soft rag and press the edges together.
This algorithm is applicable to installation near door frames.