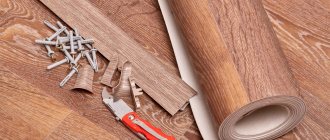
It would seem that the simplest stage of laying a linoleum covering can be considered the installation of a wall profile, but, oddly enough, not all craftsmen know how to correctly lay a plinth on linoleum. And even more so, many problems arise if you have to face such a task for the first time.
Installing a plinth without a drill is almost impossible
Preparation
A guarantee that you will be able to quickly and without problems, and most importantly, correctly install the baseboard on linoleum, has always been and remains competent preparation of the floor and walls adjacent to the floor covering at the bottom.
Before starting installation you need:
- It is possible to completely complete the work of laying the covering, to lay the skirting boards on the linoleum efficiently and reliably only if the PVC sheet is fully adapted to the floor surface so that shrinkage takes place and, as they say, the material gains its size;
- Using a wooden hammer or, if available, a household cable locator, check the bottom edge of the walls. If the apartment or house is old enough, then it is possible that there are some communications, cables or electrical wiring inside, under the plaster;
- Using a building level or a long steel profile, we check the geometry of the walls and floor in those places where the baseboard is supposed to be nailed to the linoleum.
It is clear that decorative floor finishing needs to be installed so that there are no gaps between the top edge of the baseboard trim and the wall. A control measurement will allow you to identify defective areas of the wall and make a decision about which plank model is best suited in this particular case. At the same time, you will need to measure the perimeter of the room in order to accurately determine the quantity and footage of the material.
Under load, the coating will definitely shrink
For your information! In addition, you will need to decide what and how exactly to attach the plinth to the linoleum and to the wall.
Ideally, for new rooms with concrete or brick walls, you can use self-tapping screws with dowels. If, based on the results of an inspection of the walls, it turns out that the lower edge is leveled with a layer of plaster several centimeters thick, then plastic skirting boards cannot be placed on the linoleum or nailed to the wall with self-tapping screws, nails or similar fasteners. Under load or as the linoleum sheet shrinks, the decorative overlay will simply be torn off from the attachment points.
Laying volumetric plastic planks
Any process consists of several stages, and installation of plastic planks is no exception. All work will include the following operations:
- Taking measurements of the perimeter of the room.
- Preparation of tools and materials necessary for installation.
- Cleaning the walls from dust and marking them.
- Drilling holes in walls.
- Fastening planks to walls and connecting them.
First of all, the owner of the home will need to measure the room around the perimeter in order to know how much skirting board will be required for it.
Scheme for calculating the required amount of plinth.
The standard length of a plastic strip is 2.5 m, but it is better to take a few meters of material with a margin of several meters. You should calculate how much is needed to place connecting elements (end caps, external and internal corners, connectors).
Next, the owner will need to prepare all the materials and tools for the job. In addition to the strips and connection elements, these will be:
- construction vacuum cleaner;
- cloth or brush.
- construction tape;
- pencil;
- hammer;
- hacksaw for metal;
- screwdriver;
- awl;
- perforator;
- screwdriver;
- screws.
It is important to clean the lower part of the walls and the linoleum adjacent to them from dust and construction debris using a special vacuum cleaner, a rag or a brush with soft bristles. After this you can start marking. It is better to start doing it from the corner. The marking is done as follows. Take a long plank and put a corner on its end, then apply the plinth to the wall so that the corner of the room and the corner of the plank coincide.
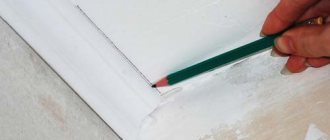
The first mark is made at a distance of 5 cm from the corner: this is where hole No. 1 will be. Then a distance of 40 cm is measured with a tape measure and hole No. 2 is marked with a pencil. All other holes are marked in the same way. After this, the plinth is moved to the side and drilling begins.
Scheme for installing fittings on baseboards.
It is better to drill holes with a hammer drill, but if the wall in the house is made of plasterboard, a professional drill will do. When the holes are ready, the vacuum cleaner or brush will need to be used again to remove any debris that has appeared. The next stage of work is the installation of plastic dowels into the holes. They are driven into the wall with a hammer.
Next, the plinth is installed. The design of the plastic strips provides a channel for laying the cable; it is located on the front wall of the split strip. Before installation, the upper part of the strip (overlay) is removed. The back part should be attached to the wall, and then holes should be pierced in it. This can be easily done with an awl, since the baseboard is very soft. All holes in the plank must coincide with the dowels, into which screws will need to be inserted through the holes, and then screwed in using a screwdriver or screwdriver. When the length of the strip comes to an end and 1-2 holes remain without screws, you will need to put a connector on the second end of the plinth and only then screw in the last screws.
Make holes on the slats for self-tapping screws using an awl.
Next, the next piece of plastic strip is attached to the connector, and its installation is similar to the first piece. There will come a time when you need to saw off a piece of the baseboard, since a corner of the room will get in its way. A hacksaw for metal is suitable for this. The end of the plastic strip is reinserted into the corner connector and installation is continued in the manner described above. In the same way, attach the plinth to the rest of the walls of the room.
After this, below the level of the dowels, carefully lay the wires into special grooves in the back of the plinth. To ensure that the communications are well fixed in the channels, they can be glued in some places with double-sided tape for reliability. The narrow front panels of the plank are then connected to the back of the plank.
How long should linoleum lie before installing skirting boards?
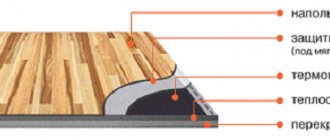
Traditionally, linoleum is laid on the floor with a slight overlap on the walls. This is done in order to provide a small margin, which would compensate for the decrease in the size of the linoleum as it shrinks.
Therefore, it is not recommended to lay linoleum and baseboards at the same time. Even for expensive two-layer coatings, be sure to make a reserve, which is cut to size no earlier than two weeks later. There are two ways to speed up the adaptation process:
- Periodic heating of the floor covering using a heat gun or an infrared household heater;
- Laying on the surface of linoleum a load of household items, furniture, household appliances and simply heavy objects available in the household. The main thing is that the load is evenly distributed in the center and around the perimeter of the room.
If good quality material is laid on the floor, you can proceed to installing skirting boards on linoleum in 7-10 days.
You can cut linoleum under the baseboard simply by hand, but it’s better to use a tool
Installation of flat plastic strips
Installing a flat plinth differs from installing volumetric planks. Typically, flat plinths are not screwed to the walls, but glued to them using liquid nails. To work you will need:
- building level;
- pencil;
- roulette;
- hacksaw;
- glue liquid nails.
First, as in the installation method described above, you need to prepare planks of the required length for the entire perimeter of the room, and select the corners for them. Next, you need to try leaning the baseboards against the walls to see if all the materials are enough and if they fit well together.
Installation of flat plastic skirting boards.
Then they begin laying the planks on the walls. To do this, apply glue to the clean inner surface of the first plank in a wavy line or in the form of dots, and then press the panel tightly against the wall.
Do the same with all other parts of the plinth, if necessary, connecting their parts with corners and connectors. Don't squeeze too much glue out of the tube at once. So as not to smear the baseboard, linoleum and unnecessary parts of the wall with it. Liquid nails dry in about 12 hours and finally harden after 7 days.
The main condition for such installation is that the installed planks must be glued only to the wall and can only slightly touch the linoleum. If they are attached only to the floor covering, then over time it will shrink, which will lead to the formation of gaps between the plank and the walls, since the linoleum will move the baseboard away from the vertical surfaces. For reliability, some owners try to fix the planks both on the wall and on the linoleum, but this action is also a mistake, since the shrinkage of the linoleum contributes to the deterioration of the appearance of the plastic: its cracking and deformation.
How to install skirting boards on linoleum
After the linoleum canvas has gone through an adaptation period and its size has decreased somewhat, it’s time to trim the edges around the perimeter. This can be done with an ordinary stationery knife and a metal bench ruler. The distance from the edge to the wall should be within 3-5 mm.
Next, you need to determine which version of the baseboard will fit best on the linoleum:
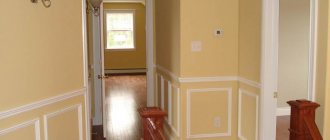
- If everything is in order with the geometry of the walls, then it is easier and cheaper to install a wooden strip - a “step”, as in the photo;
- For a very small room with high ceilings, colloquially “glass”, high flat slats would be a more suitable option;
- In all other cases, it is best to use plastic decorative overlays.
An ideal option for an apartment with concrete walls.
This plinth, as a rule, has a soft upper and lower edge, so it fits perfectly to the surface of the linoleum and the wall, and well masks any violation of the surface geometry. In addition, correctly attaching a plinth to linoleum is much simpler and accessible to almost anyone, even without experience, and the presence of an internal channel allows you to hide cables or electrical wiring.
How to nail plastic skirting boards onto linoleum
If you have the opportunity to choose, it is best to purchase a collapsible model. This bar can be disassembled into lower and upper parts, which makes it very easy to install.
The front surface of the strip is made in the form of one continuous strip installed on top of the lower part. Before installation, the cover plate is separated into two parts. The upper part is set aside, and the lower part is installed on the linoleum around the perimeter of the room.
Important! The entire fastening process boils down to carefully pressing the plastic strip against the wall with your hand and drilling holes in the concrete or brick for installing the dowel plug.
The hole in the plastic must be made in advance so as not to split the lining with a concrete drill
The attachment points are located in increments of 30-40 cm. End connectors are used to join several planks. In the corners, both internal and external, plastic strips are joined together using overlay decorative elements. They can be installed with latches, but most often the parts are glued to the ends.
We put on the decorative part on top
This video will help you figure out how to properly lay a plinth on linoleum:
How to install wooden skirting boards on linoleum
Quite often, apartment owners prefer to install wooden slats instead of the popular plastic decor. There may be enough reasons for such a decision, including the desire to save money. It is quite possible to nail wooden skirting boards onto linoleum, but only if the geometry of the walls and the thickness of the plaster are not satisfactory.
In the simplest case, it could be the same wooden step slat or any similar material. If possible, it is best to choose a plinth with a cut off top on the back side, as in the photo.
First of all, it is necessary to place skirting boards on the linoleum around the perimeter of the room. Using a pencil and a ruler, drill points are applied to the wooden slats for future fastenings; these can be self-tapping screws or magpie nails. Marks on the plinth are made in increments of no more than 40 cm, and you need to alternate holes - for vertical drilling into the floor and for horizontal drilling for installing a self-tapping screw into the wall.
Drilling points for nails
At the junction points in the corners of the room, the slats are cut at an angle of 45° so that the decorative strip can be rotated. The installation technology is as follows:
- The plinth overlay, which comes first to the corner, is installed on the linoleum and the marks for drilling are transferred to the wall. Here they mark the cut line at the end of the plinth;
- The plank is cut with a hacksaw and returned to its place, attached to the wall using self-tapping screws;
- The next step is to nail the profile or secure it with self-tapping screws directly to the wooden base located under the linoleum;
- After the plinth is fixed, take the next bar, it will be rotary, and mark the required cutting angle along it. This is done so that there is no gap with a cut of the previously installed rail. The plinth is placed on the linoleum, pressed into the corner against the first plank and nailed to the floor and wall.
After the installation of the plinth has been completed, the holes on the surface are filled with putty. This is followed by toner treatment or varnishing of the wood.
How to attach flat skirting boards to linoleum
Installation of flat decorative overlays can be done in two ways. A wooden or polyurethane skirting board can be fixed to the wall using glue or special metal fasteners, as in the photo.
Installation on brackets
Such staples-clothespins are attached to the lower part of the walls around the perimeter of the room. The flat plinth is placed on the linoleum and simply snapped onto the fasteners. It turns out very quickly, but not very reliable. Often, due to the bottom edge of the baseboard touching the surface of the linoleum, the decorative strip simply falls off the bracket.
Installation on foam
Fixation with nails
The easiest way is to install flat decor on polyurethane foam. After cutting and adjusting the blanks, a thin strip of polyurethane foam is applied to the wall, a plinth is placed and secured to the wall with thin nails.
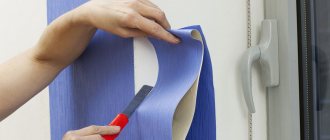
It is clear that before starting work, the wallpaper in the lower part of the wall, approximately 40 mm from the surface of the linoleum, needs to be cut off using a simple device.
Advice from professionals
Laying carpet over linoleum is not a difficult task at all, and some methods can even be called simple. You don't have to be a professional, even beginners can do it. But in order for everything to go as well as possible, you should take into account the advice of professionals when working:
- We remember about reliable fixation of linoleum to the rough base. No bulges or depressions are allowed. You also need to restore damaged areas and degrease the surface.
- In the room where the carpet will be installed, you need to control low humidity in the air. This is easy to provide with the function of heaters.
- We need to decide on the flooring method. To do this, take into account your work experience, the availability of special tools, materials, and the design of the room.
- Completely clear the floor of furniture, lamps, and even children's toys that will interfere with your measurements.
- After the work is completed, the room needs to be ventilated. To do this, the windows need to be opened; if it is the warm season, then they can be kept in this position even for a day.
Ventilate the room after completing all work
Many small loose particles will be lost in the pile. Take a regular dustpan and broom for cleaning. Final cleaning is done using a vacuum cleaner.
How to cut skirting boards correctly
The plastic lath is cut very simply; if you do not try to cut the material with scissors, there will be no cracks or chips. It is best to perform trimming with a regular hacksaw blade for metal with a fine tooth. To do this, just rest the rail on a table or stool and, without making much effort, cut the material at the desired angle. There are no problems with plastic, since you have to cut mainly at a right angle; the cut line, even if it is not quite straight, is still covered by a plastic adapter.
Another thing is a wooden plinth. To install several slats on linoleum, and at the same time make them look like one whole, you have to resort to tricks. There are no adapters for wooden slats, so splicing is done with an oblique cut.
Splicing with an oblique cut
The adjacent edges of two pieces of plinth are cut at an angle of 45° and connected, as a result the cutting line is almost invisible.
A similar technique is used to make a gash at the junction of the baseboard with the door frames. To do this, cut a triangle 3-5 cm wide on the edge, turn it over and lay it on the cutting line, as in the photo. This results in a smooth transition from the baseboard to the door.
Washed down the junction to the platbands
In the corners, the wooden profile is sawed at 45° so that the plank fits tightly to the linoleum and walls, the back side of the joint line is cut with a knife.
How to lay linoleum and baseboards if there is a cable
As a rule, new wiring that could not be installed in the wall or in channels under the ceiling is laid out on linoleum around the perimeter of the room. There is enough space under the plinth rail to lay a multi-core cable 10-12 mm thick. True, for this you will have to lay a special model of plinth on the linoleum, approximately the same as in the photo.
In this case, the lath is not nailed to the floor, but glued to the wall
If at the time of laying the wiring the baseboard was already installed on the linoleum, then the cable can be hidden in a niche and covered with a decorative cover.
How to fix linoleum without a baseboard
Often, the interior design does not allow the installation of a decorative rail, most often because of the furniture, which they always try to push as close as possible to the wall. In this case, double-sided adhesive tape is glued under the linoleum around the perimeter, and a metal strip is mounted on the wall, onto which the edge of the floor covering is placed.
Fillet for laying edges on the wall
As a result, the linoleum floor does not lose its decorative qualities, and at the same time provides reliable protection against moisture seeping under the coating.

