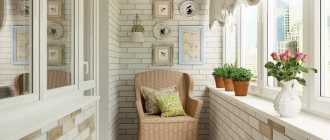
A simple and affordable way to increase the usable area of your apartment by several square meters is to convert your balcony into a comfortable room.
Cladding is often used to cover walls and ceilings. Practical and affordable material, after treatment with protective agents, is not afraid of changes in humidity and temperature, and is resistant to photoaging caused by sunlight. We will tell you in detail how to cover a balcony with clapboard.
Lining: properties and types
If you carefully sand a thin board, select a groove on one edge, and form a tenon on the other, you will get the well-known lining. The finishing material got its name due to its close connection with railway transport.
In the 19th century, carriages were sheathed with such boards. The locking connections turned out to be so strong and waterproof that the builders borrowed this solution from the railway workers. Now lining is widely used for exterior and interior decoration.
Block house
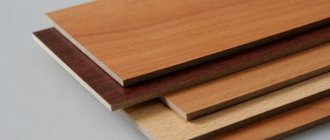
Natural wooden lining is a lamella 8-25 mm thick and 70-250 mm wide. During processing, the front surface acquires a certain relief. The most popular profiles are “block house”, “calm”, imitation timber, soft-line and others.
Landhouse
To obtain an exclusive finish, artistic surface treatment is carried out - milling, embossing, brushing.
For cladding, it is recommended to use lining with a humidity of no more than 12-15%. When dried, a damper board is prone to warping and torsion, the locks come apart, which leads to a violation of the integrity of the coating and a complete loss of appearance.
When purchasing lining, it is advisable to give preference to kiln-dried lumber. Wood maintained at high temperatures is resistant to rotting and retains its geometry even with fluctuations in humidity.
Cedar and larch
The cost of lining primarily depends on the raw materials. The most affordable boards are made of spruce and pine; larch and cedar are somewhat more expensive. The most expensive products are made from deciduous and hardwoods - linden, ash, oak, and exotics.
The price within one category is determined by grade. The two highest quality classes - Extra and Premium (A) - do not have visible defects or they are located on the back side of the board. Grade B lining is cheaper, but a certain number of knots, resin pockets, and blind cracks are allowed on the surface. The lowest grade C is intended for cladding temporary structures where there are no strict requirements for external finishing.
How is eurolining better than regular lining?
The term “eurolining” refers to a type of lining with some improvements:
- There are compensation grooves on the bottom surface. When humidity fluctuates, they help reduce the tension between the wood fibers, which reduces the tendency of the board to twist.
- The lock joint has a wider tenon and a deeper groove. Due to this, the fastening between the panels is tight and reliable, and the skin as a whole is less susceptible to deformation.
- During manufacturing, eurolining is immediately treated with deep penetration antiseptics. The material is ready for installation without any additional operations. As a rule, it is recommended to first antisepticize ordinary lining and only then install it.
Eurolining is produced in 4 quality categories - Extra, A, B and C. In all respects, it is superior to regular lining, but accordingly, it is more expensive.
Before covering your balcony with clapboard with your own hands, weigh the pros and cons of each material. While price may not be the most important factor, quality and durability will be.
Plank profiles
Wooden panels for cladding differ not only in quality and size, but also in appearance and locking design. Taking into account the desire of consumers to create an individual design indoors, manufacturers produce several types of profiles. The following types can be used to cover a balcony:
- Standard. The length of the board is 2-6 m. The outer surface is smooth, carefully sanded. The cross section has the shape of a trapezoid. An additional chamfer (angular or rounded) is made on the front side near the tenon. This allows you to see clearly defined seams on the wall after installation.
- Softline. The surface has no corners, which reduces the likelihood of burrs and chips. The rounded profile creates an unusually decorative effect.
- American. The inner plane of the plank is supplemented with a special recess, which allows for overlapping wall cladding. There is no chamfer near the tenon; a smooth transition is made from it to the center of the front part. This design exactly imitates siding panels with reliable joining of elements.
- Landhaus. The front side of the parts is processed with a milling cutter, hot stamping or another method to obtain a complex pattern on the surface. The inner side of the lamella is flat with grooves. A reliable connection is ensured by the side joints in the form of spikes. The processing method makes this type of lining the most expensive.
- Block house. The front part is completely curled. After installation, it seems that the balcony is made of round logs. Grooves on the inside will allow moisture to flow freely. The type of joints is tenons and grooves. This material is often used to decorate saunas.
- Calm. The planks are similar in appearance to eurolining, but have a not so wide tongue-and-groove part. There is no chamfer near the tenon, which makes the seams faint after installation.
Material calculation
In order to stock up on everything you need, but without excesses, it is better to make calculations according to a drawing or diagram. Enter the obtained figures into the table, and then proceed with the purchase.
Lathing
It is a frame made of slats, attached to the wall, ceiling and outer fencing of the balcony. The lathing is made of wooden bars with a section of 20x40, 30x30 mm or galvanized profiles. They are attached in a direction perpendicular to the laying of the lining itself. As a rule, the vertical arrangement of the panels is chosen, so the bars are installed horizontally. The pitch between the bars is 400-600 mm. The frame must be secured around the openings, near the floor and ceiling at a distance of 30-50 mm, so that the edges of the lining can be fixed.
To calculate the sheathing, you need to mark the position of the slats on the drawing or directly on the surfaces to be finished. Measure and sum up the length of the timber; for purchasing, reserve 10-15% for trimmings. The step size can be adjusted to the width of the insulation to make it convenient to insert the slabs sideways.
Lining
Due to the fact that part of the panel is a tenon that fits into a groove, the calculation is carried out taking into account not the actual, but the working width of the lining. To find out how much is required for cladding, you need to divide the surface area of the balcony (minus openings) by the area of one element.
The dimensions of the panels, including the working width, are indicated in the markings. The length can be from 2000 to 6000 mm. The area is calculated as the product of width and length (mm must be converted to m). For example, a 140 mm wide 2.5 m long lining has an area of 0.14 x 2.5 = 0.35 m². It is necessary to provide a reserve for cutting and unaccounted defects of 10-15%.
The optimal width of panels for finishing a balcony is 120-140 mm. There are many openings and corners in the room, to get around which the material will have to be cut; therefore, if the width is too large, there will be a lot of waste.
If you are interested in how to properly line a balcony with clapboard inside, then you need to take into account all the parameters of the material. It is better to choose a thickness of at least 14 mm. Thinner boards are intended for interior decoration of rooms with stable humidity and temperature. A balcony, even with heating, is not one of them.
Thermal insulation
When insulating a balcony, thermal insulation is laid on the walls, ceilings and floor. If you isolate one area, there will be no effect. The recommended minimum thickness of insulation is 30 mm, for a heated room - at least 50 mm.
The slabs are placed between the sheathing bars and secured with glue or foam. The heat insulator consumption is equal to the insulated area. Reserve - 5-10%.
If mineral wool is used, a vapor barrier will be required. Thick polyethylene film or foamed foil polyethylene are suitable for this.
A thin layer of foil reflects infrared rays into the room, which contributes to better heat retention.
Before starting finishing work, it is recommended to waterproof the balcony using rolled or coating materials. If leaks are found, they are repaired using sealants. All these nuances must be taken into account when calculating.
Fasteners
To attach the sheathing to the wall you will need concrete screws and dowels. Immersion depth - at least 50 mm.
The lining is fixed to the sheathing in different ways:
- Nails driven through the surface. This option is used if subsequent painting with opaque compounds is required.
- Small nails installed in the bottom flange of the groove. The fastening is invisible and holds the board well on the frame. But when drying, the nail may be pulled out and the connection weakened.
- With studs or pins using a nailer - a nail gun. To make the fastenings invisible, rods without caps are used.
- Self-tapping screws of yellow or white color with a cross-section of 2.2-3.5 mm and a length of 20-45 mm. For wet rooms this is the best option. With constant deformations of wood, they provide reliable fastening due to threads.
- Clamps, which are placed on the edge of one panel, are then attached to the sheathing. The free tongue is wound behind the adjacent paneling. The connection is hidden and performs well in dry rooms, but in high humidity the reliability decreases.
Fastening the lining with a nail (screw, staple) into the groove
Fastening with clamps
The outer and corner panels are always attached rigidly - with nails or self-tapping screws. Subsequent ones can already be fixed with clamps. Fasteners are installed in each connection or in a checkerboard pattern.
The approximate consumption of fasteners is 30-60 units per 1 sq.m. To calculate the need, you need to multiply this value by the cladding area.
Traditional processing option: brief instructions
Let’s take a closer look at a solution that is suitable for any enclosed space – a room, veranda or loggia. How exactly to process the lining on the balcony, decide for yourself, based on your own preferences, but for greater efficiency, adhere to the following procedure:
- Cleaning wooden surfaces (especially for recycled materials).
- Grinding of slats (with the exception of top-class products that are completely ready for painting).
- Primer of all wooden elements requiring painting.
- Applying varnish or paint.
Make sure the primer or finish contains antiseptic ingredients.
Surface cleanliness is the key to quality painting
The surface needs to be cleaned in two cases: if this is not the first painting or if the panels were stored in unsuitable conditions, as a result of which they became damp, stained or moldy. The old decorative layer is removed using available tools - a hair dryer, a spatula. The stains are treated with bleach. We recommend replacing parts with severe damage.
It is better to sand with fine sandpaper or pumice, as well as a power tool with suitable attachments. This is a labor-intensive process, but the appearance of the panels largely depends on it. The dust generated during sanding must be removed, then you can begin priming.
To apply the primer, use a wide paint brush or spray gun. One layer is enough. Don't forget to work the gaps between the planks and hard-to-reach places - a small brush will do for this. If you did not have time to buy a special composition, prime the surface with a finishing paint.
The last stage is the application of a decorative agent, such as paint. The instructions for paintwork materials usually define the painting sequence and indicate the number of layers required to create a durable, uniform coating. Usually they paint 2-3 times, waiting for the previous layer to dry.
The number of paint layers affects the color intensity
This is a description of the standard process for processing wood panels; you can safely make adjustments to it. This instruction is also suitable for exterior work, but the materials for exterior finishing will be different.
Preparing the balcony for covering
Before finishing work, glazing must be installed and all cracks and crevices must be sealed. Cover the floor with coating waterproofing extending 20 cm onto the wall or cover it with rolled material.
Treat the walls and ceiling with an antiseptic to prevent the formation of mold. It is also recommended to impregnate all wooden materials with a bioprotective agent, if this has not been done by the manufacturer.
Sequence of finishing work
Before carrying out work on the interior decoration of a loggia or balcony, it is necessary to carry out the process of glazing, as well as insulating these premises.
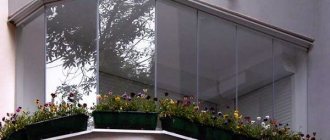
Glazing
The next stage of work is covering the walls. You can either do it yourself or contact a specialized company. For the internal lining you will need several plywood sheets or galvanized iron. These sheets are attached to the installed frame with special screws. If there are cracks or holes, they should be sealed with foam. For exterior finishing, siding or lining is usually chosen, which are distinguished by their moisture-resistant properties and durability.
Insulation
Using liquid nails, insulation is attached to the film, which can be used as polystyrene foam, mineral wool, and so on.
Then follows the process of installing gratings for interior finishing work. The last stage will be insulating the floor and covering it.
Next, you can do the finishing itself, for this you need to choose suitable materials, and we’ll talk about this.
How to cover a balcony with clapboard: step-by-step instructions
The technology of finishing with wood panels is simple. It involves several stages:
- installation of sheathing;
- fastening wooden panels;
- improvement of joints;
- finishing treatment.
Additionally, you can insulate the balcony with polystyrene foam, polystyrene foam or mineral wool. This will make it possible to use the room during the cold season, and will also improve the thermal insulation of the apartment itself.
Installation of sheathing
The cut bars are attached with dowels and self-tapping screws to the wall and ceiling. In concrete and brick walls, holes are pre-drilled with a diameter 1-2 mm smaller than the cross-section of the dowel.
The sheathing is aligned vertically and horizontally using a building level. If the surface is uneven, with blockages or depressions, you need to place a piece of plywood or a mounting wedge under the bars.
Laying thermal insulation
Thermal insulation slabs are installed between the sheathing bars, and the gaps are filled with sealant. If polystyrene foam or expanded polystyrene are used, vapor barrier is not needed, since they are not afraid of moisture.
When laying mineral wool, vapor barrier is required. It protects the hygroscopic material from condensation accumulation. The film is stapled to the sheathing, and a gap of several cm must be left between it and the mineral wool. Therefore, when insulating a balcony, the size of the bars is selected based on the thickness of the heat insulator.
The joints between the vapor barrier strips are taped. It is advisable to put a counter-lattice on top of the bars to prevent contact of the finishing board with the film and to ensure ventilation.
Fastening the lining
Installation begins from the corner or window frame, where you will have to make a cut for the protruding window sill or the bottom of the wall.
Lining installation diagram
The first element is fastened with a tenon into the corner using self-tapping screws or nails nailed into the face. The hole is pre-drilled to prevent the wood from splitting. The tenon does not need to be cut off; then it will be covered with a decorative corner or plinth.
All elements are mounted sequentially and fixed in the chosen method. The board is inserted with a comb into the groove of the previous panel and carefully knocked with a hammer through a piece of the same lining or with a mallet with a rubber tip.
If the room is geometrically correct, all boards are cut to the same size. Otherwise, you will have to take measurements for each lining or block of 3-4 pieces.
The last panel is cut according to the fact and firmly fixed. There should be a small gap at the bottom and top to compensate for wood deformations. It is subsequently decorated with skirting boards.
Slope construction
Neat slopes are a sign of professionally done work. They can be cultivated in various ways:
- cover with a plastic sandwich panel;
- putty level with the edge of the panels;
- install a full-fledged box made of bars and cover it with clapboard.
The gap between the slope and the board is closed with a decorative corner.
The device option is selected depending on the distance between the frame and the slope. If it is narrow and does not allow the use of lining, then the only option left is a method with a minimum finishing thickness.
Masking joints
Decorating the corners where the trim meets is not very difficult. Ready-made wooden corners are used, which are fitted with inconspicuous fasteners or nailed with thin nails.
It is much more problematic to beautifully connect the skirting boards at one point, where 3 planes converge - 2 walls and a ceiling. According to classical technology, the ends should be filed using a miter box at 45°. Moreover, you need to cut either all 3 plinths on both sides to form the top, or one with the top, and two - only on one edge.
But in practice, a simpler scheme is more often used:
- the upper skirting boards are sawn at 45°, they should fit tightly in the corner;
- the vertical one is cut straight and simply adjacent to the other two.
When working with a miter box, you first need to practice on scraps to determine the correct option.
Finishing
The lining can be treated with any exterior finishing product intended for woodwork:
- alcohol-based impregnation or stain;
- alkyd, oil or polyurethane varnish;
- wax, oil;
- oil, acrylic or acrylate paint.
They protect the wood surface from moisture and ultraviolet radiation and add decorative properties.
Installation of sheathing, laying insulation
This stage begins with marking the elements of the future frame. There are two options for installing timber - vertical, horizontal. In the first case, the lining is placed horizontally, in the second - vertically or, in an original way, diagonally. The latter type of design is usually not chosen for a small balcony. The reason is complexity and unreasonably high consumption of material.
When mounting the guides horizontally, the first element is fixed at a distance of 10 mm from the floor. For vertical installation, work starts from the corner. The fastening pitch is not affected by the version of the chosen sheathing: in any case it is 600 mm. When marking, the horizontality and verticality of all lines are constantly checked.
After completing this stage, they proceed to the manufacture of the sheathing.
- The timber is cut into elements of the required length. They are applied to the line, holes are drilled through them, the pitch is from 500 to 800 mm. It depends on the width of the insulation boards. The first and last hole from the edge of the beam should be at a distance of 50 mm.
- The timber is removed, dowels are placed in the holes, then they move on to securing the waterproofing. The membrane is unrolled and secured at several points with liquid nails (glue). Then the sheathing is mounted on top with self-tapping screws.
- The plane of the structure is tested with a plumb line. It is fixed to the topmost element. This role can be played by a cord stretched between the upper and lower beams. The selected insulation is placed in the cells. If a foil type is purchased, it is attached before installing the sheathing.
- To prevent the appearance of cold bridges, all joints between the material and the sheathing are blown with polyurethane foam. If mineral wool acts as thermal insulation, then a waterproofing membrane is laid on top. It is attached to the frame with a stapler.
Features of installation of lining made of PVC and MDF
In addition to wooden finishing boards, PVC or MDF panels are often used. They are more resistant to moisture and have more variety in design.
PVC lining is produced from polyvinyl chloride with subsequent decorative surface treatment. To make the plastic resistant to exposure to the sun, stabilizers are added to the raw material, and the outer side is covered with protective films.
MDF panels are made from wood waste using the dry pressing method. With this method, natural glue - lignin - is released from wood fibers. It combines the finely dispersed fraction into a durable structure. Additionally, synthetic resins are added to increase the moisture resistance of the material. Decorative processing is carried out by painting, laminating, veneering.
When installing imitation lining, the same sequence of operations is maintained. The exception is finishing with paints or varnish, which artificial panels do not need.
Further care is also very simple. It consists of periodic wet cleaning of the surface. Care must be taken not to scratch the decorative finish.
Application procedure
Before treating the lining on the balcony with paints and varnishes, it is necessary to prepare it for this procedure. You should approach each stage responsibly: the service life of the wood and the decorativeness of the coating directly depend on the quality of their implementation.
Each means for processing lining has its own technical characteristics and application features. Therefore, before starting work, you must read the instructions from start to finish, and then adhere to the rules specified in it.
Particular attention should be paid to the “Precautionary Precautions” section
Preparation
If the coating is applied to an old, already nailed lining, then it will need to be cleaned of the old coating or dirt. Then you need:
Carefully inspect the surface and look for any cracks or crevices that may have appeared during the service of the lining. They are thoroughly puttied: any recesses are a potential “breeding ground” for pathogenic microorganisms and pests, and if the crack is on the outer wall of the balcony, cold wind will blow into it. It is recommended to use a special wood putty - it will hide even minor irregularities. After applying to problem areas, excess mass is carefully removed with a spatula. Sand after the putty has dried using sandpaper with a small grit: no more than P. First, only the putty areas are treated, and then (if desired) the entire rest of the surface is sanded. If you try and spend enough time, you can get an almost perfectly smooth lining. Clean the wood from dust. The easiest way is to use a vacuum cleaner turned on at maximum power. Alternatives – broom or brush
It is important to remove all dirt, including in hard-to-reach corners and at the joints of boards. Dust and pieces of wood caught in the paintwork will make it uneven.
Now you can proceed to applying an antiseptic, if necessary.
Impregnations: creating an antiseptic and fire-resistant layer
Antiseptics protect wood primarily from fungi. Of these, the biggest headache is caused by mold, which loves to settle in cool and damp rooms, which include the balcony.
Antiseptics are divided into 2 types:
- Glazing. The translucent texture emphasizes the pattern of wood fibers and traces of knots and tints the lining.
- Covering. They completely cover the texture of the board and come in different colors.
Builders recommend applying an antiseptic layer before nailing the boards in order to treat them on both sides. But covering one side of the lining will also bring a lot of benefits, reducing the risk of mold appearing on the balcony.
Most antiseptics also produce a fire-resistant effect, which increases the safety of using the lining. In case of fire, it will not burn intensely. Double action products are also called “Biopyrenes”.
All types of impregnations are applied using a brush. If paint is applied in the future, a primer will also be required.
Application of the base coating
Coating the lining is a simple process. But it requires accuracy, attentiveness and adherence to technology. The most suitable conditions are air temperature 10–30 °C and low humidity: up to 40–60%. If it is damp or has recently rained, it is recommended to reschedule the work because the applied layer will not adhere well.
A good tool is one of the keys to success
Processing of lining takes place in 4 stages:
- Preparation of the product. It is described in detail in the instructions for use. Usually it is enough to mix the composition with a stick so that its consistency becomes homogeneous. If it is too thick, some paints and varnishes can be diluted with warm water (but its volume should not be more than 10% of the total) so that the layer of paint or varnish lays down easier and more evenly.
- For the application itself, you need to use a high-quality brush with long and thick bristles. It is not permissible for the fibers to fall out when pressed. The products are applied along the wood grain, section by section, trying not to create sharp transitions between shades.
- You need to separately brush the corners and recesses between the boards.
- Wait for the first layer to dry (from 3 hours or more - depends on the type of coating) and, if necessary, apply a second one.
Paint and varnish materials are distributed evenly over each board, leaving no empty areas. After completing the work, it is better to play it safe and once again inspect the walls of the balcony under bright lighting to detect possible defects.
Thermowood lining
This is a natural material made from solid wood using stabilization at temperatures up to 230°. After removing excess resin, the tree acquires moisture-repellent properties, resistance to biological destruction and a noble dark color. Even ordinary inexpensive pine after such treatment looks like a valuable species.
Thermowood lining is used for finishing rooms with high humidity. Its service life is measured in tens of years, and maintenance does not require regular painting and varnishing.
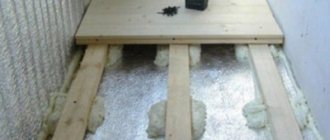
Installing the floor when insulating a loggia with your own hands
First you need to cut the 40x50 timber into pieces 1300 mm long. When laying, the distance between them should not be more than 600 mm. Each must be secured to at least two anchors. The timber should not be too close to the walls, otherwise a so-called cold bridge will form.
Next, longitudinal logs are installed. To do this, you need to find the top point, which will play the role of a level, i.e. it is along this that the first joist will be laid. The second lag is installed on the opposite side at the level of the first. Next, a thread is stretched between them, according to the tension of which all other logs are installed. Wooden spacers can be used to adjust the height. All logs are attached using 60 mm wood screws. To insulate the floor, the entire surface up to the joists must be foamed with polyurethane foam.
A sheet of chipboard is laid on top of the logs with a gap of 50-100 mm from the walls. The chipboard is also fastened with self-tapping screws. All joints and gaps formed during the installation process are also foamed.