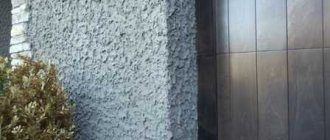
Covering a stove with ceramic tiles with your own hands is not such an easy task, but if you wish and take a careful approach to this process, it is quite doable. Tidying up the walls of a brick kiln is done if the plaster previously applied to them begins to peel off, or if the brickwork, which is not covered by anything, looks sloppy.
Do-it-yourself oven cladding with ceramic tiles
This process becomes especially relevant when a major renovation is planned in the room where the stove is installed. You can, of course, remove the old cladding and plaster the surfaces with a new layer of mortar, but such a finish will still look “boring.” Therefore, quite often plaster is combined with tiles or the walls are completely finished with ceramic tiles of one type or another.
It is also important that often the ceramic layer can perform not only a decorative function - it becomes an additional heat accumulator and an effective source of thermal infrared radiation.
Types of ceramic tiles for the stove
There are several varieties of it. These include the following options:
- Bicottura;
- Glazed;
- Clinker;
- Cotto;
- Porcelain tiles.
Now let's talk about each in more detail.
Bicottura tiles undergo double firing, after which they acquire a smooth texture. This material can be used to work with walls and floors.
Many craftsmen call glazed tiles ceramic tiles. It can also be used to transform walls and floors. In various stores this product will be presented in the form of a material with translucent glossy enamel.
There are also opaque tiles, but with glossy enamel. These two types will have a matte and embossed texture. The tiles have an anti-slip surface, which is very convenient.
This model with small-sized mosaic elements is in great demand. Many clients purchase it to add variety to the walls or floors of their home.
If the client needs tiles that have an uneven edge, then they need to buy a clinker model. This product can be used to decorate not only the floor and walls, but also the fireplace. Using this type of inflow, you can create an interior in the style of hi-tech, loft, country, minimalism. It all depends on your imagination.
By choosing cotto tiles, you can get an uneven surface texture with natural shades. This tile option is most used for flooring.
- Porcelain tiles are best used in rooms with a large area.
- These tiles come in matte or glossy textures in large sizes.
- If the client needs seamless installation, then this tile option is very suitable.
This tile model has many different shades. You can also depict something on it using photo printing.
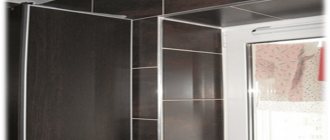
Oven tiling
If someone has an old stove, then it can be transformed using various materials. In this article we want to tell you how this can be done using ceramic tiles.
It is best to trust a tile laying specialist, as he will do it efficiently and beautifully. Everything, of course, depends on the financial situation of the owners. Sometimes owners plan to do this transformation themselves.
If you decide to start transforming the stove, you must act in a certain sequence, as the master does:
- Initially prepare the furnace walls for work. It is imperative to remove the old cladding and clean it of dust and various contaminants;
- The next step is to use a wire mesh and use nails to tighten it well and secure it. Nails need to be fastened into the seams and the distance should be 500mm;
- Then the surface under the tile will be plastered. To do this, you will need to use a special solution or make a mixture of clay, sand and cement and be sure to add PVA glue;
- It is necessary to plaster twice. Before you start re-plastering, be sure to check that the first layer has dried thoroughly. The layer should be applied no more than 5mm;
Then you need to treat the surface with a heat-resistant deep penetration primer. This should be done when the second layer has dried.
Preparing for decoration
Before starting work, it is advisable to completely remove the old layer of finishing and remove all dust and other particles, deepening the joints between the bricks.
After which it is better to prime the surface twice with a heat-resistant compound and let it dry.
Next, the above mesh is stretched and strengthened. You can use metal elements at the corners.
Laying process
Be sure to remember to heat the oven in advance. The walls should be heated to 30-35 degrees. Before you begin, you need to prepare a solution. It is prepared in small quantities.
- Work must be done from the bottom corner. The solution must be applied using a trowel. Be sure to make sure that there are no air bubbles under the tiles.
- The tile with the glue applied should be pressed well and lightly tapped with a rubber hammer. Use special crosses to keep the seams straight.
- Sometimes glue appears in the work, so it must be removed immediately with a damp sponge. Try to do this carefully so as not to move the tiles and maintain an even seam.
- To give even greater beauty and durability to a stove with ceramic tiles, treat the seams with a special grout. To do this you need to use a rubber spatula.
After completing the work done, you should wait three or four weeks so that everything dries well and you can use the oven.
Grouting joints
Jointing is carried out when the lining is completed and the glued material has had time to dry for 24-72 hours. At this stage you will need a rubber spatula and a special grout mixture. You can buy it ready-made or make it yourself from sand and clay (3:1, respectively). The jointing mixture can be tinted with colors if you want to make the seam less noticeable or highlight it with even more contrast.
The plastic composition must be rubbed into the gaps between the tiles with a rubber spatula, carefully filling all cavities. Clean the surface with a sponge or damp cloth, being careful not to damage the seams. After the solution has set (after 1-2 hours), the tiles can be cleaned again using a grout film remover. This will make it shiny and completely clean.
Having completed the finishing of the Russian stove or Dutch oven, you need to wait 3-4 weeks until the solution dries completely. Only after this can the brick kilns be heated without allowing the walls to heat up too much. As soon as the tiled heater becomes warm, the fire should be extinguished and the heater should be allowed to cool completely. After this, the finishing material placed on the stove will be ready for use.
Ceramic tiles for oven cladding
A huge selection of materials that can be used to transform the stove. Many owners try to choose a specific product for installing the stove so that it fits well with the interior of the house.
In this article we will tell you why you need to choose ceramic tiles.
This material has its own characteristics:
- Firstly, this material can withstand high temperatures
- Secondly, it allows you to retain accumulated heat for a long time if the stove has been turned off. All this happens due to its porosity and density of the material.
If the client decides to purchase this particular material, then he should pay attention to heat-resistant tiles.
There is no need to worry about the tile design, as it is very diverse. Therefore, each buyer will be able to choose something suitable for their style.
Applying plaster
Here, any heat-resistant composition is used for basic plastering of walls. The solution is thrown onto the mesh and leveled with spatulas, moving from bottom to top.
There is no need to make layers thicker than a centimeter to avoid cracks. Then you can heat the stove and make sure that this will not further destroy the materials laid under the finishing.
Tools and materials
Craftsmen who will be tiling the stove must bring with them everything they need for the job.
This includes the following:
- Rubber spatula;
- Grinder machine;
- Tile;
- Level;
- Master OK;
- Container for preparing the mixture;
- Drill;
- Spray;
- Crosses for fastening tiles;
- Sponge;
- Grout;
- Primer;
- Brush.
Each employee who will do this must purchase this entire assortment for himself.