Types of cable channels
Several criteria are used to classify a cable channel:
- Size. There are small products for laying one wire of a small cross-section or large boxes designed to mount up to eight conductors of different cross-sections on the wall;
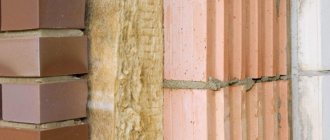
- Material of manufacture. They produce aluminum, steel and plastic structures. For indoor installation, plastic models are more in demand, and fastening steel and aluminum boxes is more often used when laying electrical wiring along the facade of a house;
- Location. The cable channel can be fastened in several places. The design of the product is maximally adaptable depending on the installation location. There are plinth, parapet, main and floor models.
Installation of cable channel, step-by-step instructions
During the installation of the cable channel, monitor the room temperature; it should not be higher than 60°C. The step-by-step installation algorithm is as follows:
- Before starting work, turn off the power supply.
- Mark the surface where the channel will be located.
- Measure and cut the required length of the channels.
- Remove the covers from the channels and begin attaching the base. To do this, attach the channel to the surface of the wall and drill an outer hole through the channel to the length of the self-tapping screw. Maintain an interval of 30-40 cm between the holes, then secure the base with self-tapping screws. When installing channels on a concrete surface, the upper and lower holes are fixed with dowels, the remaining holes are secured with nails. Instead of self-tapping screws, you can use a special mixture called liquid nails. In this case, the base is lubricated with the substance twice, after which it is pressed against the surface for 5 minutes. The best fastening effect will be achieved by a design with a combined fastening option.
- After installing the direct channel, proceed to installing additional cable channel accessories. Install corner parts and connectors.
- Then proceed to position the wires in the base. It is important to ensure that the cables are not intertwined, do not have sharp bends, and are insulated.
- Close the base with a lid, install sockets and switches, if they were provided for in the plan.
- Turn on the power supply to the system and make sure it is working. If problems are detected, there is no power supply in sockets and switches, remove the cover of the cable channel and find the source of the problem visually or using a special tool.
When installing a cable channel, at the beginning of the work you need to draw up a plan, carefully outlining all the components of the system. This article discussed the basic concepts of a cable channel. Thanks to this article, you learned why you need a cable channel, its advantages and disadvantages. After reading this article, you will be able to install the cable channel yourself.
Become our author
Every person is special, and everyone's experience is unique. Tell us about yours. Earn recognition and gratitude from our readers.
How to choose a cable channel
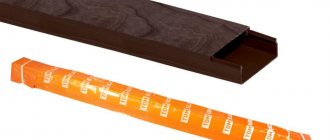
The cable channel is a rectangular, usually U-shaped profile, closed with a flat snap-on cover made of the same material.
Sometimes they are called boxes. Installation of cable channels is carried out around the perimeter of the rooms under the ceiling at a distance of 15 cm with vertical outlets to sockets and switches. To lay wires through walls, holes are drilled in opposite channels and the wall. To The standard length of the box for walls and ceilings is 2 meters, the minimum profile section is 8x8 mm, the maximum is 100x60 mm. For laying a small number of wires, usually low-current, in the corners between the floor and walls, there are specially designed skirting boards. If you need to connect the wire to a device far from the walls, there are floor-mounted options with a rounded surface.
Boxes vary in cost and performance characteristics depending on the material. Products are produced by:
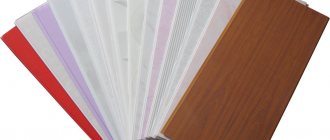
- made of plastic. The most common option and the cheapest. For rooms with high humidity and on the external walls of a building, IP 55 plastic with a high degree of protection can be used. The color palette of plastic boxes allows you to choose the desired tone;
- aluminum with polyethylene coating. More expensive, but stronger and more durable than plastic ones. The number of cycles of opening and closing the lid is small due to the extension of the locks. The polyethylene coating is easily destroyed by mechanical stress. The color is given to the channels by a polyethylene coating and is quite varied;
- galvanized steel. Such structures are the most durable and expensive. Mainly used under high load conditions. For example, with floor wiring and in the external environment. The color of the products is varied.
The choice of the type and size of boxes begins with determining the wiring throughout the house from the electrical panel and entry points for television, computer network, telephone and security alarm cables to sockets, switches and lamps, drawing the wire lines on the drawing of the apartment or house. Depending on the power of the connected equipment, the wires will be of different thicknesses; this should be noted on the drawing.
You should immediately calculate for each section of the box the number of internal and external corners along the wiring line, the number of end transitions of the plugs, the number of T-shaped transitions to the branches and their cross-section. Of course, you can do without them, but the gaps at the joints and the difference in cross-sections will be noticeable. Using sealant to seal cracks will lead to difficulties when necessary, for example, adding or replacing a wire in the main.
The wiring will take on an aesthetically finished look if sockets and switches are installed from the same manufacturer. They are ideal in both size and design.
We advise you to pay attention to the walls. The unevenness of the walls will be especially visible when installing the boxes. If the type of room is important, in this case it is worth considering installing the structure along the wall along the floor
If the appearance of the room is important, in this case it is worth considering installing the structure along the wall along the floor.
Main varieties
Depending on the modification, the dimensions of the cable channels, their shape, material of manufacture and technical parameters vary. In everyday life or for registration of wiring in offices, the following are most often found:
| Name | Peculiarities | Areas of application |
| Mini | Box with a small cross-section. They hold up to 3 small cables. Installation of mini cable channels is carried out using self-tapping screws. When turning the wires, the joints are poured at an angle of 45° or plugs are installed. Typical sizes range from 10x10 mm to 60x80 mm | Most often used for Internet, television and telephony. |
| Flattened floor | An oval profile, which is used if it is not possible to route cables around the perimeter of an office or apartment. When installing, one edge of the box is attached to the floor with self-tapping screws, then it is closed with a lid and plugs are placed at the joints. Made from aluminum, galvanized or hard plastic. Size variations: from 16×6.5 cm to 7.5×1.5 cm. Colors include white, black grey, brown and a natural wood option. | They are laid in offices where it is necessary to run the wire to office equipment or a workplace in the center of the wall. Suitable for one or more medium sized cables. |
| Parapet guides | Main (parapet) boxes are made of plastic. There are several variations depending on the type of profile: similar to the “P” burka without a partition, “W” - with three sections, “G” for corners, curly and universal. The main advantage is the ability to adjust the rotation angle from 7 to 45° using adapters. Dimensions from 10×6 cm to 1×2 cm. | Can be used in any domestic premises. |
| Perforated with open access | Made of plastic or metal, it is 30-40% lighter than conventional options with easier installation. They provide good air circulation, have constant access to the wire in different parts of the network and can be installed on curved surfaces. | They are used to connect wires to each other when entering electrical panels or in production workshops, where the appearance of the wiring is not important. |
| Skirting floors | This type of cable duct is fastened using self-tapping screws to the walls or floor. Their design resembles hollow sections with a lid on top. The main selection parameter is the width of the diagonal wall (5 and 7 cm). The advantages include versatility for residential and office premises, variability of colors and immunity to ultraviolet rays. After dismantling the plinth cable channel, it can be reused. | Offices, administrative buildings, apartments and private houses. |
| Flexible | Prefabricated structures made of metal or plastic. Available in different colors, there are corrugated models. Such cable channels protect against mechanical damage, vibration or chemical reactions with the external environment. Such a box is flexible, can reduce noise levels and provide free access to wiring. At the same time, it is easy to replace a separate element, and installation does not require much time. By diameter you can find the following subtypes:
| When connecting wires to machines and other equipment in production. |
| Corner under the ceiling | Installation of the corner cable channel is carried out at the joint between the wall and the ceiling. The triangular shape of the structure fits perfectly into a flat corner. The maximum dimensions of the internal cavity are 4 by 4 cm. Simple installation and light weight of the structure are among the positive aspects of the box. Such cable channels are fixed only under the ceiling due to their fragility. | Any office and residential premises. |
| Transparent with backlight | Externally similar to corner ceiling models. They have a completely transparent lid, tilted at an angle of 45°. They have built-in lighting. | They are used to decorate lighting systems under the ceiling, frame kitchen cabinets and other decorative elements. |
| Industrial wire | Made from metal wire. They provide free air circulation, quick access to wires and do not accumulate dust inside the structure. | Installed in warehouses and workshops, as well as behind suspended ceilings. |
The types of cable channels listed can be divided according to the degree of rigidity, the presence of a cover or the type of locks at the joints. However, installation of wiring boxes in an apartment is carried out according to the same principle and with general rules.
Tips and tricks
Before purchasing and installing cable channels, determine the position and number of power and low-current outlets in each location. If you know where and what furniture and electrical appliances will be located, it will not be difficult to count the sockets.
Related article: How to attach a photo frame to a wall without nails
It is more convenient to lay the wires in the channels in one bundle, while simultaneously closing the box. You can pull the wires one by one, securing the already laid covers with a small piece every half meter.
Criterias of choice
More often they use options with a double lock, which makes the structure durable and independent of mechanical stress. Such clamps allow you to open and close the lid many times, while the rigidity and integrity of the box does not change.
When choosing a channel model, the following factors are taken into account:
- material of the walls and base, presence of a lid;
- appearance of the channel or tray, shape;
- ability to use standard fasteners .
of the width and height matters Pay attention to the presence of separation barriers if power and low-current lines are combined in one channel. The regulations state that the wires in the box should not fill more than 1/3 of the internal space.
Valera
The voice of the construction guru
Ask a Question
The PUE recommendations contain a recommendation that the sum of the external cross-sections of all wires inside the channel should not be more than 35% of the internal cross-section of the box. The method of laying the cable (loose or orderly) does not matter.
Method No. 2 – Dowel-nails
If you need to attach a cable channel to a concrete or brick wall, which is a typical situation for an apartment or a house, you cannot do without dowel nails, also called “quick installation”. In addition, for fastening you will need a hammer drill with a 6 mm drill. So, in order to independently fix the electrical box for the cable on a wall made of concrete or brick, you need to perform the following steps:
- Pre-drill 6 mm holes in the bottom of the cable channel every 40-50 cm.
- Attach the box to the wall according to the markings (more on this later) and mark the drilling points that coincide with the finished holes in the cable channel.
- Drill holes according to the marks on the wall.
- Place the plastic box and drive the dowels into the appropriate places.
- Hammer the nails.
Using these simple instructions, you can install the cable duct yourself in a wall made of concrete or brick
We draw your attention to one very important point - you should not drill holes with a drill while leaning the box against the wall. When drilling plastic, the impact mode can cause cracks to appear, which can have a negative impact both visually and on the durability of the finished wiring.
Method No. 4 – Liquid nails
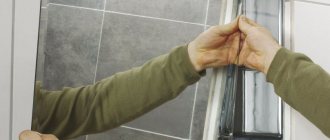
Well, the last way to attach a cable channel in an apartment or house is with special glue “liquid nails”. The need to glue the cable channel to the wall arises if another installation option is not possible. Most often, liquid nails are used when installing electrical boxes on bathroom tiles or a smooth metal surface. However, it is unlikely that it will be possible to secure the box well with glue alone. The adhesive mixture is often used as an additional fixation option. It can be combined with self-tapping screws or even quick installation.
There is a very important nuance in attaching the cable channel with glue - first you must apply the adhesive mixture to the surface of the box, and then lean it against the wall according to the markings. Once you have the back panel against the wall, remove it and wait a few minutes for the glue to thicken a little on both surfaces to be glued. After the liquid nails “grab” at least a little, press the cable channel against the wall as hard as possible, the main thing is not to break it. In this simple way you can attach the cable channel to glue with your own hands.
Installation rules
The installation procedure depends on whether shaped products - corners, branches and plugs - will be used or not. If they exist, the manufacturer gives clear recommendations about what distance should be left for proper installation. They should be followed to the nearest millimeter. Then everything looks neat. We will talk about the basic rules for installing cable channels of the usual type below in more detail.
How to choose a size
If you decide to route wires into cable channels, first you need to decide what size they are needed. Dimensions are selected based on the number and size of conductors that will need to be laid and some reserve added for the future - so that if necessary, one or two more wires can be laid.
When choosing a size, you need to take into account the number of cables that will need to be laid
The number of conductors in a cable channel is not standardized. The main thing is to be able to close the lid without problems. A limitation may be the need for separate placement of power and low-current cables. In this case, select the cross-section so that there is at least a small distance between the groups of cables.
Installation procedure and features
According to the rules, wiring is laid horizontally and vertically; inclined installation is permissible only on stairs. In other cases, the rules are not deviated from when wiring is open. To obtain an even cut when installing plastic cable channels with thin stacks, use metal scissors or others, but the cutting edge must be sharp. Aluminum and metal trays are cut with a hacksaw. Thick plastic can also be cut with the same tool - there will be a smooth edge and the profile will not wrinkle.
If you need a piece of a certain length - for a outlet, for example, you need to cut it in this order: snap the lid, align the edge, apply marks on the lid and body at the same time. Then you can cut it separately. With this order, the length of both products will be the same.
Please note that when passing the corner, the lid is not cut into two parts, but only the side walls are cut so that it can be bent. Do not forget that when going around the outer corner, the cover should be longer than the tray; in this case, it is better to mark the places of cuts on it after the cable channel body is secured
Rules for installing plastic cable trays
The cable channel is attached to a non-wooden surface using nails with a wide head (screws can be used), or to plaster or plasterboard walls using self-tapping screws. For installation on brick or concrete walls, installation with dowels is required. The fastening step of the fasteners is about 60-70 cm; at the ends of the profile and at the joints, the fasteners are installed at a distance of 3-5 cm from the edge.
If two pieces of cable channels are joined, the cover must be positioned so that the joints of the housing and the cover do not coincide. Otherwise, the joint will be too noticeable and an unevenness may form, which will further emphasize the joint.
Order of laying wires
We lay conductors in the mounted housings. To prevent the walls of the cable channels from sagging, we install supporting jumpers with some steps, and then snap the covers. At this point, the installation of wiring in the cable channels can be considered complete.
Fastening the cable in the groove
When laying hidden in non-combustible foundations, the cables are laid in a special groove cut into the wall. These grooves are called grooves, and the process is called gating or gating. In order for the cable to stay in this groove and not fall out, it must be secured in some way. There are several ways to fix:
- Dilute the construction plaster and use its “cakes” to fix the wires to the walls of the made recess. The method is suitable for a small number of conductors with not very rigid insulation. While working, you need to mix a small amount of gypsum as it “sets” very quickly.
- Use a dowel tie. Installation of fasteners occurs before laying the cable. Not a bad way, but it takes a lot of time. Especially when installed in concrete walls or floor slabs. The second drawback is that when the routes are long, a significant amount of money accumulates on the fasteners themselves.
- If you need to save money, just take a dowel or a nail - depending on the type of base, pierce a piece of telephone “noodle” in the middle with it, and wind the wire. Install the fasteners as in the previous case - before starting to lay the conductors.
- To quickly secure the cable in the groove, you can use pieces of corrugated hose. Cut a piece slightly longer than the width of the groove, squeeze the hose, and install it in the groove. It holds the cable well due to its elastic force and saves a lot of time. As the plaster is applied, these “holders” for the cable can be removed.
Features of combustible substrates
If hidden wiring is done in flammable walls - wooden, frame, etc. - according to fire safety requirements, they must be laid in a non-flammable protective shell. The non-combustible casing is either corrugated hoses made of non-flammable plastics, or all-metal boxes. When using corrugated hoses, the fastening method is the same as when fixing the cable. The difference is in the diameters of the required fasteners.
To secure corrugated hoses, you can use any suitable size clamps
When using metal boxes, they are fixed in the wall, and then cables are laid in trays. This method is more often used in frame housing construction, because sanding channels in wooden walls significantly reduces their heat-insulating properties. In addition, a wooden house constantly changes its size and rigidly fixed boxes can become a problem. When laying wiring in wooden houses, they often use open wiring in cable channels or make retro wiring.
Large bundles of wires
Often, when installing electrical wiring, it is necessary to lay a large number of cables. To minimize the time required to attach large bundles of wires, you can:
- Break them into bundles of 3-4 pieces and secure them with ties, dowel ties, etc. The method is not bad, but the grooves must be deep, which is impossible with small wall thicknesses (a problem with panel houses).
- Make a shallow and wide groove in which to place the conductors “in one layer”, securing them with aluminum perforated tape. These tapes are used in the construction of suspended plasterboard structures and are inexpensive.
A combination of these methods can also be used. When using tape, it is attached along the edges. Due to its rigidity, it holds even hard conductors or corrugated shells well. If necessary, you can install fasteners between the cables, but you must be careful not to damage the insulation.
Preparation for installation, surface marking
Open installation imposes increased aesthetic requirements: everything must be “smooth and parallel.” In this case, the box is fixed along the preliminary marking lines. It is carried out using a level (laser or water, construction), a square, a tape measure, a marker, a ruler, a pencil (marker).
Installation instructions Install the box according to the marked markings
Here's how to properly divide the process into stages:
- Initially, a diagram of the optimal electrical wiring is drawn up;
- lines on the wall are drawn by tapping according to the level, all branches are strictly at right angles;
- on them, with a pencil, according to the existing plan, the location of distribution boxes, sockets, switches is marked;
- necessary adjustments are made as work progresses.
You can make turns and angles yourself
At the end, you should calculate the length of the marking stripes, the number of installation points, turns, and corners. This will allow you to order the exact amount of working material.
Turns and corners can be purchased either ready-made or made from cable duct yourself. Using the former leads to increased costs. But work on difficult sections is faster, and the appearance of the route is better than when using homemade ones.
Self-production will require the additional use of sealants to seal seams.
If you have a laser, you don’t have to make markings
Boxes for installation can be cut in advance (for a large area) or during the process. The first case begins with precise measurements using a tape measure along the marking lines.
Then they cut the working material into the required lengths in order to install it later. Accuracy of measurements is important here.
It is easier to carry out the work according to the scheme: try it on - cut it - fasten it.
General information
Features of the material
The usual type of cable channel is a white box with a square or rectangular cross-section, but you can always choose a product of a different color and shape to suit your taste. Due to its low price, ease of installation and use, the plastic version is widely used and can be mounted on a wall made of all materials. Often, the floor plinth has a compartment for one cable, since it is not recommended to use more than one wire in a channel; to lay several wires, you will need to purchase a multifunctional box.
The procedure for attaching the cable channel to the wall
During the construction of a new house or major renovation, electrical wiring is laid differently, namely, mounted inside the walls, i.e. it turns out to be a closed method. Such work includes cutting grooves. But what to do if the wall material is not suitable for hiding wires (for example, if we are talking about a wooden bathhouse), or if there is no desire to carry out repairs in a cloud of dust, you need to power the devices?
In this case, the electrical wiring should be installed in an open manner. The ideal option would be to use an electrical box. But before attaching the cable channel to the wall, especially if you plan to do it yourself, it is advisable to thoroughly understand all the nuances.
Classification
Using a cable channel makes it possible to fix the cable on any base - brick, concrete, plasterboard, stone and foam block. However, the mounting methods will be different. Depending on the room in which the cable will be laid, i.e. schematic layout of the wiring line and the number of wires, we recommend using different types of boxes. Their detailed classification is in the table. The construction market makes it possible to choose a product for certain conditions of use. The most expensive option is aluminum cable channels, and the cheapest is plastic. The latter are worth taking, but only if they do not ignite, but only melt.
Preparation, surface marking
The open installation method places high aesthetic demands - everything must be parallel and even. In this case, the box must be secured along the marking line. This line is drawn using a building level (or a laser, water level), a tape measure, a square, a ruler, a marker and a marker (pencil).
This process should be divided into stages:
- First, draw up a diagram for laying electrical wiring in the most convenient and rational way.
- Lines on the wall should be drawn using a level, and all branches should be strictly at right angles.
- The location of distribution boxes, as well as switches and sockets should be marked on them according to the plan.
- You can make adjustments as you work, if necessary.
You can make the corners and turns yourself. Finally, calculate the total length of the marking strips, as well as the number of installation points, corners and turns. This will make it possible to order the exact amount of working material. Angles and turns can be purchased ready-made, or you can make them yourself from a cable channel. Using the first option will lead to increased costs, but at the same time, work on difficult sections will be accelerated, and the appearance of the route will be better than when using home-made elements.
Making your own corners is easy, but it will require additional sealants to seal the seams. If you have a laser, you don't have to make markings. Boxes for installation can be cut in advance for large areas, or during operation. In the first case, you will need to take precise measurements using a tape measure along the marking lines.
After this, the working material should be cut into the required lengths, and after that it can be installed. The accuracy of the measurement is very important here. The easiest way to do the work is according to the principle of “fitting - cutting - fixing”. Applying straight marking lines and using ready-made components makes it possible to create a cable channel that will look aesthetically pleasing in the room.
2 best ways
The main advantages are:
The ability to install everything yourself.- The wires will be insulated from each other.
- The appearance of the structure is acceptable.
- Can be fixed on any surface.
So, how do you attach a cable duct to a wall? There are two great ways.
- A box with a single section, with a one-sided lid. An ideal option if you need to stretch the cable from the PC/TV to the entrance to the apartment, or hide the cord to the outlet.
- Box with two sections with a double-sided lid. This is a great option if two cables go in the same direction.
If you have more wires, you will have to install several cable channels on top of each other. But in this case, it is better to think about laying grooves if the connection is stationary, and the owner does not intend to move the devices to which the cables lead.
Sometimes people get confused about the shape of the electrical box. It may seem rude to some and does not fit into the interior. We would like to please you - the cable channel comes in many types, and you can find soft, rounded outlines. It will take a little longer to search for such a channel, but it is difficult to call it a scarce commodity. The method is quite simple to implement, but there is one drawback - if necessary, the cable channel can only be dismantled with pieces of finishing/plaster. In addition, if your walls are far from ideal, then there will be an uneven gap between the surface and the box, and this is not very attractive visually and it is better not to use such a structure. But if you are sure that dismantling is not required and your walls are smooth, use these instructions.
- Cut the cable channel to size, attach it to the floor, wall or ceiling and check the alignment of the markings and the tightness of the joining of the parts.
- Apply adhesive or liquid nails in wavy lines on the wrong side of the piece. The wave width should be equal to 1.5 times the width of the cable channel.
- Next, press the element to the surface for a few seconds and immediately remove it. Wait until the remaining trace of glue on the wall becomes thicker.
- Then return the cable channel to its place and press it firmly, this time as firmly as possible, so that it adheres well to the wall.
Often, in order to enhance the reliability of fastening the cable channel to the wall and ceiling, you can use driven nails or screws (it all depends on the wall material). A special case of the adhesive method is the installation of cable channels based on which there is already an adhesive composition. But this option does not inspire confidence, and because of this it is also supplemented with self-tapping screws.
The second option is more expensive, but it is much more reliable and there is the possibility of safe dismantling. The cover should be removed from the cut cable channel, i.e. top part. After this, the base should be attached to the wall and a hole should be drilled directly through it in the wall. If the base is made of reinforced concrete, blocks or bricks, it is better to use a hammer drill. The hole spacing should be from 0.4 to 0.5 meters. If the walls have a large curvature, the distance can be reduced to install the box around the entire perimeter so that it fits well to the surface. We remove the base, and you can screw the plastic parts of the dowels into the holes. The lower half can be put back and secured using the main part of the fastening.
Now all that remains is to route the wire and put the cover in place. That's it, the issue of fastening the cable channel can be considered resolved. Whichever method you like best, use it, but the advice is the following - when choosing an adhesive composition, at least occasionally use dowels.
Features of open wiring with CC
Open wiring using electrical boxes tempts with ease of installation, repair and simplicity of carrying out an ongoing audit of the condition of cable lines inside the CC.
Note! Installation of hidden wiring is inherently comparable to the overhaul of the entire room. During the replacement of hidden wiring elements, the room is virtually unsuitable for work or even staying in it due to clouds of dust formed when previously sealed grooves are opened
https://www.youtube.com/watch?v=ytaboutru
The industry produces sets of accessories for CC, with the help of which an external type cable route is mounted, duplicating the outlines of the walls, floor and ceiling of the room.
Accessories for cable channels
During the operation of cable lines, if it is necessary to repair or replace the electrical wiring laid in the KK box, it is enough to remove the cover and perform the required work. An important advantage of open wiring in CC is the possibility of laying additional wires and cables in already laid boxes without finishing work.
Types of wiring
The need to attach the wire to the wall is first considered from the point of view of the expected service life. Power cables coming from wire distribution boxes are intended for long-term use. Communication lines and television connections are of a temporary type, capable of changing their position if necessary.
Based on this, there are 2 types of laying electrical communications:
- open wiring, when the line is fastened to the outer surface of the structure and the entire network is accessible for inspection and partial repair;
- hidden wiring is embedded in the wall materials (walled up) and is accessible for operations at the points of connection to it (sockets, connectors) or intermediate switchings (boxes, panels).
If the hidden laying of the wire is made in corrugated or smooth pipes, then in these areas a subsequent quick replacement of the electrical wiring is possible.
The procedure for installing a network in pipes
An example of installation in smooth PVC pipes is shown in a series of photos:
In technical rooms, such wiring may remain uncovered by a layer of plaster; in residential apartments, it is located under a layer of finishing.
Installation Tips
So, so that you can install the cable channel correctly and at the same time quickly, we recommend that you familiarize yourself with the following installation nuances:
- First of all, carefully align the wall with the ceiling and prepare it for attaching the plastic box. The smoother the surface, the larger the pitch between fasteners can be. In addition, the absence of gaps will have a positive effect on the interior of the room.
- To connect the cable duct at corners (external, internal, the junction of a vertical route with a horizontal one), make special angles at 45 o. To do this, you can use a miter box, as shown in the photo.
- In addition to point 2 - in order not to bother with cutting out identical corners, use ready-made components from the manufacturer: internal and external plastic corners, T-shaped connectors, plugs, etc.
- The cable channel must be fastened evenly, both vertically and horizontally. To attach the box horizontally and level, use a building level. To level the route vertically, it is best to use a plumb line.
- Before installing a cable channel on the wall with your own hands, you need to mark these walls. There are certain standards on this issue, which we discussed in detail in the article - how to install open electrical wiring.
- If you need to mount a plastic electrical box on a plasterboard or wooden wall, do not drill holes in the surface in advance. The self-tapping screws will fit into the wall well without this. As you understand, this option for attaching the cable box will not work with concrete and brick.
- If possible, start laying the cable duct from a corner, so that later it will be easier to join sections and trim them if necessary.
- There is not much difference in when you decide to install the cable duct - before or after the decorative finishing of the walls. We recommend laying the product last, because... Installing a cable channel on wallpaper is much easier to do than gluing wallpaper, cutting it due to the already laid route.
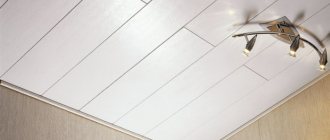
- If you decide to place plastic wire protection on the ceiling, do not forget to prepare the ceiling surface in the same way as the walls. The cable channel is attached to the ceiling in the same way as on the walls.
That's all you need to know about how to attach a cable channel to a wall with your own hands. We hope that the provided detailed description with photos and video examples was useful for you!
Also read:
What fasteners can be used for electrical wiring?
Their list is quite extensive, but we will highlight the most popular types of wire fasteners, related to versions for open and closed installation. Let's start with hidden installation:
Dowel clamps
Dowel clamps are considered the most popular because they are easy to use and have a low price.
But it is not difficult to get confused in them due to the abundance of different types, differing in functional features and external shape.
The simplest version is considered to be “bracket”. It is made on a plastic basis and has jagged ends with a width of about 8 mm. The size along with the shape can be chosen based on the need to create a quality fastening.
But dowel clamps for fastening have a spacer part and are considered a more reliable product for forming high-quality wiring. The design is based on a plastic rod base for using a hammer to drive the fastener deep into a pre-created socket.
What is the difference:
- Can withstand loads of up to 8 kg, which is enough for home electrical wiring;
- Thanks to the clamp, you can secure power cables, smooth-walled versions of pipes and corrugations with a diameter of no more than 32 mm.
Important: This type of fastener can only be used once, so we recommend that you mark the points for its installation correctly
Installation site
The version with the name “installation platform” is considered a hybrid option, since it includes the capabilities of the two fasteners considered. Externally, it is offered in the form of a dowel based on a mounting head, which has an input for creating a plastic or metal tie. Created using nylon or polypropylene
If a strong base was used, then it is distinguished by reliable fixation in the wall, which is due to the special shape of the rod. Due to this, you can securely secure one cable or several wiring lines.
Types of cable channels
Several criteria are used to classify a cable channel:
- Size. There are small products for laying one wire of a small cross-section or large boxes designed to mount up to eight conductors of different cross-sections on the wall;
- Material of manufacture. They produce aluminum, steel and plastic structures. For indoor installation, plastic models are more in demand, and fastening steel and aluminum boxes is more often used when laying electrical wiring along the facade of a house;
- Location. The cable channel can be fastened in several places. The design of the product is maximally adaptable depending on the installation location. There are plinth, parapet, main and floor models.
Do-it-yourself cable channel installation
When installing electrical wiring, an important step is to camouflage the cables. Exposed wires stand out noticeably on the wall, so they spoil the overall picture of the room's interior. Most often, cables are hidden under drywall or in the thickness of the wall. When connecting an outlet or switch, the wires will definitely end up on the outer surface of the wall. Cable channels allow you to make wiring invisible. In this article we will look at the scope of application of the cable channel, find out why the cable channel is needed, its pros and cons. The article will also discuss preparation and step-by-step instructions for installation work.
What kind of cable channel does a bathhouse owner need?
To organize open-type electrical wiring, a wide range of products of various shapes, dimensions and colors are now produced. Affordable white plastic boxes with a length of 2 m or more with variations of a couple of tens of cm predominate on sale.
Those who want to choose products that exactly match the wooden walls have a chance to buy channels of the required color. There are complex systems in stores with a full range of accessories for forming a network of any degree of complexity. There are mini-channels without additional devices to facilitate installation.
Cable channels are not cut to the sizes required by the buyer in stores. You will need to prepare the sections for installation of the main yourself. You will need to stock up on a hacksaw for metal, preferably a grinder. You will need a miter box for cutting workpieces at an angle.
The choice determines the purpose of the work:
- if the task is to install an additional switch or socket, it is enough to purchase an overhead version of this electrical installation product and buy one mini-channel for it;
- if the electrification of the bathhouse will be done from scratch, it makes sense to buy partially or completely a set of channels with accessories: corner and T-shaped adjustable elements, plugs, devices for installing sockets, distribution boxes, switches, etc.;
- If you plan to set up a simple circuit yourself with cable routing in inexpensive plastic boxes, you need to first draw up a diagram, calculate the footage of the channels and stock up on accessories of the same brand.
Buyers of an integrated system, along with a pleasant purchase, will receive detailed instructions on installing the main and additional elements to connect them into a single highway.
DIYers who decide to use mini-boxes for organizing electrical wiring will not be offered instructions. This article will be useful to them about how the cable channel is laid and what rules must be followed.
Common Mistakes
A self-taught DIYer may not know how to properly route cables through channels.
Such people make the following mistakes:
- They refuse to draw up diagrams and drawings at the preparatory stage. It happens that the owner of the house decides on the location of the cable during installation. In this case, you have to adjust the entire environment of the house to the electrical network.
- Using inappropriate tools. For example, a metal drill is not capable of making a hole in concrete or brick. An incorrectly selected hammer drill attachment quickly fails.
- Save on accessories. Some people think that buying accessories becomes an unnecessary expense. Experienced electricians successfully install channels into joints. The self-taught person does not get a high-quality angle the first time. The fittings mask unevenness and gaps. In a wooden house, connectors protect cable ducts from displacement and walls from excessive heating.
- Fasten products to the surface without markings. Not everyone wants to buy a level or level. Unsuccessfully installed systems have to be redone.
- Glue the trays. This method cannot be used when planning dismantling. Part of the cladding is removed along with the structure.
Proper installation of cable ducts is a simple and safe way to lay wiring. Cables are freely accessible, but not visible.
Tips for installing corners and joints of cable channels
When using special accessories, the places where plastic CC passes through the external and internal corners of the walls or floor are closed, respectively, with external and internal corners, aesthetically fitting into the interior of the room. The joints of the KK boxes can be trimmed with slight deviations from right angles and straightness of the cut if connectors are used that hide the joints of the sections.
In the absence of factory-made elements, corner transitions can be made as follows:
- To pass the internal corner you need:
- in the place where the KK route bends, make cuts along the sides of the box with a cutting depth to the level of the plastic base;
- bend the box at the desired internal angle;
- install the box at the transition site and attach it to the wall using one of the previously described methods (depending on the wall material);
- close the box with pieces of lids.
- To install the CC on the outer corner, the box is cut and fixed in the same way as the work for the inner corner. However, cuts are made on the lid at an angle of 450 with the center of the angle on the bend line.
The use of cable channels when arranging home and workshop electrical wiring greatly simplifies the design and installation of cable networks, speeds up installation work and allows the full reuse of wires and cables after dismantling the wiring.
CC with cable wiring
How to glue fallen tiles to the wall and floor
A tile on the wall has fallen off
Over time, any repair gradually loses its original luster and gradually becomes unusable. Depending on the type of cement mortar, this problem is typical for the tiles; they simply peel off over time due to the destruction of the surface adhesive layer of the back surface. Moreover, the problem of fallen tiles, although significant, can be restored.
For this, a number of adhesive compositions are used; you can also solve the problem radically by replacing the cement mortar in the right places. To glue loose tiles in the bathroom, you can use one of the following methods, including the one shown in the video.
Advice from experienced craftsmen
As a rule, when it comes to such a problem as fallen tiles on the wall and floor in the bathroom or kitchen, it is recommended to glue it with one of the available materials:
Floor tiles fell off
- glue;
- homemade adhesive solution from linoleum and acetone;
- silicone sealant;
- put on oil paint;
- bitumen or resin;
- casein mastic;
- cement paste;
- liquid nails.
Each of these methods for falling off tiles has its own advantages, but still refers to a kind of “ambulance”, that is, unprofessional methods.
Considering that this problem occurs in places of vibration - the floor, a plumbing hatch with a panel or a bathroom door, you need to ensure reliable fastening for long-term use. In this sense, it is worth commenting on the above list of funds.
Homemade glue from linoleum and acetone
A home remedy for quickly repairing tiles in the bathroom and kitchen, on the wall and floor is glue made from leftover linoleum. It is prepared by cutting pieces of the coating and pouring acetone over them. The oil fraction acts as a solvent, resulting in a high-strength polymer adhesive. As is known, polymers have excellent adhesive ability.
Linoleum and acetone glue
According to reviews, this product glues ceramic tiles and wood better than many compounds. However, the recipe given refers to old manufacturing methods. At that time, linoleum was made from nitrocellulose and resins, the result was an NC-type adhesive that could actually be used to glue different surfaces, including concrete and ceramics.
Nitrocellulose adhesive is commercially available and is used mainly for parquet, wood, yachting and furniture. You can also use it to glue tiles that have fallen off, but they are not designed for this purpose.
PVC glue, which is obtained from modern linoleum, is an analogue of industrial compounds recommended for rubber and plastics. At the same time, the well-known Moment also applies to polyurethane compositions and can be used for gluing tile ceramics back to concrete.
Liquid nails for fallen tiles
Liquid nails Axton
There are quite a lot of adhesive compositions under the general name liquid nails; there is a mounting adhesive called Moment that belongs to this type. This composition is not bad, but it temporarily holds the ceramics on the concrete base.
Over time, it will disappear anyway. Some craftsmen, instead of liquid nails, recommend giving preference to regular PVA, which ensures normal adhesion to the surface.
Cement paste and tile adhesive
Cement or mortar mixture is the most suitable way to repair tiles. Use leftover cement or cement mixture. You will need to beat off the base with a chisel, put new dough and use a homemade level to glue the ceramic tiles.
As part of a budget renovation, this is one of the most affordable and reliable options. Moreover, in order to glue a fallen tile to the wall, if it has fallen off, it is better to use good tile adhesive rather than cement mortar. After curing, you will need to caulk the seams.
Modern adhesives for bathroom and kitchen tiles
Applying adhesive to tiles
These compositions for gluing tiles if they have fallen off are often used when installing a hidden plumbing hatch, but in this case the ceramics are placed on a wooden base, gluing with almost any available composition. For gluing to concrete, silicate glue is used, having previously treated it with silicate to improve adhesion. The result is a strong connection, but if you have loose ceramic tiles in an area of use, for example, near a door, then such repairs are only temporary.
Another affordable and reliable option is styrofoam glue. This is a mastic that has good binding ability to concrete. Perfect for the floor if you don’t want to use a radical method of repairing the wall with tile adhesive.
General rules for marking QC
Correctly executed markings clearly indicate how to attach the cable channel to the wall, taking into account all the executive elements of the electrical wiring. To apply marking lines you need to prepare:
- ruler and pencil;
- bubble or other type building level;
- beating cord, also called coated thread, with pigment.
The sequence of applying QC markings is as follows:
- In accordance with the architecture of the room and the electrical wiring diagram from the distribution board, the placement points for sockets, switches, and mounting boxes are determined. The optimal dimensions of their distance from the joints of the floor with the walls, corners, etc. are measured with a ruler. Appropriate marks are made on the walls with a pencil.
- In all places where the cable route is supposed to be laid, straight lines are drawn with a tapping cord.
- The construction level controls compliance with the vertical and horizontal lines.
QC marking
Installation technology
The main advantage of a channel cable for open wiring is ease of installation. At the same time, the structure can be fixed on any surface: wall, floor or ceiling. The surface material is of greater importance: the method of best fastening depends on this. Let's consider the main installation options, as well as the types of surfaces to which the channel cable is attached.
Surface marking
Before you begin to attach the cable channel, you need to make markings on the surface: the location of the electrical wiring boxes is marked on the wall. This can be done with a pencil or chalk and a building level. It is important to maintain horizontal and vertical lines, since after installation the unevenness of the gasket will be evident.
Self-tapping installation
To secure the box to a wooden wall, use ordinary self-tapping screws. The recommended length is 2–3 cm. This method is suitable for wooden houses, bathhouses and other buildings. Self-tapping screws are also suitable for walls covered with wooden clapboard.
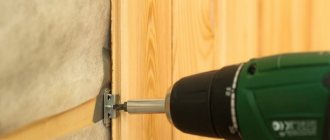
When performing installation, holes are pre-drilled in the bottom of the box, into which self-tapping screws are then screwed. In plastic structures, holes can be made directly with a self-tapping screw during fastening. The optimal distance between installation points is 30–50 cm, depending on the expected load on the cable channel (the number of electrical wires placed in the box).
Fastening with dowels
Installing cable ducts on a concrete surface requires a more serious approach and additional tools. This will require plastic anchors and a hammer drill or impact drill to make holes in the concrete wall. This method is suitable for installing any profile: both metal and plastic, indoors or outside the building. The order of work is as follows:
- Holes for fastening are drilled at the bottom of the box. The distance between them, as in the previous version, is 30–50 cm;
- Then the cable channel is applied to the wall along the previously marked line;
- Using an awl or nail, the location of the fasteners is marked on the wall surface;
- Then, using a puncher, holes of the required diameter are drilled along the marks in the wall, into which plastic dowels are driven;
- After this, all that remains is to secure the profile using self-tapping screws.
To secure the electrical wiring box to a concrete surface, you can also use dowel nails, which are driven in with a hammer. But this option has a significant disadvantage - if it is necessary to move the structure, certain problems arise with dismantling such dowels.
Glue method
Another option for securing the cable channel is to use mounting adhesive for fixation. Most often, the adhesive composition “liquid nails”, produced under the Moment brand, is used for these purposes. This glue is available in tubes for a mounting gun or in ordinary tubes for manual application.
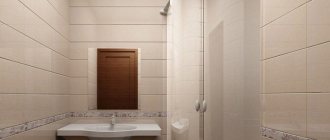
The adhesive installation method is used for attaching cable channels to plasterboard, PVC wall cladding (plastic lining or panels), as well as in bathrooms on ceramic tiles. It is worth noting that only plastic wiring boxes are suitable for this method, since their weight is minimal. It is also desirable that the number of wires laid in the cable channel be minimal and do not create significant loads on the structure.
The technology of the adhesive fixation method is as follows:
- An adhesive is applied to the back of the profile. To ensure maximum adhesion area, the glue is distributed in waves;
- Then the cable channel is carefully applied to the wall along the marking line and immediately removed;
- After 2–3 minutes, when the glue has begun to dry, the strip is reapplied and pressed firmly for several minutes.
After the adhesive has completely set, additional fixation is performed in problem areas. For fastening, use small screws or hammer nails.
In conclusion, here are a few recommendations that will come in handy when installing cable channels.
To facilitate profile connection, use additional elements offered by the manufacturer: T-shaped and corner structures, strip connectors, various bends and other accessories.
To install sockets and switches, it is best to use overhead versions of these products or use box models with built-in structures.
Separately, we note that the installation of external electrical wiring is carried out last, after all finishing work has been completed.
Method No. 1 - Self-tapping screws
If you decide to install electrical wiring in a wooden house or apartment with plasterboard partitions, then the installation of the cable channel must be done with special wood screws. The fastening step depends on what load will be placed on the plastic box, or more precisely, how many wires need to be stretched inside, and what their cross-section is. As a rule, to securely fasten a cable channel to a wooden wall or drywall, it is enough to screw screws every 40-50 cm. If the walls are uneven, it is better to reduce the fastening step, this will hide all defects and gaps.
You should not choose screws that are too long to install the cable channel yourself. To securely fix the box in the wall, it will be enough to screw in fasteners about 40 mm long. For screwing, it is best to use a screwdriver with a Phillips bit. We talked about how to choose a screwdriver for home repairs in the corresponding article!
How to change the wiring in an apartment without gating?
It is possible and necessary to replace electrical wiring in a panel house, including without gating: Method 1 - pulling. The apartment is de-energized, and then a new one is tied to the end of the old wire in the junction box, for example, using electrical tape. The main thing is that the node does not have protruding ends, otherwise the cable will get stuck in the channel.
Interesting materials:
Who will have their pension increased from August 1, 2022? Who will get an increase in pension? Who owned the cornucopia in Greek mythology? Who owns the Maldives? Who owns the Borjomi company? Who owns the Snils number? Who is contraindicated for melatonin? Who is contraindicated for stretching? Who should not exercise on a treadmill? Who is given fire safety training?
Decoration of corners
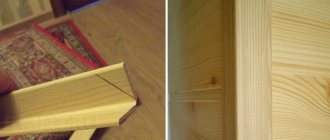
When installing electrical wiring in cable channels, you may need to make corner joints in the corners of the room or between the vertical and horizontal parts of the channel on the wall. To make a joint in the corner of a room, the end of the cable channel is cut from the side adjacent to the corner at an angle of 45 degrees. It is better to start installing the cable channel from a corner.
To make the junction of the vertical and horizontal parts, the cable channel is also cut at an angle of 45 degrees, but in a different plane. You can do it another way: cut the lid to the full width of the box. Minor defects can be covered with sealant.
Features of fastening on different materials
On some surfaces the channel is easy to install. Difficulties may arise when working with problematic materials such as drywall.
Wooden wall
The easiest way is to fasten the trays with self-tapping screws. The length of the screw is 1.5–2 cm. Holes are drilled in the cable channel in increments of 20 cm, which will be used for fixation. It’s easier to work this way, but installation takes more time. Experienced builders screw the self-tapping screw into the bottom of the channel and the wall at the same time.
When wiring is laid openly along the lining, problems arise. The board has a profile; you need to screw in the screws carefully.
When the screw hits the convex section of the lining, it can be tightened. When screwing a fastener into a concave area, the self-tapping screw must not be inserted all the way. The screw should not deform the plastic tray.
Classification of cable channels
Using a cable channel allows you to fix the cable on a base made of concrete, brick, wood, plasterboard, foam block, stone.
However, the attachment methods will be different.
Depending on the room, the schematic arrangement of the wiring lines and the number of wires in them, it is recommended to use boxes of various types.
Their detailed classification is presented in the table.
| Classification feature | Kinds | Description |
| installation location | floor | in their shape and appearance they are optimally adapted to the installation location; |
| main | ||
| skirting | ||
| color | Available in different colors and shades | fit harmoniously into the interior of the rooms |
| size | different channel volumes - for one, 2, 3 or more cables | dimensions from 12×12 to 100×60 mm; have different shapes of corners - from sharp to rounded |
| number of locks | with one | 2 latches – more securely hold the cover on the channel, reducing the possibility of deformation; |
| with two | ||
| product material | aluminum | covered with film; a variety of shades gives an attractive look; fireproof |
| steel | installed indoors or outdoors; Available with a galvanized surface in different colors; do not burn; susceptible to corrosion when scratched |
The most expensive option is aluminum, the cheapest is plastic. In any case, the latter should be taken, which do not burn, but melt.
Attaching cables to the ceiling
It is necessary to attach cables to the ceiling mainly when installing suspended ceilings or ceilings made of plastic panels and plasterboard. In the case of plasterboard, everything is somewhat simpler: there is a system of suspensions to which you can fasten wiring harnesses with plastic ties. In other cases, everything is somewhat more complicated: you have to drill a large number of holes for fasteners, because they use the same clips and brackets, and under each you need to install a dowel (if the ceiling is made of a concrete slab).
Attaching the cable to the ceiling is time-consuming
There are several ways to speed up installation:
- Using cable trays (described above).
- After attaching a number of lines to the ceiling, hang small wire harnesses from them using plastic ties.
- Use a long perforated strip of metal for fastening.
How to fix a cable duct to a concrete wall
During the construction of a house, electrical wiring is installed in a hidden way, under the plaster. A complete replacement of the electrical wiring is usually carried out during a major overhaul. In this case, grooves are made in the wall, into which the wire is laid.
But what to do when there is no opportunity or desire to engage in dusty wall slitting? Or do you need to connect a recently installed powerful electrical appliance, such as a water heater? In this case, many choose the open method of laying electrical wiring, and fastening to the wall is carried out using a cable channel.
Open installation fasteners
When using an open installation method, they try to use the least visible types of fasteners
Such cable fastening cannot be completely invisible, but it may not attract attention.
We must try to make the cable invisible...
Staples from a construction stapler
If you have a stapler on your farm, you can fasten a small-diameter low-voltage cable easily and quickly. There are special U-shaped brackets on sale. They are designed precisely for these purposes. There are two types:
- 28 or S. Made of 1.25 mm thick wire, suitable for fastening cables with a diameter of 4.5 mm, leg height from 9 mm to 11 mm.
- 36 or L. They have a diameter of 6 mm, leg height from 10 mm to 14 mm.
There are also special cable cleats with a plastic housing (pictured on the right). They are more expensive, but due to the plastic housing there is less chance of crushing the wires or damaging the insulation.
The brackets can be made of galvanized steel or stainless steel. The legs can be regular or pointed. The second option fits easier even into dense substrates such as chipboard. As you understand, this fastener is not used for serious conductors, but for wired Internet, telephone, etc. very convenient.
Staples and clips
Fastening cables of different diameters is most often done using staples and clips. They are made from metal and especially durable plastic. Plastic clips are used to secure wires indoors; metal clips can also be used outdoors. The metal can be galvanized or painted, but it is better to find ones made of stainless steel for outdoor use.
Clips and brackets for attaching cables to walls
The most inconspicuous of the clips are small plastic clips with nails (upper left corner in the photo). They are used if it is necessary to stretch one thread of cable. The work is progressing quickly - I put a nail in place and drove it in. The remaining staples are more noticeable, but stronger and stiffer wires can hold them.
There are also plastic clips for attaching the corrugated protective shell to the wall. There are them in the form of several rulers, and there are one at a time. So you can secure both a single conductor and a group of cables.
For fastening corrugated hoses
The same clips can be used to fasten cables of suitable diameter. For very hard ones, it is better to use metal staples, and for conductors of medium hardness, these are also suitable. Clips with a lock are good for these purposes (pictured below on the left). They can also be used to secure cables to the ceiling.
Based on dowels
There are cable fasteners based on plastic dowels. The plastic used is heavy-duty, so the area of use is not limited - it can be installed in both brick and concrete walls. There are several types:
- Dowel tie. The plug of this fastener is cast with a tie. Convenient if you need to fix a bunch of cables.
- Dowel clip. Suitable for fastening single conductors. Made from plastic tape with notches. Available for round and flat cables of different diameters/sizes. This is one of the most invisible fastening methods.
- Dowels with a platform for the screed. There are two types - with a removable platform and a plastic tie and with a slot in the cap.
All these types of fasteners are inexpensive, but do their job well. They are even better to use than with metal nails - there is less chance of damaging the insulation. Since they are inexpensive, they can be used to secure cables in a groove.
Fastening the cable channel to the wall using self-tapping screws.
If you decide to install a cable channel in a wooden house or apartment with plasterboard partitions, then the installation must be done with special wood screws. The fastening step depends on what load will be placed on the plastic box, or more precisely, how many wires need to be stretched inside, and what their cross-section is.
As a rule, to securely fasten a cable channel to a wooden wall or drywall, it is enough to screw screws every 40-50 cm. If the walls are uneven, it is better to reduce the fastening step, this will hide all defects and gaps.
You should not choose too long self-tapping screws for installing the cable channel. To securely fix the box in the wall, it will be enough to screw in fasteners about 40 mm long. For screwing, it is best to use a screwdriver with a Phillips bit.
Fastening the cable channel to dowel-nails.
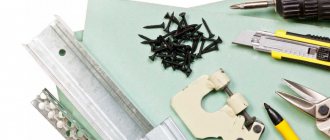
You will need the following tools:
- Hammer.
- Dowel-nails.
- Sharp knife.
- Level and pencil.
- Screwdriver.
To begin, draw a straight line on the wall (ceiling) (for walls at a level) and prepare dowel-nails for work, from which you need to cut off the plastic cap with a sharp knife. This is done so that the channel fits tightly to the wall. We will use a concrete drill with a diameter of 6 mm and, accordingly, dowel-nails No. 6.
Next, attach the cable channel to the line and punch it with a hammer drill, going deep into the wall to the length of the dowel. Insert the cut plastic insert and screw the dowel-nail with a screwdriver until it stops. The next attachment point is located 40-50 cm, the extreme one 5-7 cm from the edge of the box. Insert the wire into the channel and snap the cover on.
How to attach a cable channel with glue (liquid nails).
Fastening with glue is not very reliable; it is used where others cannot be used, for example, for fastening to tiles. You can combine it with others - with fastening with self-tapping screws or dowel - nails.
To glue the box to the wall, glue is applied to it in a zigzag line, then pressed against the wall along the markings so that the glue is imprinted on the surface, and removed. After a few minutes, when the liquid nails have set a little (the time depends on the specific type of glue, this can be read in the instructions on the package), the box is pressed firmly against the wall again.
Remember that dismantling a cable channel glued to the wall with liquid air without damaging the coating or the electrical box itself is impossible. The cable can only be laid after the adhesive has completely hardened.
Fastening the cable channel to metal.
If there is a need to attach a cable channel to metal less than 2 mm thick or an aluminum profile, then we advise you to use metal screws, also called “bugs,” for fastening. There is nothing difficult about installing an electrical box on a metal surface; the main thing is to choose good screws and charge the screwdriver.
This is interesting: Non-return valve for sewerage - characteristics and installation
Nuances of installation to a concrete wall
How to attach the cable duct to the wall depends on the material of the walls, since they have different strengths. The weight of the structure is determined mainly by the weight of the cable in the main box and ranges from 100 grams in the lightest case to several kilograms per linear meter. The distance between the screws should not exceed half a meter. If the base of the box does not have holes for fastening, it is better to drill them immediately before installing each section. Let's consider each type of wall material and installation features.
There are several ways to attach a cable duct to a concrete wall. You can choose the most suitable one:
- Professionals do this work using an air gun and special nails. The fastest option, but dismantling will be difficult and the tool is expensive.
- We drill holes with a hammer drill in the pre-marked places where the cable channel is attached. We insert plastic dowels and secure the channel with self-tapping screws. The most common installation method for small volumes of work.
- Adhesive connection. For use only on flat surfaces. Subsequent dismantling clearly renders the cable channels unusable. Procedure: special glue (liquid nails) is applied to the base of the cable channel of the required length along a sinusoid and for a second it is applied to the place marked on the wall. After 2 minutes, the cable channel must be pressed firmly for the glue hardening time indicated on the package.
Fastening the cable channel to a brick wall can be done in the same way as for concrete walls. It should be taken into account that dismantling the glued structures will lead to tearing off the plaster.
Installation of a cable channel on a wall made of wood or gypsum fiber board is almost the same. No drilling is required; the screws are screwed directly into the wall material.
It is worth noting that due to the fragility of gypsum fiber, the distance between the screws can be reduced. The adhesive method when applied to wood and gypsum fiber board has the same advantages and disadvantages as when applied to other materials.
If it is necessary to fasten the cable channels to a metal partition, you can use special metal screws 1.5-2.0 cm long with a drill at the end. If the surface is smooth, you can use the glue method.
Stages of wiring installation in CC
The process of installing wiring in cable ducts is divided into the following stages:
- Development of a wiring diagram for the premises.
- Drawing up a drawing of the CC route.
- Carrying out CC markings on the wall, during which the installation locations of sockets, switches, mounting boxes and the expected locations of adapters are determined.
- Drawing up a specification for the drawing with a complete list of required accessories for the marked QC route.
- Purchase of CC and accessories.
Should be considered! The standard length of the CC box is 2 meters, so the actual length of the purchased CC will exceed the nominal length of the route by 10-12%.
- Preparation of QC for installation work. Experts do not recommend immediately cutting all the material into assembly sections for the entire route, since after the work is completed, any deviations will certainly be revealed, especially on the lines where the wall meets the floor or the wall meets the ceiling.
- Installation of CC boxes along the marked route. QC installers work according to the formula:
- cut off - exposed;
- secured with fasteners;
- installed the accessory;
- further in the same sequence: cut - installed, etc.
Important! Fasteners for installing KK boxes are selected in accordance with the material of the surface to which the KK is attached (plasterboard, brick or concrete, wood)
- Laying and securing wires in the CC box.
- Fixing lids on QC boxes.
- Installation of sockets and switches.
Mounting options
Despite the versatility of boxes, different methods of installing elements are used. When choosing a method, take into account the type of base to which the products will be attached.
Common fixation methods:
- screws;
- dowels;
- liquid nails;
- "bugs".
Self-tapping screws
This method is used to attach channels to drywall or wood. Most often, self-tapping screws 4 cm long are used. The frequency of placement of fasteners depends on the cross-section and number of cables being laid. It is enough to maintain a step of 40–50 cm. Using a screwdriver simplifies the work.
Screeds with platform
It is a dowel with a thread and a platform (square or rectangular) to which a tie is attached. These fasteners (KSP) are convenient for quick installation. Made from non-flammable plastic.
KSP - screed with mounting platform for dowels
Initially, a dowel is installed, onto which the platform with the screed is screwed. After this, the wires are attached. Installation is suitable for wooden, brick and concrete walls and ceilings. With the help of such platforms you can attach several cables at once.
Dowel clamp
Used for quick fastening of one cable. The clamp is very easy to install. Using a hammer drill (if the wall is concrete), a hole of the required length and diameter is drilled. After this, the clamp is carefully opened, the cable is placed in it and the sharp end is inserted into the hole. The clamp will not fall out of it thanks to the double-sided notches on its sides.
The shape of the clamp must match the cross-sectional shape of the cable. Basically it is either round or rectangular. These installation elements are low cost and reliable in installation.
Features of application
The choice of technology depends on the building material of the walls, the cross-section and number of cables, operating conditions, and network voltage - 220 V or 380 V. Each fastening element has application nuances that should be taken into account when carrying out installation work:
- “Butterflies”, “umbrellas”, fasteners with a drill and other elements with a wide middle or end are suitable for attaching to thin and porous materials - drywall, foam block, chipboard.
- Self-tapping screws of various types are used for fixing to plaster, wood and other dense bases.
- Dowels with plates or clamps are used if the structure needs to be secured to a brick or concrete surface.
Installation features
The temperature at which cable ducts are installed varies widely, but should not fall below minus 50°C or rise above 60°C. The box installation algorithm is as follows:
- de-energize the facility by turning off the input machine;
- make markings directly on the surfaces where the base will be attached;
- cut the boxes to the required length;
- remove the cover;
- secure the base. To do this, if the fastening is made into wood, drywall or metal, you need to attach it to the surface, drill holes directly through it in increments of 40 - 50 mm and secure with self-tapping screws. In the case of fastening to concrete, blocks, bricks, holes are first drilled in the wall into which dowels are installed, and then, after attaching the base, they are secured with nails. They are inserted into the dowels and hammered in flush with the base. When using special glue (liquid nails) for fastening, they first lubricate the base with it, then bring it to the place of fastening and press it. Then they are taken away from this place for a few minutes and re-glued. Sometimes in this case additional fastening is carried out using self-tapping screws or dowel-nails.
- install the necessary accessories that simulate the track. Attention must be paid to the corners. They need to be done flawlessly using special overlays.
- lay the wires in the base, making sure that they do not intertwine, and securely fasten them;
- cover the base with a lid
- install overhead sockets and switches, if provided for in the diagram;
- turn on the power supply to the facility;
- check functionality.
The dismantling of the boxes is carried out by de-energizing the section of the route in the reverse order - the corners, overhead products and other accessories, the cover are removed, the wires are removed, then the fasteners. After careful dismantling, the product can be reused.
Installation of a cable channel for laying low-current and power conductors in an open way is the cheapest and least labor-intensive way to supply an object with electricity, which can be done independently, without resorting to the services of specialists. This can be done if you have basic knowledge of electrical engineering, occupational safety and the ability to use the necessary tools and devices.
Basic selection rules
The choice of a specific product depends on the following factors:
- purpose of the premises;
- installation locations;
- colors;
- size;
- type of lock.
For different types of premises, depending on the installation location, a different type of cable channel is selected:
- for industrial plants and outdoor installations, usually made of aluminum or steel;
- for installation in private properties, offices, apartments - made of impact-resistant, self-extinguishing plastic.
Metal products are more reliable in terms of fire resistance than those made of PVC, so they are used in the creation of warning systems and fire alarm systems, access control, and external video surveillance. Aluminum cable channels do not corrode during operation, while steel ones require careful handling (any scratch will lead to oxidation processes over time, which will negatively affect its appearance and strength). The color of the product is selected depending on the design of the room, the color of the outer wall of the building, or they try to choose one that will harmonize with them.
The choice of size and number of sections depends on the diameter of the conductors being laid and their number. They always select a product with some reserve so that, in the case of laying additional communications, it is possible to use the existing main route. The standard dimensions of cable channels in mm are as follows:
- width from 12 to 100 (12; 15; 16; 20; 25; 40; 50; 60; 70; 80; 100);
- height from 10 to 60 (10; 12; 16; 25; 40; 60);
- length - 2000.
Locks for cable ducts can be very different. This depends on the production technology adopted by the manufacturer. You need to choose one that latches well without much effort, and the opening and closing operations can be performed repeatedly. This makes it easier not only to install, but also to dismantle. It is also necessary to remember that a cable channel with a two-way snap-on cover is better than one with a cover that opens in one direction.
Fastening wires using a hammer drill and dowels, staples, clamps
First, let's look at the first method using a familiar hammer drill.
The most popular and common types of fasteners for laying cables in an apartment in this case:
Dowel tie for fastening a single flat or round cable
The principle of fastening is to drill a hole with a diameter of 6 mm, put a cable inside the clamp and push the clamp into the hole.
This fastener has several advantages - economical, fast, no extra protruding parts if you have to seal the fastener in the groove. In addition, these fasteners can also be used to attach corrugation.
Cable tie with dowel hole
Minimum consumption costs. All you need is a plastic dowel and nothing more. Takes up minimal space on the surface.
Mounting square pad
Drill a 6mm hole, hammer in a clamp or a plastic dowel and screw the platform to the wall. Then use a cable tie to tighten the cable to the site.
Corrugated clips
The clip is fastened with a dowel and a self-tapping screw. Clips are selected depending on the diameter of the corrugation. The advantage of the clips is that they can be assembled into blocks (there are special locks on the side for this) and several cable routes can be laid simultaneously.
Metal staples
If the cable is laid in a metal hose, then use metal brackets for fastening. Again, the size is selected based on the diameter of the metal hose.
Self-adhesive pad
If you need to lay a section of cable on a metal surface, and this surface cannot or is not desirable to drill, use self-adhesive pads. The pad has a self-adhesive backing, which, after removing the protective layer, easily sticks to a clean surface. The cable is secured to the platform again with a nylon tie.
Such fasteners are often used when installing wiring in a large electrical panel room.