Finishing the house with OSB from the outside: methods of finishing OSB sheets: painting, plaster, artificial stone, siding.
OSB boards or otherwise OSB sheets are widely used for the construction of walls in houses, in particular in frame construction. Therefore, the issue of their external decoration is very relevant today. Moreover, not only from an aesthetic point of view, but also in terms of protecting the material from the negative effects of external factors (high humidity, sudden temperature changes, solar radiation and others).
In this article we will consider the following issue: finishing OSB outside the house.
Finishing OSB outside Finishing walls from OSB boards outside the house: how to finish OSB walls
There are many different ways to decorate walls made of OSB sheets outside the house. All of them take into account the features of OSB boards, which are subject to the same deformations as wood.
Among the main methods used for external finishing of walls made of OSB sheets are the following:
Painting a house made of OSB
Painting is the simplest and most common option, which does not require a lot of time and money. Water-based or oil-based wood paints are used for exterior work. In order for the coating to adhere well, it is important to properly prepare the surface for painting. First of all, it is recommended to seal the interpanel seams with acrylic sealant, and then thoroughly clean and prime the entire surface of the slabs. The paint is applied in several layers. Each of them must be given time to dry thoroughly before applying the next layer.
Painting OSB boards
To paint OSB boards, you can use a brush or roller.
Applying plaster to pox boards
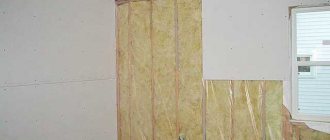
Plaster allows you to extend the life of the slab and additionally protects it from fire. OSB boards can change their geometric dimensions over wide ranges due to changes in humidity and ambient temperature. If you apply plaster directly to the OSB board, it will soon become covered with cracks and peel off from the base. Therefore, two main technologies are used: the use of an intermediate layer and layer-by-layer application of plaster.
Plastering OSB boards
Expanded polystyrene or glassine can be used as an intermediate layer. Expanded polystyrene has good moisture insulation and further improves the thermal insulation properties of the wall. Glassine or bitumen cardboard has a low price.
To prepare the base, sealant is applied to the joints between the sheets. The sheets themselves are primed. After this, an intermediate layer in the form of polystyrene foam or glassine is glued. A reinforcing mesh is attached on top of this layer and a layer of plaster is applied.
When applying plaster directly to OSB sheets, the process is divided into several stages. After preparing the base, as in the previous version, proceed to the first stage. During which the first layer of plaster is applied, a reinforcing mesh is embedded in it. After drying, apply another layer. After this, a leveling layer is applied.
The option without an intermediate layer is less reliable and after 2-3 years the plaster may begin to peel off, so it is usually recommended to use an intermediate layer.
Installation of decorative stone on osb boards
Artificial stone is one of the most complex and expensive finishing methods. However, the excellent appearance of the finished facade and the durability of such a coating will certainly pay for itself over time. Stages of work:
- Before starting work, the seams of OSB boards are filled with frost-resistant sealant, and the boards are primed.
- Polystyrene foam is glued on top.
- Then it must be filled with frost-resistant putty.
- Then apply two layers of glue. Place the reinforcing mesh into the first one.
- Place decorative stone on the second layer.
Finishing OSB boards with decorative stone
Sometimes decorative stone is glued without an intermediate layer in the form of polystyrene foam. This option is less reliable and after 2-3 years the coating begins to peel off.
Fastening siding to OSB boards
Siding is a universal finishing method that can be used for any facade. The material has an affordable price and excellent appearance. Provided that the OSB board has a flat surface, fastening the sheathing is optional. At the same time, so that during operation the material does not swell from the condensation formed, it is important not to forget to install a windproof, waterproof membrane between the slabs and the siding.
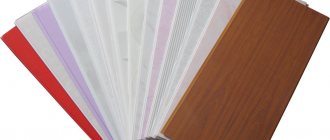
Finishing OSB boards with sidingDecorative facade panels
Decorative facade panels have a wide range of modifications and are made using various materials: wood, metal, plastic, glass. The technology for installing such panels depends on the panels themselves. Most often used for fastening are: dowel fasteners, brackets and metal profiles.
Installation of decorative panels on the walls of an OSB house
Each of the listed methods has its own advantages and disadvantages. It doesn't matter which one you choose. The main thing is to strictly adhere to the recommendations of specialists and the correct technology.
Methods for finishing osb outside
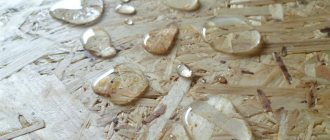
Durability of OSB
Usually, everyone who decides to do something like this is primarily concerned with the question - what will happen to the facade in 3-5 years if it is sheathed with OSB.
Some people think that the slabs will swell, because... OSB is not a finishing material intended for outdoor use. Some people believe that this cladding option is possible and, moreover, optimal from the point of view of reducing financial costs and the possibility of repeating it yourself.
Victor BanevFORUMHOUSE user
Whether or not to use OSB on the facade - opinions vary. I decided that the game was worth the candle in terms of speed, ease of installation and low cost of such a facade. I’ll just note that an OSB façade is an economical option for thrifty summer residents. To decorate a permanent structure - a cottage - more weather-resistant materials should be used.
Looking ahead, let's say that the service life of the facade made of OSB boards has already entered its third year, and what it looks like is clearly demonstrated in the following photo.
Pie wall with OSB
The result is impressive, and now let's move on to practice. There is an old uninsulated dacha measuring 6x8 meters. The outer cladding is inch board. On top of the boards is painted hardboard. The place of alteration is the Leningrad region, i.e. an area with higher humidity than Moscow, with frequent rains, fogs and short summers.
What is required is to insulate the building from the outside and make a beautiful façade. The budget is minimal. This means: work without hired workers, using relatively inexpensive materials and technology that can be done by two people. The user’s train of thought when choosing methods for finishing the facade is also interesting.
Victor Banev
I don't like finishing the facade with siding. It's boring. Block house is too expensive. The well-proven option of using CSP (cement particle board) for further painting and imitation of half-timbering is also eliminated. Expensive and, due to their heavy weight, difficult to lift the sheets, much less mount them at a height. Sheathing it with clapboard is also not the same. But I, as they say, fell in love with half-timbered wood and began to think about how to bring this idea to life.
After going through several options, the user decided to make the façade he liked so much as a half-timbered structure based on OSB boards. This, according to the user, is much cheaper and easier than fiddling with the DSP.
Pie wall based on OSB
As a result, the user came to such a “patty” of the wall. From inside to outside:
- drywall;
- wall;
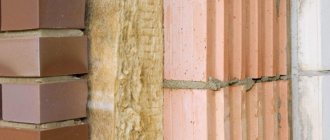
- insulation – mineral wool, laid in 2 layers, with a total thickness of 100 mm;
- wind- and moisture-proof membrane;
- counter-lattice;
- OSB 3 boards with imitation of half-timbered layout.
Since total savings are at the forefront, the first thing our site user Victor Banev did was to virtually lay out the slabs on the walls to minimize their cutting and waste.
Moreover, the dimensions of the OSB sheet dictate the location of the decorative layout of boards (25x100 mm), which cover the joints of the slabs and imitate half-timbered timber.
After several intermediate layout options, we managed to come to a common denominator. A sheet measuring 224x122 cm, placed vertically, almost completely covers the wall, and overlays (boards) are needed only to protect the vertical joints of the slabs. We'll tell you how to estimate the layout (having taken all the necessary dimensions from the facade in advance) using the example of the left wall of the house.
If you look at the picture above, you will notice that 2 whole sheets of OSB are placed vertically on the left and right. Based on the results of wall measurements, it turned out that the distance (remaining gap) in the middle is wider than one sheet, but narrower than two. Those. - we need to sheathe the wall with two pieces laid horizontally, and then close the resulting horizontal seam. To maintain symmetry and the overall design of the layout, we add horizontal strips to the outermost OSB sheets and proceed in a similar manner along the entire perimeter of the building.
The layout of the slabs and boards that cover the joints depends on the size of the house, and each case should be considered and calculated individually.
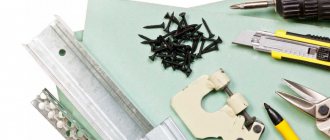
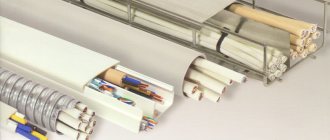
Additional elements for corrugated sheets
In addition to the sheets themselves, additional elements will be needed for finishing. Each of them performs specific functions and is an integral part of the house’s cladding.
| Item name | Purpose |
| Outside corner External corner | Used for framing external corners. Gives the skin a finished look and at the same time protects the joints from precipitation, dust, and small debris. Mounted on top of the corrugated sheet, as a result of which the screw heads remain visible |
| Internal corner Internal corner | It is attached to the inner corners of the building and performs protective and decorative functions. Mounted on top of profiled sheets, fasteners remain visible |
| External corner difficult | Performs the same functions as a regular corner, but it is attached to the sheathing before installing the sheets. This installation allows you to make hidden fasteners |
| Inner corner difficult | Installed in the internal corners of the facade before installing corrugated sheets, it performs protective and decorative functions |
The docking strip is complex | Intended for protecting and finishing sheathing joints on the wall plane. Attached to the sheathing before installing the corrugated board |
End strip | It is used to frame the ends of the sheathing, protects them from the effects of precipitation, and gives a neat appearance. Attached to the sheathing before installing the sheets |
Sloping strip | Used for framing door and window openings. Protects against precipitation and debris, attaches to the sheathing before installing the sheathing |
Docking strip | Performs the same functions as a complex docking strip, but is attached after installation of the sheathing, as a result of which the fastener heads remain visible |
| Molding | It is used to finish the joint between the facade of the house and the lining of the eaves overhang. Attached to the sheathing before installing corrugated sheets |
Window ebb | Used to protect window sills from rain flows. Installed at the bottom of the window slopes before installing the casing |
| Platband | Used to decorate door and window openings, giving them a finished look |
Base strip | It is used to protect the upper part of the base from rain and snow, thereby extending its service life. Attached to the bottom of the sheathing before installing corrugated sheets |
As a rule, these products are produced in lengths of 3.2 and 1.25 m, although each manufacturer may have its own parameters. It is much easier to calculate their number than sheathing sheets, since here everything is measured in linear meters, and not in square meters.
Installation of slabs
Having dealt with the layout design, we move on to installing the slabs. The work is simple, but there are a number of nuances. First of all, do not forget that the curtained façade requires good ventilation to allow excess moisture to escape. If we neglect the main ventilation duct (gap) with an exit in the upper part of the facade, then the moisture will be locked inside, behind the OSB boards, which do not allow steam to pass through well, and with a large thickness are practically vapor-tight. Hence - a bunch of problems in the form of mold and waterlogging of the insulation.
The user is left with a gap at the top of the façade, approximately 1.5 cm across the entire width of the panel.
We proceed directly to the installation of OSB. The thickness of the slabs in this version is 9 mm. This is quite enough, because the sheets practically do not carry any force load. First, on the walls, outside, we stuff a frame - a lathing made of vertically placed wooden blocks with a cross-section of 50x50 mm.
We lay mineral wool insulation between them, by surprise.
Next, we stuff the horizontal sheathing and, accordingly, lay the insulation (the so-called cross insulation), orienting it horizontally. Thus, the joints of the plates overlap. Then we attach a vapor-permeable moisture-proof membrane, with obligatory overlap and gluing the joints with tape (double-sided).
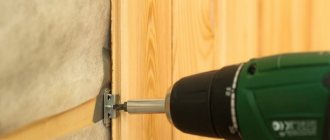
Then we fill vertical bars 30x40 mm for fastening OSB sheets.
Victor Banev
The installation step of the bars is 0.4 m, i.e. it turns out: 3 vertical strips per 1 sheet. The OSB was secured with self-tapping screws, 6 pieces each. for 1 block. A gap of 2-3 mm was left between the sheets. Next, the gap was carefully painted over, although I think this is not necessary, because... from direct contact with rain or dew, the ends of the slabs will be protected by wooden plates 100 mm wide.
In addition to insulation, the windows of the house were replaced, for which they were moved forward on frames made of 5x15 cm boards.
Once the sheathing was completed, we began painting the assembled walls.
Before painting, one additional layer of universal bioprotective moisture-resistant impregnation, based on varnish, was applied to the surface of the slabs. Application was carried out on 2 sides.
Next, the slabs, before installation on the walls (this makes it easier and faster to work), were covered with two layers of acrylic facade paint. At the coverage stage, the user made one mistake, which will be discussed below, but for now we suggest looking at what happened at this stage. According to the user, the result exceeded all expectations.
If you move 1.5-2 meters away from the facade, you get the impression that the walls are finished with plaster, and it is impossible to understand from the street that this is a facade made of OSB boards.
In addition to the decor, instead of the old porch, a summer veranda in the shape of the letter L was erected from 15x15 cm timber.
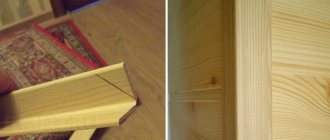
After this, we moved on to the final finishing – installation of the half-timbered layout. The planed layout board has different lengths. Somewhere - 2, somewhere - 3 meters.
Diagonal jibs, 2.5 m each, are made from one solid board.
The boards are attached at the edges with self-tapping screws. The result is a strong, hermetically sealed connection that does not allow moisture to enter.
For contrast, the boards were painted dark brown.
Summing up and recommendations
Three years of operation of the facade confirmed the correctness of the technology. The OSB boards at the ends have not swollen, the paint has not peeled off, and the quality of the façade is consistently high. The only point mentioned above: due to an error made at the installation stage (several slabs “forgot” to be treated with bioprotection), the outside of the OSB was covered with fungus, which in some places protruded from under the paint.
The slabs treated with protection were not affected by mold. This error turned out to be easy to fix. The cladding was removed and painted over again (with an antiseptic additive for safety). A year later, the fungus did not appear. What Viktor Banev ended up with is shown in the following photos.
The result is obvious, and the dacha has been completely transformed.
And at the end of the material, we present a similar facade, with an imitation of half-timbered wood, but on DSP slabs, from a user of the portal with Nikoms.
Andrey PavlovetsFORUMHOUSE Member
The facade has been in use for 10 years. I went over the DSP boards with water-based emulsion 2 times, and that’s it, since then I haven’t touched up anything in all this time. The paint holds up just fine. I did everything myself. I sawed a 1200x3600x10 mm DSP into squares with a side of 1200 mm. Otherwise you won't be able to lift it. The most difficult thing is to make the upper corner outer elements. To sheathe, you had to climb up a ladder; if you made a mistake with a cut, you had to go down and cut again. I drilled holes for the screws in advance, then attached them with fasteners and, using a system of blocks, lifted them up. It's difficult, but it's worth it.
In the topic on FORUMHOUSE you can find out more about the micro-budget facade made of OSB 3 under half-timbering. In addition, we also recommend that you familiarize yourself with the section facades and facade materials.
Users of the portal will find useful articles that tell you how to deal with wood pests and how to make a beautiful wooden facade with your own hands.
And the video shows the nuances of building a frame with a half-timbered facade.
Frame house-building technology allows you to build comfortable housing quickly and inexpensively. The external walls of such a building are covered with OSB boards, which, unfortunately for all developers, do not have the aesthetic appeal required for the facade. Therefore, it is necessary to purchase material for cladding the house, which leads to higher construction costs.
Facade made of OSB boards
Manufacturers of paints and varnishes have taken into account the need of developers for finishing OSB boards and are offering their own solutions to this issue. Craftsmen who know how to create masterpieces from any material did not stand aside either. Thanks to these folk craftsmen, creative solutions for the exterior decoration of a frame house appeared.
Methods of decorative coating of OSB panels
Wood paneling
Wood has been used in construction and decoration for centuries, and it seems that it will be relevant for a long time. All thanks to its excellent appearance and ability to regulate indoor humidity. This is perhaps the only material that will remove excess moisture without problems, regardless of what material the walls are made of.
Wooden cladding can have a completely non-standard appearance: different colors and sizes, different directions. It's simple, but the effect is amazing
The most popular materials for wall cladding are block house and imitation timber. There is also lining for exterior decoration - it is thicker than that intended for interior decoration of a house, but otherwise it is no different.
The block house imitates the surface of a rounded log - the front part has a rounded shape. Imitation timber is very similar to planed timber. Both types of cladding are attached to the sheathing, then sanded and coated with protective impregnations, and optionally varnished or painted.
What does lumber look like for exterior cladding of a house?
If you can't decide how to cover the outside of a foam block house, consider wood cladding. In this case, lathing (metal or wood) is nailed to the walls. If necessary, insulation is laid between the slats - basalt wool (foam or polystyrene foam cannot be used), and then wooden sheathing is nailed.
This building is sheathed with imitation timber. Under the skin there can be brick, log frame, frame or any of the building blocks
If you need the cheapest option, for most regions of Russia this is an ordinary planed board. Its thickness is from 40 mm, it is stuffed in the same way as a lining or block house onto the sheathing, the lower end of the upper board extends 10-20 mm onto the one located underneath it. It turns out the principle of the cone. This way you can cheaply cladding a country house or even a residential one. When properly processed, such cladding has a very good appearance.
How to cheaply cover the outside of a house? For central Russia - planed wooden boards
The disadvantages of such finishing are the same as with any wood: it can be damaged by pests, rot, without proper care it quickly loses its decorative effect, becomes dark and ugly. If you want to cover your house and not think about it for years, this is not your choice. Wooden cladding requires maintenance, and, most often, annually.
Read how to cover a house with bricks here.
Features of OSB boards
Production of OSB boards
Oriented strand boards (OSB) consist of several layers of chips and shavings pressed and glued together. A feature of the manufacturing technology of these types of panels is that the chips in the layers are located in different directions. This provides the material with high bending strength and allows it to securely hold the fastener. On the outer layers of the panel, the chips are located along the surface, on the inner layers - across.
Classification of OSB boards
But despite the longitudinal direction of the wood component, the front side of the panel does not have the smoothness necessary for high-quality painting. Both sides of the OSB board are uneven and rough. This feature has its pros and cons. The advantage is that the lack of smoothness allows you to get a surface with a spectacular texture. The disadvantage is the need for additional processing of the slab with various tools and materials.
The market offers several brands of oriented strand panels: OSB-1, OSB-2, OSB-3 and OSB-4. The latter are intended for front finishing and have a fairly smooth and effective surface. But in the construction of frame houses, OSB-3 is most often used, since it is cheaper and has all the necessary characteristics for constructing walls. However, the surface of OSB-3 boards needs to be improved.
OSB - oriented strand boards
Since this material is most popular among developers, all the finishing methods proposed below take into account the peculiarities of the surface of these panels and can be applied to products of other brands: OSB-1 and OSB-2.
Decorative finishing options
For interior walls, OSB boards are ideally smooth, sufficiently durable and absolutely dry surfaces, ready for further puttying, painting, and wallpapering. Also, after plastering, you can apply relief plaster. Then the interior space will look original. This will require less effort.
For the outer surface of the walls, such panels also need to be plastered, and then they can be:
- paint;
- lay out with decorative facade panels;
- trim with clapboard or siding.
Choosing a method for painting OSB boards
Choosing a method for painting OSB boards
Transparent coatings
Painting is the most inexpensive way to give panels an aesthetic appeal. Many developers like the texture of the slabs, which they would like to preserve. The unevenness of the surface of the panels when the sun's rays fall creates a certain play of light and shadow. It is this effect that is most attractive in untreated OSB.
In order to preserve and enhance it, use transparent paint with an ultraviolet filter. For example, Cetol Filter 7 Plus. This composition is intended for exterior wood finishing and is made on the basis of alkyd resins. The coating is transparent and has a semi-matte finish. The paint contains a UV stabilizer and water repellents, which provide reliable protection of wood from environmental influences.
Cetol Filter 7 Plus
If there is a need to preserve the natural texture of the slabs, you can use the following materials:
- clear varnishes;
- azure;
- transparent impregnations for wood.
Glazes are the most effective, as they have the ability to emphasize the grain of wood and give the painted surface a stylish shade and silky shine. A wide selection of these compositions is offered by the manufacturer BELINKA, whose assortment includes the “Toplazur” line, which includes 66 colors and shades.
Belinka Toplasur
Transparent wood varnishes will add gloss to the surface of the slab. You can use oil-based, water-based or organic-based formulations. Acrylic varnish will reliably protect the wood, and yacht varnish will give it a beautiful shade. An inexpensive and practical solution is semi-matte transparent “Drevolak”, designed for coating untreated wood and brick. This composition is easily applied to OSB and fills all its unevenness.
Drevolak - water-based acrylic varnish for wood protection
Tinting OSB boards
To emphasize the texture of OSB, you can use stain. To obtain the desired shade, it is diluted either with water, or with a solvent or acetone.
Shades of stains
The technique for painting OSB with stain is as follows:
- apply paint using a paint brush or spray gun;
- give time to dry (when diluting the stain with a solvent or acetone, the drying time is 5-7 minutes);
- Apply polyurethane primer to a dry painted surface and wait for it to dry.
Tools for applying stain to wood
In the photo - OSB board decorated with stain
To obtain the effect of artificial aging, use a patina of the desired color. After it dries, sand the slab with a soft foam sponge, which allows you to remove any remaining patina. After which the patinated panel is coated with transparent varnish.
Gold patina paint for wood
Covering enamels
In order to completely hide the protrusions of chips, thick covering enamels and water-soluble paints are used. The choice is wide:
- silicone;
- alkyd;
- pentaphthalic (forming a dense smooth film);
- acrylic (water soluble);
- latex.
Oil paint for wood
Oil paints have the highest viscosity. Their advantage is that they are practically not absorbed into the slab. Therefore, paint consumption is relatively low. The disadvantage of these compositions is the long drying time. But they have the main advantage: a durable covering layer and good adhesion to the surface, which is important when painting OSB. However, oil paints are not recommended for external use due to their instability to moisture and ultraviolet radiation.
Tikkurila Oil paint TECHO
Alkyd paints meet all requirements for painting facades. These compositions form a thin polymer film on the treated surfaces, which is moisture resistant and does not change its color when exposed to sunlight. Alkyd enamels can withstand significant temperature changes, therefore they are recommended for use in regions with any climate.
Range of alkyd coatings
Silicone paints are one of the most expensive. This is the main reason for their low popularity. This is despite the fact that silicone enamels fully comply with all the requirements for facade work. These paints have good resistance to mechanical stress, are crack-resistant and moisture-repellent. These compounds can be applied to OSB boards that have already been painted or whitewashed.
Facade silicone paint
Latex paints have high moisture resistance, so they are the best choice for regions with a maritime climate. Due to their excellent covering ability, they are not demanding on the quality of surfaces, which is especially important when finishing OSB boards. Facade latex paints can withstand a significant number of freeze-thaw cycles.
Latex water-based paint
The optimal choice for painting OSB is acrylic facade paints . They are inexpensive and have a lot of advantages: moisture resistant, withstand sudden temperature changes, vapor permeable, resistant to UV rays (do not fade in the sun). Acrylic paints can be applied at any time of the year. But in winter the air temperature should not be lower than -20°C.
Facade paint
Facade acrylic paint Ceresit CT 42
Fire protection of OSB boards
The OSB board burns with the release of caustic substances, including toxic hydrocyanic acid. In the event of a fire, smoke is the decisive factor for survival. Using Soppka paints, you can solve two important problems at once: painting the panel and increasing its fire resistance several times.
Soppka - experts in OSB protection
Soppka compositions and paints are designed specifically for finishing oriented strand boards, so the manufacturer takes into account all the features of the surfaces of this material. The company's products have excellent adhesion to OSB, which cannot be said about other fire retardant compounds. The service life of Soppka coatings is more than 15 years. Paints can withstand any environmental influences.
Conclusion
OSB can be painted with any high-quality facade paint designed for fire protection of wooden surfaces. Good reviews about "Valtti Color Satin" from "Tikurilla". This enamel has excellent covering ability, does not change its color when exposed to sunlight, prevents wood from rotting, and has a noble matte finish.
Valtti Color Satin
Tikkurila Vallty Color Satin
If you decide to give the OSB surface an ideal smoothness, additional processing will be required, including grinding, priming, and impregnation with an antiseptic. All these points have many nuances that you need to know about to get the desired result. Therefore, it is better to consider painting OSB boards using specific examples of the use of various finishing options for these panels.
Preparing OSB boards for painting
OSB requires preparation before painting
Before painting, the oriented strand panels are prepared. First of all, they need to be primed. This is not as simple a task as it might seem at first glance. The fact is that the front surface of the new slabs is smooth and quite slippery, so the primer will collect in drops and flow down. For this reason, experts recommend not to waste time and money on priming new slabs, but to immediately begin filling or painting them.
Panels that have stood in the open air for some time lose the smoothness of their front side. The surface becomes rough and able to absorb primer. The composition is applied with a roller on a long handle. The optimal choice is the Ceresit ST17 primer, the quality of which has been tested by time.
Primer ST 17
Technique for painting OSB boards
When applying paint with a brush or roller, you may notice that some chips swell from moisture and rise. This happens regardless of the type of composition chosen. If you need a budget solution for finishing the facade, you can ignore these small shortcomings.
But if you intend to complete all the work with the highest possible quality, you need to adhere to the following technique:
- priming the panel;
- installation of fiberglass mesh over the entire façade area;
- puttying with a moisture-resistant and frost-resistant composition;
- coloring.
When choosing elastic paints (for example, Descartes or Emarque), the puttying step can be skipped. These paints will fit perfectly on the mesh and cover it. After applying the second layer, the OSB will acquire a smooth, glossy surface.
OSB painting with artificial aging effect
This method of processing OSB panels allows you to preserve the surface texture while smoothing out the most noticeable chip protrusions. The end result is a smooth slab, on which its natural pattern is clearly visible. Using multi-layer dyeing with compositions of different colors and purposes, they provide two stylish effects at once: colored dyeing and artificial aging.
Tools and materials that will be required to complete the work
- Angle grinder (grinder).
- Abrasive grinding wheels of different grain sizes: P180 and P320. You can use modern abrasive Velcro tapes, one side of which is self-adhesive.
- Abrasive sponge P320.
Abrasive sponge fine grain P 280-P320 - Airbrush or spray gun.
- Primers: FI M194 and FL M042/CO2.
Primer FL-M042/C02 Renner - Acrylic varnish “Mother of Pearl” JW M120.
- Tinted varnish JO 00M294.
- Patina GM M048/Black.
Stages of painting OSB boards
Step 1: Sanding the Panel
Smooth out uneven surfaces of the panel using a grinder and a P180 grinding wheel. To obtain the desired result, work with light pressure from the tool. The panels are passed over each section with an abrasive wheel no more than three times.
Sanding OSB
Step 2: Apply the first coat of primer
OSB boards are made using a special adhesive impregnation, which includes various resins, wax and paraffin. These substances are necessary to prevent the panel from delaminating and the formation of rot and mold in it.
Primer for OSB
Applying primer
A primer on the sanded OSB surface is needed to ensure that the resins and paraffin continue to remain inside the slab. At this stage of work, barrier primer FI M194 is used. It is applied using an airbrush or spray gun. Material consumption is within 50-60 g/m2. Further work begins after 1.5-2 hours, after the soil has completely dried.
Step 3. Applying pigment primer
At this stage of the work, the panel is covered with primer FL M042/CO2. This is a matte white composition that dries within 2.5-3 hours. The soil consumption should be at least 100 g/m2.
Step 4: Sanding the slab
Use a grinder with a P320 abrasive wheel. Only the top layer of pigment primer is removed. The result should be a smooth whitish matte surface.
Primed surface
Step 5. Varnishing the slab
Acrylic varnish “Pearl” JW M120 is applied to the OSB so that the weight of the wet layer is 100-120 g/m2. In order to achieve this result, each section of the panel must be covered with 2-3 layers of varnish. Then wait for the coating to dry completely for an hour.
Step 6: Patination
At this stage of work, black patina GM M048 is applied to the panel. As before, an airbrush or spray gun is used for this purpose. The weight of the wet layer should be 60-80 g/m2. There should be no gaps in the panel from the previous white layer. The patina dries within 5-7 minutes.
Patina for wood Renner GM M048/C01
Step 7: Sanding the Patina
Using light pressure, sand the panel with a P320 abrasive sponge. After such processing, you should get a surface with a clear chip pattern, the main part of which is white, and the spaces between the chips are black. This provides an artificial aging effect.
Remove excess patina with a sponge
Step 8. Tinting the OSB board
Tinting is the stage as a result of which the slab acquires color. To perform this task, acrylic varnish is used. The color is chosen depending on how you want the facade of your house to look. Varnish consumption is within 100-120 g/m2. Drying time according to the manufacturer's instructions, but on average 1.5-2 hours.
Acrylic lacquer
It should be noted that as the varnish dries, its color will change due to the gradual acquisition of dullness. This example uses JO 00M294 zero gloss varnish. If you want to give the façade of your home a glossy look, you can opt for compounds that provide this effect.
Example of applying varnish with a brush
Material calculation
To avoid unnecessary costs, you need to correctly calculate the amount of material before purchasing. First, measure the walls and calculate the total area.
Area of walls and pediment
Next, take away the area of window and door openings, as well as those areas that will not be sheathed (if any). The area of the gables is added if they are also planned to be sheathed. Now the resulting value remains to be divided by the area of one sheet.
When calculating, you should take into account not the overall, but the usable width of the sheet, since the corrugated sheet is laid overlapping. The standard sheet length is 2 m, although it can vary from 0.5 to 14 meters among different manufacturers.
Standard sizes of corrugated sheets
For example, let's take a rectangular house: the height of the walls is 3 m, the length is 4 and 6 m, there are 4 windows measuring 1.5x1.1 m and a doorway 2x1.4 m. By multiplying the height by the length and adding up the area of the walls, we find out the total area future cladding – 60 m2. Using the same formula, we calculate the area of the openings:
1.5 x 1.1 x 4 = 6.6 + 2.8 = 9.4 m2;
60 – 9.4 = 50.6 m2.
That is, the working area of the walls is 50.6 m2.
The area of the gables is calculated differently, depending on their shape. If the pediment has the shape of a trapezoid, you need to sum up both bases, divide in half and multiply by the height. If the pediment is an isosceles triangle, you need to multiply half its height by the base. For example, the height of the pediment is 2 m, the base is 4 m. 0.5 x 2 x 4 = 4 m2.
Since there are two gables, we add another 8 m2 to the total cladding area, and as a result we get 58.6 m2. The standard dimensions of a sheet of corrugated sheet C-8 are 2000x1150 mm, which means its area is 2.3 m2. We divide the sheathing area by the sheet area - 58.6: 2.3 = 25.48. Rounding, we get 26 sheets, but you need to take 2-3 more in reserve, since additional material may be needed when cutting.
Technology of painting OSB with primer-paint
This method of painting oriented strand boards was developed by Holzer specifically for finishing the facades of frame buildings. Therefore, the instructions offered by the manufacturer use exclusively its products.
Tools and materials required to perform the work
- A spatula with a narrow metal blade.
- Holzer Festspachtel Elastich putty.
Putty Holzer Festspachtel Elasticch - Holzer primer color.
Holzer primer color - Roller for applying paint (with a foam or faux fur coat).
- Container (tray) for paint.
If desired, you can use narrow decorative panels, with the help of which you can decorate the façade in the half-timbered style.
Finish example
Instead of plastic panels, you can attach thin wooden blocks, pre-treated with an antiseptic and painted in a color that harmonizes with the finish of the facade.
Stages of work
Step 1. Puttying the seams between OSB boards
Holzer Festspachtel Elastisch putty is applied to the seams between OSB boards. Use a spatula to press the compound into the gaps and spread the putty at a distance of 5-7 cm from the seams. They strive to smooth out the composition in such a way as to obtain a smooth surface without visible cracks. Wait for the composition to harden.
Puttying
Step 2: Painting the panel
Using a roller, Holzer primer is applied to the slab.
Application of primer
The soil dries in about 6 hours
You can choose any color from the manufacturer’s catalog (there are more than 7 thousand colors in stock). If a fur roller is used, it must first be kept in water for 1.5-2 hours. If a bucket is chosen as a container for paint, you need to prepare a small piece of plywood on which to roll out the roller, removing excess paint from its coat.
Coloring technique:
- paint is poured into the container;
- dip the roller in paint and roll it several times over a special part of the tray or plywood;
- Apply paint to the wall so that each next layer overlaps the previous one by 4-5 cm.
Holzer paints have good covering power, so even surfaces do not require a double coat. But in the case of OSB, it will be necessary to properly paint all the protrusions and recesses. Therefore, the manufacturer recommends painting with vertical strokes on the first day of work, and horizontal strokes on the second day. In this case, the coating will acquire the thickness and strength necessary for facades.
Video - Creative finishing of OSB boards
Video - Painting OSB boards
Arrangement of the final roofing covering
To form a high-quality, reliable and durable roofing covering, the surface formed by OSB is most often covered with soft tiles.
Other types of roofing materials are not as reliable or their use is not advisable in these conditions.
Work order:
- A drip and drainage system along the edges of the roof is thought out and installed. It is done using cornice strips and gutters.
2. A waterproofing carpet is laid. At large angles of inclination, over 18 degrees, it is allowed to lay it only in places of inflection: ridges, valleys, lower and gable borders of the roof. Waterproofing rolls have a self-adhesive layer covered with polyethylene film. For additional fixation, bitumen mastic and nails for roofing felts are used.
3. Laying is done in horizontal stripes from bottom to top, the lower limit of the laying is the cornice strip (5 cm from the bend), the overlap of the joints between the strips of 10-15 centimeters is coated with mastic. Particular attention is paid to ridges, valleys, pipe outlets and gables.
4. Mark the roof with a waterproofing carpet laid. This is done using a marking thread. The resulting lines will serve as a guide for laying bitumen shingles.
5. Soft tiles are laid on bitumen glue with additional fastening with nails along the upper border of each element. The upper element of the tile covers with its petals the driven nails on the lower one.
6. The rows of tiles are oriented according to the markings, starting from 5 mm below the edge of the waterproofing carpet, shifting each new row half a petal upward.
7. The finished roof can be equipped with aerators to improve layer ventilation.
Aerator.
The following video presents the entire technology from the first to the last step: