Self-leveling floors appeared relatively recently and did not have time to acquire several decades of experience, like traditional concrete screeds. But thanks to their performance characteristics, they are successfully gaining popularity, gradually pushing aside more “venerable” categories, both in the segment of rough bases and in the segment of finishing decorative coatings. Naturally, such interesting and versatile material could not go unnoticed among users of the FORUMHOUSE portal.
Preparation and application of the solution
To achieve success, it is important to prepare the solution correctly.
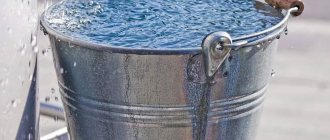
Pour 6 liters of cold water into the prepared container. Pour 25 kg of dry mixture into it and mix the solution well with an electric mixer. As a result, a fluid homogeneous mixture is formed. Wait 5 minutes and stir again
Pour 6 liters of cold water into the prepared container. Pour 25 kg of dry mixture into it and mix the solution well with an electric mixer. As a result, a fluid homogeneous mixture is formed. Wait 5 minutes and stir again.
One caveat - there should not be an excess of water, otherwise the mixture may begin to separate.
The fluidity of the solution can be checked like this. Take a piece of plastic pipe with a diameter of 5 cm and a length of 4-5 cm, place it on the glass and fill it with the resulting mixture, then lift the piece of pipe. The solution should spread evenly.
After 2 minutes, measure the diameter of the blurred mixture: if it is from 16 to 18 cm, then the solution is ready for use, if it is more, add dry mixture, and if it is less, then add water.
The special mixture remains fluid for 40 minutes, then it hardens. You cannot add water to a thickened composition.
The solution is applied manually or using a special pump, which allows everything to be done smoothly and quickly. To remove bubbles that appear on the surface, use a needle roller. When the liquid floor hardens, there should be no drafts.
How to prepare the solution
Use a construction mixer with an attachment to mix the solution in a clean container, and strictly follow the instructions on the package. To distribute the mixture evenly, you need to periodically stir the lumps along the bottom of the container with a spatula. After the mixture has become homogeneous, you need to wait 3-5 minutes, mix again and start pouring the floor.
After each batch, it is worth cleaning the container, otherwise large fragments can ruin the filling.
Specifics of self-leveling floors
How to level a wooden floor under linoleum
Liquid flooring has some advantages compared to other coatings: strength, mechanical stability, dustlessness, hygiene, seamlessness, fire safety.
Its uniqueness lies in the fact that the floor spontaneously levels and turns into an ideal, flat surface. Material: polyurethane and epoxy primer. The coating can be applied in two layers. First, polyurethane enamel is applied, then epoxy material.
Self-leveling floors can be of several types. Floors with a cement and gypsum base are especially common. Polyurethane and epoxy floors are more durable.
The self-leveling coating is chosen taking into account the room: for wet conditions it is suitable on a polyurethane basis, for dry ones - on cement or gypsum.
Before applying the solution to the base, it must be prepared: cleaned of dust and other contaminants that may impair the adhesion of the mixture to the base.
After cleaning the surface, remove seams and cracks. Then the base is primed and allowed to dry (3 hours). An edge strip is attached along the perimeter of the walls for heat and sound insulation.
To save money, you can buy a roll of regular polyethylene foam and carefully cut strips and attach them to the walls with glue. Beacons are placed on the base and fixed.
The quality of application of the solution depends on how the base is treated. If the surface absorbs too quickly, then the primer is applied twice. You should not save on primer, since its price is low, but the impact on the quality of the self-leveling floor is very significant.
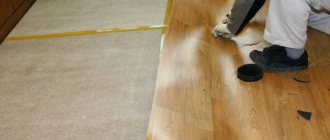
How to operate an electric floor leveling machine
The machine has a round disc onto which sanding paper of various grain sizes is fixed.
Sander
Replaceable grinding discs
The machine is connected to a vacuum cleaner
The disk spins in only one direction, the number of revolutions is not adjustable. In order to drag the machine to the workplace, there are special wheels at the bottom. The unit tilts all the way against them and rolls into the desired room; this does not require much physical effort.
To facilitate the process of leveling the floor, correctly adjust the height of the control lever. It is determined simply - the palms of the lowered hands should touch the handles. Changing the direction of movement of the machine is carried out due to the height position of the handle. When it is slightly lowered, the unit moves to the left, and after lifting, to the right. You need to raise/lower the handle smoothly, the grinding unit reacts immediately.
Self-leveling floor grinding process
The photo shows dust from grinding, the movement of the machine to the right and left
Important. When working with the grinder, electrical cables must always be behind the operator to prevent mechanical damage.
The cutting width of one pass should not exceed half the diameter of the grinding disc. This will ensure leveling of the area in two directions, which improves the quality of the work performed. Along the wall and in other hard-to-reach places in the room, the floor will have to be leveled manually using special sanding blocks.
Floor after sanding
Questions and answers
Materials and technologies for floor insulation in a private house
What to do if there are both bumps and depressions on the same floor?
A very unpleasant situation. First you need to determine the adhesion strength of the self-leveling floor to the base. To do this, there is no need to tear it off; just tap lightly on the surface in several places. The presence of a dull drum sound indicates that there is an air gap between the self-leveling floor and the base. It is impractical to level such floors; they will have to be completely dismantled and re-filled. At the same time, be sure to recognize the mistakes and not make them again.
Dismantling self-leveling floor
What to do if there are many small bubbles on the surface?
The main reason for this phenomenon is that the concrete base had high humidity. Due to it, chemical reactions occurred with the release of gases that rose to the surface of the liquid self-leveling floor. Such irregularities can be sanded using electric units or removed manually. The main thing is not to waste time, correct problems before the composition completely sets. Shallow pores can be left untouched; they do not affect the quality of the final floor covering.
What thickness of concrete can be ground, and what should its strength be?
What to do if the material begins to harden in the container?
A thick mixture cannot be used; it will never be able to be leveled to the desired parameters. The costs of subsequent elimination of defects are much higher than the loss of several liters of material. Hence the conclusion - the frozen composition should be thrown away, and only freshly prepared mixtures should be used for filling.
Thickened self-leveling floor mixture should not be used.
Is it possible to level small depressions with repair compounds?
As practitioners say, it is possible, but not necessary. The fact is that the thinner the layer, the worse its performance. The small thickness speeds up the drying process; during the remaining time, chemical reactions do not have time to proceed fully. Another problem is that two layers never have the same adhesion as one. This means that the risk of detachment of the thin repair layer increases significantly.
Recesses can be sealed with repair compounds, but this is not recommended
How to smooth out cracks?
First, find out their cause and determine the parameters. If cracks have formed as a result of swelling of the coating, then it must be completely removed; leveling will not have a positive effect. If the cracks are the result of drying too quickly, then the floor can be leveled, this should be done in the following sequence:
- Use the end of a metal spatula or a diamond grinder disc to widen the cracks if possible;
- use a vacuum cleaner to remove all dust;
- Prepare the repair solution according to the manufacturer's instructions;
- carefully pour the mixture into the cracks, using a spatula, drive it to the maximum depth;
- remove all excess from the floor plane; if the surface is uneven, you can use a clean sponge instead of a spatula;
- The filling of deep and wide cracks must be repeated the next day, due to this the primary shrinkage will be eliminated.
Repairing a large crack
What should I do if the thin film on the floor surface peels off?
This happens if the room was very warm, and the evaporation of moisture was enhanced by drafts. The situation is very unpleasant, you should act this way.
- Remove the film with a spatula. It should be easy to remove.
- Remove debris and determine the magnitude of the differences in height. If it exceeds 2–3 mm, it will have to be leveled. If the unevenness is minor, then such a floor is quite suitable as a base for laminate flooring. Make a specific decision taking into account further work on arranging the floor.
Removing peelings with a spatula
When is leveling a self-leveling floor after drying impossible?
We have already partially answered this question throughout the article. But it would not be superfluous to list these conditions again.
- The cracks are scattered throughout the surface and have great depth.
- When tapping the surface, dull sounds are heard.
- The strength of the floor does not meet the standards; it crumbles and gathers dust.
Self-leveling floor is cracked and crumbling
The reason for all cases is gross violations of the recommended technology. The only possible leveling method is to completely remove the old coating. Do not entrust the work to coven workers, do not undertake to do it yourself without practical experience.
How to level local problem areas of the floor?
There is no such thing as a local defect of a self-leveling floor among professional builders. A local problem does not mean that it occupies a limited area. This only means that due to lack of experience, you were unable to notice the same flaws in other places on the floor.
Defect No. 4. Mounds and depressions
Sometimes the self-leveling floor turns out to be uneven. After drying, depressions (pits) or bumps clearly appear on it. Such a defect not only reduces the decorative value of the floor, but can also interfere with laying the finishing coating (laminate, parquet, etc.) on it.
Reasons for the appearance of bumps and depressions:
- Uneven concrete base. If there are significant bumps or depressions on the base, then all these defects are more likely to be imprinted on the surface of the self-leveling floor.
- Pouring the mixture “by eye”.
- Failure to comply with the recommended proportions when mixing the components of the bulk mixture. If during the mixing process more water was added than required by the instructions, then after drying, depressions often appear on the surface. If, on the contrary, little water was added, the surface becomes lumpy.
To remove the bump, the floor is sanded. Then fill the surface with a finishing layer of self-leveling mixture.
The depressions are filled with putty (epoxy or cement based) or the same self-leveling mixture that is used for the entire coating. After drying, lay the final self-leveling coating (if necessary, if the self-leveling layer is the front layer).
Drying time of the self-leveling floor or when the floor covering can be laid
How to level walls correctly with your own hands Video on how to level walls correctly How to level walls with your own hands using beacons video How to level walls using the rule How to level clay walls What mortar to use to level walls
On the packaging of self-leveling mixtures for rough work. How long does the composition really need to dry completely so that laminate, linoleum or tile can be installed?! Let's figure it out.
Bulk mixtures for preparatory work: hardening features
As is known, self-leveling mixtures consist of a binder, mineral filler and modifying additives. The basic component - cement or gypsum - after mixing with water, it is transformed into a stone-like body. This does not happen instantly, of course, but over a certain period. All physical and chemical processes can be divided into two stages:
- Setting - during this period the initial transformation of the cement paste occurs. Due to the reactions of hydration of minerals and the formation of a colloidal (adhesive) gel, the solution loses its plasticity and sets. Thixotropy is characteristic - at rest the material increases viscosity, that is, it thickens, and under mechanical action it liquefies back. By time: starts approximately 30-40 minutes from the moment of mixing with water and lasts from 2 to 12 hours. That is why manufacturers write on the packaging “you can walk 2..3..8 hours after pouring.”
- Hardening and strength gain (aging). The processes of formation of crystalline structures are already taking place here. The self-leveling floor is gradually compacted and strengthened.
There is a scientifically documented pattern of increase in the strength indicator for cement under normal conditions (air temperature = +20? C, humidity – 60%):
- After 7-14 days - 60-80% strength (depending on brand),
- After 28 days – 100% (of the design value).
There are no strictly fixed indicators for complete drying time for gypsum. It all depends on its brand (from G1 to G25) and the retarders introduced into the solution (lime, glue, etc.). On average, the material sets within 30 minutes, and full strength gains occur in 14-20 days.
Installation of massive parquet on self-leveling floors.
So, how long does it take for a self-leveling floor to dry? 14-28 days is the standard for basic formulations. However, individual physical and chemical processes by introducing various plasticizing, modifying additives, polymer additives, etc. into bulk mixtures. They:
- accelerate or slow down the initial drying time of the solution,
- increase the strength coefficient of the finished coating against fracture and tearing (elasticity),
- contribute to an increase in the degree of density and hydrophobicity of cement-gypsum stone.
Useful additives significantly increase the price of the dry mixture, but the result justifies the investment.
How long does it take for a self-leveling floor to dry - read the instructions
Drying time and curing period are different concepts. The first implies the possibility of temporary foot traffic, and the second - constant, intensive use. Simply put, this is how manufacturers let customers know when they can simply walk on a finished screed and install the finishing coating, and when they can install heavy objects (furniture, equipment), etc.
The initial setting of the solution is already dense, but still thixotropic.
Based on the technical documentation of manufacturers of self-leveling floors, we have compiled a table that will help you with choosing a mixture for interior work (residential and office premises). All measurements were carried out in laboratory conditions at a surface temperature of 18-20 ° C, relative air humidity of 50-60%.
Filling principle
The liquid floor is poured in stages; the maximum depth can be filled up to 14 meters. The space is divided by formwork with an area of up to 25 m2 when pouring manually and up to 70 m2 when pouring by machine.
Attention! The viability of the finished solution is up to 30-40 minutes. Don't delay filling the floor.
Note!
How to update the tiles in the bathroom without changing them or removing them: step-by-step instructions, stickers, painting, decor (140 photos)
Do-it-yourself Venetian plaster walls: types, application instructions, photos of beautiful wall decoration, colors
How to unclog a toilet if it’s clogged: step-by-step instructions, a review of the most effective methods for removing a blockage with your own hands
It is worth pouring the composition evenly, trying to distribute the solution evenly over the area. If you pour the mixture into one point, it will not be evenly distributed.
Once the mixture has completely covered the area, use a needle roller to go over the surface. It will distribute the liquids evenly and remove air bubbles.
Attention! The height of the roller needles should be 2 times the thickness of the floor being poured.
Laying
Under laminate
Taking into account all the standards, the surface for installing the laminate should not have differences of more than 3 m by 1 m. If you are performing a wet screed under the laminate, then you must use special mixtures that are capable of self-leveling. Thanks to them, it is possible to facilitate the process of preparing the base. You can also use reinforcing fiberglass mesh for leveling. The floor must be poured in small sections and leveled using a special device.
When the screed has dried, you can proceed to sanding. The screed under the laminate takes about 2 weeks to dry. But here everything depends on the layer being laid. The process of installing the laminate is carried out after it has gained 50% strength.
Under tiles
Most often, a cement mixture is used to level the floor under the tiles. You can walk on this floor within the next 24 hours, but here’s what to do with the finishing. Based on the experience of already experienced people, we can say that the process of installing tiles can be carried out the next day. This is completely harmless, although not entirely advisable.
If you entrusted the process of performing the work to strangers, then it is very important to check whether reinforcement was done
And when choosing a material for a finished floor, it is useful to know which laminate is good for an apartment.
The thickness of the screed to be poured must be at least 4.5 cm. If the required thickness cannot be achieved, then the following measures must be taken: lay a plastic mesh with small cells on the screed. It is sold in rolls at any hardware store. After this, be sure to secure it with nails and cover it with a dry adhesive mixture, which will be used when laying the tiles.
The video shows how long it takes for a floor screed to dry:
Purchase of materials
In order not to run to the hardware store every day, it is worth purchasing basic equipment. Useful:
- wire brush, solvents, broom or vacuum cleaner (for removing debris);
- level, tape measure and marker for marking floor thickness;
- self-leveling mixture;
- deep penetration primer or contact concrete;
- 2 clean containers of 80-100 liters for priming and mixing the solution;
- a mixer with a nozzle or any device for mixing the solution;
- primer roller;
- needle roller and smoother (usually a squeegee);
- sealant for surface preparation;
- damper tape;
- shoe linings.
Types of self-leveling floors
Self-leveling floors can be of various types:
- Cement based. in turn, subdivided into floors both using ordinary Portland cement and using the so-called “quick-setting” cement or concrete-polymer, where the main binder is cement, but with a high content of various polymer additives and additives designed to increase the plasticity of the cement mortar , its strength, resistance to various adverse influences, reducing the time during which it dries (sets);
- Based on polymer resins. such as polyurethane, polystyrene, polyacrylic, epoxy and others. To better level and strengthen the outer surface, combined methods for constructing a self-leveling floor can be used, for example, laying in layers, where the lower layers are formed with cement-based compounds, and the upper ones with polymer resin-based compounds.
To better level and strengthen the outer surface, combined methods for constructing a self-leveling floor can be used, for example, laying in layers, where the lower layers are formed with cement-based compounds, and the upper ones with polymer resin-based compounds.
Despite the fact that at the time of manufacturing such a floor, most of the work in leveling its surface will be done by gravity, it is impossible to do without “manual” intervention in the installation process. It is necessary to use a spatula to help the mixture fill the corners of the room, to prevent the mixture from flowing out of the room through doorways and other openings located at floor level. It is also necessary to treat the liquid composition with special spiked rollers during the pouring process in order to prevent the formation of various air cavities.
Defect #1. Blistering, peeling of the filling surface
Coping with this defect will not be difficult.
If small holes appear, you can simply fill them with putty. After drying, wet the trowel and smooth the area where the repair was made. If the unevenness is large, then the surface will have to be leveled by pouring another layer of cement-based leveling coating. Before using the mixture, do not forget about.
Professionals recommend using tile adhesive as a repair composition, which is durable and has good adhesion to the surface.
Lumps and sagging
In this case, it is enough to simply sand the surface of the self-leveling floor using a special tool. If you don’t have a grinding machine, then you can rent one, since there is no need to buy a tool to eliminate defects in the self-leveling floor in an apartment - it costs a lot of money.
Craters
This defect can occur when the self-leveling coating is installed on a wet base. If no voids are found during the inspection, then you can simply seal them with a repair compound. If delamination occurs, you will have to carry out minor dismantling work.
Bloating manifests itself as the formation of single or multiple bubbles on the self-leveling floor. Their surface may become cracked (if the layer is thin) and collapse. In this case, we can talk about detachment.
The cause of swelling and peeling is insufficient adhesion (adhesion) of the self-leveling layer and the base. The coating, which is not properly glued to the base, begins to move away from it.
Errors in technology leading to swelling and peeling:
- Insufficient cleaning of the concrete base from dust, grease stains and other contaminants.
- Using a low-quality primer.
- Laying the self-leveling layer on a wet base. In this case, excess water and condensate are rejected by the filling layer, bubbles and peeling form.
- Low grade strength of the concrete base.
- Failure to observe the time interval between applying layers of self-leveling floor.
- The coating components were not mixed thoroughly enough before pouring. Mixing must be done only mechanically, using special attachments.
- Failure to remove air bubbles from the coating using a needle roller. Bubbles remaining in the thickness of the coating move to the surface during the drying process and leave behind swollen bubbles or burst “craters”.
- Violation of temperature and humidity indicators in the room. According to the technology, when carrying out work, the room temperature should be above 5°C and humidity below 60%.
Elimination of blisters and detachments:
- All swelling must be removed. You can remove bubbles and formed “craters” with a grinding machine or manually using a spatula.
- Clean the floor from small particles of construction debris and dust. To do this, the surface is vacuumed and wet cleaned. Before proceeding to the next step, the base is thoroughly dried.
- Prime the defect areas, twice if necessary.
- Fill the defects with the self-leveling mixture used. As an alternative, you can use polymer or cement putty. Cement putty is intended for self-leveling cement floors, while polymer putties are universal, many of them can be used not only for polymer, but also for cement (or concrete) coatings.
If the self-leveling floor is not facial, then at this step the repair can be completed. The self-leveling floor, used as a front covering, needs complete visual masking of the “patches”. Therefore, the entire floor is filled with a finishing self-leveling layer, fully adhering to the manufacturer’s instructions for the self-leveling mixture.
Professional repair of polymer floors begins with searching for the reasons for the violation of the uniformity of the surface. Often these are violations of coating installation technology. For example, before applying the primer, the concrete layer was not cleaned, during which the cement “milk” is removed and the screed is weakened. The presence of dust and dirt between the coatings also causes peeling.
The external manifestations of these factors include swelling of the polymer coating and its slight movements under directed external influence.
To eliminate it, the following work must be done:
- Analysis of the damage area. Accurate determination of its boundaries will reduce the labor intensity of work and the consumption of materials.
- Remove the polymer layer and check the condition of the primer. If it is satisfactory, then you can start filling. Otherwise, the middle layer is also dismantled.
- Before starting work, the surface is degreased and the solution is mixed according to the manufacturer’s recommendations.
- After pouring, air voids are removed using a special spiked roller. The new layer is leveled and sanded after hardening.
The last point is more important for maintaining the appearance of integrity. If you do not take these actions, the place where the polymer flooring will be replaced will be clearly visible.
This method is often used if refurbishment of apartments is required. Self-leveling floors, even in new houses, do not always meet the requirements for the quality of their manufacture.
The polymer coating can peel off from the base, literally in pieces, due to poor cleaning of the base from moisture, dust, fatty deposits of organic and mineral origin, or any other contaminant. This defect is considered one of the most difficult, because if the total area of the damaged areas turns out to be too large, a complete replacement of the coating will be required.
Situations where complex peeling occurs are typical for insufficiently hard concrete mortar in the base. If the curing period has not been met, excess moisture remains inside. The polymer layer has hygroscopic properties - absorbing water from the outside. Its outer part was protected during the installation process. Through leveling and processing, the surface tension forms a dense area.
Since water vapor leaving the concrete base is concentrated in the primer, it peels off over time. The best way to eliminate this defect is to install a new floor in the area of the damage. This procedure fully complies with the installation rules with a few exceptions.
Tip: At the junction with the intact one, its edges are treated with mastic, which will ensure adhesion of the new layer to the rest of the floor structure.
Installation of sand-cement screed
It’s worth noting right away that it’s best to carry out all the work with an assistant, so that one person can mix and carry the solution, while another person fills and levels the screed under the laminate. The work will be carried out according to the following algorithm:
- The first step is dismantling the old coating. Care is needed here: often the old floor has several layers, and you need to remove them all, right down to the ceiling. Next, all debris that may interfere with normal operation is removed.
- The next step is gluing the damper tape. It should create a continuous contour running along the perimeter of the wall in its lower part.
- Next, the entire floor surface is covered with a construction film 300 microns thick. The overlap on the walls should be about 5-6 cm, and the film strips themselves should have an overlap of about 30 cm. At the joints, the film is connected using plumbing tape.
- Using a level, the highest point in the room is determined: it will be the starting point for installing the beacons and will allow you to determine how thick the screed under the laminate flooring in the room will be.
- Now a reinforcing mesh is laid on the floor, which needs to be raised by 2 cm using pads. The joints of the mesh are fixed with wire.
- Using a metal profile and cement mortar, the level of the highest point must be raised by 5 cm, and beacons from the profile are installed at this level. The distance from the wall and between the beacons is determined depending on the dimensions of the rule.
- After the beacons have hardened, the stage of pouring the floor begins. Having prepared the cement-sand mortar, you need to pour it into the space between the two beacons. The resulting surface is leveled using the beacon rule.
- Having finished one of the stripes, you need to move on to filling the strip located across the row, and then return to the missed one. This way the entire room is filled and leveled.
- After the solution has hardened, it is necessary to carefully remove the beacons, and the places where they are installed are carefully covered with the solution using a wide spatula, flush with the floor.
- Now all that remains is to wait until the poured solution finally hardens and dries - this is a mandatory condition that must be observed before laying any coatings. To check whether the solution has dried, you need to take a whole piece of polyethylene with an area of about a square meter and stick it with tape to the surface. If after a few hours there is evaporation on the film, then the screed should stand for some more time. Even if it is not known exactly how long it takes for a laminate floor screed to dry, it will be possible to determine this time in this way.
Conclusion
This article answers the question “how to make a floor screed under a laminate with your own hands?” Before you start work, you need to choose the most suitable method of leveling the floor. Careful preparation and consistent execution of all operations are the factors that directly affect the quality of the screed and the durability of the laminate laid on top of it.
Tools and accessories
Here is a list of tools you need to fill your floor yourself.
- A container for a solution with a volume of at least 20 liters , metal or plastic.
- Needle roller . To make the floor uniform, follow the rule: the thicker the layer, the larger the diameter of the needle roller should be! If the layer thickness is 3-4 cm, use a roller with a diameter of about 10 cm.
- Raklya
- Paintshoes
- , a drill with an attachment is suitable for renovations in an apartment .
- Laser or bubble level.
- Lighthouses . They are needed if the floor has large differences. There are different types of beacons (even made from screws), but craftsmen consider reference ones to be the most accurate and convenient .
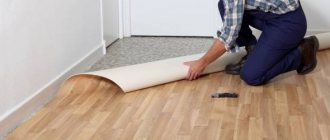
Leveling a wooden floor under linoleum work technology
With the question of how to level a wooden floor under linoleum, things are a little easier and, most importantly, cleaner. No dirty, wet and labor-intensive processes with a long period of drying of the solution will be required here. As a rule, the preparation of a wooden base for laying linoleum is done using sheet material - either thin fiberboard, OSB, or plywood. The choice between them is made solely based on the curvature of the floor.
- Fibreboard is an inexpensive material with a thickness of 2 mm and its application in the field of base preparation is limited. It is used only if the floor itself is smooth and the only defects on it are the gaps between the floorboards.
- OSB. This material can have different thicknesses: 6, 8, 10, 12mm and so on. It is quite specific - due to its structure, it has the ability to bend under the action of fasteners, which leads to slight smooth curvatures. That is, it repeats the plane of the floor, only to a lesser extent, and the thicker the OSB, the less it bends. OSB is now used almost everywhere and, as they say, thoughtlessly - in fact, it is an excellent way to level a floor that has deep, small damage, but a flat plane. In all other cases, the result of using this sheet material is a floor base with smooth bends - if they are visually invisible, then there is nothing terrible about it.
- Plywood. This is a more durable and, accordingly, expensive sheet material, which is able to really level the wooden base of the floor - thanks to its layered structure, it practically does not sag. To level the floor, plywood with a thickness of at least 10 mm is used. Leveling the floor with plywood under linoleum is considered the best option for solving this issue - plywood is sold in any thickness and, if necessary, can be a good alternative to fiberboard.
The choice of material for leveling a wooden floor is entirely up to you - the only thing you should understand is that saving is not appropriate here. If the floor covering itself can be easily changed later, then this number does not work with the base - it must be done once and for a long time.
How to level a wooden floor under linoleum photo
In conclusion to this topic, I will add only one thing - when approaching the question of how to level the floor under linoleum, you need to be prudent. You should understand that perhaps next time you want to lay laminate or parquet - it is better to look for a universal option that is quite capable of meeting the installation requirements of most modern floor coverings. And this is plywood and the base, leveled with its help into the ideal horizon plane.
Author of the article Alexander Kulikov
Advantages
The popularity of this method of installation is due to the performance properties of the coating:
- Self-leveling floors are universal and have found application in premises for various purposes. In home construction, they can be seen in any room, but they are especially popular in bathrooms. They can be found in retail and exhibition halls, in medical and educational premises and other facilities with a high level of traffic. This coating is often used in industrial and warehouse areas.
- The coating does not accumulate dust and static voltage on its surface.
- The material is not destroyed by chemical reagents.
- Thanks to the monolithic nature of the coating and the absence of joining seams, the coating is moisture resistant, easy to care for and clean from dirt, which, like moisture, is not absorbed into the structure of the material.
- The coating is completely hypoallergenic and environmentally safe.
- The coating can be included in the “warm floor” system.
- Self-leveling floors are durable (at least 25 years of service) and do not require updating.
- The technology for creating coatings with images and 3D effects has significantly expanded the decorative potential of this material.
Warehouse floor
Among the disadvantages of the coating, the following are noted:
- Difficult dismantling and the inability to correct errors when pouring the composition.
- Difficulties during pouring due to lack of experience in carrying out such work.
- Strict adherence to all stages of the technological process is necessary.
Studio interior in modern style
Prices for self-leveling floors "Starateli"
self-leveling floors prospectors
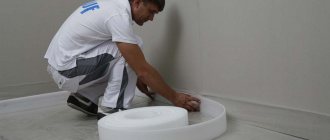
Preparing the base
This stage is the most important. The base must be strong, without holes through which the self-leveling floor will leak to the neighbors below. It is not recommended to make a self-leveling floor on a wooden base, even if you purchased the most expensive mixture - there is no guarantee that it will not crack. Carefully remove debris from the base, as well as paint, resin residues, and anything that is softer than the base and can weaken the adhesion of the solution to it.
The cleaned base must be coated with a layer of primer and dried for 2-4 hours. In cases where the surface absorbs strongly and quickly, it needs to be primed twice. Do not skimp on this procedure, since the consumption and price of primer are small, but the impact on the subsequent quality of the floor is very significant.
Defect No. 5. Small inclusions, roughness
If dust or small particles of debris get onto a non-dried self-leveling floor, then pimples, roughness, and small irregularities form on its surface. In this case, it is impossible to achieve a mirror-like, absolutely smooth surface.
Causes of the defect:
- An insufficiently cleaned concrete base, dirt from which has entered the bulk mixture and is distributed over its surface.
- Dust floating in the air and settling on a pouring surface that has not yet hardened.
Elimination of small roughness:
- The floor surface is cleaned of dust.
- A thin finishing layer of coating is applied to cover the defects.
Work order
As you know, working with self-leveling flooring is quite simple. The solution is poured over the surface so that the next portion is next to the previous one and the layer is at least 5 mm thick at the thinnest point. If in some place the layer thickness turns out to be more than 20 mm, this is not a big deal, the mixture consumption will simply increase.
You need to go over the floor surface with a spiked roller or at least a very stiff, thin brush. Thanks to this procedure, air bubbles will come out, which will contribute to better leveling of the surface. It is recommended that two people work together: while one pours and levels it on the floor, the second prepares the next portion.
Please note that cement mortars should not dry out at all for the first two or three days, so they should be protected from drafts and direct sunlight. It is highly advisable to cover the floors with plastic film or foil for the first two days, this way you will increase the strength of the surface.
Laminate flooring can be laid only after the screed from the self-leveling floor has completely dried. The drying period depends on the conditions and thickness of the screed, so it ranges from 3 days to 2 weeks
It is also important not to let the solution dry on your tool, so immediately after finishing work, wash it thoroughly under water
Professional advice
Before leveling the self-leveling floor, it is recommended to remove the milk from the surface. To do this, you can use a wide spatula; run it over one place several times.
Spatula with long handle
If this operation is performed until the solution has completely set, then at the same time the surface can be slightly leveled. In the future, cement materials become very durable. As for gypsum solutions, the result depends on their percentage. The more gypsum, the less strength of the self-leveling floor, the easier it is to level. To make work easier, tape the spatula to a wooden handle; the length should ensure a comfortable position for the master.
Another positive effect of removing milk is that the sanding papers become less clogged and need to be changed less often. This increases labor productivity and reduces the cost of leveling work. After removal, the milk should be removed from the floor surface using a powerful vacuum cleaner or broom.
Currently, small-sized cyclones are sold for vacuum cleaners. Use them, it's very convenient. Firstly, the dust receptacle does not become clogged, and the frequency of cleaning the bag increases. Secondly, an incompletely dried solution quickly clogs the bag, causing the electric motor of the vacuum cleaner to overload. Thirdly, the exhaust air becomes much cleaner, which is very important for self-leveling floors.
Cyclone filter for vacuum cleaner
After leveling, be sure to cover the surface with two layers of primer. It will strengthen the surface and prevent dust formation. During leveling, microcracks may appear, subsequently their parameters increase to critical values. By priming, it is possible to prevent accelerated wear of the coating.
Pouring primer
Pouring primer
Choose the leveling method depending on the brand of the mixture, the size and nature of the unevenness. Each individual case requires an individual approach.
If the height of the tubercles is very large, then it is much easier to cut them off with a chisel, and smooth out the unevenness with any cement-based glue. This method can only be used for finishing coats.
Chisel
In conclusion, let us repeat the axiom once again - it is better to prevent marriage than to eliminate it. Carefully study all the intricacies of filling the floor with self-leveling mixtures; not everything in this matter is as simple as the manufacturers advertise.
Prices for screeds and self-leveling floors “Stone Flower”
Screeds and self-leveling floors Stone Flower
Types of self-leveling floors
When carrying out repair work, the issue of planning construction stages is always a tough one, so one of the fundamental issues is taking into account the drying time of the leveling self-leveling floor.
Today, manufacturers offer a varied selection of self-leveling floors depending on the type of dry mixture on which it is produced.
The following types are distinguished:
Quick-drying mixtures - with a hardening period of up to 5 hours.
This type of quick-hardening self-leveling floor is optimal for the further creation of designer floor coverings with a 3-D effect based on it.
Based on cement mixtures - with a hardening period of 7 to 14 days.
Often used as a base for laying ceramic tiles.
Polymer mixtures - with a hardening period of 2 to 6 days.
They are used for filling floors on an industrial scale with the possibility of adding pigments and additives, as well as an additional protective layer. It is possible to install a laminate coating on its basis.
Polyurethane mixtures dry completely in 3 days.
This type of base is recommended for further installation of linoleum, and is also used as a base for installing laminate flooring.
Gypsum mixtures - complete drying period up to 10 days.
This coating is not recommended for rooms with high humidity (bathrooms, corridors, kitchens, etc.), but it is optimal as a basis for further installation of the laminate.
Epoxy mixtures - drying time from 2 to 5 days.
Very wear-resistant.
Mixture calculation
To determine the amount of solution, you must:
- Find the highest point, design using a level and place beacons. The largest difference plus the height of the new floor layer is the thickness of the screed.
- Calculation formula.
To fill 1 m2 you need 1 liter of mixture with a screed layer height of 1 mm. If a 30 mm layer of self-leveling floor is required for pouring, then for every square meter you need 30 liters of solution.
On a note. Manufacturers can indicate their mixture consumption for pouring 1 m2. It is worth following these recommendations.
For a room of 12 m2, 360 liters of mixture will be required with a screed thickness of 30 mm. Calculation of self-leveling floor
Defect No. 6. Cloudiness
Cloudiness is the appearance of a whitish tint on the self-leveling floor. Cloudiness can significantly deteriorate the decorative qualities of the coating, making it dull and inexpressive (this is especially noticeable on colored self-leveling floors). Cloudiness reduces the aesthetic properties of the material, but does not impair performance.
Causes of cloudiness:
- Contact with grease and aggressive chemical compounds on the surface of the self-leveling floor.
- Excess water in the self-leveling mixture.
- Poorly mixed components of the self-leveling mixture.
- Incorrect mixture ratio.
Correcting the defect with “little blood” will not work. Therefore, if the decorative qualities of the coating must be at their best, it is recommended to fill the existing floor with another finishing layer. Naturally, you should fully adhere to the filling technology recommended in the instructions for the self-leveling mixture.