Features of artistic oil paints
One of the characteristics of oil-based paints is their long drying time.
This allows the artist:
- adjust the drawing, correct mistakes;
- achieve the desired color transition;
- apply layers on top of each other;
- mix colors directly on canvas.
When applying several layers, the dye does not become cloudy. If necessary, it can be easily removed from the canvas with a spatula, palette knife or piece of fabric, and after drying, it is covered with a new layer of the desired shade.
The ability to maintain a wet consistency for a long time is due to the oil base.
Includes:
- Coloring pigments (organic, mineral or synthetic), which enrich the color and thicken the composition. These substances have the form of a powder; after grinding, it is mixed with a binder using a special technology. The purity, richness of tone, naturalness and resistance to fading on the canvas depend on the pigments.
- Vegetable oil (traditionally linseed), which acts as a binder. Thanks to this component, the pigment acquires the desired consistency for application to the canvas. The predictability of the dye and ease of application depend on the oil. Cheap products use refined oil or standol. The necessary information is indicated by the manufacturer on the packaging.
Thanks to the oil base, the brightness and richness of the color range is enhanced. The main properties of oil paints are durability and light fastness (indicated on the packaging by asterisks).
Suitable Brushes
An artist will need brushes, but there is no perfect set for every professional. You will have to select the appropriate tools yourself. Beginners just need to purchase eight different models:
- liner made of synthetic fibers - a thin brush that is convenient for painting branches and stems of plants, clear lines;
- flat column - necessary for drawing small details;
- round synthetic brush - suitable for working on petals and leaves;
- beveled tool - it allows you to use the entire plane of the pile or just its tip;
- large column - this brush has many functions, it copes with the background and small elements;
- a tool with rounded bristles - necessary for creating different textures;
- fan brush - it is used to coat a picture with varnish or draw glaze layers;
- a large tool made of natural bristles - if it is not in the artist’s arsenal, then you can purchase an ordinary construction flute.
DIY stained glass
All brushes need to be looked after. After use, they are washed in solvent, warm soapy water and wrapped in a paper envelope, leaving holes for lint.
It is necessary to let the brush dry, and without a shell its bristles will bristle in different directions. Instead of an envelope, you can use a special sink.
It consists of a small container, similar to a bucket. A grid with holes for tools is placed at the bottom. A large spring is attached to the handle; it holds the brushes while cleaning. Fill the brush with turpentine or oil, it makes the pile more elastic. After drawing, the tool is washed in thinner, wrung out with a rag and placed in a container. It will remain upright until the next use. Before using the brush, squeeze out the bristles.
Types of oil-based paints
The structure of the dye can be transparent or opaque. In the first case, the composition is lighter and transmits light.
On the packaging this parameter is indicated by a square:
- completely painted over – high hiding power;
- half painted over – medium transparency;
- not painted over – transparency.
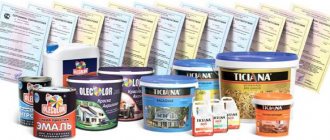
Conventionally, materials are divided into professional and student materials.
There are 3 types sold in stores:
- Highly artistic. Designed for professionals. They contain components of the highest quality, eliminating the loss of shine and color in the painting over time.
- Studio. Used by professionals and students, they have the characteristics necessary for comfortable work. The composition includes high-quality components.
- Sketchy. These are products of a low price segment, suitable for students to develop application techniques.
Cheap compositions have an uneven drying rate, fragility, and low light fastness.
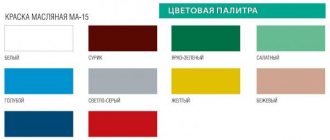
Main palette
Each artist selects his own basic palette of shades, which is necessary for his work.
However, it is possible to identify shades without which painting a picture will become difficult:
- Whitewashed. Zinc or lead are used. In the first case, the composition has average covering power and increases the strength of the dye mixture. In the dark, such whites turn yellow, but restore whiteness when exposed to light and can crack. Lead white is distinguished by its viscosity, good hiding power and adhesion. They dry faster than zinc and are toxic. They are resistant to light. White paint with the required characteristics is obtained by mixing different types of white.
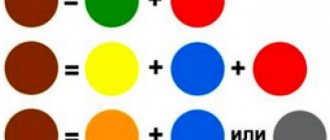
- Reds. Among the many shades we can highlight the following:
- “Kraplak” (dark undertone);
- “Red ocher” (restrained shade);
- “Cinnabar” (bright color);
- “Carmine” (pure bright tone);
- “Cadmium Red” (bright shade).
- Green. “Emerald” has a bright transparent shade; restrained shades include “Green Earth”, “Chromium Oxide”.
- Yellow. Yellow ocher has a spectacular golden tone. The shades are restrained, presented in light and dark versions. A bright tone is provided by “Cadmium Yellow”, “Cron” or “Chrome Yellow”. “Strontian Yellow” has a light lemon tint.
- Blue. “Prussian Blue” stands out with its rich, bright shade. “Cobalt Blue” and “Ultramarine” have good characteristics.
- Brown. This color range includes “Umber”, “Burnt Sienna”.
- Black. It is recommended to purchase “Grape Black” or “Burnt Ivory”.
You may need “Cobalt Violet” to work. It is necessary to learn to extract colors by mixing shades, then the basic set will be enough for painting.
Terms of use
For creativity you will need paints, canvas, brushes and a palette for mixing colors. You can purchase pre-stretched, primed canvas. Some artists write on paper, but such a base quickly absorbs wet dye, so it must be dense. It is also recommended to pre-prime the paper base with glue or a special primer.
Everything you need should be kept in a place prepared for storage.
How to paint in oils
Each artist has his own technique.
There are 2 directions on how to paint with oil paints:
- Multilayer overlay. It is complex and requires a large amount of material. Care and patience are required to avoid uneven matte areas.
- Overlay in 1 layer. The technique is used more often than the first, because The material consumption in this case is less. It is necessary to take into account the nuance - after the single layer dries, cracks may form. For this reason, experienced artists apply a second coat after complete drying.
Painting requires the preparation of proper lighting.
Step-by-step painting:
- The outline of the future exhibition is drawn on the canvas. Coal is used because... in case of an error, it can be easily erased with a piece of cloth.
- Painting a picture begins with drawing the most striking elements. The darkest and lightest fragments of the composition are highlighted. The necessary tones and shadows are obtained by constantly mixing shades.
- After completing the sketch, they move on to drawing the details. The entire canvas is gradually involved; you cannot focus on just one fragment.
- Amendments can be made within 3 days, during which time complete hardening occurs. Even after removing the failed area with a spatula and applying a new coat, the exposure will remain strong.
A dried painting should not be wiped with a rag or touched with hands.
Does it need to be diluted?
To create relief multilayer exposures, it is permissible to work with undiluted compositions. The application technique may require the use of thick pigment.
For painting in other directions it is necessary to apply light, sometimes transparent, strokes. To soften the structure of the composition, a solvent is added. By diluting, you can add shine and transparency to the layers on the canvas, as well as extend or shorten the drying time of the exposure.
Another reason for using solvents: due to the thick consistency, the compositions become dense, and it becomes necessary to dilute them.
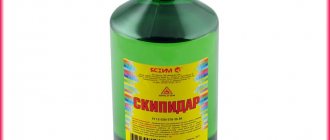
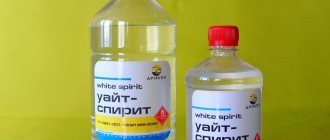
What is used as a solvent
The connecting link of the pigment is oil, so special oil-based compounds are used for dilution.
Types of thinners:
- Linseed oil. Odorless, safe for health. Maintains the brightness and thickness of colors and does not require much consumption. The product gives a matte finish after drying and reduces the strength of the layer.
- Oil-based varnishes with diluted resin (fir, mastic, dammar). They add density, increasing the strength of attachment to the canvas. Enhances color and glossy shine. They reduce drying time, but the paint loses its texture. Used for painting miniatures, fixing the bottom layer for the purpose of applying the next one (glaze).
- "Double". Consists of an oil base and varnish. The product thickens the paint, improves mixing, and increases the drying period. Emphasizes brightness and depth of color. The surface of the strokes retains its shine and reflects light evenly.
- "Tee". Contains oil, varnish and thinner (pinene is most often used). Increases work efficiency: thickens strokes, improves mixing, increases strength, maintains shine. It also increases the drying time of the layer.
- Pinen. Transparent, turpentine-based thinner, odorless. The product does not cause yellowing of paints, gives the layer transparency and lightness, and speeds up drying. However, artists do not use pinene as the only thinner when painting the entire picture, otherwise the layers will become dull and lose strength.
- "White Spirit". The disadvantage of the solvent is its pungent odor. The product is used for cleaning brushes and palettes and degreasing canvas. When diluted, the paint quickly evaporates, giving the strokes subtlety, but it disrupts the structure of the dye, making the layer matte and short-lived.
With limited work time, the question arises of how to quickly dry the painting. In such cases, varnishes and thinners are used to speed up drying. Depending on the technique and the desired result, various combinations of agents are used.
About drawing techniques
Preparing for creativity does not take much time, especially since in modern art stores you can purchase everything you need for work. Already stretched and primed, canvases can be found in any size - from the smallest to the largest.
A painting done with oil paints looks very impressive. The strokes applied by the artist look as if they are separate from each other. Many people think that oil painting is a fairly simple activity, but this is absolutely not the case. Let's try to figure out how to learn to paint with oil paints.
Each master has his own drawing technique, which has its own characteristics. The standard ones are:
- multi-layer application;
- alla prima - one layer.
Performing multi-layer application is a very complex technique in which you need to be as careful as possible, knowing all the properties and characteristics of oil paints. It is necessary to work in the same style and not dilute the paint in order to finish the job faster. A diluted composition may appear more matte and dull on the canvas than other parts. With this technique, the whole job will take more than one or two tubes of paint.
When applying one layer, be aware that the paint may shrink and cracks will appear in the painting. In this case, artists let the first layer dry completely and paint the second. Many craftsmen use this technique more often, since the material consumption is lower.