Primer of the ceiling
Many people, when doing their own repairs, forget about such an important stage of finishing as priming, or consider it not necessary. And it’s completely in vain: any type of finish - plaster, putty, wallpaper or paint - will last much better and longer on a primed surface . Therefore, it would not be amiss to talk about how to prime the ceiling.
Priming the ceiling before painting
When carrying out repair work, it is important not only the quality of materials, but also the technology of their application. If you skip one of the stages, the result will be completely different. One of the important stages is priming the ceiling. The advantages of pre-priming include:
- antibacterial surface protection. The primer contains antimicrobial substances that prevent corrosion and mold;
- eliminating dust particles and filling porous surfaces;
- after treatment, the surface becomes rough, which improves adhesion to further coating - putty, paint, glue, etc.;
- some types of primers form a fire-resistant film and prevent fire;
- savings on finishing. When using a primer for the ceiling, a smooth surface is formed and when applying the next decorative and finishing material, its consumption will be less.
Is it necessary to apply
Professional builders definitely recommend priming the ceiling before further finishing. Due to the force of gravity, any finishing coating on the ceiling will be pulled down. Over time, decorative material applied to an untreated surface will begin to crumble and crumble, even if we are talking about tiles.
Safety precautions or necessary tools
During repair work, we must always remember about protective equipment, so before priming, be sure to purchase safety glasses and gloves. Do not forget about creating technical conditions for priming:
- the room should be well ventilated,
- the temperature during work should vary between 5–250C,
- humidity should not exceed 70–75%.
Tools:
- rollers of different sizes, one of which should have a long stem. It is better to purchase those that come with removable elements,
- brushes, which are chosen in the same way as rollers - with removable parts,
- a tray to match the size of the rollers to facilitate the work process.
Features of priming the ceiling with different types of primers
Among the most popular means is acrylic primer. It has good penetrating power and versatility, it can be applied to brick, concrete base or plasterboard sheets.
Strengthening impregnation is used for weak surfaces, for example, after whitewashing or in small cracks. It gives them additional strength.
The adhesion promoter contains small particles. They add roughness to the ceiling and then any finishing material can be applied to it.
Impregnation for loose substrates contains latex polymers that penetrate deep inside and make the substrate stronger.
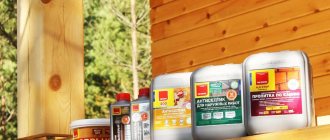
The following types of impregnation are less commonly used:
- alkyd impregnations for metal and wood bases;
- PVA-based primers for surfaces made of concrete, wood and plaster;
- epoxy primers for concrete and metal;
- primers with mineral components for brick, concrete and gas silicate surfaces;
- silicate soils for street work.
Important information
In order to avoid making a certain number of mistakes when priming, you must adhere to the following tips:
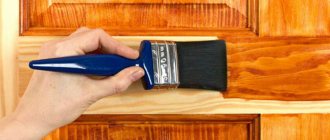
- If you plan to subsequently paint the ceiling, you should use only a roller, because when using a brush there is a risk of streaks and brush elements appearing on the surface, which will be very difficult to disguise with paint.
- If some of the primer gets on other surfaces, it should be removed immediately before it dries.
- Construction tools such as brushes, rollers and trays that are planned to be used in future work should be washed immediately after all work has been completed.
- Be careful and wear gloves and a hat.
- In order to speed up the drying process, you can use a standard heater or dryer, which are installed in the room where the priming was carried out.
- In order to determine the degree of drying, it is worth attaching a small piece of adhesive tape to the surface. If the surface is still damp, the tape will fall off, but will stick to the dried surface. Read also: “Ceiling clothes dryer - features of choice.”
Which one to choose for water-based paint?
Rooms with high humidity, such as the bathroom or kitchen, require a good, durable ceiling coating. Therefore, water-based paint is often used.
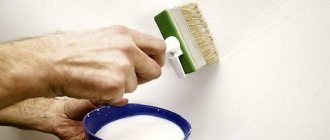
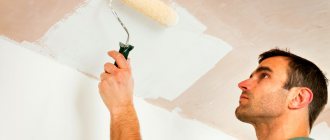
Before priming the ceiling before painting, it is important to thoroughly sand the base and use a soft-bristled brush to remove particles of dirt and dust.
Important! If the base is additionally degreased with solvent or white spirit, the adhesion of the finishing material will be better.
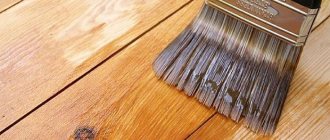
Next, pour the impregnation into a special tray and use a paint roller to paint in one layer. To avoid splashing the walls onto the roller, it is recommended to take a little material. After the ceiling has been primed, it is recommended to wait 4-6 hours until the layer has completely dried, and then reapply the liquid.
Preparing the ceiling surface before painting
- 10-01-2014
- 8872 Views
- 0 comments
Repairs need to be done from time to time in any room. Let's say you need to paint the ceiling. This is not as easy as it might seem. First, the surface is prepared before painting. It definitely needs to be processed.
Before painting the ceiling, the surface must be well leveled.
Preparing the surface for painting with water-based paint is a very important stage of work.
If this is not done, then all the flaws that were on the ceiling will appear very clearly after painting. It turns out that all your work was in vain. Therefore, in order not to redo anything, you need to initially thoroughly prepare the ceiling surface.
Preparing the room before painting with water-based paint
Different types of brushes for painting the ceiling.
Before you start making repairs, you need to prepare the room. To do this, you need, as far as possible, to remove all things from the room in which the renovation is being carried out, because if things are splashed with paint, then it will be difficult to clean them later. If there are any interior items left in the room that cannot be removed for some reason, then it’s okay. In this case, the furniture can simply be covered with film, then paint and dust will not get on it. Window openings also need to be protected from paint. Film is also used for this. If there are lamps on the walls, remove them along with the chandelier. After all, if paint gets on them, it will be very difficult to wash the lampshades. Now you can start making repairs.
Technology for applying primer to a concrete ceiling
Surface preparation
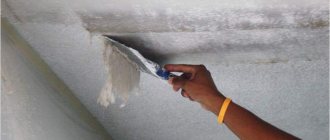
If there is any old coating left on the surface, it must be completely removed. To do this, first thoroughly moisten it so that the material soaks, and then remove it with a spatula. If foam ceiling tiles were glued, then they are torn off along with the glue. This step is recommended to be carried out even if you plan to install a stretch ceiling, in order to avoid the old coating from falling off on the inside.
At the second stage, uneven surfaces, cracks and crevices are puttied. The dry surface is sanded with sandpaper until completely smooth.
Now you can move on to priming.
Features of calculating primer for the ceiling, consumption per 1m2
Before applying primer to the ceiling, you need to calculate the required amount of material. As a rule, manufacturing companies write consumption rates per 1 m2 on the packaging. However, you need to keep in mind that these are only approximate figures, and they do not take into account the absorbent properties of the coating base, the type of tool, or the possibility of re-application.
For example, for universal and acrylic primers, the approximate consumption per 1 m2 is 100-170 ml.
Prime the ceiling - choice of material and application technique
When starting to paint the ceiling, it is necessary to prime it correctly. This will maximize the quality of adhesion of the materials used, which, in turn, will significantly increase the strength and reliability of the coating. In any case, priming the ceiling before painting is an indispensable procedure that must be performed in strict sequence.
- Surface preparation
- Recommended materials
- Additional tools
- Why do you need to prime?
- Main stages
- Drying time
Surface preparation
Before you begin the process of priming the ceiling, it must be properly prepared. For these purposes, a number of works should be performed:
- at the initial stage, completely remove all layers of the previous coating;
- then thoroughly clean the base of the ceiling;
- after this, proceed to repair existing defects in the base, be they voluminous depressions, cracks or bulges;
- perform preliminary priming;
- after this, apply the initial layer of test plaster;
- then apply a layer of high-quality finishing putty to the ceiling surface;
- The next important stage before the final primer is thorough treatment of the ceiling using special sandpaper and troweling.
Keep in mind that before you begin the final priming of the ceiling and walls before painting, you must get rid of all remnants of construction debris. This is necessary to avoid excess dust, which can spoil the result obtained after your work.
Recommended materials
Let's look at how to prime a ceiling according to all the rules, and what materials can be used for these purposes.
Currently, construction shopping centers and supermarkets offer a wide selection of primers for walls and ceilings - they are produced in the form of ready-made primer mixtures or a concentrate, which must be properly diluted with water in the proportions specified in the instructions. If you need to prime large areas of ceilings and walls, it is advisable to purchase special concentrates in large volumes - this way you will experience real savings.
Anyone who plans to prime the ceiling before coating it with water-based or other types of paint is interested in how many hours the primer takes to dry, as well as in what proportions it should be diluted correctly. The total drying time of the primer depends on the type of surface coating. The type of surface coating also affects the calculation of proportions when diluting the primer mixture, however, in most cases it is recommended to adhere to proportions of 1:5 or 1:2.
Additional tools
It is important not only to purchase a high-quality primer for the ceiling and walls, but also to correctly select all the necessary tools and auxiliary materials.
For priming under special tiles or under coating with water-based paint, you need to use a convenient roller or brush. It is important that these products are of high quality, because this affects the durability of the coating and the reliability of the work performed. In most cases, it is preferable to use a roller for priming, since it allows you to do this job much better, easier and faster.
Brushes with overly stiff bristles should not be used for priming ceilings and walls, as they can leave unattractive streaks and marks on the surfaces.
But if you plan to wallpaper in the future, a hard brush is exactly what you need. It will create characteristic roughness on the surface, thanks to which the quality of adhesion of the putty to the adhesive composition and to the wallpaper itself will significantly improve.
Results
You should not skimp on primer, nor should you refuse this type of work. In terms of finances, this still won’t justify itself; there will also be costs to correct various problems with the ceiling surface.
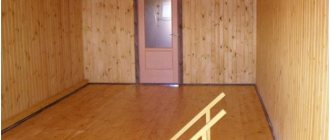
A beautiful ceiling in a room is quite possible if the surface is primed correctly
The secret is to choose a specialized primer for your ceiling or one that has a mineral base. Universal primers are often used for ceilings. It is important to study the instructions carefully and buy the product that will match the surface. They usually decide on the spot whether to prime the ceiling plinth. It’s better to just remove it – if it comes off easily.
Which primer is best to use?
The choice of primer depends on the surface material and the specific purpose of application. The table will help you make a choice.
| Type of primer | Surface | Goals and properties |
| Acrylic | Any | Universal |
| Water based | Any | Under water-based paint |
| Alkyd | Steel, fiberglass | The most durable |
| Mineral based | Concrete, expanded clay, brick | Contains cement and lime for excellent adhesion |
| Based on epoxy resin, drying oil | Wood, metal | Moisture resistant and protects against corrosion |
| Deep penetration | Any | Strengthens old surfaces |
| With quartz sand (concrete contact) | Any | "Rough" ceiling design |
Some tips for choosing a primer:
- To avoid mistakes, it is better to buy primer whose packaging indicates the desired type of surface (“primer for concrete”, etc.).
- Additional protection against fungi and pests is provided by antiseptics and biocides in the soil. Most important in private houses and apartments located on the ground floor.
- All popular brands (Ceresit, Knauf, Axton, Starateli, Lakra, etc.) produce primer mixtures of approximately the same quality. If the composition of primers from different brands is the same, choose the cheaper one.
How to putty a ceiling with your own hands
You need to start applying putty from the corner
A properly plastered ceiling has a significant impact on the entire design of the room and requires the involvement of craftsmen associated with this matter. However, many visitors to the Runet are not interested in the idle question of how to putty a ceiling. How to putty a ceiling yourself, with your own hands, saving a certain amount of money and receiving moral satisfaction. Yes, it is correct, because if you delve into the essence of the issue and have some theoretical basis in this matter, and plus add your diligence and hard work to everything, the task of puttingtying the ceiling on your own is quite doable.
As with any endeavor, you need to create a consistent list of work to be done. We will not deviate from this rule, and we will outline our plan:
- Prepare the necessary tools.
- Prepare the ceiling surface for putty.
- Ceiling primer for putty.
- Applying the first and second layers of putty to the ceiling.
The plan is ready and we will carry out the putty work, adhering to it.
Tools needed for ceiling putty
- We will need three spatulas of different sizes: small up to 15 cm, medium up to 25 cm and large - 40 cm. It will be more convenient for novice putty masters to apply putty with a small spatula.
- Hammer hammer, bucket, hammer drill mixer, hand grater, 100 grit sandpaper, roller and brush for applying primer.
- Starting putty, finishing putty, primer.
Preparing the ceiling surface for putty
To check the evenness of the ceiling plane, you can use a wide spatula, applying its sharp end to the ceiling. In places where gaps are observed between the edge of the spatula and the ceiling, this indicates that the ceiling has a depression or protrusion. If these gaps are large, a ceiling screed along the beacons is required. But our task is not to screed, but to putty the surface, so we omit the screeding process.
If there are traces of old putty on the ceiling or it exists in full, you need to remove it to a clean floor slab. This is done with a small and medium spatula. I would like to immediately note that ceiling work must be done with glasses, a mask and a hat, otherwise you will have to wash yourself for a long time. After removing all remnants of the old plaster, you need to thoroughly clean the ceiling from dust using a vacuum cleaner or brush. If this is not done, small particles will then drag behind the spatula, forming unnecessary stripes on the plaster layer.
Ceiling primer for putty
Ceiling primer for putty
Before applying the first layer of putty, the surface of the ceiling must be primed in order to bind small particles located in the micropores of concrete and which prevent the adhesion (adhesion) of the putty to the ceiling. Usually, Ceresit CT 17 primer is used to prime the surface of the walls, but if you find another brand, nothing terrible will happen.
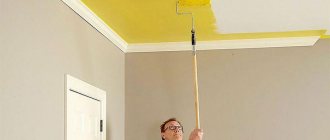
You need to start the priming process from the corners, using a brush, and you need to do this very carefully. After the corners, you can use a roller for priming, which is used for painting. A shaggy roller would be better since the liquid will drip down copiously from the foam rubber. When applying primer, it is better to move the roller away from you to avoid being splashed. After the first time and after the primer layer has dried, it is necessary to prime again.
Applying putty to the ceiling
First of all, you need to select a putty for the work. Good results are shown by the dry mixture from Knauf, which comes in two types: starting putty KNAUF NR Start and finishing putty - KNAUF NR Finish. The mixture is stirred in a bucket using a drill or hammer drill using a mixer for mixing. Before pouring the mixture into the bucket, be sure to check it. The bucket must be perfectly clean. Otherwise, all the small solid particles will leave grooves in the ceiling. This may be off topic, but you will know that experienced finishing craftsmen have their own buckets, which they take with them to order and which they carefully protect.
Recommended direction of movement of the spatula
You should stir until the required consistency is obtained, which would allow the mixture not to drain from the spatula and at the same time be removed from it well. After the first mixing, the mixture should stand for 5-10 minutes and then mix it again and add water if necessary. There is no need to mix a large amount of ready-made putty, as long as it lasts for 15-20 minutes of work, since after 30 minutes it will set and it will be impossible for it to work.
You should start applying the solution to the ceiling from the vertical wall at the corner. The method of applying the first layer is as follows: the layer is applied and immediately removed, applied and removed, and so on over the entire surface of the ceiling. What does this achieve? Firstly, all small holes and cracks will be filled, and secondly, a very thin and even layer is obtained and, one might even say, and thirdly, material is saved. The spatula should be held at an angle of 45 - 60º. When applying the first layer, small grooves and dimples may appear - no big deal, everything can be cleaned up later.
Applying putty to the ceiling
After complete drying, the first layer must be thoroughly cleaned - this will greatly facilitate the application of the second layer, which, again, will save material. When cleaning, gross imperfections in the form of stripes and sagging are removed with a small spatula, and finishing is carried out using a hand grater into which fine-grained sandpaper measuring 100 units is inserted. Naturally, when performing this stage of work, you did not forget about protective equipment: glasses, a mask and a hat.
Before applying the second layer, there is no need to prime the first one, since the finishing putty has good adhesion to the starting putty. Moreover, the second layer can be applied immediately with a wide spatula, which will significantly save your time. Another condition for successful work: the walls must be puttied with at least a primary layer, otherwise later there will be a problem with puttying the surfaces of both the wall and the ceiling in the corners. After the second layer has dried, you need to sand the surface.
Then you can prime and paint. It takes 5-6 days to putty the ceiling.
remontzhilya.ru
What functions does the primer perform?
The main purpose of a primer is to increase adhesion. This term refers to the adhesion of dissimilar materials - including the plaster covering the ceiling and the water-based paint with which it is finished. Good adhesion ensures a better, more durable finish - the paint applies evenly and does not bubble or crack once dry.
High adhesion due to the properties of the primer:
- fills air spaces (pores and cracks), levels the ceiling;
- “neutralizes” dust particles that interfere with the adhesion of materials;
- prevents moisture from entering the main surface (concrete, wood).
The primer also prevents the appearance of mold and protects the ceiling from small pests, which is important for wooden coverings.
And a small bonus - when covering the ceiling with water-based paint, part of the material is absorbed into the fresh primer, so the paint does not smell so much when drying. It is important in autumn-winter renovations in a residential building, when you cannot keep the windows open.
Is it necessary to apply a primer?
Priming the ceiling is not a mandatory procedure, but recommended. Regardless of the material the ceiling is made of, primer will never hurt.
Even if the manufacturer of the paint and varnish material has indicated in the instructions on the packaging how to use the product instead of a primer, an additional layer of primer is still useful.
When primer is not needed
The only case when it is impossible to prime the ceiling is when using wallpaper for painting. It is necessary to prime under the wallpaper itself, but not on top of it before painting. Here the soil is almost useless and leads to the soaking of the ceiling wallpaper, which causes it to peel off.
Cases when priming is allowed, but not required:
- temporary cosmetic repairs - it is permissible to leave the old layer of soil and apply a new one later, during a future major overhaul;
- finishing the ceiling in the technical and utility room.
In these situations, the quality and durability of the coating are not so important, so in order to save money, primer is sometimes abandoned.
Why do this
Any coating applied to a ceiling slab is a multilayer composition. And if each of the components of this layer cake is not given due attention, then this will certainly affect the quality of the entire work.
Putty will adhere better to concrete if it is pre-treated with deep penetration primers. The paint will also adhere better to the surface being painted. Also, such treatment not only provides better adhesion of the applied paint to the surface, but also reduces paint consumption.
Another merit of these mixtures may be the strength of the resulting coating, especially on substrates prone to cracking and crumbling. For this purpose, a special strengthening primer is used.
In addition to the above, there is a primer for the ceiling that prevents the appearance of mold and the development of fungal spores. It has bactericidal properties and the room in which the ceiling has been treated with similar compounds will be safer in terms of health. This treatment is highly recommended in children's rooms where the child spends a lot of time.
The general purpose of all such solutions is to increase the adhesive properties of the treated base for further work. In addition, if the ceiling plane has been treated with such mixtures, then it absorbs paint more evenly or ensures uniform distribution of putty.
[custom_ads_shortcode2]
Useful video
And so, many novice professionals ask themselves the same question: is it necessary to prime the ceiling before painting and puttying. Is primer important or necessary? Let's find out the answer by watching the video:
So, should you prime your ceiling before painting? Need to! Even if we are talking about whether a ceiling primer is needed for painting with water-based paint, the answer will also be positive - this will help to achieve the best results. Even if you follow only the tips listed above, you will be able to cope with the repair. However, if you doubt your abilities, then it is better to trust a professional team of repairmen who will help you renovate your apartment for a relatively small amount.
ratings, average:
from 5).
Loading…
Contents of the article: 1. Advantages of priming 2. Primer of the ceiling before painting: preparatory work 3. How to prime the ceiling before painting Due to the existence of a large number of modern paints and varnishes, logical questions arise. Manufacturers claim that the substances cannot be applied to all surfaces without their preparation. Let's figure out how to prime the ceiling before painting and consider all the nuances of such work. The primer helps improve the adhesion of materials, ranging from plaster or putty to paint or glue. A layer of primer covers all cracks in the base material. It also prevents moisture from penetrating vulnerable parts of the ceiling. This is especially important for certain categories of materials. For example, various glue mixtures must, according to technology, maintain their moisture content for a specified period.
But let us immediately note that neither one nor two primer layers will be able to level the surface of the ceiling. In principle, they do not have such a task. However, they guarantee the distribution of an even layer of paint (water-based or oil-based).
Don’t forget about uniform drying without loss of moisture. You will immediately notice the attractive “glossy” appearance and feel the ease of use.
How to prime walls for painting?
CapaSol deep penetration primer The advantage is that material consumption is reduced because less paint is absorbed after priming. The paint is easier to apply and does not peel off as quickly. In the case of mineral substrates such as mineral plaster, deep primers are used.
Interesting materials:
Is it possible to train the vestibular apparatus? Is it possible to touch a sleepwalker? Is it possible to remove moles? Is it possible to remove fuzz on the face? Is it possible to remove moles with hair? Is it possible to remove moles in the spring? Is it possible to remove moles with liquid nitrogen? Is it possible to remove wax plugs for otitis media? Is it possible to remove a tattoo during menstruation? Is it possible to remove hair immediately after photoepilation?
Can I use liquid paint instead of primer?
Instead of a primer mixture, water-based paint is often used. It is diluted to a slightly more liquid state (the volume of water is about 10% of the volume of paint) and used as a regular primer.
But replacing the primer with liquid paint is not always acceptable:
- a new (in new buildings) or durable surface with a recent high-quality finish, which does not absorb moisture much, allows the use of paint instead of primer;
- the ceiling, which was previously finished more than 1-2 times, needs to be fully primed;
- if the plaster under the old coating cracks and crumbles, primer is also used.
You also need to look at the paint packaging. It should say “it is permissible to dilute the product with water.” Then the paint is suitable for priming and can be used as an alternative to primer.