Wood is one of the most used materials for building houses and making furniture. Over time, it began to be used even more, and processing methods improved. But before applying the varnish it must be processed. How to prime wood before painting? You can find out about this in this article.
Do you need a primer? Certainly. Priming wood before painting makes finishing simple and economical, and also extends the life of the material.
The tree is exposed to external influences. This may change the appearance or, over time, the material will begin to deteriorate, and it may also negatively affect human health.
The most common of these impacts are:
- Ambient humidity. A wooden structure can become deformed, rot, and mold will begin to appear on it. Cheap wood is especially susceptible to rotting.
- Sun rays. Because of them, the tree becomes dry and its strength may decrease.
- Insects can damage the structure of the tree.
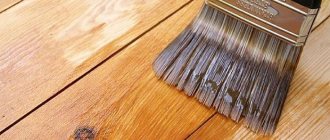
To protect the material from such influences, wood is treated, varnished or painted. But first you need to prime.
Why do you need a primer?
All cracks and pores are filled with the composition. Thanks to this, mold and mildew will not appear in them. In addition, some compounds protect the tree from insects.
However, primer is not only intended for this. Special substances that impregnate the wood can also cope with this. And thanks to priming, the surface of the wood becomes strong and smooth, and not very permeable. Thanks to this, the paint lies evenly and the structure does not absorb it. This allows you to use it sparingly and reduce costs. In addition, the primer penetrates deep into the base of the wooden structure, making it very durable.
In addition to this, the finishing composition adheres better to the structure. It will last longer, not peel or crumble. Primer is more cost-effective than painting because it costs less.
Basic selection criteria, what to focus on when choosing soil
Before choosing a primer, it is important to consider the following points:
- Will the wood be painted in the future or will a clear varnish be applied?
- The work will need to be carried out indoors or outdoors. Several factors are at work here. For the interior, choose quick-drying, low-toxic and odorless mixtures. Then, as for the exterior, any are suitable, the main thing is that they protect the wood as much as possible from the effects of ultraviolet radiation, moisture and temperature changes;
- Also, you need to pay attention to the type of wood. Due to the fact that coniferous types of wood emit more resins, this effect should be minimized. Therefore, it is preferable to choose slag primers in this case.
Any primer is suitable for the exterior, the main thing is that it protects the wood as much as possible from the effects of ultraviolet radiation, moisture and temperature changes.
Wood that is intended for priming
If a wooden structure is located outdoors, it will be subject to temperature changes, attacks by pests, rot, and is also negatively affected by moist air.
List of things that should be primed first:
- window;
- entrance doors;
- fence;
- house siding;
- balcony, veranda or terrace.
If the wood is to be coated with paint or varnish, then a primer becomes mandatory.
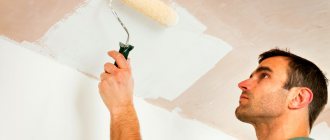
Advantages of a primed ceiling
The quality of ceiling finishing depends on many factors: the skill of the finishers, the correctly selected finishing materials, and most importantly, the correct technology for the work. There are no small details in construction, and if even one technological operation is missed, or unreasonable savings are made on the building materials required by the technology, then you can forget about the quality and durability of the repairs performed.
The main evidence in favor of the advisability of priming during repairs is the clear and undeniable advantages of primed ceilings:
- Filling the porous surface of the base and binding the dust particles remaining after cleaning.
- Improving adhesion (adhesion) of finishing materials. A slight roughness of the treated surface has a positive effect on the connection of layers of putty, plaster, and paint.
- Creation of an antibacterial coating. If the primer contains antimicrobial components, then the applied primer will serve as a kind of shield against the penetration of fungal diseases, eliminating the appearance of mold and unpleasant corrosion phenomena.
- Increasing the fire resistance of the final finish. The use of special types of primers with fire retardant additives contributes to the non-flammability of the final finish.
- Reducing the actual consumption by 1.5 times of generally expensive ceiling paint, which leads to a cheaper budget for ceiling repairs. The thinnest transparent film of the base primer envelops the porous structure of the base and subsequent surface treatment will require much less putty or paint.
A primed ceiling increases such an important indicator as paint coverage, and after painting the surface will be perfectly flat and smooth.
Ceiling priming is an extremely important technological process that improves the technical and operational characteristics of the finishing coating.
What exactly can you prime wood with?
There are several primer solutions for wood before painting.
Alkyd primer
Used if the tree has not been treated. With its help you can get a smooth and even surface, and it is suitable for any finishing work. If you choose a pigment primer, a dense matte film will appear on the surface of the wood. Dries in approximately 12-16 hours. It is not advisable to use it in residential areas due to the presence of organic solvents in it.
Polyurethane primer
Quite expensive. It is used if the wood will be coated with parquet varnish. It is based on polyurethane synthetic resins. It contains a fairly large amount of solvent, and there are no tonic additives.
Silicone acrylic primer
After its application, the moisture content of the wood becomes stable. It will not change when the ambient humidity fluctuates. Naturally, in order to ensure complete protection of the structure from moisture, an acrylic primer should be applied over the entire surface in several layers.
Shellac primer. It is necessary if it is necessary to smooth the surface or remove resin. Suitable for coniferous trees.
Emulsified primer
Can be used for any material, not just wood. It dries quickly (up to 4 hours), it can be diluted with water, it has no unpleasant odor, and it is also safe for humans. Due to so many advantages, this priming method is the most ideal and used.
Epoxy primer. Most often it is paint that is diluted with a solvent. Not a good priming option as there are different recipes and formulations.
Aerosol
It differs from other types of primer in the way it is applied. If in all previous compositions you need to use a roller and a brush to apply paint to the surface of the wood, then here the structure needs to be sprayed. There are advantages and disadvantages to this method. The advantages are that the primer will penetrate well into all crevices and hard-to-reach places, and it also dries quite quickly. The disadvantages are that the aerosol is consumed quite quickly and it is very difficult to determine how many layers of primer have been applied.
Antiseptic primer. It comes in liquid or powder form and is diluted in water. It is used in this way: first, the solution is diluted in a certain amount of water. Then a roller is taken and the primer is applied to the surface. It is necessary to apply several layers so that the solution gets into all the pores and cracks.
putty
There are a large number of compositions for wood putty. It all depends on the type of wood and what it will be covered with. If this is varnishing, then a mixture made with your own hands from PVA glue and wood sawdust is best suited. Homemade putty, after the glue dries, is painted the same color as the wood. It is quite durable and easy to sand.
If the wood is to be painted, then the purchased putty should be applied with a steel spatula in two layers. At the same time, it constantly needs to be dried and polished. Putty paint is quite elastic. If the air humidity is high and the temperature is low, then this type of putty protects the structure from cracks.
Drying oil and enamel
If you need a good penetrating primer, you can use oil paints or alkyd enamels. The best primer for wood that will be coated with oil paint is drying oil. It must be applied in two layers. The second layer is applied only after the first has dried. This may take about a day. It is necessary to dry the surface of the wood on all sides, this will protect the wood from various damages.
In order to protect the wood from moisture, you need to apply hot impregnation with drying oil. There are 2 ways to heat it:
- the drying oil is heated in a water bath and applied hot;
- You can first apply cold drying oil and then heat the surface using a hair dryer.
Alkyd enamel
The structure can be primed with glyphthalic primer GF 021. You must first dilute it using turpentine or white alcohol. In this case, the primer will be able to penetrate to a greater depth and, therefore, will better adhere to the base.
There are a lot of priming solutions. Choose the one that suits you.
Paint options for wooden fences
Acrylic water-based paint has a bright color and dries quickly
There are many nuances to using compounds to paint a wooden fence and pre-treat the surface. For example, impregnations can be ready for use or they can be diluted. Composite formulations are mixed before use.
Dyes differ in color, initial raw materials, and functional purpose. Single-component products provide one type of protection, while combined products comprehensively protect the tree from destruction.
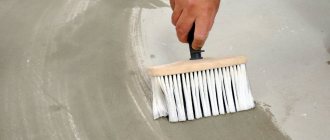
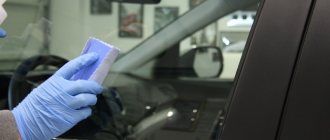
Priming process
Everything is simple here. Anyone can cope with this task. Products are always purchased along with instructions. There you can familiarize yourself with the conditions and methods of application. The most important thing is to prepare the surface of the wood.
The first step is to get rid of traces of paint, dust or stains. It is worth removing unnecessary screws and nails.
If the surface is not smooth enough, the material should be sanded with sandpaper or special tools. If water was used during cleaning, it must be dried.
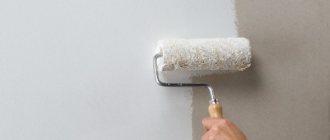
Now you can take a brush or roller and start priming.
Impregnation on sanded wood
If you have thoroughly approached the issue of restoration and removed traces of old paint from the surface of your fence, exposing the structure of the wood, then you don’t have to paint it, making do with impregnation.
The cost of impregnation for wood is about 500 rubles per 5 liters. It must be applied with a sprayer - a spray gun or at least a garden sprayer. This way you will significantly save the composition and achieve an even layer of coating. This treatment will extend the life of the boards by at least another 20 years, and if you apply impregnation in 2 layers, then by all of 35.
Degreasing the wood surface
For this, turpentine or acetone is used. Wet a rag with the solution. If there is too much resin on the tree, then these places are filled with solvent. This procedure should be repeated 4 times.
In order to remove the old coating, universal removers are used. First, they are applied to the paint and covered with polyethylene for half an hour. Then, using a spatula, remove the softened coating.
Oily
Oil paint for exterior woodwork is used by many owners of such structures. Its parameters include:
- the created coating is resistant to various atmospheric influences;
- the wood is protected from moisture;
- the paint has excellent penetrating ability, so the material is absorbed by the wood;
- If the painting procedure is carried out correctly, the result will be a glossy finish with a service life of at least 6 years.
The disadvantages of this solution include a long drying time, so it usually takes about a day. Painting wooden walls must be done in good weather.
Useful tips
Air humidity should be low. This will allow the material to dry faster. The air temperature should be from 5 to 30 degrees above zero. The higher it is, the faster the primer will dry. Therefore, you should do this in the morning or evening.
- The first coat of primer should be thin enough to fill all pores and cracks.
- If the wooden tiles are created by pressing chips, then 4 layers of primer should be applied.
- The quality of material impregnation depends on the number of primer layers.
- To apply a new layer, the old one must be completely dry.
- Soil doesn't have to be expensive.
- The primer must be water-repellent. This applies not only to the painting process. The shelf life of the tree itself and how precipitation will affect it will depend on this. It is worth noting that alkyd primer is not afraid of moisture.
- Time. A high-quality primer always dries quickly and is easy to apply.
Conclusion
Now you know what and how to prime wood for painting, and why this procedure is needed at all. Additionally, watch the video in this article. If you have any questions on this topic, you can contact me in the comments.
Did you like the article? Subscribe to our Yandex.Zen channel
June 13, 2022
Wood, Paint, Construction Chemicals
If you want to express gratitude, add a clarification or objection, or ask the author something, add a comment or say thank you!