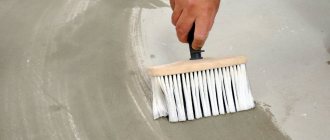
Primer is a preparatory coating before painting walls. After priming, the paint adheres to the surface better, resulting in a perfectly even coating. However, some do not use primer, but immediately start painting. Let's find out how necessary it really is to prime the walls before painting, whether it can be abandoned, and how to prime the surface according to all the rules.
Why do you need a primer?
Primer is a dispersion of film-forming substances based on water or mineral solvents. The task of the primer composition is to improve the adhesive properties of materials. Primers also improve the properties of substrates, making them waterproof and strengthening loose surfaces. Using dispersions, you can antisepticize walls to avoid the appearance of fungus and mold in the future.
Read also: Why do you need fiberglass?
By improving the properties of the bases on which the finishing coating will be applied, the primer allows you to fully reveal all the qualities of the finishing material. This is especially true for paints. The tone and color will be fully transmitted. Priming the walls before wallpapering will reduce the consumption of adhesive.
The choice of composition for use depends on the tasks facing repair or construction work.
Types of primer. The task of each of them
- Acrylic primer is considered the most versatile and common. If you are at a loss as to which primer to choose, you can safely choose acrylic. It is suitable for painting concrete, plaster, and plasterboard walls. Its distinctive feature is that it dries quickly, has virtually no odor, and also protects and strengthens the base from moisture.
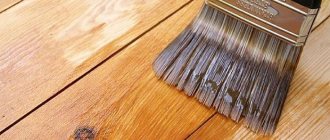
- Alkyd mixture - suitable for wooden walls and metal surfaces, has anti-corrosion properties, that is, it will not allow rust to appear. This mixture improves adhesion and dries in about 15 hours.
- The aluminum mixture is distinguished by the fact that it protects the surface from infection by fungus. Suitable for wooden walls.
- Epoxy - consists of two components, mixed before use. Resistant type of soil for metal and concrete structures. This primer is considered durable.
- Silicate – intended for brick and decorative plaster. Often used when decorating a bathroom, balcony or loggia. Moisture resistant.
Soil types
The range of primers for walls for painting is varied. Based on the type of base, they can all be divided into several groups.
- Acrylic. Universal, good for wood, concrete, chipboard, plaster, drywall, etc. Can be used for porous coatings, dries in about 5 hours, odorless. Not applicable to metals.
- Glyphthalic. Area of application: metal and wood. It dries in about a day and loses its properties in conditions of high humidity.
- Alkyd. A good option for any wood. After treatment, the fibers swell slightly, which significantly improves adhesion. Dries in about 15 hours.
- Perchlorovinyl. A universal preparation that is used for plasters, metal, plywood, wood, etc. Dries quickly and takes about an hour. It is better to choose it for outdoor use due to its high toxicity.
- Epoxy. A two-component product that significantly increases the adhesion of the base. Used for metal and concrete.
- Mineral with gypsum, cement or lime. Use for concrete or brick. Dries from three hours to a day.
- Aluminum. Used for wood. Additionally protects it from fungal infection.
The optimal and most popular option can be considered universal primers, which are suitable for almost any material. They improve the adhesion of the base and strengthen it, but do not have special characteristics. However, in most cases the latter is not required.
Interior primer Ceresit IN-10, 10 l
667
Buy
Specific characteristics of solutions
If the room has special conditions, you may need to choose a special purpose primer. This could be a primer:
- Antiseptic. It contains an antiseptic that prevents the development of microorganisms. Protects the wall from the appearance of fungus or mold.
- Moisture-proof. Gives the surface water-repellent properties, which is necessary in rooms with high humidity.
- Deep penetration. Strengthens loose and porous substrates. Prevents peeling and cracking of decorative coating.
- Non-contact or adhesive. Improves adhesion to finishing composition. Used for non-absorbent smooth surface.
The packaging of the drug will necessarily contain recommendations for its use. The types of materials with which it is combined and the application conditions are indicated. This information should not be neglected. If the product needs to be prepared for use in some way, this should also be indicated.
Walls How to prime walls before puttying: simple instructions and tips for choosing a material
Do I need to prime the walls before painting?
Novice finishers do not always understand why preparatory work is carried out. It seems to them that the most important thing is to level the base, then they can safely paint. In fact, this is not entirely true. Indeed, before painting it is very important to level the coating. There should be no differences, cracks or other defects. Therefore, the first step of proper preparation is alignment. It can be made in different ways: drywall, plaster, etc.
At the last stage, finishing putty is most often applied, which will become the base for painting. The next required step is priming. It is necessary because the soil:
- Strengthens the base. It binds weak, porous and loose surfaces into a single whole, making them more durable. Deep penetration formulations cope especially well with this. They are capable of going deeper by 80-100 mm, while conventional preparations do not go deeper than 20-30 mm.
- Improves adhesion or bonding of finishing material and base coat. Thanks to the primer, the paint stays better on the surface, preventing it from peeling and cracking. Moreover, during subsequent repainting it will be easier to prepare the base for work.
- Reduces coating consumption. After treatment, the absorbent properties of the base are significantly reduced. Thanks to this, about a third less composition will be required for finishing.
There are materials with special properties. They can increase the moisture resistance of the surface, prevent mold, etc.
Special primer Tikkurila Otex Akva 0.9 l
1 567
Buy
- Walls
How to prepare walls for finishing
How to choose the right one
When making a purchase, be sure to pay attention to the manufacturer, price and characteristics of the solution you choose. Don't forget to read the instructions on the package, there may be useful information there. Also pay attention to the absorbency of the mixture; this is an extremely important property for a primer.
Perhaps the most commonly used primer for painting is an acrylic mixture. It is universal and perfect for finishing almost any type of wall. It can be used for painting with a water-based solution and for treating walls both indoors and outdoors. If you are in doubt about what material you need to purchase, it is better to buy a universal solution.
Conclusion
From the article, you learned how important it is to prime the surface for painting and have a good understanding of all the nuances of the work process. I am sure that you can cope with such work without difficulty. The video in this article will help you better understand the aspects of the work process, and if you still have questions, write them in the comments below.
Did you like the article? Subscribe to our Yandex.Zen channel
November 28, 2016
Decorative wall decoration, Paint, Finishing materials, Walls, Construction Chemicals, Dry building mixtures
If you want to express gratitude, add a clarification or objection, or ask the author something, add a comment or say thank you!
Primer of walls for water-based emulsion
Experts definitely recommend priming surfaces before painting them with water-based emulsion. This type of paint is harmless, dries quickly, and is available in a large number of colors. The water-based emulsion is prepared by mixing white paint with coloring pigments.
When planning to apply a water-based material, you need to prime the drywall or plaster, putty it, and level it using an abrasive mesh. After this, the surface should be puttied and also sanded using a fine-grained mesh. After the substance has completely dried, the wall is primed. After the layer has dried, the surface is painted with a suitable water-based emulsion. Experts guarantee a good option, even application, and no cracks when using fiberglass.
Experts definitely recommend priming surfaces before painting them with water-based emulsion.
What to prime: popular primer options for different surfaces
Primer compositions differ according to the type of surface for which they are intended:
- For wood and metal. Alkyd and aluminum primers are used, which have anti-corrosion properties and ensure strong adhesion of the finish to the base.
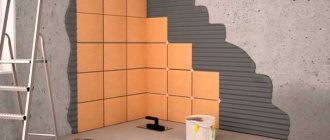
- For concrete. Epoxy primers that are resistant to cracks and chips due to their high resin content are best suited. Used for subsequent painting, laying tiles, and laying linoleum.
- For brick. It is worth choosing a silicate primer, as it is the most resistant to natural influences and is suitable for treating facades, balconies or bathrooms.
- For polyvinyl acetate paint. The primer of the same name has a narrow specialization, allowing the paint to dry faster and adhere better to the surface.
A universal acrylic-based primer can strengthen and protect surfaces made of wood, concrete, ceramics, plaster and putty.
Why prime an already painted surface?
You can also paint over a previously painted surface, although this is incorrect, such treatment is still practiced. In this case, priming the walls before painting is done if you plan to apply paint over the old layer of water-based emulsion, but in a different color. The primer will not allow the old shade to show through the new layer. We can say that the adhesive composition will act as a barrier.
If you prime a painted surface, the old shade will not show through the new layer.
If you are going to paint a wall that has previously been treated with nitrocellulose enamel or oil paint, you must first ensure that the surfaces are rough and then apply an adhesive compound. Without the sanding process, the painted surface will not last long, because roughness improves the adherence of the applied material. If a primer for water-based paint is applied to a surface painted with other types of paints, then it is best to use a composition called Betonokontakt.
Above we discussed penetrating primers, which are used to compact a porous or loose plaster layer. Concrete contact is an adhesive substance, the component of which is an acrylic binder. Cement, quartz sand and other components are also used as fillers in the composition, which help to increase the adhesion of plaster, putty or adhesive substances to concrete and other smooth and poorly absorbent surfaces.
Types of primer
There are several types of primer that are designed for different types of surfaces:
- Alkyd – for wood and metal. First of all, it is used for metal structures, as it has anti-corrosion properties. On wood and chipboard, this primer creates a protective layer that prevents the destruction of the material.
- Acrylic – universal, suitable for all surfaces. It penetrates into the pores of any material: wood, plaster, putty, concrete, metal. Strengthens the base and protects it from moisture.
- Epoxy – for concrete walls. Its base is epoxy resin, which increases the strength of the coating. Used as a base for painting, covering with linoleum, gluing ceramic tiles. It is durable and will not develop cracks over time.
- Aluminum – for wood and metal surfaces. Contains aluminum powder, which ensures reliable adhesion of the paint and varnish material to the base.
- Silicate - for brick or decorative plaster. Most often it is used for processing facades. Resistant to temperature changes, durable, moisture resistant. Places for its possible use in the apartment are the bathroom and balcony or loggia.
- Polyvinyl acetate - used for special types of paint. It is applied to the surface, which is then painted with polyvinyl acetate paint. It has good adhesion to different surfaces and dries very quickly.
USEFUL INFORMATION: Assembling a frame from a metal profile for plasterboard
The primer must be selected based on the type of surface, area and manufacturer. If you need to cover a small area, you can buy an aerosol can, it is more convenient to use.
You should buy repair products at a hardware store after consulting with a qualified salesperson. A well-known manufacturer is an additional advantage; it can guarantee good results. Before purchasing, check the expiration date and appearance of the packaging.
Workflow Description
All necessary activities are divided into 3 stages:
- Collection of necessary materials and tools;
- Surface preparation;
- Application of the composition.
Let's look at each of them in detail.
Stage 1 – purchasing the necessary materials and tools
First, let's figure out how to prime the surface. Most preferred:
- Deep penetration compositions based on acrylic have a strengthening and penetrating effect . They are suitable for the preparation of plastered and puttied surfaces, as well as for plasterboard structures. The price per liter ranges from 30 to 100 rubles and mainly depends on the size of the package and the manufacturer;
There are many options and most of them are of good quality
- Latex primer for painting is distinguished by the fact that it creates a water-repellent, moisture-proof coating on the surface. It can be used both indoors and outdoors; I recommend using this option on highly absorbent surfaces. The cost is similar to the group of products described above;
Latex compositions can also be considered universal
- If you are working in a bathroom, toilet or kitchen, then an excellent option would be to use a solution with the addition of antifungal additives. In terms of its functions, it does not differ from the usual version, but the fungicidal additive allows you to effectively resist the occurrence of fungus and mold;
The presence of anti-mold additives is always indicated on the packaging
- Primer paint for walls is different in that it contains a color pigment and after application the surface becomes white. This solution is often used as a base for decorative coatings, but I also recommend it where you need to change the color of the wall. At the same time as strengthening, you will create the ideal base for any color, and the cost of a 10 liter bucket is about 1,200 rubles;
Primer paint makes it easy to repaint the wall in any color
- If you need to paint concrete or apply the composition to surfaces previously painted with oil or alkyd paint, then you will need an adhesion primer . It creates a good base, and water-based paint or any other paint will apply perfectly. But you should not buy the option with quartz filler, but a special composition, for example, Tikkurila Otex, it costs about 750 rubles per 900 grams.
This option is even suitable for preparing glass and tiles for painting.
All of the above options can be purchased both in finished form and in the form of a concentrate. The composition is diluted with clean warm water in the proportions recommended by the manufacturer. The ratio of components may vary depending on the type of base.
The concentrate is convenient because it can be diluted as much as needed right before work.
We need a simple set of tools that can be bought at any hardware store.
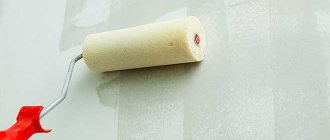
A roller with a tray is the best option for priming walls
| Tool | Recommendations for selection |
| Roller or brush | This is the main tool for application, the roller should be at least 18 cm wide with medium-length synthetic bristles, and a brush from 10 cm. The first option is faster and more convenient to work with, the second better fills all the unevenness with soil |
| Painting bath | This is a special container with a recess under the ground and a squeezing grid. The grid allows you to squeeze out the roller coat to remove excess composition and distribute it more evenly over the entire area of the roller |
| Narrow brush | Needed for processing corners, places near switches and structures of complex configuration. Optimal width 2-3 inches |
| Brush or broom | Necessary for removing dust, cobwebs and other contaminants from surfaces |
| Means of protection | Although the primer itself does not pose a danger, it is better to protect your hands with gloves and your eyes with goggles |
Safety glasses help prevent splashes from getting into your eyes
If you have pockets of mold on the walls, then you will additionally need to purchase a concentrated antiseptic composition, which is used to pre-treat all problem areas.
Stage 2 - preparatory activities
Before priming surfaces, you need to prepare for work:
- The room should be cleared of anything that will interfere. As a last resort, move the furniture to the middle to provide easy access to all surfaces to be treated;
- The temperature should not be lower than 10 and higher than 30 degrees, these are optimal conditions for high-quality work;
- If there are damages on the surface, they are sealed with putty. The fewer flaws there are, the better the final result will be. Pockets of mold, if present, are removed with a stiff brush, and all problem areas are additionally treated with an antiseptic;
After the putty has dried, it is advisable to rub the repair areas with a block.
- The surface is cleaned with a brush, broom or vacuum cleaner. It is important to remove dust from the walls to improve the adhesion of the composition. It is advisable to carry out this work an hour or two before the main stage, since dust tends to settle constantly, and if you clean the surfaces a few days before priming, they will become dirty again;
Using a vacuum cleaner can get the job done much faster and better.
- The walls must be dry; if there is high humidity in the room, it must be eliminated by ventilation. A more radical option is to use a heat gun, with its help you will definitely dry the walls.
A heat gun will quickly dry the room
Stage 3 - applying primer
Now let's figure out how to properly prime the walls. Instructions for doing the work yourself look like this:
As you can see, the diagram is very simple and clear
- First of all, it is worth preparing the composition; the primer should be at room temperature. If you have a ready-made solution, then you simply need to mix it thoroughly before use. If it is a concentrate, then mix the required amount with water in the proportion indicated on the package;
Adhesive compounds are mixed especially carefully, since filler always settles in them
- Then the composition is poured into the paint bath so that it fills the recess. The roller is carefully dipped on one side, turned, dipped again, after which you need to wring it out on the grill. Press the tool with moderate force and move back and forth several times, the composition will be distributed over the entire surface, the excess will flow into the recess;
The composition is distributed evenly over the roller
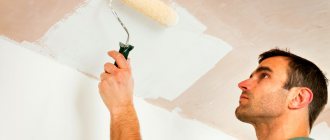
- The walls are primed for painting in any order. Start from a place that is comfortable for you, but it is better to go from top to bottom to remove smudges as they form. Press the roller so that the wall is abundantly moistened, but excess mortar does not flow along it;
The primer is applied with progressive movements in the direction from ceiling to floor
- Corners and other difficult areas are primed with a brush; this can be done at the beginning, or at the end, as is more convenient for you;
The walls are usually high and a stepladder or table is required when working. But you can get out of the situation easier: buy a special extension for the roller handle, with its help you can process the entire surface while standing on the floor.
The handle extension greatly simplifies the work process
- After applying the layer, you need to leave the walls to dry. How long the surface dries depends on the ambient temperature and the type of composition. I usually wait 2-3 hours. It is very easy to determine how dry the walls are by looking at the wet spots that should disappear;
You should not speed up the process with a heat gun; drying should be done under natural conditions; this is the only way to ensure maximum penetration of the soil into the base.
- The second layer is applied in a similar way, it is important not to miss pieces of the wall so that the base is evenly processed . If there are flaws, the absorption of individual areas will differ and the paint will lie unevenly.
Finally, let's figure out whether it is necessary to prime the walls before painting if they are painted with the same color? Everything is simple here: if the condition of the surface is good, there are no damages or stains on it, then you can immediately apply paint, bypassing the preparation stage.
And the last nuance, is a primer necessary if colored fragments are applied to a base of white paint? In this case, you can also do without primer, because it was applied under the main coating.
When applying colored paint to a white wall, there is no need to prime the wall.
Details
How to choose what to prime?
How to prime the walls if you haven’t decided on the composition yet? There are the following:
- For metal and wood - aluminum and alkyd primers are used, they have anti-corrosion properties and ensure strong adhesion of the finish and the base.
- For concrete, epoxy primers are ideal because they are resistant to cracks and chips due to their high resin content. They are used for further painting, laying tiles, as well as linoleum flooring.
- For bricks, you should choose a silicate primer, because it is the most resistant to natural influences and is suitable for treating a facade, balcony or even a bathroom.
- For polyvinyl acetate type paint. A primer of the same type has a narrow specialization and allows the paint to dry faster and adhere better to the surface.
You can strengthen and protect surfaces made of concrete, wood, ceramics, putty and plaster with a universal type of primer, which is made on an acrylic base.
How to do the work correctly?
The application process can be divided into preparatory and main stages:
- When preparing, you should sand the surface, remove dirt, dust and mold from it. If necessary, which may be dictated by the instructions for the primer composition, the wall should be degreased - for this use acetone or other solvents. During preparatory work, proper ventilation of the premises and temperature conditions should be observed in the range from +5 to +25 degrees.
- The main stage of the primer will consist of diluting the required amount of the composition and applying it to the surface of the walls.
Let's figure it out: what kind of wall
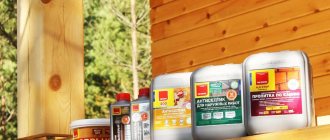
Walls made of wood are light and resistant to deformation. Such walls can last more than 100 years. But wooden surfaces have a drawback - their susceptibility to external influences (insects, high humidity, sunlight).
The primer makes the wood more protected from unwanted influences, since after priming the surface of the wood becomes more durable and less permeable to insects.
Brick walls, unlike wooden ones, are not susceptible to insects, are durable and fireproof. It may take several days to warm a brick house to comfortable conditions due to its high heat capacity. Brick walls, due to their strength and resistance to external factors, can theoretically do without priming, but this is undesirable. A primer is a primer, that is, a preparatory and leveling agent, but brick walls are not smooth and uniform. Therefore, it will be easier to achieve perfect coverage. This will also increase the durability of the finish.
Walls made of lightweight concrete (foam concrete, expanded clay concrete), like the previous ones, are fireproof (can be adjacent to stoves, fireplaces, etc.) and are not susceptible to insects. Concrete is a fairly porous material, and dust, moisture, and dirt can become clogged in the pores. The primer mixture fills these pores with a durable film, leveling the surface. And adhesion, i.e. adhesion will be significantly higher than to concrete.
Frame walls are the lightest of all those considered, so they warm up quickly and are resistant to deformation. They are susceptible to rotting and insect attack, and therefore require special treatment and protection. The primer will just create a protective layer and make the walls more resistant to the negative effects of the environment.
In general, the primer will not harm any type of coating; moreover, it will simplify the finishing and increase its durability.
Primer preparation
Having decided on the question of whether it is necessary to prime the walls before painting, we will consider the available options for the substance. Some are already ready. It is enough to mix them and you can start repair work. Others need to be prepared. To do this, the dry mixture is filled with a sufficient amount of water. It is necessary to ensure that the solution has the desired consistency. If it is too liquid it will run off the walls; if it is too thick it will be difficult to apply on the surface.
Each is suitable for plastering one or another material. Before use, the selected primer is thoroughly mixed until a uniform layer is formed. To improve the properties of the plaster, let it sit for 15-20 minutes. After this, the mass is mixed again. Then you can start priming the walls.
After applying each layer, the walls must dry. This usually happens within 24 hours. The substance dries faster in hot and dry conditions. When the surfaces are smooth, you can start painting.
Before use, the selected primer is thoroughly mixed until a uniform layer is formed.
Types of primers
There are many options on the market for primers that can be used before painting. Having decided on the question of whether or not it is necessary to prime the putty before painting, you need to choose the right option for the job. Let's talk about each type in detail:
- Wooden, concrete, plastered material is treated with a polyvinyl acetate type of priming;
- Before painting, the brick wall is treated with silicate;
- Acrylic is a universal material. It can be used to process internal and external coatings;
- Treat metal and wood with alkyd;
- Aluminum is used for painting wood;
- For deep treatment of structures outside and inside, epoxy is used.
Select a primer depending on the type of wall being treated. Otherwise you will damage the structure. If it is difficult to decide on an option on your own, contact the seller for advice. He will give advice on what is suitable in a given situation.
Select a primer depending on the type of wall being treated.
Review of popular manufacturers
Currently, various Russian and global companies are engaged in the production of these products. The most popular materials among compatriots are the following brands:
- The materials are of excellent quality.
- Soil from the Knauf brand is in great demand.
- There are good reviews about Tex primer.
- VGT compositions have proven themselves to be quite good.
- Experts recommend using Tikkurila brand soil.
Here are the highest quality primer options for interior and exterior work from Russian and foreign manufacturers. This list does not include budget companies, since the quality of their products is noticeably inferior to the presented options.
Important. When choosing this product, you should not rely only on cost and customer comments; here you need to properly select based on the technical characteristics, as well as the intended use of the compositions.
At the moment, when arranging premises or other structural elements, the main task that needs to be solved is a significant increase in service life. Of course, this is almost impossible to achieve when using a conventional paint coating, which is why auxiliary components have been developed that significantly extend the service life of not only the coating, but also the entire structural element as a whole.
Is it possible to paint without primer?
When is it possible
- Wallpaper does not require preliminary priming before painting, since its structure implies adhesion to the dye without intermediaries.
- When the walls are treated with latex-based finishing putty, which does not crumble.
When not to
- A primer is necessary when gluing wallpaper for reliable adhesion to the walls.
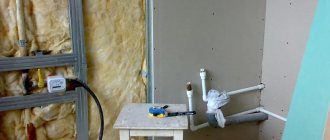
- When using drywall in finishing. The sheets are coated twice: immediately after installation, and after the paint has dried for better fixation.
- When repainting an old layer of paint with a new color. In this case, the primer allows you to neutralize the show-through of the old finish.
Advice from the experts
The basis for a high-quality result of finishing work is the use of products from one manufacturer.
This helps avoid unpredictable chemical reactions between different formulations. In addition, product lines from one company are designed for combined use, which allows you to obtain the planned shade and structure of the coating. The principle of a stronger base relative to the applied paint coating is mandatory to adhere to. This means that the primer layer should take on the functions of leveling and adhesion to the wall, and the selected paint will only have a decorative function.
Often, beginners seek professional help because they cannot determine whether a primer is needed at all. To determine the need to use primers, professionals conduct a very simple test - you need to rub the wall with your finger: if a mark remains, then you cannot do without a primer before painting.
Priming any surface before painting is a stage that facilitates further finishing work. Modern primer compositions can strengthen the wall, protect it from destruction, cracks, chips, and rust. After applying the primer, the paint layer is distributed much better, which allows you to reduce the consumption of paint coating.
How to calculate the cost of funds
To determine the approximate amount of material, simple calculations should be made. First, we determine the area that needs to be primed. This can be done by multiplying the height of each wall by its length and then adding the results together. It is important to remember to subtract the area of doors and windows. We should have a certain number of square meters.
Now we determine the rate of consumption of the product. It must be indicated on the packaging. It is rare that in such a case there will be only one number. More often a small fork of values is shown. This is due to the fact that different types of base absorb differently. Knowing what kind of coating we have to work with, we select a number and multiply it by the previously calculated number of squares.
We decide on the number of layers. If you need one, all you have to do is multiply the result by a factor of 1.15 to get some supply of material. In the case when it is supposed to apply two or more layers of primer, we multiply the calculated value by their number, and then by the coefficient. This way we get an approximate amount of primer, which we focus on when purchasing.
Instagram art_remont_stas The required amount of primer depends on the type of base, the number of its layers, absorbency, etc.
Finishing materials How to paint wet rooms: tips and life hacks
Tool selection
In order to perform high-quality and correct priming of walls, it is necessary to properly approach the selection of auxiliary devices. Let's consider a number of points that will allow you to make the right choice:
- area of work being carried out;
- available amount of primer for consumption;
- required number of layers for application;
- available material costs for the tool;
- amount of time available for work;
- surface material to be primed;
- soil used for work.
Taking into account all these parameters, you can choose the most suitable tool option. It is best to use a sprayer, but its use is associated with high costs and cannot be used in small spaces.
Important. If preference is given to a spray gun, you should remember that it is necessary to work with it in a respirator and protective equipment so as not to cause harm to health.
Questions and answers
1. Should I prime the walls over old paint before painting?
It is recommended to prime if the color of the walls changes. Otherwise, the color may wash out, and then you will have to paint with an additional layer, wasting extra paint. The paint will not wash away the soil and will lie more evenly.
2. Do I need a primer when painting the same color?
If the walls are smooth and not covered with dust and a grease film (as can be the case in the kitchen), then you can do without a primer. If traces of dust, etc., are clearly visible on the walls, then primer should be applied before painting.
3. Is it necessary to apply a primer to putty walls before painting?
It is necessary, since dust forms on a putty wall, which is difficult to remove, which will greatly affect how the paint lays down and how it sticks to the wall.
4. In what case can the number of primer layers be reduced?
There is no need to neglect the number of primer layers prescribed by the manufacturer.