Despite the emergence of various innovative materials, wood has been, remains and, most likely, will continue to be in demand in any construction. Well, furniture made from natural wood is considered the most prestigious. The demand for the material is explained by its unsurpassed environmental qualities, natural warmth, durability, and ability to create comfort.
Wood stain
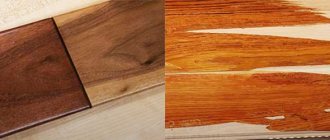
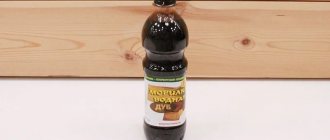
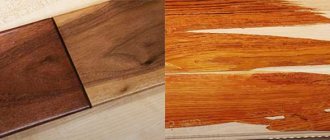
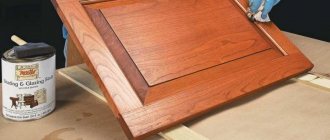
Both in order to maximize the life of products and for decorative purposes, many special means are used, one of which is wood stain. This unique composition can not only transform the appearance of ordinary wood, but also reliably protect its structure from various pests and the effects of external adverse factors.
But to use stain, it is important to be able to understand the variety of possible compositions and the technology for their application.
Types of wood stains
The stain, which forms a thick layer, is suitable for application to perfectly dry wood with a maximum humidity of 12-17%. Heavy-duty stain is suitable for structural elements that do not change their dimensions significantly during their service life depending on humidity and temperature.
High build stain is suitable for:
- Window shutters;
- Doors;
- Wooden cladding of the facade of the house;
- Roof cladding, etc.
This stain is thicker, less absorbed into the wood and contains more dry substances, which form a transparent film after drying. on a wooden surface.
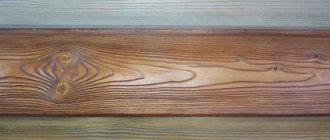
The layer of such stain on the surface of the wood is much smaller than that of varnish or paint; the natural grain of the wood is emphasized and immediately catches the eye.
Thin layer
Thin-layer stain is less dense and contains less dry matter compared to thick-layer stain. This means that the thin-layer stain penetrates deep into the wood and leaves virtually no protective film on the surface.
- It is generally suitable for application to wood that is not completely dry and therefore has a higher moisture content.
- It is suitable, for example, for garden furniture, fences, garden houses and all other structures made of damp wood.
- If you use a thick layer of stain, expect it to peel off.
Medium layer
Medium-layer stain forms a transition between thin-layer and thick-layer. It is more suitable for dry wood, suitable for windows, doors, wood cladding facades, formwork, garden furniture, etc.
Hybrid
Hybrid stain is a thick layer containing hybrid molecules that form a flexible and breathable membrane. The stain is deeply absorbed into the wood, protecting it from damage by mold and mildew, exposure to adverse weather conditions and UV radiation.
Suitable for almost all wooden surfaces, exterior and interior.
Finishing wooden surfaces with stain: tips from TBM-Market specialists
To make the result pleasing, before starting finishing work you need to remember the simple rules of wood processing:
- To increase the depth of penetration into wood and improve adhesion to the surface, the composition should be slightly heated to a temperature of 36-38°C.
- The stain can be applied in different ways: rub in in a circular motion using a swab and longitudinally using a roller and brush.
- Wiping off excess must be done only along the fibers.
- To avoid blots and drips, do not dip the brush or swab into the solution too much.
- Do not apply a second layer of composition on the first one that has not dried.
- The ends and sections of wood that actively absorb the composition must be subjected to more intensive processing.
- Vertical surfaces of doors, panels, and walls should be coated starting from the bottom to prevent stains from being absorbed into unpainted wood.
- The procedure for applying layers can be repeated several times until the desired tone is achieved.
The ability to give boards a fashionable aged look is one of the additional advantages of water-based stain. The effect of achieving vintage antiquity begins with applying stain to the surface to be treated as the main background. Without letting it dry, in the right places where the imitation of scuffs will be placed, you need to quickly wipe off the dye. After complete drying, apply the next layer.
The stained surfaces of wooden gazebos, benches, and garden furniture are often lightly burned with a gas burner, which gives them a brighter, interesting look and enhances the appearance of texture. Firing is allowed only after the stain has completely dried. Then the surface is cleaned with a stiff shoe brush and varnished.
| Buy |
Stain Basics
Synthetics are a standard, long-used dye composition. The stain does not have such stringent requirements for the readiness of the base as stains with a water-soluble base.
In principle, there is no need to dilute the stains, but to clean with a brush you already need a synthetic solvent.
- Water-soluble acrylic base is an ecological type of stain. Application is very easy, dries faster, has no odor, and tools are easy to clean.
- However, some professionals avoid acrylate-based stains because they require a perfectly clean and grease-free base.
- Some also argue that water-soluble stains do not blend well with the wood and do not create a uniform finish.
Dry matter content
This is a relatively important parameter, but it can only be tracked in the product passport. For a non-professional, this parameter is not so important. The dry matter content of the product is indicated in%.
The higher the dry matter content, the thicker the protective film will form on the wooden surface after the stain dries.
In the case of thin-layer options, the dry matter content is about 20-30%, in the case of thick-layer stains - about 55-65%.
How to properly apply stain to wood
Priority number one is a properly prepared base.
She must be:
- Clean;
- Polished;
- Low fat;
- Cleared of dust.
If you are staining a surface that has previously been painted, you should check the condition of the original paint. If it's hard, sticky, and doesn't peel or crack, just peel it off and sand it gently with sandpaper.
If the paint is peeling or cracking, it must be removed carefully. Then the base must be sanded and cleaned of large chips and dust particles.
It is important that the moisture content of the wood does not exceed the maximum permissible value, otherwise the stain may peel off.
Before applying stain, it is recommended to apply a fungicidal impregnating agent, which will prevent blueing of the wood or damage to the wood by a fungus that destroys the wood.
- However, there are also stains on the market that have both decorative and protective properties. The stain must be mixed thoroughly so that no sediment remains at the bottom of the container. Seal any unused remainder to prevent it from drying out.
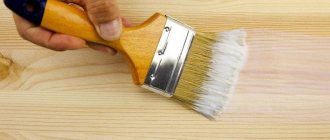
- The composition is applied to the wooden surface with a soft brush in the direction of the wood grain. The optimal temperature for application is 10-30 ° C. The stain is applied in at least 2-3 layers, with the interval between individual layers being at least 5-7 hours.
It is impossible to standardize the exact conditions for applying stain. It is always necessary to study the stain application instructions or product data sheet, where you can read everything that is important, from preparing the base to finishing the stain surface.
Surface treatment before work
Before applying stain, the wood surface must be prepared. They do this in stages:
1. Remove the old coating (if any). To do this, scrape and polish the boards. In addition to removing the old coating, these procedures will level the floor surface.
2. Clean the surface from grease and oil stains by wiping problem areas with a rag soaked in white spirit or gasoline.
3. It is advisable to deresin coniferous species before applying stain. That is, remove resin from the wood structure, which can interfere with the absorption of the stain. Solutions for degumming are prepared according to the following “recipes”:
- 50 g of potassium carbonate and 60 g of soda ash are dissolved in 1 liter of water heated to 60˚C.
- Dissolve 50 g of caustic soda in 1 liter of warm (soft) water. Treat the surface with the resulting 5% soda solution.
- Mix 750 ml of distilled water with 250 g of acetone.
Any of these solutions is generously applied to the boards, preferably in several layers. After half an hour, wipe the surface with a cotton cloth and rinse with warm water.
The most common mistakes
If the wood is not completely dry, it is not recommended to cover it with a thick layer; the stain may peel off over time. If necessary, use a thin layer of stain that absorbs into the wood and does not leave an airtight film on the surface.
- If you are treating wood outdoors, make sure the stain is rated for that purpose and has a UV filter to prevent the wood from blackening or graying.
- Lighter shades have a lower pigment content, which protects the wood from unwanted discoloration, while shades that are too dark accumulate heat better, changing their volume and are more susceptible to cracking.
Controlling air humidity is also suitable for applying thick build stain. If the composition is applied in high humidity, the surface of the stain may become dull soon after application. Therefore, it is recommended to apply stain early in the morning when air humidity is lowest.
Color selection
Also, stains are classified according to their purpose - for internal and external use. They differ in that the composition of the outdoor products contains a pigment that prevents fading.
When choosing a composition, it is necessary to take into account the method of its application and the tools that will be used for this. Some compositions are applied only with a brush, others - with a spray gun.
When processing furniture, preference is usually given to oil- or wax-based compounds. They contain practically no volatile components. Almost all stains can be varnished.
Alcohol-based compounds are ideal for tinting wooden furniture or door panels. For parquet or stairs, you need to choose a different type of product. To apply alcohol-based compounds, it is necessary to use a spray gun, because delays or errors in work lead to the appearance of stains that cannot be corrected or eliminated.
Powdered alcohol products must be dissolved with 96% alcohol. But there are absolutely no guarantees that the purchased alcohol will meet the required parameters. For this reason, preference should be given to ready-made formulations.
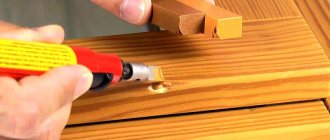
Oil or wax based impregnations are quite expensive. Apply to the surface in any way. Excellent for restoration work, non-toxic.
The color of the stain is selected according to the international classification. At the same time, you cannot rely on a conventional name, because impregnation from different manufacturers under the same name usually has different shades. This is due to differences in production technology.
When choosing a color, you should pay attention to the tone stated in the color range and the natural color of the wood. The same product looks completely different on different types of wood.
You should choose a color based on demonstration dies made from different woods and painted with the same stain. In specialized stores they are presented as a sample. This way you can get a complete picture of the final result.
Calculation of the amount of stain
Before you go to the store to buy stain, calculate how much you need. Each jar displays the consumption of stain, in other words, how many m2 of 1 liter of stain is used.
The value is given within a certain range, but it is always recommended to stick to the lower limit. It may happen that the wood you stain will be too absorbent and therefore the consumption will be higher.
Also keep in mind that you will likely be applying more coats of stain. Thus, if, according to the manufacturer, the spray can is enough for at least 15 m2, and you apply 3 layers of glaze, in fact it will only be enough for 5 m2.
Self-production
In order to make oil stain for wood with your own hands, you do not need any special skills or knowledge. You just need to follow the instructions prescribed by the masters who have tested “homemade” paints in practice and guarantee their results.
As the basis for a future stain, you can use purchased drying oil (and you can even choose from inexpensive ones), or you can make it yourself. To do this, you need to boil vegetable oil (linseed oil is better) in a water bath. In order to reduce the subsequent stickiness of the composition (on a dried surface) and speed up its drying, turpentine is added to the oil, based on the fact that for 1 liter of boiled oil you need to take a quarter liter of turpentine.
Having thoroughly mixed the ingredients, we get drying oil. Next, you need to add a solvent to it - for 1 liter of mixture, 200 ml of solvent liquid and approximately 20 ml of color. In fact, the amount of dye is determined during the mixing process and adjusted to the desired shade by adding it in small portions.
In general, the best option would be to first prepare small volumes of solutions using a minimum amount of ingredients and test the resulting stain on the surface of a board each time. It is also recommended to initially mix the dye with a small amount of base, and only then pour it into a container with drying oil.
