There is a wide variety of wood stains, differing in color and composition. Wood will always be popular, because it is a beautiful and environmentally friendly material. However, like all natural decorative elements, boards are afraid of moisture and are a favorite habitat for insects, fungi, mold and other microorganisms. To increase the service life of things made from wood, various protective agents and antiseptics are used. Today we will talk about such a wonderful substance as stain, with its help you can not only solve some problems associated with premature damage to wooden materials, but also give your products an unusual and noble appearance.
What is wood stain
Wood is a strong and durable material that is susceptible to adverse environmental factors, therefore, in order to protect products made from it from possible damage, they must be treated with special means. On the construction market you can find a huge number of different antiseptics, varnishes and other impregnations that change the color and some properties of wood; the most popular and inexpensive product is stain. Some people think that stains are used only to change the color of an object, but this wonderful drug also has other properties.
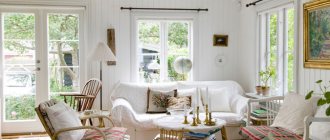
The color of wood stain should be chosen depending on the interior design.
The properties of stains may vary depending on their composition. However, even if you do this tint yourself, it will still have some protective properties.
Properties of stains:
- If you want to change not only the color of the wood, but also highlight its texture, then stain is just what you need. It does not completely cover the design, like paint, but gives the entire product a pleasant shade.
- Staining wood will protect furniture from insects and rot, while maintaining the texture and grain of the wood.
- Stain is a protective agent that increases the service life of wooden objects and costs several times less than varnish and paint. In addition, due to its watery consistency, it penetrates deeper into the wood structure.
- With the help of stain, you can make even inexpensive pine, painted with colored stain, look like noble and strong oak and exotic mahogany.
- Tinting with stain can lighten the wood. This technique is especially often used before painting wooden products.
- Impregnation with stain will strengthen the structure of the wood and give it a slight moisture-proof property.
Not all stains have the above qualities. To understand what kind of stain you need, you need to read its composition and see what the instructions for use say. By the way, you can treat not only solid wooden boards with stains, but also chipboard, objects made of plywood or parquet and other wooden crafts.
Related article: Which curtains are best to choose for a loggia: some useful tips
Advantages and disadvantages
The use of stain has positive and negative properties; in order to understand whether this particular material is worth choosing, it is necessary to evaluate each aspect. The advantages of using the composition include:
- A variety of tint types that can give a wooden surface an unusual appearance;
- The grain of the wood is not lost, but rather stands out after processing the stain;
- Water-repellent coating structure;
- Antiseptics are included that protect the tree;
- Affordable cost of the composition.
But there are also disadvantages to these funds; experts note the points described below:
- There are types of stains that raise the fibers of the base, then it is necessary to sand the wood in advance to get a high-quality result without flaws;
- Not every type of stain is capable of creating a barrier from negative factors on a wooden base, and it is necessary to use other compositions;
- A number of products can only be used outside the building, and the master must wear protective gloves, a respirator and clothing;
- Some of the compositions are characterized by quick-drying properties; this requires the master to be able to cope with uniform distribution at a fast pace.
Antiseptics are turned on to protect the wood.
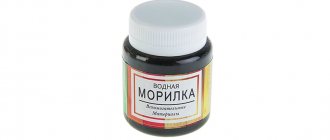
Water-based wood stain and alcohol stains
Water-based stains are the most environmentally friendly stains. They do not have a strong unpleasant odor and are easy to use.
This product can be sold as a dry or ready-made mixture. Such dyes are most popular due to their low price and the possibility of their use for both interior and exterior work.
Water-based wood stain can significantly improve the appearance of wood flooring
Main characteristics of water stain:
- The colors of water-based stains are very diverse. With their help you can create a very interesting iridescent effect.
- You can use water sprays without fear for your health. Even at the highest temperatures, such products do not emit harmful fumes.
- If you decide to experiment and are wondering: “Which stain to choose so that it can be washed?” – then water stain is what you need. This tinting agent can be easily washed off with water, so painting the floor with it is impossible.
- Tinting a wooden surface with this method makes its texture more noticeable. Unfortunately, this makes the product more sensitive to moisture, so it will need to be opened with varnish.
It is extremely undesirable to tint resinous tree species with such impregnation, as unsightly stains may appear on them. For such products it is better to use alcohol impregnations.
How long does alcohol impregnation take to dry? Almost a few seconds! This property is both an advantage and a disadvantage. Thanks to it, you can cover the butt of a sporting rifle with alcohol stain, and use it in just a few minutes, however, a large area can only be stained with a spray gun, otherwise the surface of the product will become covered with unpleasant stains and stains, and even varnish will not help correct the situation. The alcohol impregnation consists of alcohol and dyes.
Treating wood with this impregnation will make it more resistant to ultraviolet radiation and high humidity. However, due to the unpleasant odor of this product, working with it is only possible in an open space.
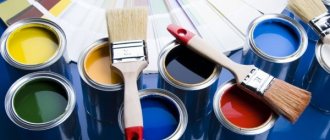
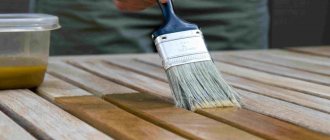
What is the best way to apply stain?
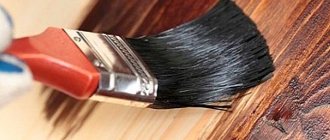
Wood staining is done with the following tools: a brush, a foam rubber or fabric swab, a roller and a spray gun.
When tinting the surface with alcohol-based stain and nitro stain, use a spray gun. These liquids dry out quickly, and brushes on the surface leave stains. The spray gun is also convenient to use for treating large areas.
Tools for applying stain to wood
For other types of stain, use a swab, rag and brush. It is necessary to choose a brush with strong bristles so that no hairs remain on the painted wood. Rags and tampons should also be of high quality, since lint and threads remaining on the surface will create an unattractive appearance of the paint.
Oil stains are used to paint wood with brushes with natural bristles, while water-based stains can also be used synthetically.
Return to content
Advantages of oil-based stains and wax and acrylic stains
Oil-based stain comes in a wide range of colors and shades. It costs more than water sprays, but it also has more useful properties. This preparation can be used not only to change the color of the product, but also to emphasize its texture.
Treating wood with oil-based stain is easy and convenient; it is applied in a thin layer and does not lift the fibers of the product. Also, this tinting does not fade under the influence of sunlight, makes the wood resistant to temperature changes and protects it from moisture. Oil stains can be removed using white spirit solvent; it can also lighten painted wood a little. It differs from compositions with similar properties in that it does not require varnish to secure it. The disadvantages of staining with oil include: long drying of the tint and its toxicity.
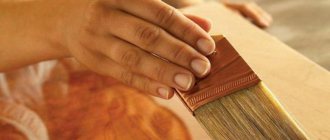
Oil-based stain can be applied using a regular brush.
It is very important to find a stain from a responsible and conscientious manufacturer. Judging by the reviews, the most popular companies are Vartan, Latek, Novbytkhim and Herlak.
Acrylic and wax stains are very easy to apply; they apply in a uniform layer and do not leave stains or streaks. However, due to the rapid drying of such stains, you need to work with them very quickly.
Related article: Which wooden curtains to hang on a doorway
Wax stain is used to protect wood from moisture. It can be used to treat parquet. This stain is not resistant to mechanical damage, so to extend its service life, it is better to use varnish.
Acrylic, also known as rustic, stain perfectly emphasizes the texture of wood. With its help you can get a variety of shades, which is why this drug is so popular. Wood painted with such stain will still need to be opened with several layers of varnish.
Work technology
Staining a wood surface is not a complicated process, but it requires a responsible approach. In order for the varnish coating to be uniform, the consumption to be minimal, and the stroke to lay evenly, it is necessary to become familiar with the intricacies of the work.
How best to apply stain to a surface: master class
- Spraying is the most effective method. The coating applies evenly, even gray wood will instantly acquire a new shade. The risk of smudges and oil marks is reduced.
- Rubbing the stain over a porous wood product with a rag will help you get the effect of oak or pine even on the most ordinary product made from base raw materials. The composition must be applied carefully, so quick-drying solutions should be avoided.
- A roller or swab for applying stain is useful when covering a small area of wood. In this way, it will be possible to highlight and emphasize the cut pattern, the stain will evenly penetrate deep into the product, creating a protective screen.
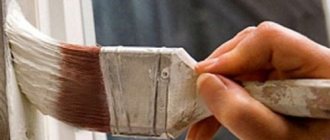
- A brush is most often used for work - the tool is easy to use, wood stains apply smoothly in the chosen direction. The master can play with natural patterns and play with existing patterns by saturating colors in certain areas.
The master decides which method is best to use and paint based on his skills, the type of stain and the surface of the wood. To determine which stain in a particular case, when choosing, pay attention to the instructions for the product, which describe the conditions of application and operation.
Basic rules for carrying out work
Often it does not matter how many layers of wood stain will be applied. The main thing is to follow the technique and take into account some nuances:
- The product must be painted strictly according to the wood grain. This way it will be possible to reduce the consumption of solution for smudges and emphasize the design.
- Wood stain should be of a convenient consistency. Non-aqueous is dissolved with white spirit to optimal thickness.
- How many layers to apply is determined by the master depending on the desired shade and effect. Usually 2-3 layers, each of which is thoroughly dried.
Make the first layer thin - the important thing here is to paint it gradually and evenly. The layer will create a base for subsequent applications and reduce the consumption of mortar solution.
- To avoid dark areas, varnish should not be applied to the same area twice.
- When dry, water-based wood stain raises the fibers. They are cleaned with a coarse cloth in a longitudinal or diagonal direction.
- Aqueous and alcohol solutions dry in 2-3 hours, oil solutions dry in 2-3 days.
The rules are the same for interior and exterior work.
Master class on surface tinting
- Clean the wood from dirt and remove protruding fibers with sandpaper;
- Pour the stain, previously diluted according to the instructions, into a small tray. Cooking can be done in small portions.
- Take the tool and, gradually pouring the solution onto it, spread the varnish over the wood.
Do not try to take a lot of paint - this will increase consumption and reduce the quality of the coating.
Wood stain colors
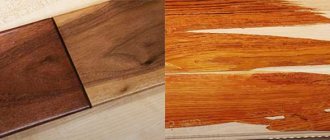
Wood stains differ not only in composition, they come in different colors and shades. Most often, a dark mixture is used; it gives the products a more noble appearance. With the help of such stains, ordinary larch and maple can be turned into oak boards.
Modern stains can give wood the most unusual shade. However, to this day the range of natural wood colors is considered the most popular.
Before choosing a wood stain color, you should study the designers' recommendations.
The most popular stain colors:
- Oak;
- Teak;
- Pine;
- Birch;
- Bleached walnut;
- Plum; Red tree;
- Olive;
- Rosewood;
- Beech.
There are many such examples. It is noteworthy that the names of the same shade from different companies can differ greatly. When choosing the color of stain, first of all, pay attention not to the color palette that is printed on the packaging, but to the samples printed on birch boards.
It is also important to consider that the intensity of the color of the stain depends on the type of wood on which it is applied. Giving a dark shade to an item if the wood from which it is made will be more difficult than darkening an oak item. A non-aqueous stain will not be able to stain a pine board well enough unless it is first desalted, but water-based stains are generally unsuitable for resinous wood species.
Variety of stain shades
The range of stain shades is so wide that it is impossible to cover it completely in one article. It can only be noted that each manufacturer develops its own color scheme for these declarative and protective materials. The most popular tones may be common to them, and even then they may differ from each other.
Color palette of universal stain.
There are several of the most popular shades that are chosen for coating wooden products intended for interiors or outdoor use. And to simplify the visual assessment of popular stain shades, you can refer to the table below:
| Illustration | Brief description of the shade |
| White stain is very popular today for coating wooden furniture, as well as facing materials for interior surfaces. As you know, light colors expand the space and add light to the room. In order to turn the usual color of wood into “bleached oak”, it is necessary to use two types of stain: - the first layer is a white aqueous solution; — the second layer is an oil-wax composition, which is applied after the previous one has completely dried. The oil composition will close the pores, giving them a darker color, and thereby revealing the natural texture of the wood. | |
| Black solutions are actively used when decorating door frames and panels. They are also used when creating combined compositions, or in order to obtain a certain effect. When choosing a black stain to decorate a particular product or surface, it is better to give preference to an oil composition, which can even be used to cover a wooden floor. Oil stains are resistant to abrasion, so they will last a long time without unnecessary need for restoration work. | |
| "Wenge" is the name of a tropical wood that is dark brown in color with black veins and inclusions. This design option for wooden surfaces is perfect for furniture accessories, doors, panels, floors, etc. The noble shade of “wenge” is suitable for classic interiors, giving them respectability and special charm. | |
| If the wood needs to be given a distinctly “rich” look, then for this purpose it is worth choosing the color “mahogany”, which contains red-brown shades. This type of stain, just like wenge, can be used for any surfaces and interior furniture accessories, naturally, if it is decorated in one of the classic or modern styles. | |
| “Ebony” is the name given to a stain that includes shades of silver-gray, blue, black and similar tones. To achieve the desired effect, it is recommended to use this color on hardwood, which should be thoroughly polished before applying the stain. This type of stain can be used to treat wooden flooring, lining installed in the form of panels, as well as individual pieces of furniture. | |
| There are quite a lot of blue and blue shades of stain on sale. The example shown features a color called “behandle”. Blue tones are usually used to cover surfaces and furniture in children's rooms, and sometimes in kitchens. The main advantage of the blue color is the ability to give the interior a certain expression, especially in cases where a good combination is chosen for it. For example, dark blue color looks harmonious with gray, blue, yellow shades, as well as white. Lighter blue tones can be combined with white and gray. | |
| “Mahogany” is a “lighter” option compared to “wenge” and “mahogany” and it may not look so rich and respectable. However, it is precisely thanks to the light tone that design elements of this color will not burden the interior. It is necessary not to forget that red color is considered “aggressive”, so you should not use it in the bedroom, and also unnecessarily overload other rooms with it. The best choice would be to use this color as an accent, for example covering a wooden table with it. | |
| The gray color of the stain must be used very delicately. He is quite capable of adding individuality and neatness to the interior, but sometimes he can also bring gloom and despondency into it. The right solution would be to find the perfect color combination with other design items, since gray shades require a bright revitalization. | |
| The color swatch shown in the illustration is called “spruce green.” Green shades help relax the eyes after a busy day at work, so they can be used to decorate wooden elements in a bedroom or living room. However, it must be remembered that “greenery” should also go well with the overall interior design. This color is also suitable for a children's room, especially if a restless child lives in it. | |
| “Walnut” - this color is popular for bedrooms, living rooms, hallways and corridors. It can be used to cover absolutely any wooden interior elements, with the possible exception of the ceiling surface. This is a light but noble shade that very favorably emphasizes the textured pattern of wood. |
White wood stain
To give your furniture a white color, you don't have to paint it. A lightening stain is also suitable for such work, which will not only make the product lighter, but also emphasize its structure.
Wood stain is intended not only to give the product a lighter shade, but also to protect it from adverse environmental conditions. It is very important to consider, when considering different types of such a product, how and what you will apply it to. If there is a risk that moisture will spill onto the surface of a bleached object, then it is best to use wax, oil and acrylic preparations, but if your craft will be in a dry and ventilated place, then water stain will also work.
With the help of white stain you can visually expand the room by applying it to the flooring or wooden walls
Using white stain you can achieve a very interesting effect and create an aged finish. It must first be painted with a white water-based stain; after it dries, the object must be treated with a stiff brush. A dark-colored wax or oil stain is rubbed into the formed pores on the wood.
When using water stain, do not forget about the protective layer. The painted product must be treated with wax or oil.
Light stains do not always have a pronounced color. There is a colorless stain that is applied solely to protect the wood from adverse natural factors.
Related article: What should the floor be like if the doors are wenge color
How long does it take to dry?
Each type of stain has different drying times , which are indicated on the packaging or in the instructions for the selected composition.
- When applied to a surface, water stains dry from 12 to 20 hours;
- alcohol compositions dry quickly, up to 5-7 minutes. In low temperature or high humidity conditions, drying time may be 30 minutes;
- oil impregnations dry in 1 to 2 days after application;
- acrylic compositions dry within 60 minutes;
- Wax stains dry for 12-14 hours after application.
How to make your own stain
It is not necessary to buy ready-made stain. By mixing dyes such as coffee, a few drops of iodine or black bark shavings, and some chemical elements, it can be made at home. Homemade stain is not only effective, it is also natural.
A few tips on how to make your own stain:
- Boil a glass of larch bark in a glass of water. The resulting product can be used to coat birch products; it will give them a beautiful reddish tint.
- Grind the dried walnut shells into powder and boil for ten minutes. The resulting decoction must be mixed with soda. Apply the solution to light-colored wood and it will turn brown. If you want to change the color of the product, you can treat it with vinegar or potassium bichromate. In the first case, the shade will be gray, and in the second, red.
- Brewed tea or coffee can give the wood different shades. The intensity of the colors depends on the strength of the brew.
- Using a solution of potassium permanganate you will paint the product cherry color.
- A red tint can be achieved by soaking rusty nails in vinegar for several days. Black stain is obtained by adding a decoction of oak or walnut leaves to a vinegar solution.
To properly make stain with your own hands, you need to first watch the instructional video
They make their own stains quite often. They turn out to be environmentally friendly and harmless. Unfortunately, they all tend to fade, so to preserve the color of the product, you need to apply a layer of varnish over the stain.
Technique for highlighting wood patterns
The use of stain for tinting wood is often directly related to emphasizing its natural pattern. For this, a special technique is used, called brushing (from the English word “brush” - “brush”). By using this technology, you can not only highlight the design with color, but also give it a beautiful relief.
The technology is possible to implement due to the existing difference in the hardness of the wood layers. If you look at a cross section of a tree, you can see a pattern formed by annual rings, consisting of fibers with different strength characteristics. Their main difference is their different densities - among the hard layers there are softer ones that are easy to process.
An example of a wooden part that has been processed using the brushing method.
The natural relief appears when the top layer of soft wood fibers is removed, due to which it becomes decorative. The stain used in this method of transforming the material contributes to the color highlighting of the structural pattern.
To use this technique in combination with tinting, any type of wood with thick or thin longitudinal fibers is suitable. Wood structured in this way is used for the manufacture of furniture, flooring, paneling, as well as for the manufacture of individual elements of decorative finishing, for example, framing cladding made of other materials.
Brushing can be called the simplest and most affordable method of giving wood individuality and decorativeness, as well as, if necessary, artificially “aging” the material. In this case, the depth of the relief can be distinguished in different ways. For example, boards intended for flooring are not deeply processed, since dust and dirt will collect in the recesses. However, the pattern can be distinguished visually by using one or more stain solutions.
Brushed and stained boards.
It is quite possible to carry out the process of such wood decoration at home. This will require some simple hand tools and some common power tools.
Tools and devices that can be used to create structural relief on the surface of wood.
So, to give the tree a certain look, you need to prepare the following tools and materials:
- Wood stains for tinting, as well as brushes, rollers or spray guns. The tool is selected depending on the consistency of the tinting composition.
- Hand-held metal brushes of varying hardness, or a grinder (electric drill, screwdriver) with a metal brush attachment. These instruments are used to remove softer fibers.
- Sandpaper of different grain sizes - for rough cleaning and fine polishing of the relief.
- Varnish for the final coating of the finished product.
Sanding the board with a sander and a wire brush.
Everything is fine, but the master works with his bare hands. Don’t follow his example - don’t neglect your protective equipment! It should be noted that with a small sander at your disposal, the work can be done much faster, and the cleaning of the wood will be more uniform. This is due to the fact that the device operates at a constant speed.
For grinders, special narrow or wide brush attachments are provided, made of metal, polymers with an abrasive applied to it, as well as hair or sisal. By adhering to the step-by-step work, using such a power tool, you can make ideally decorated parts or blanks from wood for installing interior cladding.
The work is carried out in the following order:
Samples of blanks coated with a double layer of stain and brushed.
- If you plan to show the structural design in color, then the first step is to whiten the board or other wooden piece using one of the types of stain. After this, you should wait until the material dries completely - it should form a dense layer or completely saturate the wood several millimeters deep.
- A colored layer of stain is applied on top of the bleached workpiece so that it completely covers the primary one. The second layer of solution must also dry well, otherwise the wood will produce burrs during processing.
Tinting wood with stain: step-by-step instructions
To make the product look neat and beautiful, you need to cover it with stain correctly. If the stain is applied poorly, it can fade in just a few weeks; also, if you do not follow the staining technology, you risk getting a surface covered with stains.
How to properly stain objects:
- First of all, it is necessary to remove a layer of old paint from the surface of the product. This can be done using sandpaper.
- Next, the surface is degreased with alcohol, white spirit or gasoline. If the product is made from resinous tree species, then it is deresined.
- The stain is heated and applied in a thin layer to the surface of the product. The top of the item is processed first. Layers are applied on top, one on top of the other, until the desired shade is achieved.
After the stain has dried, the product must be coated with several layers of varnish. Before applying a new layer, the dried varnish is treated with fine-grained sandpaper.
The stain was defective: ways to eliminate the consequences
Violation of work technology or the use of low-quality composition can cause defects, which sometimes can still be eliminated. If streaks have formed due to the large amount of stain applied and the excess being removed in a timely manner, you will have to remove the impregnation layer. Subsequent application of the composition will lead to softening of the base coating. Excess stain is removed with a rag.
Excess composition should be removed immediately
If the coating turns out to be non-uniform, for example, characteristic spots are visible, the composition is removed from the painted area mechanically, most often using a plane. All the face veneer will have to be removed from the plywood. After this, the processing is repeated.