The table in the gazebo is one of its most used parts. It must be smooth, durable and beautiful, otherwise you will not experience any pleasure from eating and ordinary “get-togethers”.
On the Internet I found more than ten ways to make a wooden table, using boards, bars and even old half-rotten scraps. However, it is the method proposed below that I consider the most interesting for making it yourself.
The proposed instructions use the most common available building material - board . It is quite possible that you have it on your site or you have access to a place where you can get it.
No complex design solutions are used as fastenings; ordinary galvanized self-tapping screws will be enough.
Drawing with dimensions
The finished product will have the following dimensions:
- Length - 200 cm.
- Width - 75 cm (5 boards of 15 cm each, not indicated on the drawing).
- Height to tabletop - 70 cm.
- The protrusion behind the leg is 30 cm.
Depending on the size of your gazebo, you can proportionally reduce or increase the size of this table. In general, it is suitable for both small and medium-sized gazebos. In larger structures it will be necessary to use heavier and longer material.
Beautiful examples for inspiration
Wooden pergola-type solariums look elegant and weightless. Textiles can be used to create shade. The Mediterranean style in the garden of a country house will evoke pleasant thoughts of the sea and give a feeling of complete relaxation and bliss.
Oriental style is too demanding in terms of design. For example, a Chinese gazebo should stand in a garden that will fully meet all Eastern traditions - these include rock gardens that will support the idea, and paths paved according to all the rules of the East, and the calming surface of artificial reservoirs.
A forest-style gazebo appears as a kind of shelter for a real hunter. For such a construction, you can actually use materials from the forest without buying ready-made beams or round timber. This building looks unusual and authentic.
Even when decorating your site in a modern style, for example, hi-tech or minimalism, you can use wood material. The main thing is to properly process the wood and find the necessary form for the future building.
Wooden gazebos with a stove look very cozy. The combination of wood and stone is the main feature of the rustic style. Natural rough materials look very harmonious together.
To learn how to build a wooden gazebo with your own hands, see the following video.
Construction material and tools
To make a wooden garden table you will need:
- Dry board 150mm by 50mm (about 20 meters).
- Galvanized wood screws.
- Grinder with a grinding wheel or plane.
- Screwdriver/drill.
- Jigsaw/saw.
The main task is to find 20 meters of board, and the rest is not a problem at all. Self-tapping screws cost pennies, and in a pinch you can take the tool for the job for the weekend. If you have these resources, then you can start working.
Design options and drawings
On the Internet you can find many drawings of varying complexity with photos, according to which it is proposed to make a table for a gazebo out of wood with your own hands. But if you have minimal carpentry skills or none at all, we will look at how to make simple, but beautiful and functional models of gazebo tables with your own hands.
Option 1
This photo shows the simplest version of the table, which you can make yourself.
A simple wooden garden table.
Required materials for production:
- Beam 40*40 mm for legs (50*50 mm is possible).
- Board 20*100 for table top.
- Board 2*75 mm for drawer.
- Metal corners.
- Screws.
For work we will use the following drawing. It features a table with dimensions of 120*80 cm and a height of 70 cm, but if necessary, it can be adapted to your needs and the dimensions of the gazebo.
Tool required for work (relevant for tables of all designs, discussed below):
- Saw/jigsaw.
- Grinder with a grinding wheel (or a plane).
- Electric drill.
- Tape measure and pencil.
Step-by-step manufacturing instructions:
- First you need to outline and cut 4 equal parts of 70 cm each from the timber - these are the future legs of the table, and also cut 8 parts of the board of 105 cm each (for the tabletop). For the drawer, you need to cut 4 pieces of 70 cm and 100 cm.
- Now you can start assembling the base. The base of the table consists of a frame and legs. To connect them, you can use metal corners:
You can also use a wooden block.
Screeding the frame with a wooden block.
- The final step is attaching the tabletop. You can use self-tapping screws for this. The result should be a table like in the photo:
Step by step construction process
At the end there will be attached a video from the channel “ Through ZhPU ”, in which this method was described (the name they chose is amazing, can’t you say anything??).
Below you will find instructions, after going through the steps of which, at the exit you will receive a ready-made table for the gazebo. The quality of the photos is not the best, but they are enough to understand the process.
Preparing the boards
First of all, the boards need to be marked and cut. Based on the dimensions of the drawing, you will need to make 18 separate parts, which will later be folded into the finished table.
After you have prepared the boards, they need to be dried in the sun. This is done in order to then sand them properly. If they are wet, the grinder circle will become clogged and you will not be able to process them properly.
There are no such problems with an electric planer, but still make sure that the wood is dry in advance.
Making a countertop
The table top consists of 5 parallel boards, fastened together with four 50 mm by 50 mm slats (to which the legs will be attached in the future). The space between the edge of the table and the slats is 30 cm. The tabletop looks like this from the back side (photo below).
If your boards are smooth and straight, then there will be no gaps or unevenness on the front side of the table. In the future, the tabletop will be additionally sanded and processed, so for now you can ignore it.
Making and attaching legs to the tabletop
Having prepared the boards in advance, you need to assemble the legs. The lower part of the legs on which the entire table structure will stand looks like this:
The finished version of the legs looks like this.
The table, like the legs, turns out to be quite massive, but it will withstand both a pot of potatoes and dancing guests. After attaching the legs, it will be necessary to additionally sand the bottom part so that the structure stands stable.
Strengthening the legs with an additional board
For greater stability, an additional board is installed between the legs, which is also attached with self-tapping screws. Its dimensions are about 165-170 cm, the edges of the board should protrude slightly beyond the legs (in the drawing they are flush with them).
Final finishing and sanding
After assembling the entire structure, it is necessary to process the corners and surface of the tabletop. Having achieved a smooth and even surface, you can bring the finished product inside the gazebo (I hope the table will fit through the front door, otherwise you will have to disassemble it) and enjoy your work.
Video
The proposed option for manufacturing the table was discussed in a video on the Youtube channel “ Through ZhPU ”. Despite the provocative name, the quality and thoroughness of the finished product did not raise any questions, and besides, the video is quite short and intuitive.
I directly recommend that you watch it, and also support the channel owners with a subscription or likes, the guy did a really good job.
Table made of wood based on a glued top
This design has L-shaped legs, which are also obtained by gluing together boards 20 mm thick. To make the legs reliable, they are fastened together with 5 self-tapping screws. There is no way to do this without drilling preliminary holes. Firstly, the fastening is reliable, and secondly, the heads of the screws can be hidden by drilling recesses of a suitable diameter for them. You can close the caps in several ways: putty or make plugs from wood and place them on glue. As putty, you can use PVA glue with the addition of wood dust. As a result, after the putty has dried, it will hardly be possible to find the place of attachment.
Legs with markings for fasteners
When making such blanks for the legs, you need to ensure that the mounting angles are 90 degrees. After the glue has dried, the legs are sanded and coated with varnish or other paintwork. Finally, the finished pieces for the legs are dried.
Table legs are ready
While the legs are drying, you can start making the tabletop. For this, boards of the same thickness are used, but their width can be different. To begin with, you just need to assemble the tabletop, making sure that the boards fit together without gaps and that their edges are smooth.
It is very important to find a flat surface, which determines the quality of the countertop. After coating the joints with glue, the boards are connected and tightened with clamps
Although the picture shows one clamp, it may not be enough. As a rule, you need to use two clamps, which will make the tabletop better and more durable. After the glue has completely dried, the clamps are removed, and the tabletop is trimmed and sanded. As a rule, such work is not in vain and the results of this work are simply pleasant to look at.
Gluing a tabletop from boards
This technique allows you to get a tabletop of any shape; just cut the boards along a pre-drawn line.
If the tabletop is framed, it will look more attractive, although it is not so easy to frame a round or oval tabletop. As a frame, you can use thinner boards that cover the tabletop on all sides. Naturally, the workpieces are polished before this. It is better to use finishing nails as fasteners, and the ends of the tabletop are coated with glue to ensure secure fastening.
We fasten the bar around the perimeter
Once the glue has dried, the joints are sanded using sandpaper.
This is what the finished tabletop looks like
After this, they begin to attach the legs, but first of all, from the bottom of the tabletop you need to secure a frame made of 4 boards. Frame mounting may vary. The best option is to use metal corners, a couple of pieces on each side. They are installed on the inside of the frame.
The legs are attached to the inside of the frame in the corners, especially since the legs are L-shaped and fit exactly into place. The legs are attached using self-tapping screws, a couple of pieces on each side. L-shaped legs are more stable, so you can do without additional jumpers between them.
How to make a country table “Four Elements”. Stroyhak
Watch this video on YouTube
Examples of gazebo tables
In addition to the proposed option, there are many more ways to make a table yourself. Below is a selection of ideas that you can implement in your gazebo. In addition to the standard rectangular shape, it can be made round, hexagonal, large and so on.
Don't forget about other materials - metal structures also have their place.
Made of wood
I would still like to give priority to classic wooden tables and provide more photographs of possible designs. More non-standard solutions will follow, but for now let's look at simple examples.
In addition to the table, you will also need to make or buy a wooden bench. This issue is discussed in more detail in the article - Do-it-yourself bench for a gazebo: photos, videos, options and ideas.
Round
A square or rectangular table in a round gazebo will look unnatural. Therefore, for this type of room it is better to choose a round shape; fortunately, you can also make it yourself, although it is noticeably more difficult.
Hexagonal (hexagonal)
Ideal for a round gazebo. Each person at the table gets his own personal space, which is not disturbed by people sitting next to him.
Big
It is quite difficult to make a table of large sizes, since it is necessary to work with massive and heavy material, and also to achieve compliance in technical terms on a larger scope of work.
This creates some difficulties for those who like to build on their own, however, with a strong desire and availability of materials, this option is also feasible.
Mosaic
A table with mosaic pieces on the tabletop looks interesting and unusual. There are many options for making this type, including using live leaves. Introducing this style in your dacha is not a problem at all.
With metal structure
An original solution would be to install a metal table in the gazebo. This material is less susceptible to environmental influences, including spilled drinks and fallen pieces of food, and also looks more impressive.
It’s not difficult to make a table for a gazebo with your own hands from wood. Not only a master can handle the job, but also a person who rarely uses carpentry tools. A homemade design has a number of advantages over a factory one. Factory products are produced in certain standard sizes. Their shape is not always suitable for round or polygonal walls. They look good in the photo in the catalog, but in practice they turn out to be too small or too massive. The only way to solve the problem is to do everything according to your own drawings. Only this solution will allow you to achieve maximum comfort. It becomes possible to set the necessary technical parameters yourself - height from the floor, distance to opposite benches, shape. You can choose a material with an unusual color and texture, or develop a unique design that has no analogues.
How can you make a base?
In this case, there are two options. Everyone makes their own choice depending on their skills in working with a particular material and their own preferences.
Metal
It is characterized by durability and strength
. The product will also be characterized by low weight if a profile pipe with a wall width of no more than 2 millimeters is used as a base. But in this case, you cannot do without a welding machine and the skills to use it in practice.
First you need to assemble a rectangular frame so that its diagonals are clearly visible. One or two crossbars will help strengthen the structure. All that remains is to install the legs.
Note. When the frame is made, it is covered with a layer of primer. In this case, it is necessary to use high quality paints and varnishes.
How to work with wood?
Wood is an option no more complicated than metal structures.
Here everything is even simpler, because there is no need for welding work:
- A hammer and a hand saw are enough to get the job done.
- The supporting legs and frame are mounted simultaneously, then the structure will become solid and unified.
- The level of rigidity should be at an appropriate level. The table is assembled on a flat surface.
- First we lay the frame on this surface. We insert the legs into its corners and secure them with long wood screws.
Advice. The ideal option is when the comb is cut on the frame bars. It is necessary to select grooves in the legs. But for a dacha this is a difficult option, and besides, it will require a milling machine.
All base elements must be cut at an angle of exactly 45 degrees. There should be no visible deviations in the cutting plane. After assembling the frame, it is recommended to cover it with metal elements.
You can purchase a set of parts designed just for this type of work. Holes for screws are already made in them at the factory. The homemade table for the gazebo is ready.
Selection of shape and size
You should start by measuring the floor area, as well as the distance between opposite walls and benches. Even if a large room requires a miniature tabletop, its location and dimensions must be thought out.
To make your task easier, you need to draw a diagram indicating the length and width of all elements. The more accurate the visualization, the less chance there is of making a mistake. It is advisable to depict all details to scale. On paper you will also need to draw the legs and their fastenings, taking into account its features. When planning, choose a material for the base - metal or wood.
If the countertop occupies a small part of the space, the configuration of the walls is taken into account not only when it is closely adjacent to them. With a large distance between them, the repetition of shapes helps create a feeling of symmetry in the interior.
It is easier to fit into a circle another smaller circle or a polygon whose edges are equally distant from the center. An inscribed elongated rectangle will take up a lot of usable space. Round tabletops are often used in rectangular spaces because they are comfortable and look colorful. To save usable space, it is better to install a square or rectangular tabletop in an elongated gazebo.
The legs are placed in the center or along the edges. The central support at the bottom expands to provide stability. The legs are vertical and cross-shaped, intersecting in the center. They are made flat or voluminous - square and round in cross-section. The closer they are to the edges, the more they interfere with the legs. The closer the supports are to the center, the less stable they are. When designing, you need to choose the “golden mean”.
Table with straight legs
Furniture of this design is the easiest to manufacture. The table turns out to be comfortable and stable. It is installed indoors, on an open terrace or in the garden. To make the legs, prepare 2 horizontal strips for attachment to the tabletop and for support. They are connected by vertical posts.
On a note! The legs are made different. Some models do not provide support for the bottom boards. Instead, the tabletop is supported by vertical posts. For strength, they are fastened from below with crossbars.
To simplify assembly, additional grooves are not used to connect the boards. To securely fasten the elements, all joints are glued with wood glue. Then the boards are connected to each other using self-tapping screws.
The table is assembled in the following order:
- The parts for the legs are cut out with your own hands according to the drawing with the photo. They are connected to each other with self-tapping screws, having previously coated the joints with glue for woodworking.
- The tabletop elements are laid out on a flat base and the position of the legs is marked. Then they are fastened with self-tapping screws.
- The legs are tightened with horizontal ties.
- After the glue has dried, all surfaces are sanded.
- The product is treated with antiseptic impregnation and varnished.
Material selection
On the Internet you often see photos of wooden tables and benches for a gazebo made from waste. This solution allows you to reduce the time spent searching for blanks and the costs of purchasing them, but it is impossible to achieve good quality when using this method. Its disadvantages are not only low strength and short service life, but also the appearance of the product, which leaves much to be desired.
The work will require high-quality materials. The most commonly used conifers are spruce and pine. Deciduous trees, especially oak, have high strength. They are more difficult to process, but will last longer. In addition, hardwoods contain less resin.
The workpieces must not be damaged. Boards with falling knots and resin stains are not suitable for work. Gray spots on the surface must be cleaned off. These are traces of mold, which will gradually destroy the array.
The material is treated with antiseptics to prevent mold and fire retardants to retard combustion.
Products must be straight. It is quite difficult to straighten curvatures at home. The workpieces must be dried, otherwise they will change their size and shape. As a result, the connections between the parts will have to be constantly updated so that they do not fall apart. It is better to dry the products in the sun, laying them out in stacks and separating the tiers with even spacers necessary for ventilation. At night, the stacks are moved to a shed or covered with film to prevent dew from settling on them.
We suggest discussing the topic: “a table for a gazebo - we make it ourselves.” Basic information is collected here and presented in a convenient form.
Useful little things
- The wisest thing is to take your time. Any work requires thoughtfulness and precision in execution. Don't set yourself any deadlines. Do work when you are in the mood.
- If something doesn’t work out, put the craft aside and come back to it after a while. Such work will only be a joy, and you will achieve good results.
- Don't take on a complex project right away, start with simple work. It is necessary to gain some experience for subsequent more complex crafts. Using power tools will make your work easier. Be sure to follow all safety precautions when working with any tool used for wood processing.
Even a small splinter can become a problem if you do not pay attention to it in time. Follow safety regulations
Always wear glasses when working with wood products, especially if machining is involved. If you have little experience, but you want to make at least a wooden table in your own home with your own hands, start by going to the building materials supermarket. There you will find everything you need for individual creativity. Design solutions will be suggested by the materials themselves. To begin with, use wooden blanks that require minimal post-processing. Carry out all work in a spacious room. A small workshop in the country is an ideal option. Painting should be carried out in a well-ventilated area, even if low-toxic compounds are used. Observe all required drying times for glued and painted parts.
How and from what to make a table for a gazebo
A well-made gazebo with a table and benches is an essential attribute of a good dacha or country house. You will probably find tips on how to assemble a gazebo yourself on our portal. All that remains is to decide how to make homemade furniture to make spending time in the gazebo as comfortable as possible.
There are many ways to make your own table for a summerhouse in a gazebo. But most of these methods involve the use of lumber.
The fact is that wood has a number of advantages, including:
- Ease of machining using simple tools,
- Reliability and durability,
- External attractiveness of wood products,
- Affordable price of material.
Read also: DIY cookie cutters
Let's try to figure out what configuration of lumber and what type of wood will be the best material for making country furniture.
Lumber Configuration
Today, the range of lumber in construction stores is presented in the following categories:
To make simple country furniture with your own hands, you can use three types of lumber, namely, boards, timber and slabs.
- Edged board , due to the wide range of standard sizes, can be used for the manufacture of all structural elements of furniture, from the tabletop flooring to the supports. The edged board is processed on all sides, and therefore it will be enough to sand it before use.
- Board 250x40 mm length 2 meters – 4 pcs.
- Beam 100x100 mm length 750 mm - 4 pcs.
- Board 100x20 mm length 1600 mm - 2 pieces,
- Board 100x20 mm length 800 mm - 2 pieces,
- Board 100x20 mm length 750 mm - 2 pcs.
Manufacturing technology
So, how to make a table for use in the country?
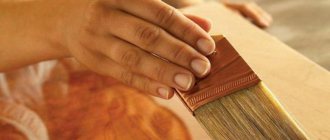
Important: when applying stain, move the brush strictly in the direction of the wood fibers.
Caring for homemade country furniture
Is your round table ready and do you like it?
To keep it that way for as long as possible, you need to properly care for it:
- Make sure that the table in the gazebo is not in direct sunlight,
- Once a week, clean the varnished surface from dust and cover it with inexpensive products such as polish,
- During the cold season, the table can be brought indoors to prevent the varnish layer from cracking.
As you noticed, the instructions for making a table for a gazebo are simple, and anyone can cope with the task. In order to achieve the best results, you must follow the technology given in the article and use the best materials that can be purchased.
In order to simplify the process of making country furniture as much as possible, watch the video in this article.
Stationary round tables
A round gazebo table is a good solution for gazebos with a small area.
Let’s take a closer look:
- For the legs, beams with a section of 10 by 10 cm are most suitable.
- We make a hole in the bottom of the leg.
- We coat the groove with epoxy glue, completely cleaning it from the inside.
- You will need to insert a pin made of wood or metal inside. It will help fix the structure to the floor.
- To insert the rod, drill a hole in the floor surface.
- We can't do without four struts at an angle. Otherwise, the legs will not be fixed to their mount with the table.
- To attach it to the leg, we use a self-tapping screw and glue. Without this, it is impossible to understand how to make a round table in a gazebo.
- The next stage is making the countertop. We assemble a shield in the shape of a square or rectangle from a tongue and groove board. A small nail is driven into the center.
Note. We tie the thread to one of the nails. A pencil is attached to the free end. By pulling the thread, we draw a circle on the material.
- We cut the tabletop according to the markings. At least three crossbars from the bottom. After this, the table fastening will be more reliable.
- The next stage is connecting the tabletop with the legs.
We use spacers for final fixation of the structure. The round table for the gazebo is ready.
How to make a wooden table for a gazebo with your own hands
In a nutshell, tables should always be made of high-quality wood. It is better to purchase it in a carpentry workshop, having made preliminary measurements. Write them down on a piece of paper and draw a schematic layout. All measurements are recorded.
The best option is wooden benches and tables made of hardwood. For example, cherries, pears, birch, ash. Over time, hardwood may change its shade, although this does not affect the quality of the material. But conifers, despite their natural softness, ease of processing and attractive appearance, have one significant drawback. They regularly emit resins that can ruin both the festive tablecloth and the clothes of people gathered at the same table.
The advantages of such a table are a carriage and a large trolley. It is lightweight and quite durable. To make a tabletop, it is important to mark the boards and cut them according to the marked lines. After this, the boards are fixed, and the guide bars are screwed onto the back side using self-tapping screws.
It is advisable to make the legs from the same material as the table top. How many supports will there be? It all depends on the shape of the table and its size. The main thing is that the legs are stable. If the floor is uneven, you will have to use legs of different lengths to compensate for the slope of the surface. After the assembly is completed, the product is coated with at least 3 layers of varnish.
Making a table from timber
To build a gazebo table yourself , you will need to take from 3 to 5 beams. Choose a smooth material that is carefully fitted. To make the legs, measure 4 pieces of timber. The width of the first two is 50-100 cm, the second will be shorter. The long beam will go on the base, the short one will lie on top. The material used is carefully adjusted to each other and connected with self-tapping screws, and the underside is fixed with slats. You can get by with glue, but it is not as reliable.
Making such a table is impossible without the main element - a stump. If you couldn’t find anything suitable at your dacha, you can only be given one piece of advice. Go to the forest and try to find the base for the table there.
Read also: How to soundproof an apartment
The found workpiece is thoroughly dried. For these purposes, you can use a dry and warm room and leave the stump in the sun. The drying process is quite lengthy and can take 1-2 months.
You will have to work hard to remove all the bark. A chisel and chisel are best suited for these purposes. Next, the surface is leveled with a plane and sanded with sandpaper. The final touch is to varnish the structure.
If the gazebo has a very beautiful floor, it is important not to damage it with such an original decoration. You can do the following - when installing the table, use special wheels or a stand.
Summarize
Your own table in the gazebo, which you made yourself, is at least a reason for pride, and at most a means for a cozy pastime on warm summer and cold autumn evenings. Show your skills, test your skills, save your budget significantly. But never forget about safety precautions, choose durable, time-tested materials. Every visit to the gazebo will remind you that it was made with your own hands.
I also want to share an excellent video from the “Prosto TV” channel, in which the author shows in detail the process of making a wooden table. Enjoy watching!
Picnic table of the most comfortable sizes
I like a table with benches of this design for its solidity and durability: I set it up and it stands, you can’t take it anywhere. The most difficult thing is to find the optimal sizes. The benches cannot be moved or moved away from this table, but it needs to be comfortable for all guests, regardless of their height and build.
Before starting work on creating such a table, our participant with the nickname keednex asked himself a few questions.
- At what height should I make the countertop?
- At what height should I make the bench?
- What should be the ideal gap between the table top and the bench to make it comfortable to stand up and step over the bench?
In his work, he decided to focus on the standards from the picture below.
And make a table with these dimensions.
KeednexFORUMHOUSE Member
It turned out very comfortable. This was appreciated by people with heights from 160 to 195 cm and different builds.
The table was made using boards lying idle and 0.147x0.037-0.05x6 m.
Keednex
First I measured the board. I built a table using these dimensions in sketchup so that I could see the angles and the required number of cuts in advance.
The resulting specification is:
- bench and tabletops – 1.8 m, 9 pcs.;
- bench holder -1.7 m (in the drawing it is 1.68 m; the master decided to round it), 2 pcs.;
- table top holder – 0.73 m, 3 pcs. (two side holders and one – a tensioner in the center, also known as a stop for the jib);
- bench puller in the center – 0.29 m, 2 pcs. (when assembling the table it turned out that these parts were not needed, so they were not used);
- jib – 0.83 m, 2 pcs. (cuts at 30 degrees);
- table legs – 0.92 m, 4 pcs. (with cuts of 30 degrees).
The cut of the legs is calculated using a special application on the phone. You need to specify the width of the board and the required angle - the program showed at what height to place a point by drawing a line to which it would be 30 degrees.
Assembling the table took several hours. When finished, it is better to round off all the elements of the table to avoid bruises on the corners, especially if there are children in the garden, sand the product with an emery wheel on a grinder and paint.
We build a table for a gazebo with our own hands
What's a gazebo without a table? After all, it is built, as a rule, for family and friendly gatherings. We have already told you how to build a bench for a gazebo with your own hands. In this article we will tell you how to make a practical table.
Examples of successful tables and benches for a gazebo
What should a gazebo table be like? Comfortable, spacious, practical and certainly wooden. Here are examples of the most successful, in our opinion, tables and benches for a gazebo, which anyone can assemble with their own hands:
To dine comfortably at the table, one person needs at least 60 centimeters of space. The distance from the wall of the gazebo to the edge of the table should be at least a meter. To make the table convenient to use, it is recommended to make it between 75 and 90 cm high (the standard table height in European countries is 85 centimeters).
The gazebo table can be either mobile or stationary. The mobile table can be removed if necessary, since it is not attached to the base of the gazebo, but is simply placed on the floor. Accordingly, if the surface is uneven, the table will wobble. A table installed permanently is more reliable in this regard, however, if you want to arrange a small disco in the gazebo, you will not be able to remove the table.
Choosing material
To make the table for the gazebo not only comfortable, but also attractive, you need to choose the right material. The optimal solution would be timber and planed boards without flying knots. The timber will be used to create the frame of the table, and the board will be used to make the tabletop. By the way, it is better to use hardwood (birch, oak, beech, etc.) for the countertops. You can use a ready-made furniture board with a thickness of 25-40 mm to make a tabletop. The tabletop is the “face” of the table, so it should look impressive.
A similar design can be used for benches:
Design differences
Gazebo furniture can be of various shapes and sizes. The choice of a specific design depends only on the owner and his preferences. The size must correspond to the capacity of the building. The distance from the table to the wall provides enough space for arranging benches and free movement inside.
The most common tabletop shape is rectangular. Suitable for all styles. The table is very comfortable and practical. Allows you to use the building space functionally and economically.
If functionality is a priority, then there are options for folding tables Source produto.mercadolivre.com.br
Large capacity accommodates up to 8 or more people. Benches are placed on the sides to suit the length of the tabletop. This design will not be convenient if the shape of the gazebo itself is round.
Therefore, for buildings with a round shape, designs with a round, oval, or hexagonal tabletop are suitable. This table is placed in the center, and there are seats around it. In this case, chairs, wicker chairs, and benches would be more appropriate.
See also: Contacts of construction companies that offer small form design services.
DIY gazebo table - useful tips
A gazebo is a cozy structure that can be found not only on areas of country houses, country houses or private (within the city) houses. Facilities for a pleasant pastime are located in kindergartens, courtyards of apartment high-rises, city parks, squares and boulevards, as well as on the territory of enterprises in areas reserved for recreation and eating. And often people make benches and a table for the gazebo with their own hands to make their pastime even more enjoyable.
This is what a homemade drawing for gazebo furniture might look like
- Use only stainless steel fasteners - this will prevent the harmful effects of moisture on the structure.
- Prefer self-tapping screws, as nails can become loose over time, causing the table to become loose.
There can be only one support, but the possibility of its deformation should be completely excluded
Advantages and disadvantages
Before starting the process, you may be worried about the question: “Is it worth it?” Isn’t it easier to order a design, or buy a ready-made one? It might be simpler, but it's not the best option. And you will see this by reading this article.
A convenient country table with benches that does not require large manufacturing costs
Let's start with the fact that a gazebo on a summer cottage has a significant place. It gathers all relatives and friends, and is also an object of self-expression and pride for the owner. The table here must be of good quality in order to accommodate all the guests, and at the same time skillfully made, preferably by the hands of the owner, which will indicate his care for his own home.
Gazebo table of unusual shape
By making a gazebo table with your own hands, you have several more advantages.
- Price. Of course, making furniture yourself will cost less. After all, you don’t have to pay for the services of a master; moreover, you can use improvised means and existing tools.
- Appearance. It is not always possible to find what is needed in a particular case among ready-made goods. By dividing everything with your own hands, you already have a completed idea in your head, and you can accurately bring it to life.
- Dimensions. No less significant factor. During the design process, you take into account all the dimensions of the pavilion and the chairs or benches. You don't have to run around stores looking for furniture of the right size. All you need to do is make the correct drawing.
More about lumber and configuration
What material is best used for manufacturing? Construction stores now sell lumber that falls into the following categories:
- Beam.
- Board.
- Sleepers.
- Lagging.
- Gorbyl.
Edged boards
Available in a wide range of standard sizes:
- Therefore, they are suitable for the manufacture of any elements in a structure.
- In the factory, edged boards are processed on each side.
- Before use, the buyer only needs to sand the product.
We have figured out one part of the question of how to make good tables yourself.
Edged beams
Edged beams for carpentry work Most often needed when making supports:
- Requires sanding, just like edged boards.
- It is recommended to use special antiseptic compounds, this will extend the service life.
Once dry, you can add a good quality paint finish.
Gorbyl
Suitable only for those who deliberately give furniture the appearance of raw, rough material. Such large tables in the gazebo also look stylish.
The processing of the slab is carried out only in two planes. The sides remain untreated. But you can use these materials as an alternative to countertops.
More about lumber and configuration
What material is best to use for making
Construction stores now sell lumber that falls into the following categories:
- Beam.
- Board.
- Sleepers.
- Lagging.
- Gorbyl.
Edged boards
Available in a wide range of standard sizes:
- Therefore, they are suitable for the manufacture of any elements in a structure.
- In the factory, edged boards are processed on each side.
- Before use, the buyer only needs to sand the product.
We have figured out one part of the question of how to make good tables yourself.
Edged beams
Edged beams for carpentry work
Most often needed when making supports:
- Requires sanding, just like edged boards.
- It is recommended to use special antiseptic compounds, this will extend the service life.
Once dry, you can add a good quality paint finish.
Gorbyl
Suitable only for those who deliberately give furniture the appearance of raw, rough material. Such large tables in the gazebo also look stylish.
The processing of the slab is carried out only in two planes. The sides remain untreated. But you can use these materials as an alternative to countertops.
