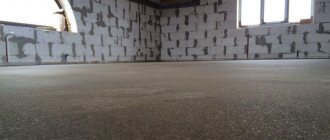
Concrete floor screeds are the most common method of arranging them both in apartments and in private houses. If desired, you can install a “warm floor” system under it for greater comfort. In stores you can find many special mixtures for screeds - the article will present the best options, characterized by high quality and a reasonable price.
TOP floor screeds
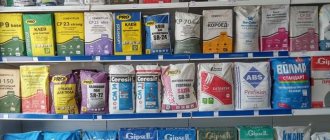
Rating of the best building mixtures for floor screed
| Photo | Name | Rating | Price | |
| #1 | Holcim M300 | ⭐ 5 / 5 47 — votes | Find out the price | |
| #2 | Weber Vetonit 6000 | ⭐ 4.95 / 5 21 - voice | Find out the price | |
| #3 | Bolars | ⭐ 4.9 / 5 5 — votes | Find out the price | |
| #4 | Paladium Palafloor-307 | ⭐ 4.8 / 5 5 — votes | Find out the price | |
| #5 | Vilis M-300 | ⭐ 4.8 / 5 2 - votes | Find out the price | |
| #6 | Rusean M-300 | ⭐ 4.75 / 5 2 - votes | Find out the price | |
| #7 | NOVAMIX M-300 | ⭐ 4.75 / 5 6 — votes | Find out the price | |
| #8 | Stone Flower M-300 | ⭐ 4.75 / 5 3 - votes | Find out the price | |
| #9 | Titan M300 | ⭐ 4.65 / 5 2 - votes | Find out the price | |
| #10 | Axton | ⭐ 4.65 / 5 6 — votes | Find out the price | |
| #11 | KNAUF Tribon | ⭐ 4.6 / 5 4 - votes | Find out the price | |
| #12 | Ceresit CN 173 | ⭐ 4.6 / 5 11 — votes | Find out the price | |
| #13 | Eunice Horizon | ⭐ 4.55 / 5 10 — votes | Find out the price | |
| #14 | Perfecta (fibre layer) | ⭐ 4.5 / 5 5 — votes | Find out the price |
Which floor screeds would you choose and which ones would you recommend?
Take the survey
Mixtures for floor screed: composition
All screed mixtures can be divided into three groups according to their composition:
- Cement. Solutions of this group are ideal for any work. In this group the filler is sand. For quick drying and greater strength, plasticizers are added to the solution, which determine which screed to take: if they are large (>0.6 mm) then for rough leveling, if medium-sized (~ 0.6 mm) then for finishing, and if the smallest ones - then you need to take self-leveling compounds.
Example of cement-based mixtures - Plaster. Gypsum-based solutions are great in cases where you need to slightly level the wall. Such solutions are distinguished by their plasticity, lack of shrinkage, and quick drying. Well suited due to its hypoallergenic properties. Gypsum offers good heat-storing properties. True, there is one “but” - such material does not withstand moisture and quickly deteriorates from it.
Example of gypsum mixtures - Dry screeds. They are made on the basis of expanded clay or polystyrene. They combine well with any base, do not cause subsidence, and most importantly, you can work with such screeds immediately after applying them, which is why they are used for rough leveling.
Example of dry mixtures
Expert opinion: Afanasyev E.V.
Chief editor of the Stroyday.ru project. Engineer.
Already know how to properly make a floor screed? I have already prepared detailed instructions for screeding the floor, I advise you to read it!
Which screed to choose
In order not to make a mistake with your choice, you need to take into account all the properties of screeds listed above. For industrial buildings, if there is no urgency, you can use the old, time-tested, and easiest to manufacture wet pour.
For apartments, a semi-dry surface would be most suitable, since it significantly improves indoor living conditions due to its versatility and the formation of a healthier microclimate, and in addition, it is environmentally friendly and non-flammable.
You can add additional floor insulation or an antiseptic if there is a high probability of bacterial contamination.
If the work needs to be done quickly and the issue of saving is not urgent, you can choose gypsum fiber or chipboard. They should also be used when the floor covering needs to be made as light as possible.
Criteria for choosing a mixture for floor screed
Everyone is looking for a good dry mix for floor screed. And many people immediately pay attention to their packaging. It usually shows a level of quality and high strength.
Based on the set of rules SP 29.13330.2011, all floor screeds can be classified according to several indicators:
- adhesive and compressive strength;
- frost resistance (indicated by the letter F and a two-digit number);
- thickness;
- concrete class (denoted by the letter M and a three-digit number).
Of all the mixtures containing cement and sand, the M300 mixture . Although its full strength is not achieved immediately, but over time, you can walk within a couple of days after application. The three-digit number indicates the pressure exerted on the material.
Important! The number 500 is the maximum possible compression pressure (kg/cm3).
Beacon screed
Regardless of which type you choose, you can make your workflow easier with the help of beacons. For them, ceiling profiles are most often used, used when installing plasterboard, or their analogues - profile pipes, wooden beams, etc.
After the waterproofing layer has been laid on the base of the floor and the zero level has been set, the beacons must be attached with self-tapping screws. The distance between them is approximately 60 cm, but there cannot be less than three of them even in rooms with a small area, otherwise the strength of the floor will be insufficient. Then, from the far corner, expanded clay, sand or any other filler is poured between the beacons, used as a base, and already on it, level with the upper level of the beacons, mortar is poured, or the slabs are fastened using the dry method.
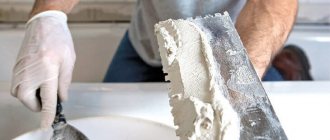
Preparing the mixture
If the mixture was purchased ready-made, then there are usually no problems with it. All you need to do is follow the manufacturer’s recommendations, which are on the packaging or in the instructions for use. You just need to thoroughly knead the entire mixture with a construction mixer until it reaches a homogeneous consistency, reminiscent of sour cream.
If you wish, you can not take the ready-made mixture, but make it yourself. For example, to obtain M300 you need to take part of the M400 cement mixture and mix it with two parts of sifted clean sand.
Preparing the mixture is a simple matter
What are the advantages of using ready-made dry mixes?
Modern dry screed mixtures are in no way inferior to traditional cement-sand mixtures in terms of performance, in many ways they can even surpass it, and have a number of advantages:
- Preparation of the solution does not require dosage of components - its composition is already optimally selected at the factory.
- Many dry screed mixtures are much lighter than traditional concrete mortars. This is a gain in labor costs, transportation costs, and loads on the floor slabs.
- When mixing the solution, you do not need any special equipment, such as a concrete mixer, and the component of physical labor is small. All you need is a container of the required volume, water and a construction mixer or a mixing attachment for an electric drill.
- If, when using conventional concrete mortar, it is simply impossible to make a screed thickness of less than 20 mm without loss of strength, then dry mixtures can reduce the poured layer to 5 mm.
- The introduction of special additives into the composition of dry mixtures significantly increases the solidity and strength of the base for the finishing coating.
- It is possible to select mixtures depending on the planned operating conditions of the floor and the type of its finishing coating.
- As a rule, the composition of dry mixtures requires much shorter hardening times for the screed with the ability to move along it and continue construction and finishing work.
It may vary for different compositions, but it is always less than the required 4 weeks when using a conventional cement-sand mixture. - The use of ready-made dry mixtures for pouring screed does not require high construction skills - it will be enough to strictly follow the instructions developed by the manufacturer and attached to the specific brand of material.
How much mixture do you need?
In addition to the issue of manufacturing and application, you need to think about the consumption of the mixture. As a rule, this data is indicated on the packaging, but since each has its own conditions, it is necessary to carry out calculations. But before that, you need to measure the area of the floor that needs to be filled with this screed. The calculation will look like this:
- a layer 1 cm thick will require the use of 22 kg of mixture per square meter of room area;
- the optimal layer of screed is 3 cm, which means that 22*3=66 kg of mixture must be spent per square meter of area.
Important! It happens that there are large differences in the floor in a room; they must be leveled.
When choosing a mixture, you can always simply use a calculator to accurately calculate the required amount of mixture - everyone has a calculator.
Important! If a warm floor is installed, then a layer of 40 mm or more is needed.
You need to correctly calculate the amount of mixture before using it.
Calculator for calculating the amount of mixture for floor screed
Go to calculations
Material calculation
Before calculating the amount of sand and cement, you should determine the volume of the future screed. This can only be done approximately: the area in square meters is multiplied by the average thickness in places, for example, 40 m2 with an average thickness of 4 cm - 40X0.04 = 1.6 m3. Based on the volumetric weight of sand concrete 1700 kg/m3, we calculate the total weight of sand concrete: 1.6 m3 X 1700 kg = 2720 kg of the finished mixture. If you use ready-made sand concrete, packaged in 30 kg bags, everything is simple: 2720:30 = 90.6 - ninety bags.
A cheaper solution would be to purchase sand and cement separately. The principles of calculations remain the same, but it should be taken into account that packaged sand can have completely different humidity, and accordingly the weight/volume ratio. The proportions of the batches also matter. From my own experience I can say: CPS in the proportions of cement to sand 1 to 3, 1 to 4 has sufficient strength to satisfy all floor coverings. Let's calculate for the proportion 1 to 4: 2720:5 (5 parts - 1 cement, 4 sand) = 544 kg of cement (11 bags) + 2176 kg of sand (44 bags of 50 kg each).
For thinner layers, the calculation principle is the same, with the difference that you need to choose a ready-made mixture, calculated specifically for the required layers; the manufacturer always indicates the range of recommended layers. Calculation of expanded clay concrete should be made on the basis that 35-40 percent of the volume is occupied by sand concrete, the rest is expanded clay (depending on the expanded clay fraction). The volumetric weight of expanded clay is about 400 kg/m3. For the same 40 m2 and a thickness of 4 cm, the calculation will be approximately the following: 1.6 m3 X 0.7 (70%) = 1.12 m3 expanded clay, 1.12 X 400 kg/m3 = 448 kg - in terms of bags of approximately 30 kg - 448 :30 = 14.9 bags of expanded clay. Next, we find the volume of sand concrete: 1.6 X 0.4 (40%) = 0.64 m3, 0.64 X 1700 = 1088 - 36 bags of sand concrete, 30 kg each. Please note that in the calculations there was an extra 10% (70% + 40% = 110%), the fact is that during pouring all the gaps in the expanded clay are filled with sand concrete. I would like to note that the calculation is very approximate and the amount of expanded clay can vary greatly, it depends both on the raw materials and on the proportions of the batches.
Cement screed calculator
Filled area, m²
Average screed thickness, cm
Cement:sand ratio (mortar grade) when using M400 cement (32.5)
Volume of solution, m³
Amount of finished sand concrete,
kg
Amount of cement,
kg
Amount of sand,
kg
Weight of screed per 1 m²,
kg
In addition to sand, cement, etc., you will need deep penetration soil, damper tape (preferably), beacons, self-tapping screws. Liquid detergent will be very useful.
The damper tape is designed to separate the screed from the walls, since during drying it decreases in volume. During the process of shrinkage of the building, various movements also occur that can break the screed. Foamed polyethylene 2-5 mm can be used as a damper. From my own experience I will say: I did not notice any negative consequences due to the lack of tape, but this solution is recommended by modern concepts in construction, so it will not be superfluous.
Regarding the “feri” in the solution: the detergent plays the role of a plasticizer, allows you to level the solution with less effort, and retains water inside the CPS, preventing it from being quickly squeezed out to the surface. There is an opinion that the “feri” in the DSP worsens its strength - this may be so, but these deteriorations are insignificant and can be neglected. I also recommend avoiding any plasticizers; in this case they are not needed.
How to apply mixtures
The key to success is careful preparation for pouring. To do all this, the surface must first be thoroughly cleaned of debris. Then you need to make sure there are no cracks.
After this, beacons should be placed. It will be clear from them when and how many cm of the mixture layer will be needed. They are placed around the perimeter in different places. When installing beating cords, the potential installer understands how much mixture will need to be installed.
Interesting! Lighthouse slats are much more convenient than bars when it comes to reinforced flooring. Half a day after applying the composition, you can work with the equipment.
Next is laying the mixture. It occurs in the form of breaking into sections with further processing of each of them. The solution is poured between the beacons until the level of the mixture reaches the desired level. Work begins from the far corner and moves closer to the front door.
If there are gaps, then the solution is simply added to them, without spreading it over the entire area where the mixture has already been poured. It turns out that the residues are discarded, and the screed is leveled. If you do everything correctly, then there will be less chance of touching the emerging floor.
You can walk on the flooded floor within a few hours. If tubercles are found, they are cut off immediately.
The longer the floor takes to dry, the more difficult it will be to remove defects.
Towards the end of the work, when the formed floor has already acquired sufficient strength, the surface is grouted. But this is not the end of the work. After grouting, you need a little more than a week (to be more precise, 10 days) to moisten the screed. As a rule, this is done with a spray gun, but it can also be done with a roller. Why should this be done? This is the only way to achieve uniform drying of the cement used to screed the floor.
Important! Do not open windows, creating drafts. This will cause the solution to lose its natural moisture.
The load should be increasing. First you need to lay wooden slats and walk cleanly on them. Over time, you can increase the load - walk one at a time, then remove them completely. The result can be seen after a certain period of time - usually two weeks.
Important! The first thing to be checked is the color. It will show how evenly the composition has been distributed and dried. The second is the presence of gaps that need to be closed quickly, while the mixture is still suitable for processing.
In general, if we talk about pouring or screeding a floor, we can say that it is not so much complicated as it is labor-intensive. But if you follow all the tips, requests and recommendations, the manufacturer’s style and the technical process, then nothing will stop you from making your own floor screed.
You may be interested in knowing which external wall insulation to choose .
Concrete or cement-sand mortar?
The floor screed can be made from cement-sand mortar or concrete with fine-grained aggregate. First, let's define what the difference is between them. Concrete differs from cement-sand mortar in that it contains crushed stone. For floor screeds with a thickness of 50 mm and above, you can use concrete with fine gravel. The maximum grain size of the aggregate should be 20 mm. In this case, a mandatory condition is met - the thickness of the screed must be greater than twice the size of the filler (20 mm * 2 = 40 mm, and 50 mm - more than 40 mm). If the screed thickness is less than 50 mm, only sand and granite screenings (granot screenings) with a grain size of no more than 5-7 mm are allowed as filler. That is, for a thin screed you can only use DSP.
If you decide to make a concrete floor screed, here are the proportions
Which is better - concrete or mortar? Concrete is cheaper, heavier and stronger. It has better sound insulation properties and is less prone to cracks. In this regard, he is better. But, as you understand, you cannot pour it onto a thin layer. For apartments, and even for private houses, a large mass may be critical. So when choosing, you need to consider a whole range of requirements.
TOP 14 best floor screeds
Perfecta (fibre layer)
Perfekta (fibre layer)
Our rating begins with a model of floor screed, which has been evaluated more than once on the positive side. It dries quite quickly - it takes two to three hours to dry for 1 cm of layer. Consumption – 17 kg per square, which is considered a small indicator.
The consistency of the finished screed solution resembles thick kefir. The composition is not self-leveling, so it is better to work with a flat floor, the thickness of which is 5-12 cm.
This dry mixture will be a good option for heated floors. It will come in handy not only when filling a water heating circuit, but also when building an electric version.
Important! The manufacturer’s main condition is that the layer thickness should be more than 2 or even 3 cm, which will provide strength and resistance to loads.
According to Perfekt's recommendations, the floor covering becomes functional a week after installation. Ceramic can be used the next day.
pros
- high-quality reinforcement;
- the shortest time for laying the coating;
- resistance to temperature changes, frost, heat.
Minuses
- wait a long time before installing flooring (exception is ceramic tiles).
Perfecta (fibre layer)
Eunice Horizon
Eunice Horizon
Eunice Horizon is a dry screed that is successfully used by domestic buyers when screeding a floor or installing a “warm” variation of it. There is increased resistance to moisture, which is important when laying on a wet base.
Important! Laying on a wet base will not cause the Eunice Horizon screed to swell or crack.
The process of filling the floor with Eunice Horizon mixture is quite simple. At the same time, interestingly, the consumption of the mixture per square meter is quite profitable - 19 kg/m2 with a layer thickness of only 10 mm.
The dry mixture can be used in two ways:
- floor screed (layer thickness is 5-10 mm);
- preparing a new foundation (if the person who bought the mixture has a new building or needs to carry out a major renovation of the apartment).
One of the advantages for which this screed is used is the ability to walk on the new floor after just a few hours, although final drying takes longer - about a week. It is also worth noting the smoothness of the surface formed by the screed, as well as how smooth the floor becomes after applying the mixture.
Although this mixture is more expensive than cheaper options, it will provide exactly what many people need - a high-quality floor screed.
pros
- quick drying;
- low consumption;
- wide scope of application.
Minuses
- final drying takes a long time.
Eunice Horizon
Ceresit CN 173
Ceresit CN 173
This model from Ceresit is perfect for floor screed if you prepare the working solution correctly and use it in the future.
The use of this mixture will be beneficial when organizing electric or water heated floors. The reason for this is the lack of shrinkage and rapid leveling of the floor after installing the “warm floor” system.
This mixture model can be used not only for floor screeding, but also for major repairs. In any case, the coating will harden within 6 hours, and strength appears the very next day after application. This is what distinguishes CN 173 from ordinary sand concrete.
pros
- low price;
- high strength;
- fast initial drying.
Minuses
- there are difficulties in working with this mixture;
- proportions must be carefully observed.
Ceresit CN 173
KNAUF Tribon
KNAUF Tribon
Next up is a mixture from the famous company Knauf. It is immediately worth noting that it can be used in two situations:
- screed (it is laid on top of old wood or any other covering);
- pouring (new floor or “warm floor” system).
It is noted that for the water version of the circuit it is necessary to use a larger amount of solution obtained from this mixture. The thickness formed when screeding the floor does not exceed 60 mm. Consumption with this model from Knauf is 17 kg per 1 m2 with a layer thickness of 10 mm.
In terms of overall strength, this model is superior to most sand-concrete options. The floor dries quite quickly (the floor can be walked on after just six hours, but it gains the necessary strength after a day). The fluidity of this model is quite high, so it will be easier for him to distribute.
A separate advantage was the availability of the necessary European certificates of conformity - there is no doubt about the quality of the mixture.
pros
- dries quite quickly;
- gives an even, durable layer;
- easy to work.
Minuses
- very demanding in preparing the foundation;
- You can’t skimp on primer;
- high price.
KNAUF Tribon
Axton
Axton
One of the options for leveling the floor is Axton products. It is perfect not only for dry, but also for wet rooms.
The mixture is quite popular among other competitors not only because of the speed of drying of the coating and the increase in strength, but also because the coating does not shrink and does not crack.
Important! The minimum floor thickness is 10 mm, the maximum is 80 mm.
The consumption of dry mixture per 1 m2, depending on the thickness of the layer (up to 1.5 cm), can be up to 30 kg (approximate weight of one bag). If the thickness is 2 cm, then you will need 40 kg of the mixture. It turns out the following: for a screed of 150 m2 you need to purchase 150 bags of 30 kg each.
The composition, interestingly, is suitable not only for indoor spaces, but also for outdoor ones. This is justified not only by protection from heat, but also from noise.
pros
- easy leveling;
- good moisture resistant qualities;
- good noise and heat insulation;
- economical consumption;
- small fractions of stones.
Minuses
- it will be possible to make a layer that is not too thick;
- Equipment cannot be installed in sub-zero temperatures.
Axton
Titan M300
Titan M300
This brand of sand concrete was included in the rating for a reason. It attracts with its price - it stands out sharply among other dry mixes on the construction market in the Russian Federation. It can not only be used to screed an existing coating or underfloor heating system, but also to fill a new one. The resulting screed, by the way, stands out for its high strength.
The packaging of this model is quite convenient, and preparing a solution based on this dry mixture is quite simple.
It will take about two hours for the floor to harden after applying the solution, which will allow you to quickly level the floor if necessary. There will be no shrinkage, which is important.
The composition of Titan M300 is as follows:
- Portland cement;
- granotsev (fraction – up to 5 mm);
- sifted river sand (fraction - about 3 mm);
Due to its composition, this model of sand concrete does not create shrinkage during hardening. An affordable price and good data have caused the appearance of counterfeits, so a potential buyer needs to look closely at the product, because there is a chance of being defective.
pros
- fast hardening;
- wide scope of application;
- low strength.
Minuses
- there is a chance of getting married.
Titan M300
Stone Flower M-300
Stone Flower M-300
Next is another domestic model of dry screed. It has everything you need for a high-quality screed or pouring of the floor. It is easy to fill and level it to a level or based on beacons. It is worth noting that this domestic brand levels well and hardens quickly.
Important! The consumption per 1 m2 of this model is not too high - 20-25 kg with a layer thickness of 10 mm.
The “Stone Flower” mixture can be used when installing a water-heated floor, which is important in winter. Preparation of the solution becomes much simpler, which makes it easier to install a “warm floor”.
This model is distinguished by its resistance to low temperatures, which allows the dry mixture to be used not only inside, but also outside of a house or apartment.
In general, this model offers a high density of the solution, good strength indicators, and ease of working with the mixture. This is all a potential buyer needs.
pros
- high quality screed;
- wide scope of application;
- resistance to temperature changes.
Minuses
- takes a long time to dry.
Stone Flower M-300
NOVAMIX M-300
NOVAMIX M-300
One of the good options for dry screeds can be this model from Novamix, formed by mixing M500 cement and sand.
You can use it to screed the floor, being confident in the quality result. And it will, because with such a mixture there will be no shrinkage if the proportions of the components when preparing the solution were observed. But not only screed can be made using this model of dry mixture - you can also use it for the initial filling of floors. The mixture hardens within two hours, and during this period of time the surface can be leveled to the maximum.
With a solution made on the basis of this mixture, you don’t have to worry about pouring or screeding the floor - it will be durable in any case and will not have a water film.
Important! This model is also suitable for outdoor work, as it has high resistance to weather conditions, including frost.
pros
- dries quickly;
- the material is inexpensive;
- high quality screed;
- frost resistance.
Minuses
- Care is required when maintaining proportions.
NOVAMIX M-300
Rusean M-300
Rusean M-300
Among dry sand concrete mixtures, Rusean M-300 is one of the most popular on the market and has proven itself to be particularly durable - it is used for screeding in rooms where a large load on the floor is planned. Preparation of the finished solution requires high precision - a lack of water will not allow the surface to be fully leveled, and its excess will reduce the strength and, when drying, can lead to the formation of cracks.
Judging by the reviews, Rusean M-300 dries quite slowly - it takes about two days to be able to safely walk on the screed. Further work (laying flooring) should be carried out only after complete drying, which occurs 7-10 days after pouring. For one square meter 10 mm thick, about 22 kg of dry sand concrete is consumed. It is often used when installing “warm” floors, since the high density of the solution (2.1 t/m²) allows you to make a thin rough screed of 10-15 mm, which, nevertheless, will be a fairly durable coating.
pros
- low price;
- wide scope of application;
- frost resistance;
- large layer thickness.
Minuses
- you will have to wait a long time until strength is gained;
- large fraction of stones;
- high consumption.
You might be interested in knowing what damper tape is .
Rusean M-300
Vilis M-300
Vilis M-300
This sand concrete is one of the options for pouring a floor from scratch. The high-strength floor that appears as a result of pouring the ready-made mortar is based on the composition of Vilis - in addition to M400 concrete, it contains coarse sand.
It is worth noting that full operation of the finished solution is possible only if it is prepared correctly. As it dries, the screed applied to the floor acquires the required strength. The material itself does not shrink, which is important when leveling the floor in any room. High plasticity can also be distinguished.
Important! This mixture is also used when installing “warm floors”.
What’s interesting is that Vilis can be used not only inside a house/apartment, but also outside. This is due to its high resistance to cold, as well as wear resistance. In other words, the mixture will not crack or crumble.
As a result, it is possible to save money, but obtain a high-quality dry mixture from which the floor screed solution will be made.
pros
- high strength;
- wide scope of application;
- resistance to frost and wear;
- plastic.
Minuses
- takes a long time to dry.
Vilis M-300
Paladium Palafloor-307
Paladium Palafloor-307
A dry mix from Paladium could be a rather interesting option. Its not-so-great popularity may surprise a potential buyer by the presence of something that all previous models could not provide.
Made from cement and foam glass, this dry mixture can offer excellent noise and heat insulation. With it you can forget not only about the cold, but also about the noise from your neighbors.
This model deserves attention for other reasons. For example, the composition. It turned out to be environmentally friendly enough to use the mixture for floor screeding in places where there are always a lot of people or there is a child.
The thickness range turned out to be quite large - from 0.2 cm to 3 cm. This makes it quite easy to approach the issue of screed. Since the mass of the mixture will be small, it can be used to restore housing that is in “dire condition.” Also, this mixture will surprise many with the fairly high quality of the screed and the ease of working with it.
The model could not get a higher place for two reasons: high price and long drying time (two days).
pros
- retains heat well;
- reduces background noise;
- environmental friendliness of the composition;
- high quality screed:
- wide range of thickness.
Minuses
- high price;
- long drying.
Paladium Palafloor-307
Bolars
Bolars
“Bronze” is awarded to the Bolars fast-hardening floor screed. It is recommended for use not only when screeding, but also when pouring a new floor. All construction work is carried out only at positive temperatures, and the coating can be used even at sub-zero temperatures. The layer dries quite quickly - on average you need to wait five hours before you can walk on the screed.
Important! Finishing is carried out after at least three days. Maximum - in two weeks.
This model offers not only high screed strength, but also resistance to moisture and sudden temperature changes.
This model has one “but” - not all bases can be leveled with one layer, and the layer itself will not be too thick.
pros
- resistance to temperature changes, moisture and frost;
- high screed strength;
- easy to apply;
- dries quickly.
Minuses
- You can only make a thin layer.
Bolars floor screed
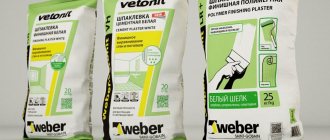
Weber Vetonit 6000
Weber Vetonit 6000
This model is ideal for basic and any other type of floor leveling. The fairly high quality and versatility of the composition only further confirm the ideality of this model of dry screed. Many other things can be said about this model: it dries quickly (three hours on average), makes the floor very durable, and does not create shrinkage, peeling or cracks.
Important! The manufacturer recommends making a layer of a certain thickness in the range of 10-250 mm.
Floor coverings can be laid 15 hours after the solution has been spilled over the entire floor. You can also use it to screed “warm floors”, water or electric – it doesn’t matter.
pros
- ease of preparation;
- wide range of mortar layer thicknesses;
- quick drying (average three hours);
- high strength.
Minuses
- not detected.
Weber Vetonit 6000
Holcim M300
Holcim M300
This mixture is successfully used not only for a home or apartment, but also outdoors. With its help, you can make garden paths or screed a “warm floor” system, no matter whether it is electric or water.
To prepare the solution, Portland cement and coarse sand are used. The quality of the components is very high, as many builders working in new buildings have seen. What is important to them is the quality of the raw materials and what their composition is.
Interesting! When hardened, this solution acquires a bluish tint.
If you prepare the solution correctly, you can not only ensure a high-quality floor covering, but also make the surface as smooth as possible.
Judging by numerous reviews from ordinary people and professionals, this model of dry mix can claim the title of “ideal dry mix for floors.”
pros
- versatility;
- wide range of thicknesses;
- quick drying;
- high strength.
Minuses
- not detected.
Holcim M300
Types of screeds
They come in three types: dry, semi-dry and wet.
Wet screed
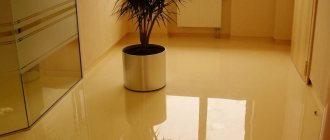
Wet technology is the oldest; when building houses 20-30 years ago, only it was used, since others simply did not exist yet. The base of the floor is filled with a liquid mixture based on concrete or cement. If necessary, the surface is sanded, but this is not always necessary, since the liquid has remarkable self-leveling properties. When hardening, it is necessary to monitor the appearance of air bubbles and remove them in a timely manner, and after it has completely hardened, it is leveled with a spatula.
If desired, the liquid fill can be made reinforced, which will increase the strength of the finished solution, but still will not be able to protect it from the appearance of cracks after drying, which is one of the main disadvantages of liquid screed. The second drawback is that the rather long drying process slows down the speed of repair work. And the third significant drawback is that a floor based on concrete or cement will not be warm. And in private houses with a shallow foundation, it can draw cold from the ground, and walking on it, even if covered with a carpet, will be very uncomfortable.
These shortcomings led to the invention of mixtures for semi-dry pouring.
Semi-dry screed
It is good because it shrinks very little or even dries out in its original form, and does not develop cracks due to the low water content in the solution. For apartments in multi-storey buildings, its use is an ideal option, since a very dense waterproof film, which must be laid on the base, will protect the apartments below from flooding in the event of an emergency, and due to its porous structure, it itself has excellent sound insulation properties and retains heat well. In terms of cost, it is almost equal to wet pouring.
The finishing layer can be laid much faster than when using a wet screed. But for final hardening it is necessary to wait about a month. So it’s better not to rush to bring heavy things and furniture into the apartment.
But with all the numerous advantages listed above, this mixture also has a number of disadvantages. And the main one is that beginners may not be able to handle it, since the technology for diluting this mixture is not as simple as it seems at first glance. If you make a mistake with the amount of water, the floor may turn out to be too fragile, uneven, or take a very long time to dry.
These building mixtures are either concrete-based or cement-sand.
Concrete based mixture
Concrete screed, or concrete-cement screed, since many mixtures contain cement, is perfect for pouring uneven floors with ledges, holes or a large slope. This is due to the relatively low weight of such a mixture, most of which consists of light fillers, so there is no fear of exceeding the permissible load on interfloor floors.
To prevent cracks from appearing on the surface after drying, you can use an expanded clay substrate or make reinforcement.
A concrete surface with an expanded clay base has many advantages. It is environmentally friendly, has excellent heat-retaining and noise-insulating properties and is absolutely not subject to fire, which makes it possible to install a heating system to create a warm floor. Due to the use of expanded clay, the floor becomes breathable, which eliminates increased humidity, as well as the spread of fungus or mold. This helps create a wonderful microclimate in the room. For the finishing layer on this screed, you can use any options.
To make the layer even lighter, instead of expanded clay, they take sand and thus make a concrete-sand coating. But, with the exception of lower weight, in all other respects it will be inferior to the option with expanded clay (worse heat retention, lower sound insulation, etc.).
Cement based mixture
A semi-dry screed made from cement is very elastic due to the addition of plasticizers and fiber fibers to its composition. This allows you to use much less water than for wet cement pouring. The thickness of the filling layer depends on the condition of the subfloor; the smoother it is, the smaller the layer will be required. On relatively flat surfaces it is about 3 cm. Advantages - complete absence of shrinkage after drying. If the technology is followed, the appearance of cracks on the surface is excluded.
As with the use of concrete-expanded clay screed, you can walk on the surface after 12 hours, and lay the finishing layer after four days.
To facilitate and significantly speed up the process of laying this fill, you can use special machines. They are quite expensive, but provide excellent surface quality that does not require subsequent leveling, and save not only time, but also consumable goods.
Dry screed
This is the laying of ready-made gypsum fiber boards with a waterproofing coating on a pre-prepared base of perlite sand, blast furnace slag, vermiculite or the expanded clay already mentioned above. Gypsum fiber can be replaced with plywood or chipboard, which are water-resistant.
This is the fastest and easiest method of all existing ones, which is perfect for both old houses with wooden floors and for residential and non-residential premises in multi-storey buildings. Another undeniable advantage is that it can be installed at subzero temperatures, which is impossible with other filling methods.
This method has many advantages. It is completely non-flammable, does not emit toxic substances, and has excellent sound-proofing and heat-retaining properties. Design features make it easy to hide communications running under the floor. Despite its lightness, such a floor can bear a load of up to one ton per 1 square meter. m.
This type of floor also has disadvantages, and one of the main ones is the danger of its damage when exposed to moisture. Unlike a semi-dry concrete mixture, which is not at all afraid of water, dry concrete can deteriorate, become deformed and become moldy, which will require its dismantling and drying. Another drawback is the large amount of dust that gets into the air during its installation, so all installation work must be done in a respirator and safety glasses or a gas mask. In terms of cost, this method is the most expensive of all those discussed above.
Voting: the best floor screeds
Which floor screeds would you choose and which ones would you recommend?
Holcim M300
36.43 % ( 47 )
Weber Vetonit 6000
16.28 % ( 21 )
Bolars
3.88 % ( 5 )
Paladium Palafloor-307
3.88 % ( 5 )
Vilis M-300
1.55 % ( 2 )
Rusean M-300
1.55 % ( 2 )
NOVAMIX M-300
4.65 % ( 6 )
Stone Flower M-300
2.33 % ( 3 )
Titan M300
1.55 % ( 2 )
Axton
4.65 % ( 6 )
KNAUF Tribon
3.10 % ( 4 )
Ceresit CN 173
8.53 % ( 11 )
Eunice Horizon
7.75 % ( 10 )
When a screed is needed: areas and purposes of application
Screed is a universal method for solving problems such as:
It is used in the construction and renovation of apartments, houses, garages, public, warehouse and industrial premises.