Icer
12636 0 3
Icer November 1, 2016Specialization: master in the construction of plasterboard structures, finishing work and laying floor coverings. Installation of door and window units, finishing of facades, installation of electrical, plumbing and heating - I can give detailed advice on all types of work.
To lay the flooring, the base must be properly prepared.
Some developers think that priming for floor screed is an extra step in the work process. They say, the surface is already very strong, why strengthen it additionally. In fact, everything is not so - the composition must be applied; if you do not do this, you will subsequently encounter a number of problems that can even lead to the dismantling of the floor covering .
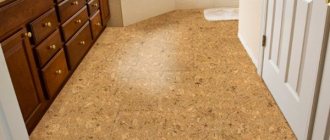
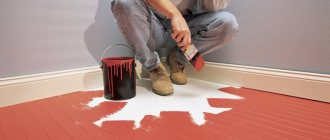
This is what can happen if you don't prepare the floor
Properties and functions of primer for floor screed
The use of a primer is considered a mandatory step when using cement or sand screed. This also applies to cellular concrete. The use of a special substance helps to obtain the following results:
- bind dust and dirt;
- strengthen the coating;
- reduce the absorption characteristics of the coating;
- achieve a high degree of adhesion;
- get an antiseptic effect.
Any material that is applied to the ground will not dry quickly. This means that it will be quite strong and hard. If repair work is carried out incorrectly, there is a risk of air bubbles appearing or the material becoming saturated with excess moisture. That’s why soil is applied to the floor. It helps prevent these problems from occurring.
Necessity
It is impossible to do without priming the base of the floor when carrying out repair work.
Finishing materials in this case last a little longer than usual, and are also completely protected from the appearance of fungus or mold. Adhesion is also improved. It is worth noting that it is practically impossible to remove all dust from a concrete floor. This is due to the peculiarity of the surface. It is dust that will contribute to poor adhesion of the material to the base. To avoid this, a primer is used for floor screed. Most often, a liquid type of material is presented in the store for sale. To use it, you will have to dilute it with water in certain proportions. In addition, there are two main types of primer for concrete floors:
- Special application. Can be used exclusively in one direction - inside or outside the room.
- Universal. Can be used both indoors and outdoors.
At the same time, they have their own characteristics in terms of technical characteristics, as well as the presence of properties and functions. They can have varying degrees of protection for the floor and withstand various impacts.
Pros and cons of applying a primer coat
The use of primers has the following advantages:
- increasing the degree of adhesion, which provides excellent adhesion to subsequent coatings through mutual penetration of layers;
- compaction of the loose structure by filling pores and voids;
- dust removal;
- reduction of water permeability;
- protection from moisture, the formation of mold and fungi - this is especially important in rooms with high humidity.
At the same time, the use of soil is practically free of disadvantages. However, to obtain the desired results, it is important to choose the right composition and strictly follow the rules for its application.
What primer is suitable for screed
It is permissible to use different types of soil under the screed. They differ in composition and characteristics.
Polyurethane
This primer is classified as a deep penetration compound. The mixture contains solvents and dyes. The substance is used before pouring self-leveling material. It can also be applied to concrete floors. Often, polyurethane primer is applied after the screed - before using enamel.
This impregnation helps achieve the following results:
- prevent the accumulation of large numbers of bacterial microorganisms and mold formation;
- strengthen the surface;
- protect the coating from moisture getting inside;
- reduce dye consumption.
The composition of the soil includes binding particles of microscopic size, which ensures deep penetration of particles into concrete and clogging of pores. Such substances essentially glue the upper structures of the floor together.
Polyurethane primer normally withstands the effects of aggressive chemical elements and can withstand any load. Therefore, the material is often used for floors in industrial premises.
See also
6 suitable types of paint for a concrete fence and step-by-step application
Epoxy
When carrying out repair work in a room with high humidity, the floor surface requires special protection. Two-component epoxy substances are perfect for this.
They are highly reliable, penetrate deep into the structure of the material and protect the surface well from moisture. The main disadvantage of the material is its high cost.
Strengthening
This soil is a low-viscosity polymer composition that is distributed over the surface of freshly laid or hardened concrete. The substance helps reduce dust separation, increase the strength of the coating and improve its water-repellent characteristics.
Popularly, these types of soil are often called deep penetration substances. After drying, the substance polymerizes. Thanks to this, it provides additional tightening of the base material.
Concrete contact
This composition is an adhesive primer. However, it is essentially glue. The substance is made from acrylic and quartz sand. The second component gives the smooth base a rough structure. The material has many advantages. These include the following:
- fast drying rate - literally after 2 hours you can begin the next stage of work;
- long period of operation - according to the manufacturer, the coating can be used for 80 years;
- reliable protection against moisture - after drying, the primer forms a film that successfully performs waterproofing functions.
Other
It is permissible to use other types of compounds for priming floor coverings. The most popular substances include:
- Mineral - may contain glue, cement, antiseptic components. Also, the composition often contains film-forming, water-repellent, and adsorbent substances. This soil can be used for concrete foundations. It dries quickly and is considered completely safe. At the same time, the composition can hardly withstand the influence of aggressive substances.
- Liquid glass - helps make concrete more resistant to moisture. The composition includes sand, silicates, soda. The primer should be applied to the concrete floor, which helps create a flawless surface with water-resistant properties. The substance sets quickly, but does not last long.
- Glypthal primer - usually used for treating metal surfaces. Thanks to this, the base becomes stronger. The material is suitable for interior work. The coating takes 24 hours to dry.
- Perchlorovinyl composition - used for brick and plastered surfaces for outdoor work. The substance can also be used to treat concrete surfaces that are located outdoors. It only takes 1 hour for the soil to dry.
- Polyvinyl acetate primer - used when polyvinyl acetate paint is required to be applied to the surface. The composition is suitable for different types of floors. It takes no more than a quarter of an hour to dry. With the help of such a primer it is possible to reduce the need for paints and varnishes for subsequent processing.
Self-cooking
Home craftsmen come up with various ways to reduce financial expenses. For this purpose, they even come up with primers that you can prepare yourself at home. The main material for work is PVA glue. Surface adhesion is significantly increased.
There is a sequence for performing the primer for floor screed yourself:
- PVA glue with a volume of about 250 ml is poured into the prepared container.
- Half a liter of water is added there. This is due to the optimal proportions of the components 1 to 2.
- After mixing the components of the homemade primer, you should get a homogeneous mass in liquid form. The adhesive mass must be completely diluted with water. To achieve this, everything is done energetically and at the fastest possible pace.
After application, a white mark remains on the surface. At the same time, there are features in the ease of performing the work. In addition to concrete floors, this prepared mixture is perfect for tiling or laying linoleum.
To improve the quality and strength of a self-prepared primer, use an additional component - crushed chalk. A small amount is enough to get the desired result.
The considered primer options for concrete floors can be purchased on the construction market. But you should pay attention to the fact that the best option is to purchase materials for repairs from one manufacturer. This will eliminate the possibility of incompatibility of individual compositions with each other. The application process does not take much time, which allows you to quickly bring the room into proper shape.
The cement-sand mixture for semi-dry screed is usually mixed with the addition of a polymer substance - propylene fiber. When mixing a semi-dry screed with fiberglass, the technology implies maintaining the following proportions: 1 part cement, 3 parts sand and 1 gram of fiber (more details: “We use fiber fiber for screed - features”). Accordingly, for 150 kilograms of cement there are 450 kilograms of sand and 150 grams of fiber.
The dry materials are mixed for a while, and then water is added to them. It is very important not to overdo it in order to obtain the optimal consistency of the solution. It is impossible to determine the ideal solution by eye and the recommendations cannot be conveyed as a photo.
If reinforcing mesh is used, then you can dispense with fiber and simply use cement and sand in a ratio of 1:3. Mixing can be done directly on the treated subfloor.
Before the screed solution is supplied, it is necessary to carry out waterproofing and insulation. To do this, dense polyethylene is laid overlapping with a spacing of several centimeters and secured with construction tape, and insulation is laid on this material. It is important that the polyethylene also extends onto the walls of the room, which will protect the walls from rising temperatures as the poured screed expands.
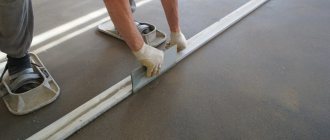
For the screed itself, it is necessary to set beacons that will correspond to the level of the previously drawn horizon line and will help to fill in the center of the room when moving away from the walls. You can use special aluminum guides, ordinary pipes or fittings.
Such longitudinal beacons are placed parallel to each other every 1-1.5 meters. These elements can be fixed to the floor using the same cement or gypsum mortar. During installation, it is important to regularly check that the top of the beacons fully corresponds to the line drawn using a level.
First you need to calculate the semi-dry screed, and then purchase the following in the required quantities:
- Portland cement (preferably grade 400 D20);
- washed quarry or river sand;
- additives that improve the fluidity of the mixture.
It is recommended to rent a concrete mixer, otherwise you will have to do it the old fashioned way, using a trough, a shovel and a lot of physical labor.
The components for preparing the solution have their own requirements:
- Sand will be required with a fineness modulus of up to 2.5. The sand should contain no more than 3% of fine clay inclusions, and should be completely free of any random plant remains and peat veins. Natural humidity is allowed, which in practice can fluctuate over a wide range, so the amount of water added to the mixture may be different.
- You need to buy cement with an unexpired shelf life and in undamaged original packaging. If Portland cement 400 D20 is used, the result will be a solution corresponding to the M200 cement brand, and in the case of the original Portland cement 500 D20, the cement mixture will be M350, which can be used in places with difficult operating conditions.
- You cannot take water from untested reservoirs, as it may be contaminated with biological or technical waste. But tap water is fine.
Proportions of the dry mixture: 3 parts sand x 1 part cement x part water in the amount required for the given case.
- In the middle of the container for preparing the mixture, you need to build a slide, pouring in portions of 3 shovels of sand and 1 shovel of cement in the required quantity.
- Then mix all the components dry, and then begin to slowly pour in water with the fiber fiber added there.
- A semi-dry cement-sand screed should be diluted with water to the consistency of sandy loam - like clay sand that sticks together into a lump, but when compressed, no moisture is released, and the lump itself retains its given shape.
- Since the moisture content of the original sand can be different, water has to be added “by eye”, which often ends in overflow. If moisture begins to ooze from a lump of semi-dry solution, then you need to add the dry components to the mixture in the same proportions.
- Polypropylene fiber should be added to each bucket of water so that it disperses more easily through the mixture. Approximately 80 g of fiber is added to each bucket, but the manufacturer’s labeling indicates how much fiber fiber should be added per cubic meter of mixture.
- If a pneumatic machine is used for semi-dry screed, then with its help you should simultaneously prepare such an amount of semi-dry mixture that would be enough for the entire thickness of the screed. If the mixture is prepared manually, then it must be laid out in layers: first the lower part, followed by tamping, then the upper part, which is leveled by the rule and at the same time sanded.
The solution begins to lose the properties necessary for the leveling mass in an hour or even earlier, so you need to plan all operations in advance and work on the screed at an accelerated pace.
- Some craftsmen recommend starting to lay the mortar from the periphery, but this option is possible if the general leveling layer can then be applied in no longer than an hour. If this takes more time, the laid mixture will be covered with a hardened crust, resulting in an extra seam that will open the way for the penetration of cold.
Recommendations for selection
To select a high-quality primer, you need to take into account many features - type of surface, composition, degree of exposure, release form.
On the treated surface
All types of soil are divided into 2 large categories:
- universal - can be used indoors and outdoors;
- highly specialized - intended only for interior or exterior work.
See also
Types of ultraviolet curing paints and brand ratings, how to apply
So, acrylic solution is suitable for rooms with high humidity. High-quality material should contain components that will help avoid the formation of mold and mildew. For the same reason, before screeding, it is worth treating the floor in basements and other rooms that do not receive sunlight.
If there are large defects or delaminations on the concrete surface, you should choose a deep penetration primer. Otherwise, there is a risk that the screed will not work.
Expert opinion
Zakharova Irina Yurievna
Cleaning professional with 15 years of experience. Our best expert.
Ask a Question
If you want to protect the surface from moisture and obtain a non-conductive coating, it is better to give preference to polystyrene concentrate.
Phenolic primer is suitable for treating wooden surfaces. However, it is important to consider that the material can cause poisoning. Therefore, during work it is very important to use protective equipment and systematically ventilate the room.
By composition and degree of impact
Depending on the composition, the following types of primers are distinguished:
- Epoxy - a special solvent is required to dilute it. The surface treated with this type of soil obtains excellent moisture-proof characteristics. It is used for arranging floors in the bathroom, swimming pool or toilet. It is permissible to apply the composition to a slightly moistened surface.
- Acrylic - considered the most popular material. It can be applied to different types of surfaces - brick, concrete, wood. The solution is considered completely safe. There are different forms of release on sale - concentrated and ready-made formulations. It is permissible to use ordinary water as a diluent. It takes no more than 4 hours to dry. Acrylic primer is not suitable for processing dark iron.
- Alkyd - most often used for application to wood. The soil loosens its surface. Due to this, the concrete screed adheres well to the wood. It does not crack or delaminate. It takes 10-12 hours for the primer to dry. After this treatment, the wood is not susceptible to fungi, mold, or rotting. The base of the substance is zinc phosphate or chromate.
- Perchlorovinyl - is a specialized primer that is suitable for concrete, brick and metal surfaces. The substance contains toxic components, so it can only be used for external use. A special line has been created for metal coatings that quickly stops the corrosion process. It takes 1 day to dry.
- Polystyrene - most often used for wood processing. Since the composition contains toxic ingredients, the substance should be used for outdoor use.
- Polyvinyl acetate - the composition includes latex and polyvinyl acetate dispersion. The material is suitable for application to brick, stone, and plasterboard bases. After applying the primer, it is possible to obtain a resistant film that takes only 15-30 minutes to dry.
- Glyphthalic - the base includes alkyd varnish mixed with stabilizers. The composition can be used indoors for application to metal. However, it takes 24 hours to dry.
Depending on the degree of impact, the following types of soil are distinguished:
- Superficial penetration – suitable for durable substrates that do not require strengthening from the inside. The material penetrates into the floor structure by 2-3 millimeters.
- Deep penetration - used for weakened and loose structures that need to be strengthened from the inside.
See also
Technical characteristics and composition of VL-02 primer, rules of application
By release form
According to the form of release, the following types of soil are distinguished:
- concentrated - they need to be diluted;
- Ready to use - just shake them and apply to the surface.
Rating of the best brands
The most popular brands that produce high-quality primers include:
- “Prospectors” - the composition is capable of filling microscopic pores and cracks. It contains quartz sand, which significantly increases the adhesion characteristics of the base to the finishing material. The composition can be used for external and internal work.
- "Ceresit" - the company has been known on the market for about 100 years. It produces sought-after high-quality products. Primers have a water-dispersion base. They use synthetic resins as the main component.
- "Optimist" - the manufacturer offers primers for exterior and interior use. They are produced in the form of solutions of fine latex with the addition of quartz sand, antiseptic components, and modifying additives. The composition can be used for application to coatings in rooms with high humidity. It has leveling properties and increases the degree of adhesion.
- "Tex" is a universal product that can penetrate porous surfaces to a depth of 6 millimeters. Due to its good absorbent properties, the primer can be used for external and internal work.
How to properly prime under a screed
In order for the application of a primer under the screed to be effective, it is important to strictly adhere to the rules of the work.
Soil consumption and solution preparation features
Material costs vary - it all depends on the composition of the primer, the condition of the floor, and the number of layers. On average, primer consumption is 200-350 grams per 1 square meter of area. However, the approximate material consumption is indicated on the packaging.
Required Tools
To facilitate the priming process, you need to buy a special container - a paint bath. It is permissible to apply the material with a roller or an ordinary brush. It is also worth preparing personal protective equipment.
Concrete floor preparation
To prepare the surface, do the following:
- Clean the floor from dust, dirt, oil and other stains.
- Remove sagging solution and loose particles.
- Seal the cracks.
Priming technique
The soil must be diluted to the condition recommended by the manufacturer. The composition can be applied with a roller or brush. It is important to monitor the temperature and humidity of the coating.
Layer drying time
The drying time is affected by the composition and characteristics of the surface. On average, this takes 4-12 hours.
Further work
Subsequent work depends on the purpose of the room. After applying the primer, you can proceed to finishing with paints or tiles.
Final stage
The screed can be brought to an ideal state during the drying process. To do this, immediately after pouring it is necessary to cover it with plastic film and regularly moisten it with water so that the solution sets better.
Within a day you will be able to walk on the screed, remove the previously installed beacons from it and seal the seams. Experts recommend leaving beacons in the floor, but in the case of ordinary pipes they need to be pulled out. The seams from the pipes are sealed with ordinary mortar.
Based on all of the above, we can conclude that creating a semi-dry screed is not the most difficult process and its cost will not greatly affect the owner’s finances. To achieve an ideal base for future flooring, you must strictly follow all instructions.
If any difficulties arise, you can always contact specialists who are ready to take responsibility for laying the entire floor, taking into account the surface cladding. Construction companies provide a guarantee for the services provided, which forces owners to turn to professionals for help if they do not want to spend their money thoughtlessly.
