Updated: 03/12/2021 17:28:33
Expert: Andrey Nikolaevich Kuznetsov
*Review of the best according to the editors of expertology.ru. About the selection criteria. This material is subjective in nature, does not constitute advertising and does not serve as a purchase guide. Before purchasing, consultation with a specialist is required.
When installing linoleum to the floor, the material will last longer if it is glued to the base. Thanks to this, the coating will not be able to move due to walking, and waves will not form on the surface from moving furniture. Over time, the decorative floor covering will not shrink due to drying, and the seams will not come apart. To fix linoleum, various compounds are used, depending on the material of the subfloor. We have prepared a rating of the best adhesives for linoleum, for which we studied the characteristics of dozens of products and customer reviews. The information will help you choose a good glue based on price and properties.
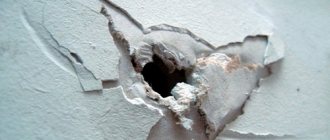
Causes of cuts and holes
A common cause of defects in flooring is construction work: stone chips, a fallen screw, inattention or negligence on the part of workers can not only scratch, but also tear the polymer material that imitates parquet.
To prevent such incidents, it is not necessary to completely remove it - just put old linoleum on top, which you won’t mind throwing away, or sheets of plywood or chipboard. Polyethylene film is not a reliable means of protection, since it breaks from any physical impact.
In peacetime, lined material suffers from dragging heavy furniture - due to the reluctance to unload cabinets or shoulder the weight. To ensure that unforeseen consequences remain in theory, it is enough to place a rag under the feet, which will not tear and will protect the flooring.
But problems caused by energetic pets with claws, or careless handling of household items can be prevented only with the help of a carpet. Another option is to choose parquet or something else instead of linoleum. As a last resort, just be careful. In the end, over the years, the resource will dry out, crack and tear - you will have to not repair it, but completely replace it.
Hot welding
The seams created in this way are durable
As is already clear from the name, the connection of two parts of the floor covering in this case occurs by heating them. This method is used mostly when laying linoleum in public buildings or rooms with high traffic.
Due to the fact that the connection occurs at high temperatures, the seams are strong enough and can withstand significant external loads.
Also in this case, the joints are sealed, which allows the floor covering to be used as a waterproofing material.
Among the disadvantages of this method, one can note the fact that only rigid modifications of linoleum that can withstand higher temperatures can be hot welded.
The table shows the classes of coatings recommended for hot welding and their brief description.
Before you start hot welding, you should practice well on unnecessary scraps of linoleum.
Tools and materials
To weld two pieces of decorative flooring, we will need the following materials and tools:
- hot air gun (soldering iron);
- sharp knife;
- cord (harness) for filling the seam.
If you don’t have a hot air gun on hand, you can use a regular soldering iron. However, in this case, it should be borne in mind that it is unlikely that it will be possible to achieve a high-quality joint using a soldering iron.
Instead of a knife for cutting linoleum, you can use scissors with curved blades. They can be useful when removing excess weld material. The cord is made of a material similar to that from which linoleum is made.
This technology allows you to firmly connect two pieces of linoleum, practically obtaining a monolithic structure.
Stages of work
We lay the two canvases not overlapping, as with the cold method, but butt to each other. Using a knife, remove the upper edges of the edges of the linoleum at the joints so that the connecting seam has the shape of the letter “V”. For a detailed description of the process, watch this video:
We clean the resulting groove from dust and debris, and place the welding tow in it. If the length of the harness is not enough for the entire joint, you can take several pieces, and their joint should be overlapped.
After the welding seam has cooled, use a knife to remove excess melt from the welding cord. Linoleum welded in this way is so durable that it can be regarded as a single, monolithic coating.
For greater effect, linoleum sheets should be placed across the illuminated window. In this case, the sun's rays falling along the joints will make them even more invisible.
What to do if the linoleum at home is torn
The material has high strength in the context of tension - that is, if you create a slot on the laid fabric, the tension force will not be enough for the damage to continue to increase in size. This means there is no need to panic or rush; you can start troubleshooting the problem at any opportunity.
Since you can glue torn linoleum at home if you have the necessary tools, tape will serve as a temporary solution. However, stationery tends to leave traces of glue after use, which are unlikely to be removed or washed. You can resort to the usefulness of electrical tape. If there are furry pets living in the house, they may become interested in a sudden “non-design decision” and continue to tear off a fragment. Children are prone to a similar interest, so both the former and the latter need to limit access to a room with a damaged polymer coating.
The first way to completely eliminate the problem is to completely replace the coating. Radical action is not rational when it comes to eliminating a small hole. But if cosmetic repairs have been planned for a long time, or the imitation parquet has been repeatedly exposed to sharp or heavy objects, you can fork out for a replacement surface design.
Do-it-yourself ways to solve basic problems
There are many problems with linoleum, each of which has its own solution.
Went in waves
If a defect appears near the wall, one may suspect a lack of technical clearance during installation. To cope with the problem, it is recommended to remove the baseboard along 3 walls and trim the panel. It should sit for several hours - it all depends on the thickness of the material and temperature conditions. Once the linoleum has straightened out, the skirting boards can be installed again.
If a bubble appears in the center of the room, carefully make cuts along the swelling on both sides. Then it is recommended to release the air and seal it with masking tape. This will prevent glue residue from getting onto adjacent areas.
Glue is injected into the resulting holes with a syringe and the edges of the coating are joined. Then apply masking tape and apply a weight. Sometimes stretching of the coating leads to swelling. In such a situation, it is recommended to cut the canvas and remove the excess. It is necessary to fix linoleum in the same way as in other situations.
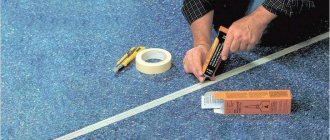
Joining seams
When fixing linoleum in large rooms and on thresholds, it is fixed by cold welding. There is a risk of seams coming apart when used. Anyone can glue such a coating on their own. It is recommended to overlap the fabrics by 5 millimeters. You should make a cut in the center of the mound and grab 2 edges. The procedure must be carried out using a level bar. Then remove the trimmed excess and degrease the edges. The surrounding areas are cleaned with masking tape.
To carry out the work, it is recommended to take PVC glue type C. To do this, you should process the edges, glue them and leave them under the load.
After the glue has hardened, the excess should be carefully trimmed with a knife, remove the adhesive and treat the welding area with wax
Elimination of burns
A patch will help cope with such damage. To do this, it is recommended to cut out the damaged area in the coating. It is best to give the hole the correct shape - round, square or rectangular. If there is scrap left after attaching the linoleum, this is considered an ideal option. Otherwise, it is worth choosing a coating of a suitable texture and color.
It is recommended to cut a patch from it that is the same size as the hole. You need to try it on
It is important that the pattern and size match. It is recommended to cover the edges of the hole with masking tape.
Clean the floor from debris and treat it with a primer. Apply glue to the patch and glue it into the hole. To do this, it is permissible to use PVC or PVA glue. Oppression is placed at the repair site for 2 days.
Sealing torn holes
If the linoleum is torn, it can be repaired with a patch. It is also permissible to glue the torn surface back in place if the damage has smooth edges.
How to seal a hole in linoleum
The main approaches are based on the choice of using a patch - with or without it. There are no strict rules for making a decision, since each owner of the footing acts based on design preferences and wallet size. However, a rational step can be taken if you take into account several features.
How can you seal a hole in linoleum?
Any universal glue, the composition of which is not based on aggressive chemicals that destroy polymer structures and cause harm to the human body: liquid nails, cold welding, sealant, molten plastic, polyurethane composition, and so on, will be suitable for carrying out repair work. After applying the adhesive substance to the desired location, it is necessary to apply a press weighing at least 10 kg so that the inner surface of the floor covering is completely saturated and fixed in position.
A possible problem is the color scheme of the glue - by default, products of this kind have a gray tint, which changes depending on the addition of dust-like crumbs of the required color (the easiest way to get crumbs is to scrape a knife blade over an unnecessary fragment of linoleum).
Required Tools
The most important tool is knives. After all, some cases imply that in order to repair the foot surface, you will have to either cut out a new fragment or extend the cut in order to simplify the task of getting glue. Since it requires effort on the part of the worker, narrow blades of office supplies are more likely to break. Therefore, full-fledged knives are in demand - the use of kitchen knives is allowed, but not table knives.
An equally useful option would be a universal shoe attribute; their shapes are designed for ease of palm pressure on the desired point. And for working with large lengths, circular knives are useful, as they do not “dangle” as you move, maintaining the evenness of the slot. Additionally, you will need a backing that acts as a cutting board - a piece of wood, the size of which is sufficient for comfortable cutting.
The adhesive will be applied either with a spatula or with a large volume syringe with an outlet tube. As a last resort, you can resort to brushes, but their dimensions in any of the options are not rational enough. And the bristles will dry out quickly - you’ll have to throw it away.
Features of polymer flooring material
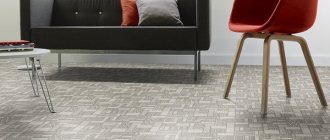
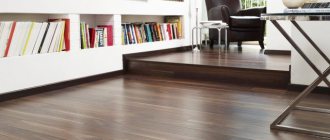
Linoleum is a popular polymer roll covering for flooring in a private house, apartment or office. This material is also in great demand for laying floors in industrial premises, warehouses and workshops.
Positive traits
The popularity of using polymer flooring is due to a number of its advantages:
- sufficient density;
- good flexibility;
- waterproof;
- large selection of structures and colors;
- affordable price;
- ease of working with the material.
Coating characteristics
Variety of coating texture
Polymer roll flooring is produced in rolls that have a width from half a meter to 5.0 meters and a length from 6.0 to 45.0 meters. The thickness of such a coating is 1.50 – 5.0 mm, and for laying floors in industrial and sports facilities, the thickness increases to 9.0 mm.
Laying on the floor
The industry produces a coating that has a heat and sound insulating base, so it can be laid directly on a concrete screed without special surface preparation. The base must be level and dry. Laying of the coating is carried out using special glue or polymer mastic.
How to patch a small hole in linoleum
Small sizes include problems with an area of about 1 cm2. It is inconvenient to fix such problems using a piece of other linoleum or glue. Fortunately, there are special mastic compositions - like putty, only for the floor. They come in a variety of colors so that those living in the apartment can fix the problem so that the end result blends in with the rest of the space.
Types of defects and ways to eliminate them
For each type of damage, there are several ways to eliminate it:
| № | Type of damage | Remedy |
| 1 | Minor cuts, tears | glued with glue, mastic, cold or hot welding |
| 2 | Minor abrasions, scratches | rub with special colored wax, mastic, sealant |
| 3 | Holes, big gaps | seal with the most suitable patch |
For each specific type of defect, you need to select the most suitable restoration option. At the same time, we use products adapted to work with a specific type of coating.
How and with what to seal a cut on linoleum at home
A cut is a line dividing one section of coating into several. In this case, we are not talking about “loss of material”, so there is no need to use a patch - not only will it not demonstrate its best side, but it will also attract unnecessary attention. The most adequate solution is glue, but before direct use it is necessary to prepare the problem area.
Linoleum itself will not disintegrate. There is also no need to widen the slot. But the smaller the resulting dimensions, the harder it is to place the adhesive composition under the linoleum - you will need syringes or brushes.
Before sealing the linoleum, the area of potential restoration must be cleaned of dust, dirt and small debris - you cannot do without a wet rag, and the drying process is accelerated using a hairdryer (important: the operating temperature should not be hot, since overheated air will weaken the structure of the material being repaired ).
By sleight of hand and without any fraud, the floor itself and the inside of the polymer product are coated with glue. It is recommended not to skimp on the adhesive substance - the main thing is to ensure the connection of as large an area as possible. If part of the solution comes out after pressing down the coating, it can be easily collected with a rag. Finally, a press weighing 10 kg or more is applied, which will not allow the surfaces to separate from each other.
Laying seams
When laying linoleum with a pattern, take into account that the seams will be located parallel to the rays of light incidence. This way we practically visually remove the seams.
The possibility of using modern technologies, in which the edges of surfaces are melted and soldered using special glue. This method is called cold welding.
How to fix linoleum without a patch
If the damage is not a line, but a partially torn piece, roughly speaking, held on one side out of four, it is realistic to deal with it without using a patch. Although the repair technology is not very different from the method of correcting a situation with a cut - on the contrary, the process is more convenient.
The entire fragment that comes off can be easily bent back and coated with glue on the inside without using syringes or brushes. The disadvantage is that the cut, once sealed, will hardly be visible under some lighting conditions. In the case of repairing an almost entirely separated fragment, the consequences of the problem will remain noticeable. Yes, they can be painted, decorated or hidden, which will be discussed later.
Which to choose?
The variety of adhesive compositions is so great that it is not always possible to make the right choice. To get a quality result, the following factors should be taken into account:
- Application area. If you are planning to lay linoleum on the floor, then you need to look towards water-dispersed compounds. It should be noted that they are completely harmless and can be used in domestic premises. When you need to glue seams, then cold welding is the best option.
- Surface type. Adhesives are intended for certain types of floors. Some can withstand moisture, while others require minimal amounts of it to deteriorate. You can find out all these characteristics on the packaging of each glue.
- Type of linoleum. This characteristic is one of the most important. Almost all types of glue work with PVC-based materials, but there are products for natural substances. Cold welding can often be used for homogeneous foam sheets, as this will result in a reliable and elastic seam. For commercial and semi-commercial linoleum, varieties of bustylate or polymer compositions are suitable.
How to repair torn linoleum with a patch
The patch is used in places where the damage has an area characteristic (and not just a line), and the size of which is calculated in square centimeters. You can solve the problem with mastic, but when maintenance is required on a noticeable area, the flooring equivalent of putty will be noticeable and can be felt by your feet. The only possible option is to cut out a fragment of a similar composition and image from the remaining canvas. The more complex the drawing, the more complex the cutting will be - it is necessary to observe all the dimensions and locations of the parts so that the appearance of the result does not raise questions.
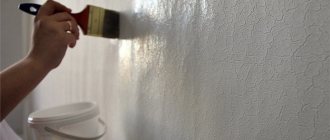
Recommendations for choosing and using glue
So, the main criterion when choosing an adhesive is the type of subfloor. Absorbent and non-absorbent substrates use different formulations, and if you use the wrong adhesive, a strong bond will not work. Absorbent surfaces include cement and concrete screed, solid wood, plywood flooring, chipboard, fiberboard, OSB.
Wood is a highly absorbent surface
Linoleum is glued to them with water-soluble compounds, but this also has its own nuances. Board materials such as plywood, fiberboard and others can become deformed from excess moisture, so for them you need to choose thick adhesive mixtures with a minimum water content. For a concrete floor, the consistency of the glue is not particularly important.
If the floor is concrete, the consistency of the glue can be any
Floors lined with natural stone, porcelain stoneware, and tiles are considered non-absorbent. Here, water-soluble compounds will be ineffective, since there is nowhere for moisture to escape, and high-quality adhesion between surfaces will not work
For such substrates, reaction adhesives are used, when applying which it is necessary to take precautions - use protective gloves and masks, ventilate the room
If the floor has tiles, it is better to use reaction adhesive
You need to buy glue along with or after linoleum to make sure that the composition is suitable for this particular coating. The glue packaging always indicates what types of linoleum it is suitable for and what the coating base should be. Be sure to check the expiration date, because expired glue will not hold the canvas. It is best to buy adhesive compositions in construction supermarkets or large stores where there are conditions for proper storage of such materials. This is especially true for water-soluble adhesives, which completely lose their adhesive properties after freezing. The exception is special dispersions with frost-resistant additives: they can withstand 3 to 5 cycles of freezing and thawing without losing their basic characteristics.
Universal adhesive fixer for linoleum and carpet Axton
Information about the glue is always on the packaging
This is what linoleum glue looks like
In order not to overpay, before purchasing you should calculate the required amount of glue. To do this, you first need to take measurements of the room and calculate the total coverage area. As a rule, consumption varies between 200-500 g per m2 (this is influenced by the type of working surface and coating base). For example, a fabric or felt base requires more glue than foam and rubber, and a plank floor requires more than a concrete screed.
To reduce glue consumption, it is recommended to prime the floor. Glue should be purchased with a small supply so that you do not have to interrupt installation and go back to the store.
Linoleum and glue must be kept in the room where the covering will be laid for at least 24 hours. Work should be carried out at a temperature not lower than 15°C and air humidity not higher than 75%. In this case, the humidity of the floor base should not exceed 8% for wood and 2% for screed.
Let the linoleum sit at room temperature for 24 hours
Immediately after applying the glue, you cannot lay linoleum; you need to let the composition dry a little for 5-10 minutes (the exact drying time is indicated on the packaging). Also, you should not apply glue in a thick layer: this will not make the fabric stick better, and excess glue will appear as thickenings and bumps on the surface of the linoleum.
How to disguise a hole in linoleum
The user of polymer flooring is not always able to quickly respond to a disaster that has arisen - for example, the linoleum tore half an hour before guests arrived. It’s impossible to seal it up unnoticeably, or to install a patch - it’s easier and faster to hide the problem than to hastily try to do it better so that it turns out the same as always.
The most basic way is to cover the hole with furniture or household appliances - a reliable option if the defect is located near the wall. Otherwise, it is recommended to lay down a carpet, which will additionally protect the floor from new adventures. If the resulting hole is small in size, then there is no point in bothering at all: firstly, guests are looking at their faces and not at their feet, so the defect is unlikely to be detected, and secondly, the floor surface does not tend to be in ideal condition - either a problem or dirt, so any sane person will react a little less than nothing to a noticed hole.
Sometimes you want to disguise the consequences of repairing a hole - here you have more time to think about it, but the key options for correcting the situation are the same: carpet, household appliances, or give up. You can immerse yourself in handicraft, as long as it is not voluminous, so that there is no discomfort when moving - for example, drawing with stained glass paints after drying will add fun to the environment. Another option is to make a craft from fabric and soak it in a water-repellent solution so as not to embarrass yourself while washing the floors.
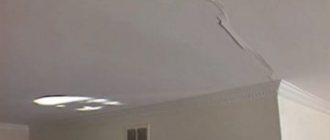
Joint repair
Loose joints are one of the most pressing problems for floors covered with linoleum.
Broken joints
Sometimes the edges of the canvases only slightly move away from the base, in other cases they swell noticeably and diverge to the sides, exposing the subfloor to view. This kind of problem cannot be left unchecked: debris accumulates in the seams, water gets in during cleaning, mold starts to grow, and the protruding edges become frayed and torn, making it difficult to walk around the room. Let's look at how to connect joints with the greatest efficiency.
Fast way
Step 1. The edges of the canvases are folded outward and all the dust is thoroughly cleaned from under the coating.
The edges of the canvases are folded outward
Step 2. Prime the floor using a small brush and leave until completely dry.
Step 3. Place double-sided tape in the gap between the sheets so that the middle of the tape is located exactly along the seam.
Double-sided tape is placed in the gap between the sheets
Step 4. Remove the protective layer from the adhesive surface and press the edges to the floor.
Step 5. Carefully straighten the edges, press and smooth the seam with your hands. Next, it is advisable to roll this area with a roller to finally level the joint.
Smooth the seam
If the linoleum sheets have shifted during operation and the joint has separated by several millimeters, there is a simple and cheap way to eliminate the gap. To do this, you need to clean the seam from dust, degrease it, and dry it thoroughly. Next, you should take a wax candle, melt it and carefully pour the wax into the gap between the canvases. After this, the remaining wax is easily removed with a spatula blade or knife, and the surface of the seam is polished with a soft cloth.
Cold welding of joints
For high-quality sealing of separated seams, it is best to use C-type cold welding. This glue has a thick consistency and perfectly fills seams up to 3 mm wide. In addition, it melts the sections of the canvas and forms a monolithic surface, impermeable to moisture and dust. But for new linoleum they use A-type glue, which is more liquid and reacts faster with PVC. Let's look at how to do this in detail.
Set of tools
Step 1. The coating strips are laid on the prepared floor, overlapping by 5-6 cm.
Step 2. Mark the cutting line exactly in the center of the overlap, measuring the required distance with a ruler. A line is drawn with a pencil along the entire length of the joint.
Step 3. Apply a ruler or metal strip to the marking and cut through both sheets with a sharp knife.
Making markings
Apply a meter ruler
Cuts right through two sheets in one motion
Step 4. Remove the cut strips to the side and align the edges of the canvases.
Excess pieces are removed
Step 5. Apply masking tape to the joint along its entire length. This is necessary so as not to stain the front surface of the coating with glue.
Painting tape is applied to the joint
Step 6. Using the edge of a knife, carefully cut the tape along the joint line.
Cutting through the tape
Step 7. Take the glue, put a cap with a needle on the tube, and twist it tightly. Next, insert the tip of the needle into the gap and lightly press the tube until a spot of glue up to 4 mm wide forms on the tape. After this, you need to smoothly move the needle along the seam, evenly filling it with adhesive.
Put the cap on
Apply welding
Step 8
After about 15 minutes, when the glue has set, the tape is carefully removed from the linoleum
After 15 minutes, remove the tape
You can walk on the coating after the glue has completely cured. The manufacturer indicates the exact drying time in the instructions on the tube, so before work, carefully study all the information about the composition.
The seam after cold welding is invisible